
Description
With all the challenges we’re facing during the pandemic, we’ve realized how constrained we can be when our access to our production site or office is limited. In this class, we’ll discuss how we can cost-effectively become productive again, and how we can increase our collaboration without compromising the quality of our work. Find out how Flame on Cloud can help you achieve this and incorporate this workflow with your visual effects pipeline, whether you’re in the office or off site.
Key Learnings
- Learn how to deploy stand-alone Flame products on AWS instances.
- Discover how Flame can collaborate with other Flame products (Flare, Flame Assist).
- Learn how to centralize the project data and increase the productivity using Burn nodes.
- Learn how to cost-effectively implement this into your VFX pipeline or workflow.
Downloads
Tags
Industries | |
Topics |
People who like this class also liked
Instructional Demo
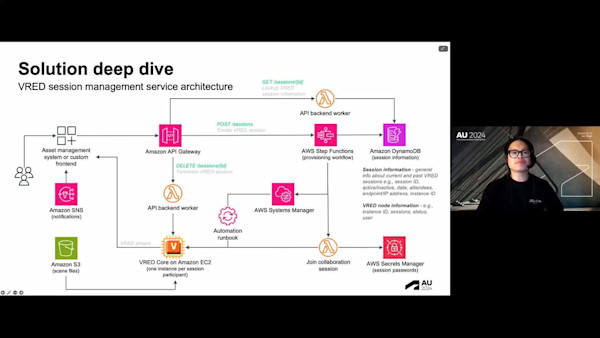
3D Design Reviews On-Demand with VRED and AWS


Instructional Demo
Improve Design and Modeling Workflows Collaboration with VR Sketching

Industry Talk