
설명
The new Model States functionality introduced in Inventor 2022 software has many uses within your Inventor design files. It was introduced as a replacement for the pre-2022 Level of Detail assembly functionality, and also provides an alternative to the iPart and iAssembly functionality. This class will begin by discussing the uses of Model States, from their role in creating component design configurations to improving retrieval times and performance when working with a large assembly. You will also learn how to create Model States in both part and assembly files, and then how to maximize these files in your drawings and presentation files to document their design.
주요 학습
- Learn about the uses for Model States in your Inventor designs
- Learn how to create Model States in Part and Assembly Designs
- Learn how to use Substitute Model States to simplify Assembly designs
- Learn how to use Model States in drawing and presentation files
Downloads
태그
제품 | |
산업 분야 | |
주제 |
이 수업을 좋아하는 사람들은 다음도 좋아했습니다.

Instructional Demo
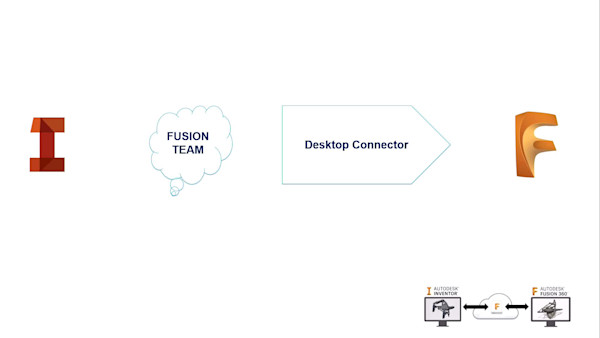
AnyCAD and the Exchangeability of Inventor
Instructional Demo
Hidden Secrets of Automating Drawings Using Inventor
Instructional Demo
