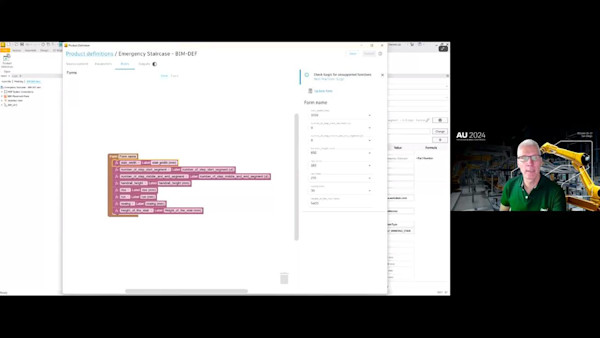
AU Class
AU Class
class - AU

Creating an Electrical Analytical Model in Revit 2023

共享此课程
在视频、演示文稿幻灯片和讲义中搜索关键字:

说明

Revit 2023 software lets users create an electrical analysis model for preliminary design in order to analyze and plan the connected load in a Revit model before placing physical electrical families. This session will show you how to create an electrical analysis model from a linked architectural model, a 2D DWG™, or a PDF. See how you can get a jump on understanding the electrical demands of your next project before placing components into the model.

主要学习内容

  • Learn about the Electrical Analytical Load Type Settings.
  • Learn about defining electrical analytical loads.
  • Learn about creating boundaries for area-based loads.
  • Learn about the conceptual distribution system.

讲师

  • Michael Massey 的头像
    Michael Massey
    Mike Massey started his professional career in architecture and has built over 30 years of experience in the AEC industry. Mike received his degree in architecture from Texas A&M University. He practiced architecture for 14 years, and during this time, he developed a love for technology and how to apply it to the AEC industry. Mike has worked for several Autodesk Partners, performing business needs assessments and implementations for design and construction companies nationwide. As a leading expert in the BIM industry, Mike now applies the knowledge he has gained throughout his career at CADD and helps clients achieve their goals and improve their workflows by implementing technology. Mike is a repeat speaker at Autodesk University and won the Top Speaker award at Autodesk University in 2016.
Video Player is loading.
Current Time 0:00
Duration 53:25
Loaded: 0.31%
Stream Type LIVE
Remaining Time 53:25
 
1x
  • Chapters
  • descriptions off, selected
  • en (Main), selected
Transcript

MICHAEL MASSEY: Welcome, everybody. Thank you for joining me today. I'm excited about presenting this topic, "Creating an Electrical Analytical Model in Revit 2023."

My name is Michael Massey. Let me go ahead and introduce myself. I'm the senior practice manager for AEC for CAD Microsystems. I've got over 30 years experience in the AEC industry.

I consider myself a leading expert in BIM/VDC. I do have a degree in architecture from Texas A&M University, and I'm a certified Autodesk instructor with professional certifications in Revit architecture, Revit MEP electrical, Revit MEP mechanical, and in 2016, I was selected as the top-rated speaker.

So that's a little bit about me. Let's go ahead and get onto the main part of this. I've broken this presentation down into four different parts, and these four parts do follow my learning objectives that are in the class outline.

The first section we'll dive into will be Define. We will define the electrical analytical load type settings. And so in this first section, we will also talk about what the tools are that they've added in Revit 2023 that will allow us to do this, but this whole section is about defining and setting up our type settings.

Then we'll move into the Create section, where we will actually create the electrical analytical loads. The next section is Apply, where we will actually apply those loads to the conceptual distribution system. Now we'll have to first create the conceptual distribution system, but once we do, we will apply those loads to the conceptual distribution system. And finally, Document, where we will document these electrical analytical loads using the documenting tools inside of Revit.

Let me first talk a little bit about the importance of electrical load estimation and why this is critical, and why this is such a big deal that they've added this to Revit 2023. Electrical designers are doing this today. The problem is they're doing these load estimations outside of Revit. They're not using Revit to do this.

They're using Excel, Excel spreadsheets, other types of programs to run these load analysis estimations. But it's a broken system. They're not using Revit to do this, and the reason that they need to do this is just for planning. They need to plan the connection for the upstream network. They need to know what the total building load of a building is, so that they can apply to the power company for supply that's going to be required.

They can also use it to plan transformer substations, if any, and the main switchgear room and the equipment that's in that room. And if they do that, that will allow them to calculate the initial budget for the electrical work. So there's lots of reasons of why this is important.

Like I said, most designers and contractors are doing this today, but this is going to allow us to bring these tools into Revit and use the Revit model to begin this estimation. And so today, there's actually three different ways-- methods-- that electrical designers are using to come up with these load estimates.

The first method is considered space-by-space, and in this method they actually divide the building up into different spaces based on functions. And then they'll take those different spaces and figure out what the areas are for those spaces, and multiply that by a load density.

Now, this low density is either in watts per square foot or volt amps per square foot. But it's basically the electrical load for that space. And so they're multiplying that electrical load with the area and add them all together to get the total load for the building. This process, this method, it can be used for any type of building, and it can be used for maybe even a portion of a building. But this is called the Space-by-Space method.

The next method that people are currently doing today is the Building Method. Now, this method is much easier to estimate. This method does not break up the building into spaces by functions.

Essentially, we assign a load density for the overall building-- just one load for the entire building. So it does offer less flexibility, but it's a very quick way of being able to calculate some loads. It can be used for either the entire building, or a single independent, or separate occupancies.

And then the final method that's being used today is the Area Method The area method is typically used when you have multiple buildings, and you're tying those buildings into the same subdivision of the electrical distribution system. So it's used for the design of substations. So if you have multiple buildings coming into a substation, we can take the loads of those buildings and add them together to get the load that we need for the substation. So those are the three main methods that are being used today to calculate the preliminary electrical load estimates.

As far as what we're going to be doing today, we're going to be focusing on this space-by-space method. This method is what's currently built into Revit and how Revit is using-- the tools that Revit uses is using the space-by-space method to calculate the electrical estimates. If we look at the load density and how the load density is actually calculated, there is actually two different ways that the load density can be calculated.

The first one is Grouped Load Density. What that is, is it will take one value covering all the lighting, the general power, and the power loads of the space, either in watts per square foot or voltage per square foot, to create that load density. So it's a grouped load for all the power all the electrical devices in that space.

Whereas the second one is the individual load density. This breaks out the lighting, the general power, the power loads, and any other devices that we may have in this space and breaks those out into individual loads, so we have multiple loads for each space-- so either grouped or individual load densities. As far as what we'll be doing today, I'm going to focus and use the grouped load density. So everything that I show you will be grouping all the lighting, the general power, and the power loads into one number that we're using to multiply the area by to get the overall load.

If we look to see how this space-by-space method is actually being calculated, like I said, we will divide the building up into different spaces based on its function. For example, we may have offices, or storage, or mechanical, or corridors, or different types of spaces within our building. We'll calculate the gross interior square footage for each space, and then we'll determine which grouped load density is needed for that space.

And then we'll simply do the math. We'll just multiply that load density by the area to get our estimated electrical load for that space. And then at the end, we'll add up all those estimates, all those loads, and we'll multiply it by a power factor and a suitable load factor to get the main service size for the building. So that's the step-by-step process of that space-by-space method.

So let's dive into our first section, Define. And in this section, like I said, we will define not only the tools inside of Revit, but we'll also start setting up our project and setting up the type settings in there by defining the electrical load types. So in Revit 2023, they introduced a whole new set of tools for electrical analysis.

Now, the main purpose of these tools is that it's going to provide the engineers the ability to analyze and plan the connected load in a Revit model before placing any physical electrical families. Like I said, we can do this today. But the problem is, we have to place families to do this today, whereas we may not know at the beginning of the project what we're actually putting in there. This will allow us to begin this estimation process prior to placing any content into our Revit models.

We'll be able to define equipment loads. We're going to define boundary areas to create area base loads. And in that, we'll be able to specify the power density, the load classification, the power factor, the parent power density for all these area-based loads. In addition to that, we'll be able to create an analytical power distribution system within the system browser inside of Revit.

These electrical analysis tools, they work with a Revit model. That's what we'll be doing today. I do have a model open that we'll be working in. It does have a link-in architectural model as the background, so it works with that.

But it also works with non-Revit data. So if you do have an AutoCAD file, it works with DWG or PDFs. We can simply import in a DWG or a PDF, and the process works exactly the same.

The workflow doesn't change, so we can take advantage of a PDF and do this exact same set of tools that I'm going to show you inside, like I said, a DWG, a PDF, or a Revit model. This is currently the first release of these tools. And one limitation that I wanted to make note about is that it currently only supports a three-phase system.

So again, the workflow will simply be first to define. We're going to define the electrical analytical load type settings. Then we'll start to create, and we're going to create the analytical loads. And then we will apply those loads to the conceptual distribution system. And finally, we'll document the electrical load analysis.

So if we look at the Load Type Settings-- inside of Revit on the Manage tab, under MEP Settings, there is a new set of settings in there for the Electrical Analytical Load Type settings. These loads, when you open it up, you'll open up a dialog box, and you'll see that there's going to be two default load types in there. You'll see that there's General Lighting and General Power.

You can either use these two loads, or you're free to create new ones. You can duplicate them. You can rename them, delete them, whatever you want to do. But setting up this naming system is what we're going to use. And I suggest that you break up your building and look at your building as far as the different functions that you have in there and create a different load type for each function.

Once you have these functions created by name, we will assign the properties to them. On the right side of the dialog box, we'll assign primarily the power density and the load classification. The power density is what is the density and watts per square foot of the equipment of the devices that are in that area. And finally, the load classification will use a demand factor and multiply that load by a demand factor.

So if we take a look at this-- I do have Revit open. Let me switch over to Revit to show you how this works and how you would set this up. So I have a Revit model open. This is a multi-story building that I do have open. Primarily, we'll be working on the first level today and just looking at the level 1.

But if I do go up to my Manage tab up at the top-- oops-- and open up the MEP Settings, underneath the MEP Settings, you'll see the Electrical Analytical Load Type Settings. And when I open that up, you'll see that there are two default settings in here. We have the General Lighting and the General Power.

And like I said, you're free to use these if you want to. These are set up for that individual load density that I talked about earlier. But I'm going to set some up for that grouped load density.

So I'm going to come down here and just create a new one. And the first one that I'll create is-- I'll just call it Common for the common areas. And in this Common areas, I'll go ahead and give it a power density of 10 watts per square foot. And the load classification, I'll change the load classification.

Now, this load classification is not new in Revit. This is using the same load classifications that's been inside of Revit for many years. But these load classifications, if you're not familiar with them, when we pick a load classification, they are assigned a demand factor. And we can specify what that demand factor is for this type of load, and that's going to be used when we multiply this against the area to get the total load.

So I'll assign this first one just a power general load classification. Let me create one more. I'll go ahead and create one and call it Residential. And once I create this, I'll assign this one maybe a power density of-- let's do 8.25 watts per square foot.

And as far as the load classification, I'll go ahead and assign this load classification to the same thing, a Power-General load classification. And so, again, I would create a load type in here for each type of function you have in your building. So instead of me typing all this out and you sitting here watching me typing it, let me go ahead and open up another project. I do have another project where I do have them typed out.

So in this project, if I just show you, if I go into the Load Type Settings, I do have different ones created for equipment space, for a fitness room. I've got a music/game room and the residential that I created before. But I also have one in there called open to below.

Now, you don't have to create this open to below. I created this just simply because I do have an open space in my building, and I just simply assign this a 0 as far as the power density, so it's not really included in the loads in there. But that's a good way of doing that if you do have some open areas in there. So with that, let me jump back to my PowerPoint, and we'll continue on.

So the next section I want to talk about is Create where we will actually create the electrical analytical loads. First of all, there are really two different types of loads that we'll be working with. The first type of load is the area-based load, and then we'll look at the equipment loads as well.

The area-based loads, they are going to be defined with a closed-end loop boundary line, an it's going to define the area that we're working in. So we'll trace or draw around the area that we want to create the area base from. And then once we do that, we'll assign a power density to that and a load type to that.

There's also going to be equipment loads. Equipment loads are assigned to major components, such as elevators, and chillers, or other types of components that are typically larger than the power density-based loads. Both of these load types-- both area based and equipment loads will be assigned a power source. Once we have the conceptual distribution system created, we will go back and assign a power source to these loads.

So the steps to create the area-based loads-- we'll first create the boundary. And so like I said, it will be a closed-end loop for the boundary. And so we'll create that closed-end loop.

Once we have that boundary created, we'll come back and define the loads by selecting the boundary to create the actual load. And then the last step would be to divide the loads. Once you have a general overall load, we can go back and subdivide that into sections, smaller parts to create other loads from that general load that we initially create.

So as far as creating the boundary line, when you start the tool, the tool will be found on the Analyze tab. But we'll start the area-base load boundary command. And when we do, it will go into a Conceptual Sketch mode.

And we will have our typical sketching tools that we're used to using inside of Revit. But we'll just create a closed-end loop. It does need to be completely enclosed.

And we can't have open ends, or back corners, or anything like that. So we'll use our modifying tools to trim it out to make sure that we have nice, square corners in there. But we'll just create a closed-end loop. Now, these lines, if they do span multiple levels, there will be properties in the Properties palette that we can go in and change and assign the top level or the bottom level if we do need it to span multiple levels.

And finally, the boundary line that we're using here, it is using a specific line style. And we can go into Our Line Style Settings under the Manage tab and adjust and modify that line style if we want to change the graphics of that line. Once we have the boundary created, the next step is to create the area-base load.

So the next button on the toolbar you'll see is the Area Based Load button. And when we pick on this button, it will go into an add or remove menu. And on that menu, we can select Add and then simply select the enclosed boundaries that we want to add to that load.

Once we create the load, there are a couple of properties that you'll want to define in the Properties palette. The first one is to assign which area-based load type we want to use for this load. And so these are the load types that we just looked at. So we'll point this to one of those load types.

Next, I recommend going ahead and giving this load a name so that you can go back and recognize what this load is for. So giving it a name that is recognizable is also recommended. And then the Supply From parameter-- we may not be able to do this initially. We won't be able to pick on this until we have our distribution system created. But once we have that created, we can go back and assign the Supply From parameter.

And finally, we'll be able to divide our area-based loads. And so like I said, if we create a general overall area-based load for maybe the entire building, we can then select on that load and use a divide tool to divide that into smaller sections . And this will essentially create two loads from that one load, and then we can assign different properties to the new load. And so this is a way that we can go back up and break up the building, break it up into smaller parts.

I do also recommend the use of filters. As you create these area-based loads, they're all going to graphically look the same.

And it's going to be very hard to determine which load is which without using filters. So we can create filters and assign color fills to these filters to help us determine which loads are what. So I recommend creating filters for each load type that we have created.

So if you created different load types, go ahead and create a filter that will filter out just those load types. And then we can come back to our views and our View Templates and apply those filters to those views and assign colors for those load types. And that way, you'll be able to determine just by looking at the plan which load types are where with the color fills that we use in there.

All right. So let me, again, switch back to Revit and show you how this works. So I will switch back to my Revit model, and I will continue working in this same model. And in this model, I first want to come in and create those boundaries. And so let me first show you that if I go over to my Analyze tab, this is where you're going to find these new tools.

Now, one thing about this Analyze tab-- there are a lot of buttons on this tab, and I've actually closed down the Structural Analysis tools that are on this tab. If you don't close down the structural tools or if you try to show them all, the tools that I'll be using are very, very small. So by closing and not showing the Structural Analysis tools, you're able to see these tools a little bit better.

Where are these tools are-- they are essentially right here on my menu up here at the top under this Electrical Analysis section. And like I said, you can close those Structural Analysis tools inside of the Revit Options. You can go in there and check or uncheck the box to turn those off.

But the first tool that I'll be using is this Area Boundary tool. So when I start this Area Boundary tool, it does go into Conceptual Sketch mode. And I do have all my sketching tools up here to use, my line tool, my rectangle tool, and so forth. You can use whichever method you want to use. I'm going to use the Pick Line method and just simply come down here and just start picking lines on my model to start creating my boundary.

Now, as I do this, I'm just picking these lines that's on this plane. This is a linked-in architectural model that's in the background here. And I'm just simply going around and tracing this to pick these lines. It is kind of slow. I'll try to do this as fast as I can to select all these lines.

But let me just say this. This is the first release of these tools. And maybe, eventually, they'll get better. As far as maybe, there will be some automation to selecting these walls in there to create your boundary. But I can pick them pretty quickly, and then I can go back and just use my corner trim and trim them out to create that nice closed-end loop.

Now, as you can see, I'm doing this on a Revit file. And so it's working great, but the same process would work if I had an AutoCAD DWG file linked in here or if I had a PDF file linked in here. Either one, it'd work exactly the same way. And so it's just creating this boundary to define the area that I'm trying to use here.

Also, as I'm doing this, notice the orange-yellow dots at the end of these lines. These are indicators indicating that I do not have a closed-end loop yet. And so what you want to do is you want to make sure that you don't have any of these dots left over. If you don't want to see the dots, that is actually up under the tool.

You can either choose to hide those boundary open ends. Or-- if you hide them, the dots go away. I like to have them on just to make sure that I have a nice, closed-end loop in there. It's an easy way of determining that. But either way, make sure that you do corner trim these out to have a nice closed-end loop.

So now that I've got my boundary created, I'm ready to move on to my next step. The next step is to actually create the load. And so now if I go up and start the area-based load command, it does go in and gives me a contextual menu up here where I have an Add, Remove, and a Finish option.

So I'll click the green check mark to finish this command when I get done. But I just want to make sure that Add is selected, and then just come down and pick inside the closed-end boundary that I created. So I'm just going to select it here to select it, and it creates the load.

Once you have finished creating it-- I'm going to go ahead and close out of this. I do want to go ahead and assign those properties to this load. And so what you need to do to assign the properties, you need to select the load. And this can be a little bit tricky.

What you need to do is select the load, but it's hard to pick this load. What you're looking for to pick it is a grip. And if you look, there is going to be a plus sign right in the middle of this load, and that's what you're going to pick to select the load. But sometimes it's hard to find that plus sign. So

Another tip would be just to simply just draw maybe a big selection window around your entire project, and then you can either-- that will show you, first of all, where the plus sign is, so you can see where the plus sign is when you do that. But then you can also use your Filter button up at the top to filter out what you're trying to select here. So I'm just going to use my filter and unselect the boundaries that I have in there and unselect the link so that I just have the load selected. And with that selected now, I can come over and assign the properties.

So the first property I want to assign is that area-based load type. And so I'll go ahead and pick in there and pick on maybe-- why don't we do just common area for this first load? And go ahead and give this load a name. And so I will just call this maybe 1-SE Common.

And then as far as the Supply From, I don't have anything defined yet that I can connect this to. But I'll come back and pick on that Supply From once we have our distribution system set up.

So once you have your main area-based load created, we can go back and start subdividing this. And for me to do that, I'm going to go back. And we could create new boundary lines in there to start subdividing this. I'm simply going to come in and modify the boundaries that I have. So I'm just going to use my corner trim and trim out a couple of these to define this big room over here on the left.

This big area over here on the left is actually an equipment room. And so this equipment room will have a different load density than the common areas. So I want to break that out into a different space.

So just by modifying my boundary and creating a separate area there, now I can go back and pick on my area-based load and use a Divide tool. And so when you pick on an area-based load, you'll see this Divide tool pop up on the contextual menu. And when I pick on that, I simply come down and pick on the area that I want to divide out.

So I want to divide out this bigger room on the left. So I'm going to pick on that, and it creates me a new area load. And so now we don't not only have one. Now we have two area-based area loads in this project. So I'm going to finish dividing that.

But now we can separately pick on this new area-based load and assign different properties to this load. And so this one-- like I said, this is going to be an equipment room. So I'm going to change this area-based load type from common areas and change it to the equipment space.

I will also go ahead and change the name of this as well and give this a name of maybe 1-Equipment. And I will, again, come back eventually and change the Supply From as well. So I would do this throughout your entire building as far as dividing up your buildings based on different functions and create as many areas as you need in your project.

Like I said, these two areas, they look exactly the same, even though they're two different areas. So this is where I would recommend the use of filters. And so if I go up to my View tab and start looking at my filters, I would create a filter in here for each type that we have as far as our load types.

So let me create a couple in here just to show you how I would do it. The first one, let me go ahead and call this first one maybe ABL for Area-Based Loads, and I'll call it Common. Once I create that, as far as the category that this filter is going to be assigned to, we do have a category down here for Electrical Analytical Loads.

And then I'll set the rule up where the rule is just looking at that area-based load type equals-- and I'm going to set it to equal-- and then I'll just pick Common. So there's my first filter for my Common space. Let me go ahead and apply that and create one more.

Let me just-- I'll tell you what. I'll just duplicate this one, and then we'll rename this new one. And I'll just change this one to be Equipment.

And just change my rule over here for this one to look for the Equipment Space. So now I have the two filters created. Then I would come in to either my view or my View Template and assign this filter to my views and View Templates. And so if I come in and add these two to the view, I can simply assign a colored fill pattern to these two filters. So maybe for the Common, I override the pattern and assign a solid fill.

And let's do, I don't know, how about this orange-pinky color for that first filter? And then for the second one, let's go ahead and assign, again, a solid fill for this one as well, and maybe we do a green color for this one. And so when I OK out of this, you'll see that you have graphically, it color codes my plan. So we can see that we definitely have two different area-based loads set up in this project.

So again, if I switch over to another project that has this completed-- this project, I've went ahead and assigned all the area-based loads for all the different types that I have in there. So I've drawn boundaries around different areas, and I've not created the loads in there and created some additional filters in there. Let me just show you the filters that I created.

I created a filter, again, for each load type that I have. And so each one of these load types has its own individual filter. And then I've gone into the View Template and assigned those filters a specific color that we can graphically see on the screen.

And you can see this either in a Plan view, or if you want to, you could actually jump over to a 3D view. And you can see the same thing in a 3D view and set you up a 3D view to see your area-based loads.

All right. Let me switch back now back to my PowerPoint. And we'll continue on and move into the Apply section of my presentation.

Here, we're going to apply the loads to a conceptual distribution system. We first are going to have to create the conceptual distribution system. But once it's created, we'll come back and apply the loads to that system.

To do this, we're going to use the System Browser inside of Revit. If you're not familiar with the System Browser, the System Browser itself is not new. It's been around for many years. And designers typically use the System Browser to make sure everything is connected in their project and also just to get an overview of all their devices and all their electrical loads inside their project.

But what they've added to the System Browser-- if you go up to the top and use the dropdown, you can now select Analytical Power Distribution. This is where we can create our conceptual distribution system. And in here, we're going to be able to add all of our equipment, all of our devices in there. And it's going to automatically add up all the loads for us to give us our total building connected loads.

To do this, we've got five main tools inside the System Browser. We have five little buttons at the top of the browser. Each one of these buttons will allow us to create a different type of load. The first one is the Power Source. And so we'll use this to create either a utility source, or maybe we have generators in our project that we can use this for.

We also have an Electrical Analytical Bus tool that we can use to indicate for panels, or switchboards, or bus ways, or-- it goes on, and on, and on. This is a big category. But we can use this Analytical Bus tool to create those type of devices.

We also have an Electrical Analytical Transformer button that we can use for transformers. We also have an Analytical Transfer Switch button. And this one is unique because it actually will have two different power sources.

And so I'll use this one in my example. You'll see that it will be connected not only to the utility power source, but it's also going to be connected to the generator power source as well. And finally, the last button is the Electrical Equipment Load where we will come in and create our major pieces of equipment and use the Electrical Equipment Load button to create those loads.

So when we add equipment loads in there, again, these are typically for our major components, and they're things like chillers, and elevators, and other equipment, things that are typically too large or beyond the load density calculation method. But once we create these equipment loads, we'll come back, and we're able to define the Load Classification, the Voltage, the Power Factor, the Apparent Load, and also the Supply From parameter in there to tell it what it's connected to. And so those will be seen on the Properties palette inside of Revit.

As far as the area-based loads, we'll come back to those area-based loads that we've already created. And once we have our distribution, we'll come back and fill in that Supply From and tell it what it's connected to. Now, initially, we'll see all these area-based loads, but they're going to be all grouped under the Unconnected folder because, currently, they're not going to be connected to anything. They're not going to have a power source yet.

All right. Let me switch back to Revit, and we'll show you how these tools work inside of Revit. I will continue working in this same model.

And the first thing I'm going to do is open up my System Browser to show you this. And so to open up the System Browser, I think the easiest way is just simply right click. And if you right click on your screen, you'll see an option for browsers. And I can go down and pick on my System Browser.

So on my System Browser here, first of all, again, you'll need to use this dropdown at the top and make sure it's selected to the Analytical Power Distribution. And once you do that, you'll see that this Unconnected folder's there. And here's all those area-based loads that I've already created in this project. And they're not connected to anything yet.

So let's start building our conceptual distribution system. So I'll use these tools up here on the top right of the browser. The first tool I'll use is the Power Source. So let me go ahead and create a couple of different power sources.

The first one, I'll just simply call Utility. The next one, I'll rename this one and simply call this one Generator. So now I have my two different power sources. So the utility's what is being provided to the site from the utility company.

Underneath that, maybe we have a campus-wide main switchboard. So let me use the Analytical Bus tool to create a campus-wide main switchboard in there. So I'll just call this Campus Main Switchboard.

And then underneath that, maybe we have a transformer. So let me use the Transformer button up here to create me a transformer. And I'll simply rename this and give this a name for a transformer. Maybe it's something like XLTUH1 or something.

And then underneath the transformer, then maybe we have another bus in there that's going to be representing our main switchboard for our building. So I'll create a main switchboard in there and just call this one Main Switchboard. And then underneath our main switchboard, maybe this is where we have our transfer switch going to our generator.

So let me create a transfer switch in there. And when I do this, let me go ahead and rename this. I'll just simply call this maybe EDP for Electrical Distribution Panel, transfer-- we'll call it EDP Transfer Switch.

But I want you to notice that there's two different power sources to this. So if I right click on this, I've already got the Supply From. It's being supplied from-- first of all, from the main switchboard. But as far as the secondary supply, I'm going to go ahead and pick the Generator on this. And you'll see that this same transformer or transfer switch is being indicated both under the Generator and the Main Switchboard now.

So maybe underneath this transfer switch, this is where we have our first panel that we're going to be connecting devices to. So let me create one more panel in there, and I'll just call this one maybe a EDP for Electrical Distribution Panel. And this electrical distribution panel is going to hold our two main elevators. And so those are major pieces of equipment, and so I'm going to use the Equipment button in here to create the equipment loads for the elevators.

So I'll create two of them. And in there, I'm going to rename the first one to the Elevator 1. And I'll call the next one. I'll rename this one and call it Elevator 2. And for both of these, I'm going to go over to the Properties and type in what the load is for the elevator.

So I'm just going to type in maybe 7,300 for the loads for that. And as I do that, you'll see the numbers start showing up here in my System Browser. So now we have a load in there of 14,600 volt amps based off those two elevators.

Let me go back and create a couple more devices in here. I'm going to go back to my Main Switchboard. And underneath my Main Switchboard, maybe we have other panels connected to that. So let me create another panel underneath that.

And I'll simply rename this first panel to be-- let's call it the Power Panel for the first floor equipment, so I'll just do 1EQ. And then also, maybe let me create one more in there-- another panel in there. And I'll call this one, rename this one to be my Power Panel for my first floor Southeast part of the building.

So now I have those two panels in there. And these two panels-- this is what I want to start connecting my area-based loads to. So now that I've got some panels in there, I can go back and pick on my area-based load and go back to its properties and assign the Supply From parameter. So for this Equipment Room, I'm going to tell it that it's connected to the power panel first floor equipment panel.

And when I do, notice that the loads automatically show up on that panel. And for the-- I'll do one more. Let me pick this Common area over here. So for this Common area space, I'll assign this one to be connected to that power panel 1 Southeast.

So as you can see, it's already starting to calculate the loads for my building. I'm going to stop right here, but I do have another project open. Let me jump over to it and just show you that this project does have the completed version completely filled out. So I've got all my loads in here connected to all my different panels.

So it's very long because I've got a lot-- it's a four-storey building. But the main thing that this has given me, though, if I go back up here and look at this utility, this is my total load, my estimated load for the building. So I've got in here a total load that's being calculated based off of actual square footage from the actual Revit model.

All right. Let me switch back to my PowerPoint, and we'll continue on and move into the Document section. This is where we can use the Documenting tools inside of Revit to document our electrical analysis loads. Now, these tools are not going to be new to you. The first one is tagging.

You're probably familiar with tagging. But I did want to point out that we're able to tag these area-based loads inside of our project. And we're able to create tags, or we can customize those tags. There's a new family category for Area-Based Load tags. And so if you're creating a tag from scratch, that is the category that you're going to want to assign that tag to because that's what these area-based loads are looking for.

So again, we can customize and create any tags we want. But this is going to allow us to document our plans and/or our 3D views. In addition to that, we also have the ability to create schedules. There are actually five new schedule types inside the New Schedule dialog box, all pertaining to the electrical analysis tools. We can create an Electrical Analytical Bus schedule, or a Load schedule, or a Power Source schedule, or a Transfer Switch schedule, or a Transformer schedule.

What I've got shown on the screen here, the first one, the big one is the Electrical Analytical Load schedule, where I'm able to capture all the loads in my building. And we can filter this any way we want to. We could filter it by sheet, or by level, or by power source, or whatever you want to do and get the totals at the bottom and calculate the totals in different ways.

And so this, again, is showing all the devices, all the loads in my building and calculating it up at the bottom. I've also got just a power source schedule indicated on this slide as well. This is just showing my generator and my utility, which is showing the total connected loads for those power sources.

So let me jump back to Revit and show you these tools real quick. So back inside of Revit, let me go ahead, and I'll just stay in this project. But I will close the System Browser at this point, so you can see my screen a little bit better. But if I just want to start tagging some of these area-based loads, I can come up to my Annotate tab and just use my normal tag by category and simply come down and pick on one of these and place my tag in there. So this tag is, by default, calling out the name of this area-based load.

We can also take advantage of the Tag All tool. So if we want to tag all of our spaces, we can come in there and simply check the checkbox and say, OK. And now all my area-based loads are tagged.

If we want to customize this tag, we can select the tag and open it up to Edit the family. And we can come in and modify what labels we're using for this tag. So if I modify this, I can come in and add any or all of these parameters I want to to my tag. So maybe I come in and we add-- in addition to the name, maybe I want to also include the power density, and maybe the area, and let's do also the parent load to be included on the tag, and also the supply from.

So I'll add those parameters to my tag, and I'll check the break mark in here so that each one of these will appear on a different line. And so that's a sample of what my tag will look like. Let me quickly save this and give this tag a name. So I'm going to do a Save As so that I can have a different tag in my project and go ahead and give this tag a name. And then I'll simply just close this and load this back into my project.

Once I have it loaded back into my project, to place this tag, I'll tell you what, I'll switch to my 3D view. And inside my 3D view, I want to tag this 3D view with those special tags that I just created.

And as you are probably aware, if you want to tag in a 3D view, you do need to lock this view. So I'll come down and say the orientation and lock the view, and then come back up and just use my Annotate tag by category again. And this time, I'll turn the Leader on and come down and just pick on one of these and tag one of my spaces.

Now, this tag, you can change or customize this tag. I typically like to have arrows on my tags, and so I can come in there and edit the type and change this arrow type and put it maybe a 20-degree filled arrowhead on this tag, so it looks a little nicer. But this is calling out the name of the area-based load.

It's calling out the load density. It's calling up the square footage. It's calling out the total load. And it's also calling out which panel this load is being supplied from.

And so, again, just to kind of-- I would do this for all your spaces in there as far as creating tags for that. You're also able to create schedules. And so if I want to create a schedule in here, I can come in there and create a schedule. So let me go ahead and quickly create one schedule, just to show you how this works.

I did want to show you those new categories that are in here. Here's those five new electrical and analytical categories. I'll just do a load schedule.

And so I'll pick the Analytical Loads. And then as far as the properties or the parameters that I want to include, I'll do, first of all, level in my schedule. And then maybe I want the name of the load, and then maybe the supply from parameter.

I'll pick on that. And then maybe the area-based load type, the power density-- let's include that one as well-- also, the power factor and just the overall area of the space. We could do the apparent load.

It could go on and on. You could pick as many as you want to. I'll do voltage and-- I don't know-- number of phases and current. So we'll end up with something like that.

I'll go to the Filter tab on this, and I will use the new Filter by Sheet checkbox down here. This is new in 2023. It's really nice.

This tool will allow you to-- when you create a schedule and put it on a sheet, it will look to see what plans on that sheet and we'll only schedule the items that are on that sheet. So if I'm on a first floor sheet and only have the first floor shown on that sheet, the schedule is only going to include the spaces or the loads that are on that first floor.

As far as grouping, I'll go ahead and group this by level. And I'll create a header for the level, and then we'll group it by the name after that. I do want some grand totals, so I'll check that. And then as far as the Formatting tab, since I'm grouping it by levels with the header, I'm actually going to hide that field.

But I will come down and get some totals in here. I want some totals for the area, the current, and also the apparent load and tell it to calculate totals for those specific columns. So if I simply just say, OK, it goes ahead and builds my schedule. Then we can see that it's breaking out this schedule by level, so we have level 1, level 2, level 3.

And it's giving me all my loads for those levels, and it's giving me the names of those loads. It's giving me the areas. It's giving me the apparent load. All the information that I need is documented here in this schedule.

So just to wrap this up, if I jump over to this last project where you can see I do have all these views on a sheet to document this. So I have my 3D view that's tagged, my Plan view that's tagged, and I can also put my schedules on here as well. So I have my Electrical Analytical Load schedule, and this is totaling up for this level, for level 1. And also, I put on here a power source schedule that is calling out my generator and my utility to give me my total building load.

All right. Moving back to my PowerPoint presentation-- I want to go ahead and wrap this up with some closing comments. And I will say, if you do have questions, feel free to reach out to me, and I'll be glad to answer any questions that you may have from this presentation.

But as far as what we talked about, in Revit 2023, you're now able to create an electrical analytical model. This is prior to placing any type of families in anything like that. But you're able to do this, first of all, by defining the Electrical Load Type settings. And then you can create the electrical analytical loads and then apply those loads to a conceptual distribution system that you create. And finally, you're able to document your analysis.

So I want to thank you for joining me today. Again, my name is Michael Massey, and here is my contact information on the screen. But if you have any questions, feel free to reach out to me, and I'll look forward to talking to you very, very soon.

标记

产品
行业
______
icon-svg-close-thick

Cookie 首选项

您的隐私对我们非常重要,为您提供出色的体验是我们的责任。为了帮助自定义信息和构建应用程序,我们会收集有关您如何使用此站点的数据。

我们是否可以收集并使用您的数据?

详细了解我们使用的第三方服务以及我们的隐私声明

绝对必要 – 我们的网站正常运行并为您提供服务所必需的

通过这些 Cookie,我们可以记录您的偏好或登录信息,响应您的请求或完成购物车中物品或服务的订购。

改善您的体验 – 使我们能够为您展示与您相关的内容

通过这些 Cookie,我们可以提供增强的功能和个性化服务。可能由我们或第三方提供商进行设置,我们会利用其服务为您提供定制的信息和体验。如果您不允许使用这些 Cookie,可能会无法使用某些或全部服务。

定制您的广告 – 允许我们为您提供针对性的广告

这些 Cookie 会根据您的活动和兴趣收集有关您的数据,以便向您显示相关广告并跟踪其效果。通过收集这些数据,我们可以更有针对性地向您显示与您的兴趣相关的广告。如果您不允许使用这些 Cookie,您看到的广告将缺乏针对性。

icon-svg-close-thick

第三方服务

详细了解每个类别中我们所用的第三方服务,以及我们如何使用所收集的与您的网络活动相关的数据。

icon-svg-hide-thick

icon-svg-show-thick

绝对必要 – 我们的网站正常运行并为您提供服务所必需的

Qualtrics
我们通过 Qualtrics 借助调查或联机表单获得您的反馈。您可能会被随机选定参与某项调查,或者您可以主动向我们提供反馈。填写调查之前,我们将收集数据以更好地了解您所执行的操作。这有助于我们解决您可能遇到的问题。. Qualtrics 隐私政策
Akamai mPulse
我们通过 Akamai mPulse 收集与您在我们站点中的活动相关的数据。这可能包含您访问的页面、您启动的试用版、您播放的视频、您购买的东西、您的 IP 地址或设备 ID、您的 Autodesk ID。我们使用此数据来衡量我们站点的性能并评估联机体验的难易程度,以便我们改进相关功能。此外,我们还将使用高级分析方法来优化电子邮件体验、客户支持体验和销售体验。. Akamai mPulse 隐私政策
Digital River
我们通过 Digital River 收集与您在我们站点中的活动相关的数据。这可能包含您访问的页面、您启动的试用版、您播放的视频、您购买的东西、您的 IP 地址或设备 ID、您的 Autodesk ID。我们使用此数据来衡量我们站点的性能并评估联机体验的难易程度,以便我们改进相关功能。此外,我们还将使用高级分析方法来优化电子邮件体验、客户支持体验和销售体验。. Digital River 隐私政策
Dynatrace
我们通过 Dynatrace 收集与您在我们站点中的活动相关的数据。这可能包含您访问的页面、您启动的试用版、您播放的视频、您购买的东西、您的 IP 地址或设备 ID、您的 Autodesk ID。我们使用此数据来衡量我们站点的性能并评估联机体验的难易程度,以便我们改进相关功能。此外,我们还将使用高级分析方法来优化电子邮件体验、客户支持体验和销售体验。. Dynatrace 隐私政策
Khoros
我们通过 Khoros 收集与您在我们站点中的活动相关的数据。这可能包含您访问的页面、您启动的试用版、您播放的视频、您购买的东西、您的 IP 地址或设备 ID、您的 Autodesk ID。我们使用此数据来衡量我们站点的性能并评估联机体验的难易程度,以便我们改进相关功能。此外,我们还将使用高级分析方法来优化电子邮件体验、客户支持体验和销售体验。. Khoros 隐私政策
Launch Darkly
我们通过 Launch Darkly 收集与您在我们站点中的活动相关的数据。这可能包含您访问的页面、您启动的试用版、您播放的视频、您购买的东西、您的 IP 地址或设备 ID、您的 Autodesk ID。我们使用此数据来衡量我们站点的性能并评估联机体验的难易程度,以便我们改进相关功能。此外,我们还将使用高级分析方法来优化电子邮件体验、客户支持体验和销售体验。. Launch Darkly 隐私政策
New Relic
我们通过 New Relic 收集与您在我们站点中的活动相关的数据。这可能包含您访问的页面、您启动的试用版、您播放的视频、您购买的东西、您的 IP 地址或设备 ID、您的 Autodesk ID。我们使用此数据来衡量我们站点的性能并评估联机体验的难易程度,以便我们改进相关功能。此外,我们还将使用高级分析方法来优化电子邮件体验、客户支持体验和销售体验。. New Relic 隐私政策
Salesforce Live Agent
我们通过 Salesforce Live Agent 收集与您在我们站点中的活动相关的数据。这可能包含您访问的页面、您启动的试用版、您播放的视频、您购买的东西、您的 IP 地址或设备 ID、您的 Autodesk ID。我们使用此数据来衡量我们站点的性能并评估联机体验的难易程度,以便我们改进相关功能。此外,我们还将使用高级分析方法来优化电子邮件体验、客户支持体验和销售体验。. Salesforce Live Agent 隐私政策
Wistia
我们通过 Wistia 收集与您在我们站点中的活动相关的数据。这可能包含您访问的页面、您启动的试用版、您播放的视频、您购买的东西、您的 IP 地址或设备 ID、您的 Autodesk ID。我们使用此数据来衡量我们站点的性能并评估联机体验的难易程度,以便我们改进相关功能。此外,我们还将使用高级分析方法来优化电子邮件体验、客户支持体验和销售体验。. Wistia 隐私政策
Tealium
我们通过 Tealium 收集与您在我们站点中的活动相关的数据。这可能包含您访问的页面、您启动的试用版、您播放的视频、您购买的东西、您的 IP 地址或设备 ID。我们使用此数据来衡量我们站点的性能并评估联机体验的难易程度,以便我们改进相关功能。此外,我们还将使用高级分析方法来优化电子邮件体验、客户支持体验和销售体验。. Tealium 隐私政策
Upsellit
我们通过 Upsellit 收集与您在我们站点中的活动相关的数据。这可能包含您访问的页面、您启动的试用版、您播放的视频、您购买的东西、您的 IP 地址或设备 ID。我们使用此数据来衡量我们站点的性能并评估联机体验的难易程度,以便我们改进相关功能。此外,我们还将使用高级分析方法来优化电子邮件体验、客户支持体验和销售体验。. Upsellit 隐私政策
CJ Affiliates
我们通过 CJ Affiliates 收集与您在我们站点中的活动相关的数据。这可能包含您访问的页面、您启动的试用版、您播放的视频、您购买的东西、您的 IP 地址或设备 ID。我们使用此数据来衡量我们站点的性能并评估联机体验的难易程度,以便我们改进相关功能。此外,我们还将使用高级分析方法来优化电子邮件体验、客户支持体验和销售体验。. CJ Affiliates 隐私政策
Commission Factory
我们通过 Commission Factory 收集与您在我们站点中的活动相关的数据。这可能包含您访问的页面、您启动的试用版、您播放的视频、您购买的东西、您的 IP 地址或设备 ID。我们使用此数据来衡量我们站点的性能并评估联机体验的难易程度,以便我们改进相关功能。此外,我们还将使用高级分析方法来优化电子邮件体验、客户支持体验和销售体验。. Commission Factory 隐私政策
Google Analytics (Strictly Necessary)
我们通过 Google Analytics (Strictly Necessary) 收集与您在我们站点中的活动相关的数据。这可能包含您访问的页面、您启动的试用版、您播放的视频、您购买的东西、您的 IP 地址或设备 ID、您的 Autodesk ID。我们使用此数据来衡量我们站点的性能并评估联机体验的难易程度,以便我们改进相关功能。此外,我们还将使用高级分析方法来优化电子邮件体验、客户支持体验和销售体验。. Google Analytics (Strictly Necessary) 隐私政策
Typepad Stats
我们通过 Typepad Stats 收集与您在我们站点中的活动相关的数据。这可能包含您访问的页面、您启动的试用版、您播放的视频、您购买的东西、您的 IP 地址或设备 ID、您的 Autodesk ID。我们使用此数据来衡量我们站点的性能并评估联机体验的难易程度,以便我们改进相关功能。此外,我们还将使用高级分析方法来优化电子邮件体验、客户支持体验和销售体验。. Typepad Stats 隐私政策
Geo Targetly
我们使用 Geo Targetly 将网站访问者引导至最合适的网页并/或根据他们的位置提供量身定制的内容。 Geo Targetly 使用网站访问者的 IP 地址确定访问者设备的大致位置。 这有助于确保访问者以其(最有可能的)本地语言浏览内容。Geo Targetly 隐私政策
SpeedCurve
我们使用 SpeedCurve 来监控和衡量您的网站体验的性能,具体因素为网页加载时间以及后续元素(如图像、脚本和文本)的响应能力。SpeedCurve 隐私政策
Qualified
Qualified is the Autodesk Live Chat agent platform. This platform provides services to allow our customers to communicate in real-time with Autodesk support. We may collect unique ID for specific browser sessions during a chat. Qualified Privacy Policy

icon-svg-hide-thick

icon-svg-show-thick

改善您的体验 – 使我们能够为您展示与您相关的内容

Google Optimize
我们通过 Google Optimize 测试站点上的新功能并自定义您对这些功能的体验。为此,我们将收集与您在站点中的活动相关的数据。此数据可能包含您访问的页面、您启动的试用版、您播放的视频、您购买的东西、您的 IP 地址或设备 ID、您的 Autodesk ID 等。根据功能测试,您可能会体验不同版本的站点;或者,根据访问者属性,您可能会查看个性化内容。. Google Optimize 隐私政策
ClickTale
我们通过 ClickTale 更好地了解您可能会在站点的哪些方面遇到困难。我们通过会话记录来帮助了解您与站点的交互方式,包括页面上的各种元素。将隐藏可能会识别个人身份的信息,而不会收集此信息。. ClickTale 隐私政策
OneSignal
我们通过 OneSignal 在 OneSignal 提供支持的站点上投放数字广告。根据 OneSignal 数据以及我们收集的与您在站点中的活动相关的数据,有针对性地提供广告。我们收集的数据可能包含您访问的页面、您启动的试用版、您播放的视频、您购买的东西、您的 IP 地址或设备 ID。可能会将此信息与 OneSignal 收集的与您相关的数据相整合。我们利用发送给 OneSignal 的数据为您提供更具个性化的数字广告体验并向您展现相关性更强的广告。. OneSignal 隐私政策
Optimizely
我们通过 Optimizely 测试站点上的新功能并自定义您对这些功能的体验。为此,我们将收集与您在站点中的活动相关的数据。此数据可能包含您访问的页面、您启动的试用版、您播放的视频、您购买的东西、您的 IP 地址或设备 ID、您的 Autodesk ID 等。根据功能测试,您可能会体验不同版本的站点;或者,根据访问者属性,您可能会查看个性化内容。. Optimizely 隐私政策
Amplitude
我们通过 Amplitude 测试站点上的新功能并自定义您对这些功能的体验。为此,我们将收集与您在站点中的活动相关的数据。此数据可能包含您访问的页面、您启动的试用版、您播放的视频、您购买的东西、您的 IP 地址或设备 ID、您的 Autodesk ID 等。根据功能测试,您可能会体验不同版本的站点;或者,根据访问者属性,您可能会查看个性化内容。. Amplitude 隐私政策
Snowplow
我们通过 Snowplow 收集与您在我们站点中的活动相关的数据。这可能包含您访问的页面、您启动的试用版、您播放的视频、您购买的东西、您的 IP 地址或设备 ID、您的 Autodesk ID。我们使用此数据来衡量我们站点的性能并评估联机体验的难易程度,以便我们改进相关功能。此外,我们还将使用高级分析方法来优化电子邮件体验、客户支持体验和销售体验。. Snowplow 隐私政策
UserVoice
我们通过 UserVoice 收集与您在我们站点中的活动相关的数据。这可能包含您访问的页面、您启动的试用版、您播放的视频、您购买的东西、您的 IP 地址或设备 ID、您的 Autodesk ID。我们使用此数据来衡量我们站点的性能并评估联机体验的难易程度,以便我们改进相关功能。此外,我们还将使用高级分析方法来优化电子邮件体验、客户支持体验和销售体验。. UserVoice 隐私政策
Clearbit
Clearbit 允许实时数据扩充,为客户提供个性化且相关的体验。我们收集的数据可能包含您访问的页面、您启动的试用版、您播放的视频、您购买的东西、您的 IP 地址或设备 ID。Clearbit 隐私政策
YouTube
YouTube 是一个视频共享平台,允许用户在我们的网站上查看和共享嵌入视频。YouTube 提供关于视频性能的观看指标。 YouTube 隐私政策

icon-svg-hide-thick

icon-svg-show-thick

定制您的广告 – 允许我们为您提供针对性的广告

Adobe Analytics
我们通过 Adobe Analytics 收集与您在我们站点中的活动相关的数据。这可能包含您访问的页面、您启动的试用版、您播放的视频、您购买的东西、您的 IP 地址或设备 ID、您的 Autodesk ID。我们使用此数据来衡量我们站点的性能并评估联机体验的难易程度,以便我们改进相关功能。此外,我们还将使用高级分析方法来优化电子邮件体验、客户支持体验和销售体验。. Adobe Analytics 隐私政策
Google Analytics (Web Analytics)
我们通过 Google Analytics (Web Analytics) 收集与您在我们站点中的活动相关的数据。这可能包含您访问的页面、您启动的试用版、您播放的视频、您购买的东西、您的 IP 地址或设备 ID。我们使用此数据来衡量我们站点的性能并评估联机体验的难易程度,以便我们改进相关功能。此外,我们还将使用高级分析方法来优化电子邮件体验、客户支持体验和销售体验。. Google Analytics (Web Analytics) 隐私政策
AdWords
我们通过 AdWords 在 AdWords 提供支持的站点上投放数字广告。根据 AdWords 数据以及我们收集的与您在站点中的活动相关的数据,有针对性地提供广告。我们收集的数据可能包含您访问的页面、您启动的试用版、您播放的视频、您购买的东西、您的 IP 地址或设备 ID。可能会将此信息与 AdWords 收集的与您相关的数据相整合。我们利用发送给 AdWords 的数据为您提供更具个性化的数字广告体验并向您展现相关性更强的广告。. AdWords 隐私政策
Marketo
我们通过 Marketo 更及时地向您发送相关电子邮件内容。为此,我们收集与以下各项相关的数据:您的网络活动,您对我们所发送电子邮件的响应。收集的数据可能包含您访问的页面、您启动的试用版、您播放的视频、您购买的东西、您的 IP 地址或设备 ID、电子邮件打开率、单击的链接等。我们可能会将此数据与从其他信息源收集的数据相整合,以根据高级分析处理方法向您提供改进的销售体验或客户服务体验以及更相关的内容。. Marketo 隐私政策
Doubleclick
我们通过 Doubleclick 在 Doubleclick 提供支持的站点上投放数字广告。根据 Doubleclick 数据以及我们收集的与您在站点中的活动相关的数据,有针对性地提供广告。我们收集的数据可能包含您访问的页面、您启动的试用版、您播放的视频、您购买的东西、您的 IP 地址或设备 ID。可能会将此信息与 Doubleclick 收集的与您相关的数据相整合。我们利用发送给 Doubleclick 的数据为您提供更具个性化的数字广告体验并向您展现相关性更强的广告。. Doubleclick 隐私政策
HubSpot
我们通过 HubSpot 更及时地向您发送相关电子邮件内容。为此,我们收集与以下各项相关的数据:您的网络活动,您对我们所发送电子邮件的响应。收集的数据可能包含您访问的页面、您启动的试用版、您播放的视频、您购买的东西、您的 IP 地址或设备 ID、电子邮件打开率、单击的链接等。. HubSpot 隐私政策
Twitter
我们通过 Twitter 在 Twitter 提供支持的站点上投放数字广告。根据 Twitter 数据以及我们收集的与您在站点中的活动相关的数据,有针对性地提供广告。我们收集的数据可能包含您访问的页面、您启动的试用版、您播放的视频、您购买的东西、您的 IP 地址或设备 ID。可能会将此信息与 Twitter 收集的与您相关的数据相整合。我们利用发送给 Twitter 的数据为您提供更具个性化的数字广告体验并向您展现相关性更强的广告。. Twitter 隐私政策
Facebook
我们通过 Facebook 在 Facebook 提供支持的站点上投放数字广告。根据 Facebook 数据以及我们收集的与您在站点中的活动相关的数据,有针对性地提供广告。我们收集的数据可能包含您访问的页面、您启动的试用版、您播放的视频、您购买的东西、您的 IP 地址或设备 ID。可能会将此信息与 Facebook 收集的与您相关的数据相整合。我们利用发送给 Facebook 的数据为您提供更具个性化的数字广告体验并向您展现相关性更强的广告。. Facebook 隐私政策
LinkedIn
我们通过 LinkedIn 在 LinkedIn 提供支持的站点上投放数字广告。根据 LinkedIn 数据以及我们收集的与您在站点中的活动相关的数据,有针对性地提供广告。我们收集的数据可能包含您访问的页面、您启动的试用版、您播放的视频、您购买的东西、您的 IP 地址或设备 ID。可能会将此信息与 LinkedIn 收集的与您相关的数据相整合。我们利用发送给 LinkedIn 的数据为您提供更具个性化的数字广告体验并向您展现相关性更强的广告。. LinkedIn 隐私政策
Yahoo! Japan
我们通过 Yahoo! Japan 在 Yahoo! Japan 提供支持的站点上投放数字广告。根据 Yahoo! Japan 数据以及我们收集的与您在站点中的活动相关的数据,有针对性地提供广告。我们收集的数据可能包含您访问的页面、您启动的试用版、您播放的视频、您购买的东西、您的 IP 地址或设备 ID。可能会将此信息与 Yahoo! Japan 收集的与您相关的数据相整合。我们利用发送给 Yahoo! Japan 的数据为您提供更具个性化的数字广告体验并向您展现相关性更强的广告。. Yahoo! Japan 隐私政策
Naver
我们通过 Naver 在 Naver 提供支持的站点上投放数字广告。根据 Naver 数据以及我们收集的与您在站点中的活动相关的数据,有针对性地提供广告。我们收集的数据可能包含您访问的页面、您启动的试用版、您播放的视频、您购买的东西、您的 IP 地址或设备 ID。可能会将此信息与 Naver 收集的与您相关的数据相整合。我们利用发送给 Naver 的数据为您提供更具个性化的数字广告体验并向您展现相关性更强的广告。. Naver 隐私政策
Quantcast
我们通过 Quantcast 在 Quantcast 提供支持的站点上投放数字广告。根据 Quantcast 数据以及我们收集的与您在站点中的活动相关的数据,有针对性地提供广告。我们收集的数据可能包含您访问的页面、您启动的试用版、您播放的视频、您购买的东西、您的 IP 地址或设备 ID。可能会将此信息与 Quantcast 收集的与您相关的数据相整合。我们利用发送给 Quantcast 的数据为您提供更具个性化的数字广告体验并向您展现相关性更强的广告。. Quantcast 隐私政策
Call Tracking
我们通过 Call Tracking 为推广活动提供专属的电话号码。从而,使您可以更快地联系我们的支持人员并帮助我们更精确地评估我们的表现。我们可能会通过提供的电话号码收集与您在站点中的活动相关的数据。. Call Tracking 隐私政策
Wunderkind
我们通过 Wunderkind 在 Wunderkind 提供支持的站点上投放数字广告。根据 Wunderkind 数据以及我们收集的与您在站点中的活动相关的数据,有针对性地提供广告。我们收集的数据可能包含您访问的页面、您启动的试用版、您播放的视频、您购买的东西、您的 IP 地址或设备 ID。可能会将此信息与 Wunderkind 收集的与您相关的数据相整合。我们利用发送给 Wunderkind 的数据为您提供更具个性化的数字广告体验并向您展现相关性更强的广告。. Wunderkind 隐私政策
ADC Media
我们通过 ADC Media 在 ADC Media 提供支持的站点上投放数字广告。根据 ADC Media 数据以及我们收集的与您在站点中的活动相关的数据,有针对性地提供广告。我们收集的数据可能包含您访问的页面、您启动的试用版、您播放的视频、您购买的东西、您的 IP 地址或设备 ID。可能会将此信息与 ADC Media 收集的与您相关的数据相整合。我们利用发送给 ADC Media 的数据为您提供更具个性化的数字广告体验并向您展现相关性更强的广告。. ADC Media 隐私政策
AgrantSEM
我们通过 AgrantSEM 在 AgrantSEM 提供支持的站点上投放数字广告。根据 AgrantSEM 数据以及我们收集的与您在站点中的活动相关的数据,有针对性地提供广告。我们收集的数据可能包含您访问的页面、您启动的试用版、您播放的视频、您购买的东西、您的 IP 地址或设备 ID。可能会将此信息与 AgrantSEM 收集的与您相关的数据相整合。我们利用发送给 AgrantSEM 的数据为您提供更具个性化的数字广告体验并向您展现相关性更强的广告。. AgrantSEM 隐私政策
Bidtellect
我们通过 Bidtellect 在 Bidtellect 提供支持的站点上投放数字广告。根据 Bidtellect 数据以及我们收集的与您在站点中的活动相关的数据,有针对性地提供广告。我们收集的数据可能包含您访问的页面、您启动的试用版、您播放的视频、您购买的东西、您的 IP 地址或设备 ID。可能会将此信息与 Bidtellect 收集的与您相关的数据相整合。我们利用发送给 Bidtellect 的数据为您提供更具个性化的数字广告体验并向您展现相关性更强的广告。. Bidtellect 隐私政策
Bing
我们通过 Bing 在 Bing 提供支持的站点上投放数字广告。根据 Bing 数据以及我们收集的与您在站点中的活动相关的数据,有针对性地提供广告。我们收集的数据可能包含您访问的页面、您启动的试用版、您播放的视频、您购买的东西、您的 IP 地址或设备 ID。可能会将此信息与 Bing 收集的与您相关的数据相整合。我们利用发送给 Bing 的数据为您提供更具个性化的数字广告体验并向您展现相关性更强的广告。. Bing 隐私政策
G2Crowd
我们通过 G2Crowd 在 G2Crowd 提供支持的站点上投放数字广告。根据 G2Crowd 数据以及我们收集的与您在站点中的活动相关的数据,有针对性地提供广告。我们收集的数据可能包含您访问的页面、您启动的试用版、您播放的视频、您购买的东西、您的 IP 地址或设备 ID。可能会将此信息与 G2Crowd 收集的与您相关的数据相整合。我们利用发送给 G2Crowd 的数据为您提供更具个性化的数字广告体验并向您展现相关性更强的广告。. G2Crowd 隐私政策
NMPI Display
我们通过 NMPI Display 在 NMPI Display 提供支持的站点上投放数字广告。根据 NMPI Display 数据以及我们收集的与您在站点中的活动相关的数据,有针对性地提供广告。我们收集的数据可能包含您访问的页面、您启动的试用版、您播放的视频、您购买的东西、您的 IP 地址或设备 ID。可能会将此信息与 NMPI Display 收集的与您相关的数据相整合。我们利用发送给 NMPI Display 的数据为您提供更具个性化的数字广告体验并向您展现相关性更强的广告。. NMPI Display 隐私政策
VK
我们通过 VK 在 VK 提供支持的站点上投放数字广告。根据 VK 数据以及我们收集的与您在站点中的活动相关的数据,有针对性地提供广告。我们收集的数据可能包含您访问的页面、您启动的试用版、您播放的视频、您购买的东西、您的 IP 地址或设备 ID。可能会将此信息与 VK 收集的与您相关的数据相整合。我们利用发送给 VK 的数据为您提供更具个性化的数字广告体验并向您展现相关性更强的广告。. VK 隐私政策
Adobe Target
我们通过 Adobe Target 测试站点上的新功能并自定义您对这些功能的体验。为此,我们将收集与您在站点中的活动相关的数据。此数据可能包含您访问的页面、您启动的试用版、您播放的视频、您购买的东西、您的 IP 地址或设备 ID、您的 Autodesk ID 等。根据功能测试,您可能会体验不同版本的站点;或者,根据访问者属性,您可能会查看个性化内容。. Adobe Target 隐私政策
Google Analytics (Advertising)
我们通过 Google Analytics (Advertising) 在 Google Analytics (Advertising) 提供支持的站点上投放数字广告。根据 Google Analytics (Advertising) 数据以及我们收集的与您在站点中的活动相关的数据,有针对性地提供广告。我们收集的数据可能包含您访问的页面、您启动的试用版、您播放的视频、您购买的东西、您的 IP 地址或设备 ID。可能会将此信息与 Google Analytics (Advertising) 收集的与您相关的数据相整合。我们利用发送给 Google Analytics (Advertising) 的数据为您提供更具个性化的数字广告体验并向您展现相关性更强的广告。. Google Analytics (Advertising) 隐私政策
Trendkite
我们通过 Trendkite 在 Trendkite 提供支持的站点上投放数字广告。根据 Trendkite 数据以及我们收集的与您在站点中的活动相关的数据,有针对性地提供广告。我们收集的数据可能包含您访问的页面、您启动的试用版、您播放的视频、您购买的东西、您的 IP 地址或设备 ID。可能会将此信息与 Trendkite 收集的与您相关的数据相整合。我们利用发送给 Trendkite 的数据为您提供更具个性化的数字广告体验并向您展现相关性更强的广告。. Trendkite 隐私政策
Hotjar
我们通过 Hotjar 在 Hotjar 提供支持的站点上投放数字广告。根据 Hotjar 数据以及我们收集的与您在站点中的活动相关的数据,有针对性地提供广告。我们收集的数据可能包含您访问的页面、您启动的试用版、您播放的视频、您购买的东西、您的 IP 地址或设备 ID。可能会将此信息与 Hotjar 收集的与您相关的数据相整合。我们利用发送给 Hotjar 的数据为您提供更具个性化的数字广告体验并向您展现相关性更强的广告。. Hotjar 隐私政策
6 Sense
我们通过 6 Sense 在 6 Sense 提供支持的站点上投放数字广告。根据 6 Sense 数据以及我们收集的与您在站点中的活动相关的数据,有针对性地提供广告。我们收集的数据可能包含您访问的页面、您启动的试用版、您播放的视频、您购买的东西、您的 IP 地址或设备 ID。可能会将此信息与 6 Sense 收集的与您相关的数据相整合。我们利用发送给 6 Sense 的数据为您提供更具个性化的数字广告体验并向您展现相关性更强的广告。. 6 Sense 隐私政策
Terminus
我们通过 Terminus 在 Terminus 提供支持的站点上投放数字广告。根据 Terminus 数据以及我们收集的与您在站点中的活动相关的数据,有针对性地提供广告。我们收集的数据可能包含您访问的页面、您启动的试用版、您播放的视频、您购买的东西、您的 IP 地址或设备 ID。可能会将此信息与 Terminus 收集的与您相关的数据相整合。我们利用发送给 Terminus 的数据为您提供更具个性化的数字广告体验并向您展现相关性更强的广告。. Terminus 隐私政策
StackAdapt
我们通过 StackAdapt 在 StackAdapt 提供支持的站点上投放数字广告。根据 StackAdapt 数据以及我们收集的与您在站点中的活动相关的数据,有针对性地提供广告。我们收集的数据可能包含您访问的页面、您启动的试用版、您播放的视频、您购买的东西、您的 IP 地址或设备 ID。可能会将此信息与 StackAdapt 收集的与您相关的数据相整合。我们利用发送给 StackAdapt 的数据为您提供更具个性化的数字广告体验并向您展现相关性更强的广告。. StackAdapt 隐私政策
The Trade Desk
我们通过 The Trade Desk 在 The Trade Desk 提供支持的站点上投放数字广告。根据 The Trade Desk 数据以及我们收集的与您在站点中的活动相关的数据,有针对性地提供广告。我们收集的数据可能包含您访问的页面、您启动的试用版、您播放的视频、您购买的东西、您的 IP 地址或设备 ID。可能会将此信息与 The Trade Desk 收集的与您相关的数据相整合。我们利用发送给 The Trade Desk 的数据为您提供更具个性化的数字广告体验并向您展现相关性更强的广告。. The Trade Desk 隐私政策
RollWorks
We use RollWorks to deploy digital advertising on sites supported by RollWorks. Ads are based on both RollWorks data and behavioral data that we collect while you’re on our sites. The data we collect may include pages you’ve visited, trials you’ve initiated, videos you’ve played, purchases you’ve made, and your IP address or device ID. This information may be combined with data that RollWorks has collected from you. We use the data that we provide to RollWorks to better customize your digital advertising experience and present you with more relevant ads. RollWorks Privacy Policy

是否确定要简化联机体验?

我们希望您能够从我们这里获得良好体验。对于上一屏幕中的类别,如果选择“是”,我们将收集并使用您的数据以自定义您的体验并为您构建更好的应用程序。您可以访问我们的“隐私声明”,根据需要更改您的设置。

个性化您的体验,选择由您来做。

我们重视隐私权。我们收集的数据可以帮助我们了解您对我们产品的使用情况、您可能感兴趣的信息以及我们可以在哪些方面做出改善以使您与 Autodesk 的沟通更为顺畅。

我们是否可以收集并使用您的数据,从而为您打造个性化的体验?

通过管理您在此站点的隐私设置来了解个性化体验的好处,或访问我们的隐私声明详细了解您的可用选项。