If you model multistory buildings, Revit 2018 will be a game-changer with new features that simplify creation of stairs and the accompanying handrails. And, yes, we know that Revit architecture users have been asking for this feature for…a while. It’s one that we’re extremely happy to include in this release because we really want to help make complex things easier to create. We know for example, being able to take one stair and expand it to an entire building will alleviate a lot of work especially for those of you who work on complex, tall buildings.
New Multistory stair object
The new multistory stair tool brings improvements in both how you initially create the stairs and also in how the multistory stair behaves when you need to edit it. This is not only an obvious time-saver and productivity booster, but it helps you do a better job creating the content that captures design intent.

With new features released for Revit architecture, creating multistory stair towers will never be the same
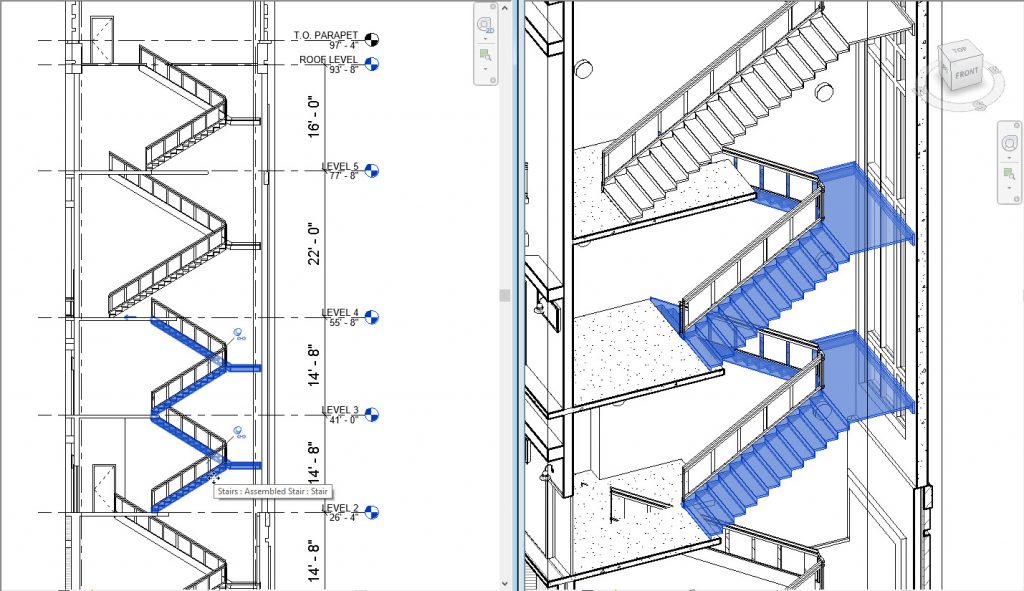
With the new multistory stair feature you can now create stair towers quickly by attaching stairs to the levels in your project. You can create the multistory stair while creating a stair or generate the multistory stair from an existing stair at a later time. When you change a level height, the stair updates automatically.
To create a multistory stair, you select the levels you need in a section or elevation view. The stairs will be grouped by level height with changes propagating automatically to all other stairs within the same height group. You can add and remove levels to the multistory stair as required, and new groups will be created automatically based on level height. If the level heights change within a group, the affected stairs will be unpinned and adjusted accordingly.
Using automatic grouping
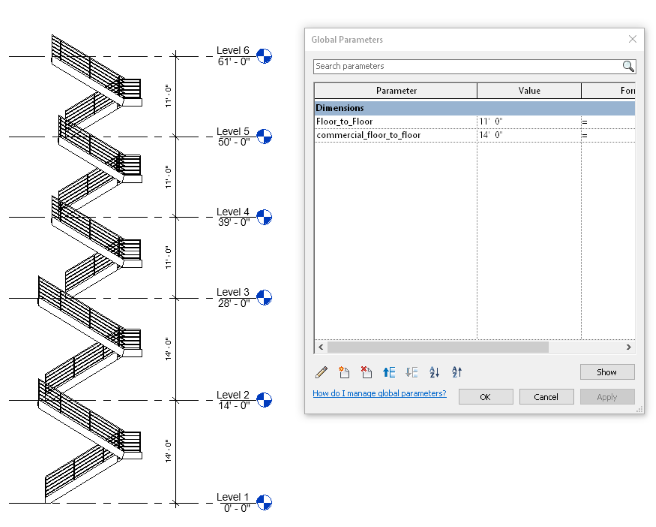
The automatic grouping behavior adds a great level of flexibility to the multistory stair tool. For example, you might have a building where the first two floors are commercial space, above that are the remaining residential floors of the building. The two commercial levels have a different floor to floor height than the residential floors of the building. The stairs connecting the first two commercial floors will be grouped and the remaining stairs connecting the residential levels will be placed in a different group. Now if you make edits to the stairs in either of these groups, the changes will be propagated to the other stairs in the group, so now you can make a change to the one of stairs connecting the commercial floors without it affecting the stairs on the residential floors.
Save even more time with a global parameter
When you pair up the functionality of the multistory stair tool with a global parameter to controlling level to level heights in a building, you can now quickly change your floor to floor heights and have the multistory stairs simply update saving time over manually adjusting individually placed stairs.

Use a global parameter with the multistory stair tool
With the multistory stair tool you can:
- generate a multistory stair from stairs created with most common runs, such as straight, winder, spiral, etc.
- align stairs on each level by the mid-landing position or the run-start point
- add or delete level stairs in the multistory stair
- ensure that the actual riser number matches the desired riser number
- change the multistory stair type and tread depth
Of course, when you need more control, you can still unpin an individual stair to remove it from a group and modify it separately.
Enhanced Railings
Revit 2018 also has some of the features you’ve been asking for that relate to railings.

Railings in multistory stair towers and hosted on toposurface elements
Railings in multistory stair tower
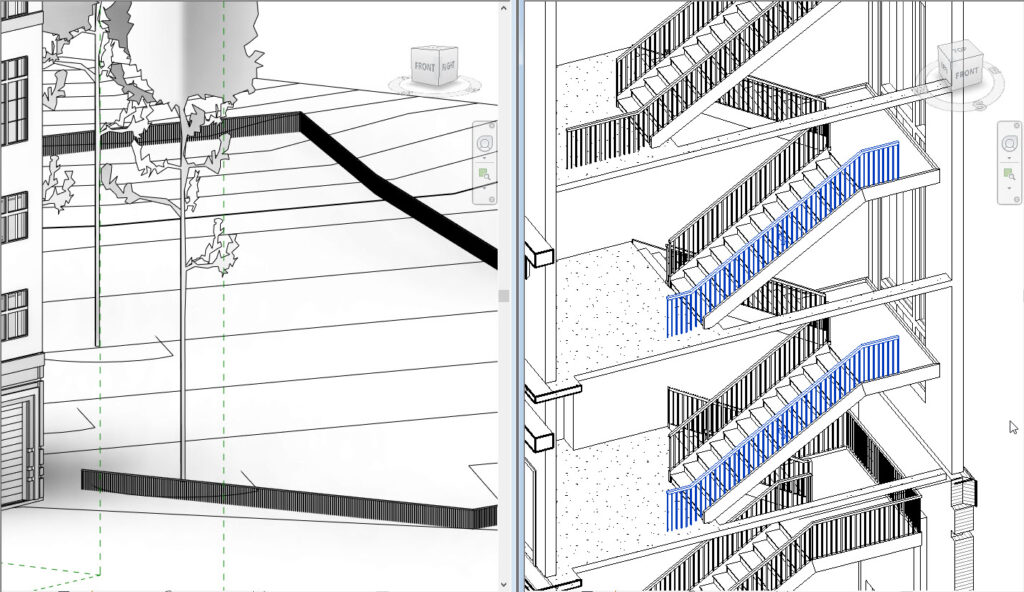
You can now add railings to an entire multistory stair tower with a single click, with railings grouped with their host stairs according to level heights. Any edits you make to the sketch of one instance in the height group will propagate to the other instances in that height group. You can delete unwanted railings can be deleted, and sketch new ones in their place.
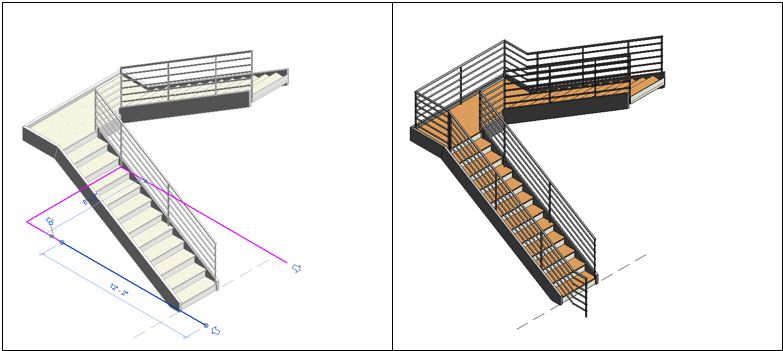
Speaking of sketching new railings, this process is also simplified with hosted railings automatically recognizing the slope of the host stair. You simply select Pick New host within the sketch, and pick the stair. Small arrows will appear at the ends of the sketch line to indicate the direction it follows along its host stair.
Because the railing now better understands the host it is placed on, creating a required handrail extension is as easy as making a modification to the sketch. Extend the sketch the required distance beyond the end of the stair and the railing flattens out to follow the floor creating the required extension.

Hosted railings recognize slope of host stair
Modeling other types of railings
We know you also need to model railings in places outside of and beyond stair towers. With new Revit architecture features in 2018 you can finally model railings hosted to elements like roofs, floors and walls. This makes modeling of elements such as outdoor railings much easier.
You can also use this functionality to make railings follow the shape or contour of their host elements including hosting railings on toposurface elements. So now you can easily and much more quickly model common site conditions like fencing or outdoor handrails right within Revit.
Easier sketching and more hosting options make working with railings easier and more powerful than ever.