Even with formal Revit training, learning to use Revit can be a big task to tackle. When coming to Revit from another application, such as AutoCAD it is quite likely everything just “feels” different and takes some getting used to. One thing that can help smooth out the learning curve of Revit is taking some time to learn some of the some of the unique language Revit uses to describe things.
Here are the five key terms you need to know when starting out in Revit.
1. Family
The family is the basic building block of Revit. Everything in Revit is a family. You might think of a family a bit like a Block with attributes in AutoCAD.
The family is more than just the graphic depiction of an element; the family also holds the information known about the element, such as the height and width of a door. The family can also hold encoded behaviors to control the family.
It is important to also understand there are three kinds of families used by Revit:
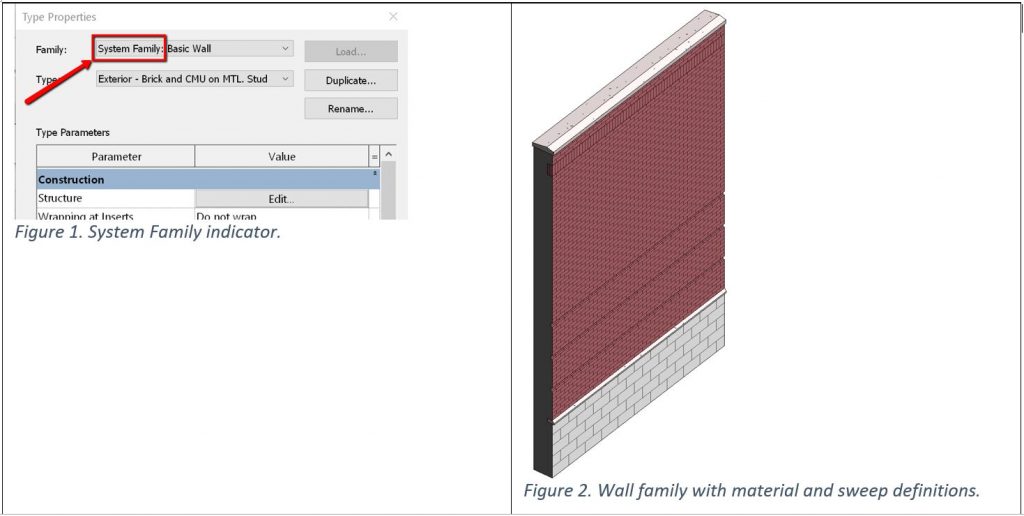
- System Families – System families are families that can only exist in a project or template file. You cannot load a system family from a library outside of the project. To create a new system family, you need to duplicate it in the project and make changes to alter the family. You know you are working with a system family if in the type properties dialog, it says “System Family:” before the family name.

Wall family includes definition of all of the wall layers, materials, sweeps, and reveals that make up the wall.
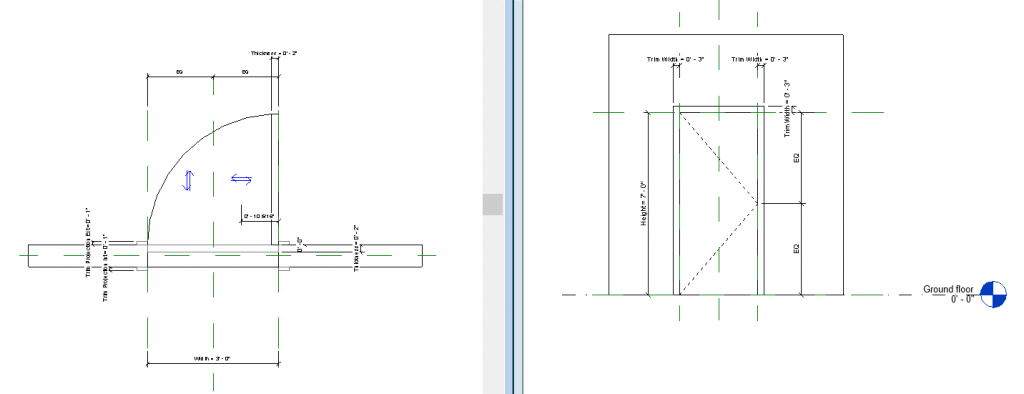
- Loadable/Component Families – Loadable or component families are kept in a library outside of the project or template. Once a loadable family is loaded into the project you no longer need a connection to the location where you loaded it from. The family definition becomes part of the project. If loading a family while in a command– e. door, window, column, etc–you can only load families made using the category of the command you are using. To be safe, you can always load families of any category with the Load Family command on the Insert tab of the Ribbon.

Door family showing labeled dimensions controlling door behavior and relationships between parameters.
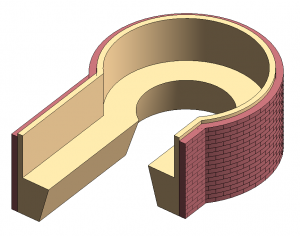
- In-Place Families – In place families are created in the project in context. You create in-place families in situation where it might be difficult to create the needed geometry for the family without the context. For example, you might have some built-in seating that fits between walls in a project. It may be easier to create this family exactly where it need to be using the walls in the project to help you. In-place families only exist in the project they were created in.

Seating created with in-place family to match surrounding walls.
2. Properties/Parameters
When you hear someone talking about properties or parameters in your Revit training, know that these are the same thing. The two terms are used interchangeably. The parameters of an element are where all the information about the elements in projects are held. Parameters are where you find the “I” in BIM. The parameters from elements can be displayed and reported in a Revit schedule. In many cases parameters are “shared” so they can appear in both tags and schedules. All elements have two sets of parameters:
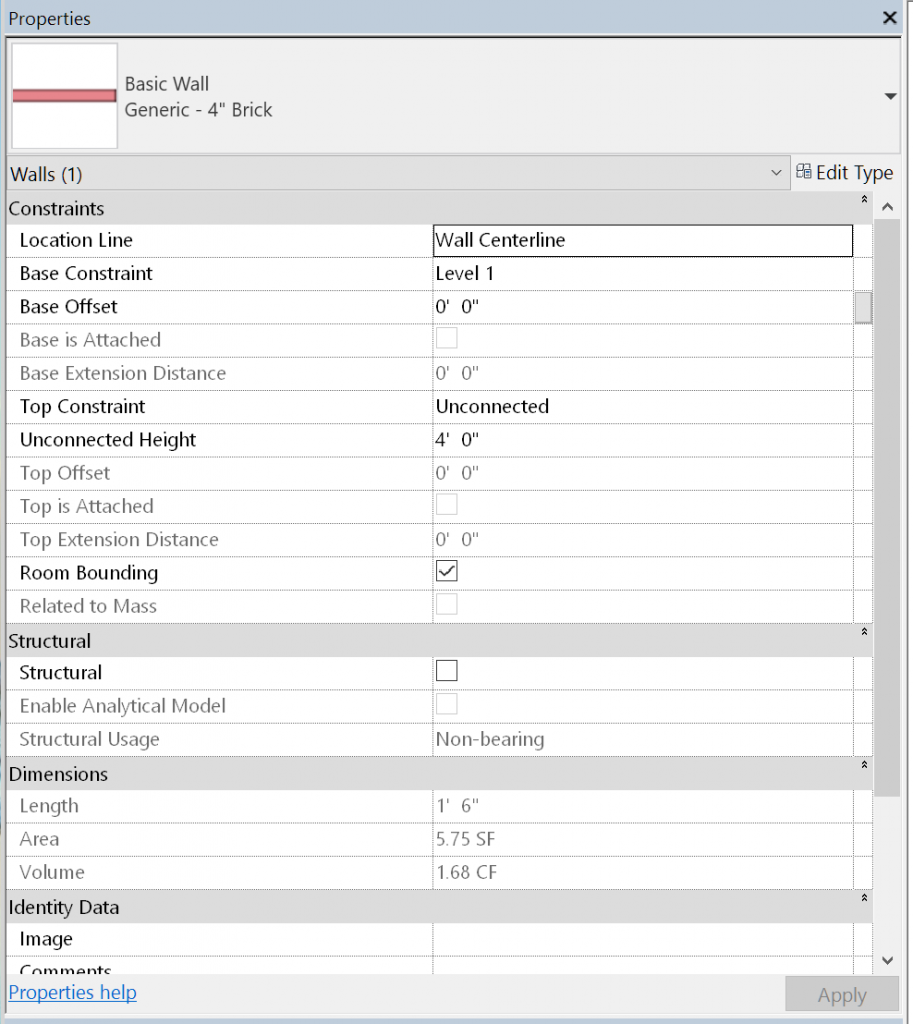
- Instance Parameters – Instance parameters are unique to that individual element. Parameters that need to have unique values should be instance parameters. For example, when specifying the hardware used on a door, you might want to consider using an instance parameter because each door might have a slightly different hardware need, but everything else about the doors in the project are the same. When an element is selected the instance properties are displayed in properties palette.

Instance properties of a wall.
- Type Parameters – Type parameters are like instance parameters, except type parameters will typically apply to multiple families in a project. For example, a door you have placed five times in your project has height and width parameters defined as type parameters. If you change the height parameter, all five of the doors in the project will have the height updated. To access and edit type parameters, you must select “Edit Type” from the properties palette when an element is selected. Because type parameters allow you to change many elements with one edit, you must be careful when editing type parameters.

Type Properties dialog.
3. Sketch
Sketches are used when certain families need to have the extents of the geometry defined. For example when placing a floor family, the type and instance parameters of the family describes much about the floor, thickness, material, etc, but the sketch defines the perimeter of the floor. In most cases sketches must form closed loops (there are exceptions such as railings, roof by sketch) to define the perimeter. When a sketch is needed, the Revit UI is put into “sketch mode” and you must either finish the sketch or cancel the command. In sketch mode the main elements are 1/ 2 toned and a Ribbon tab is displayed with sketch specific tools. All other tools are disabled.

4. Level/Work Plane
Levels in a project establish the 3D framework for the model. Levels are defined in a section or elevation view and then as you place elements they are associated with a level. For many objects, the level is also the work plane of the element. The movement or elements associated to a work plane are restricted. For example, a piece of furniture placed in a level 1 plan view is associated to level 1 as the work plane. In a section or elevation view the desk can’t be moved up to the 2nd level. It can only be moved in the x,y axis, but not the Z axis. Understanding the work plane of a view help you understand where and how an element exists in 3d space.
5. View
Because when working in Revit you are developing one common model, the views are generated directly from the model, and in this way all views are always up to date. The Project Browser organizes the view in the project so you can quickly change from one view to another while designing or tile views to design in them simultaneously. It is important to understand that each view is showing one model, but each view can also be independently controlled with visibility and graphics overrides. For example, you might have a floor plan, a site plan, and a furniture layout plan. Each of these views shows the same model but needs to convey different information. Visibility and graphics of a view allows individual control so all three plans can convey the needed information.
This is just a short list of five central terms and concepts you should learn when starting your Revit training journey. Understand these and you will be on your way to mastering Revit.
Have more questions? There’s always someone with an answer on the Revit Forums
Get to know Jeff in his Behind the Scenes with the Revit team profile