Before we move into the Dynamo part let me quickly highlight rebar numbering and partitioning in Revit.
In Revit, numbering allows identical reinforcement elements to be matched for schedules and tags.
Partitioning in Revit gives you the ability to define a common parameter for reinforcing elements within a certain construction sequence. Rebar elements are automatically given a unique number within same partition based on their type, shape & geometrical parameters.

Partitioning for reinforcement identification serves a number of organizational purposes depending on how a building is designed or how it will be constructed. Any rebar, rebar set, or fabric sheet instance in a model can only be assigned to one partition.
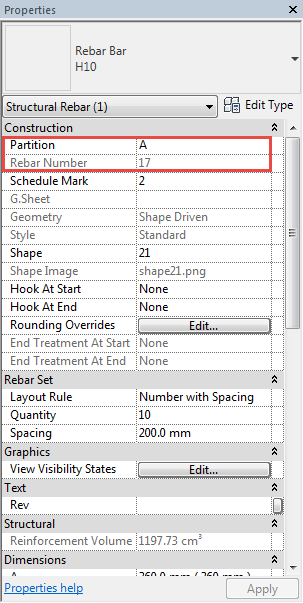
The number for a rebar or fabric sheet instance as well as its partition may be viewed in the Properties palette under Construction.
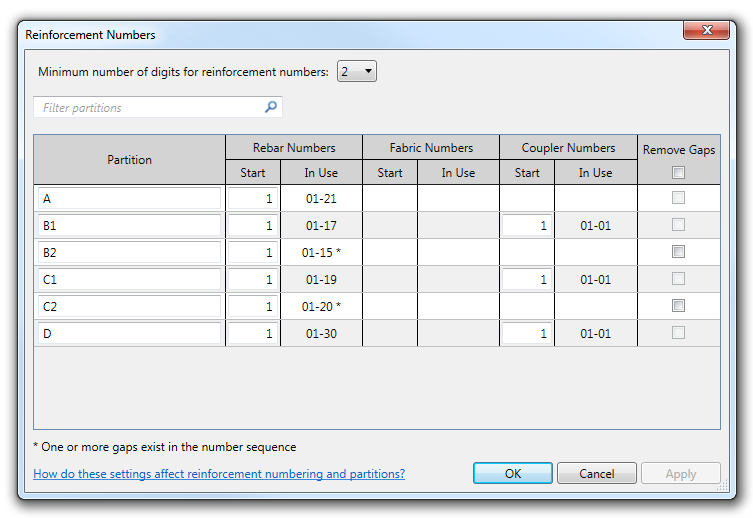
You can use the Reinforcement Numbering dialog to make adjustments to rebar numbering sequences.
Using this dialog you ran quickly and easily rename your partitions and renumber rebar elements within a specific partition.
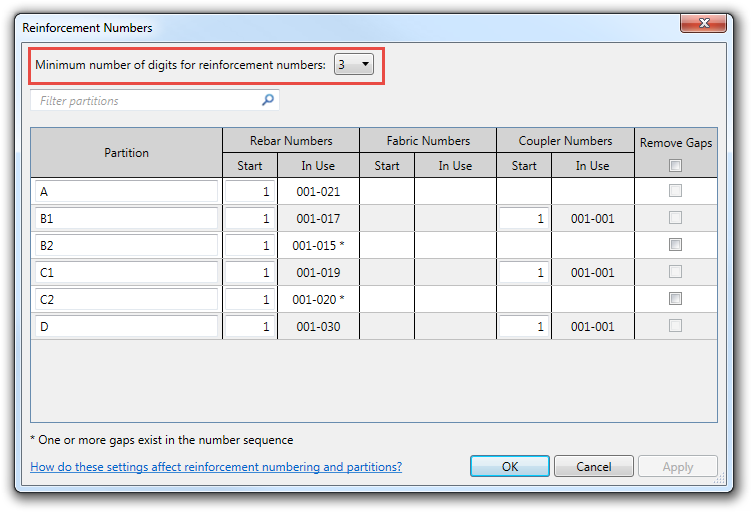
The Minimum number of digits for reinforcement numbers option specifies the minimum number of digits to display in a sequence. For example, when set to 3 digits; rebar number 2 displays as 002.
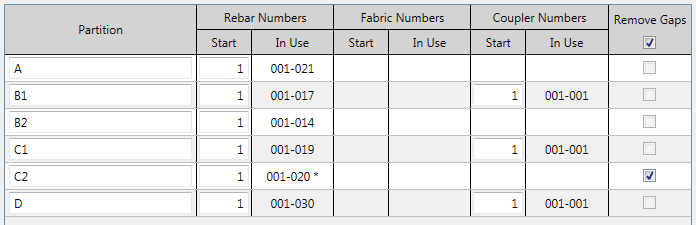
The Remove Gaps option becomes active when one or more gaps exist in a sequence. The checkbox removes gaps in the numbering sequence of rebar and fabric sheets in a partition.
This is a very convenient tool to manage rebar numbering however sometimes we need apply some specific, more sophisticated rules for how our rebars should be numbered. This is a common problem for many structural detailers.
For example, let’s image a situation where we would like to have all rebars numbered within the same partition from the shortest rebar to the longest one…
If you have already started thinking how you could do this in Revit, I have to tell you to stop. This is an instance where Dynamo for Revit comes in handy and is the right tool at the right time!
Let me show you how helpful Dynamo is for this issue.
I made a few assumptions:
- In my Dynamo script I want to select all rebars from a specified partition automatically (this is so there is no need to select any rebars in my model).
- All rebars from the given partition will be renumbered from the shortest rebar to the longest one.
- I want to be able define a starting number of the shortest rebar.
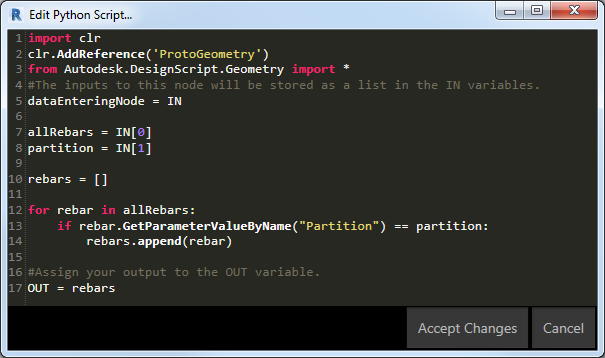
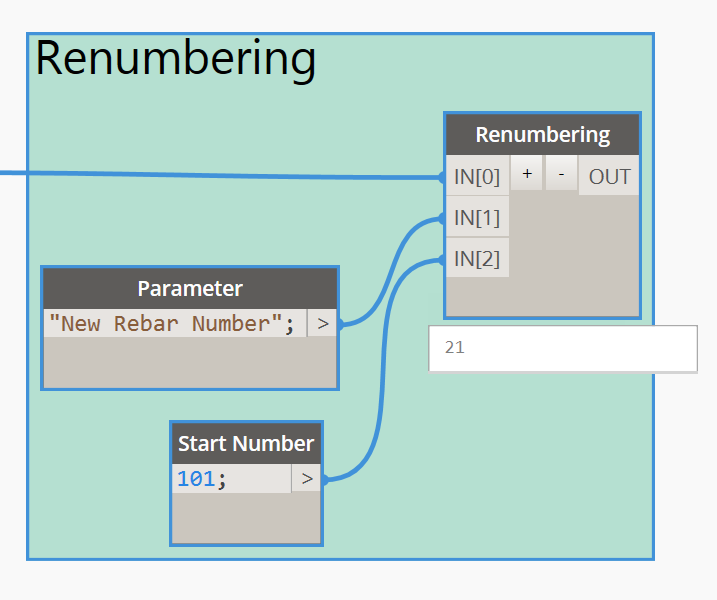
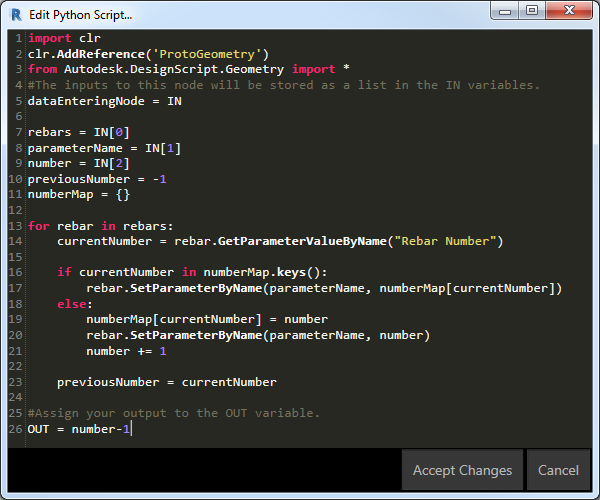
Because the Rebar Number parameter is read-only, first I need to create a project parameter which I call “New Rebar Number” and then I end up with the following Dynamo script:
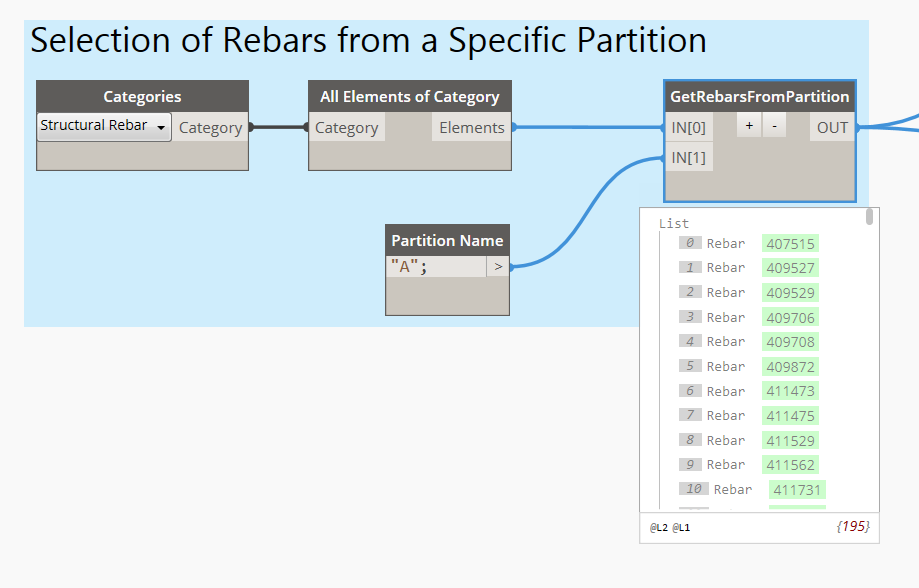
As the first step I need to select all rebars from a partition I specify.
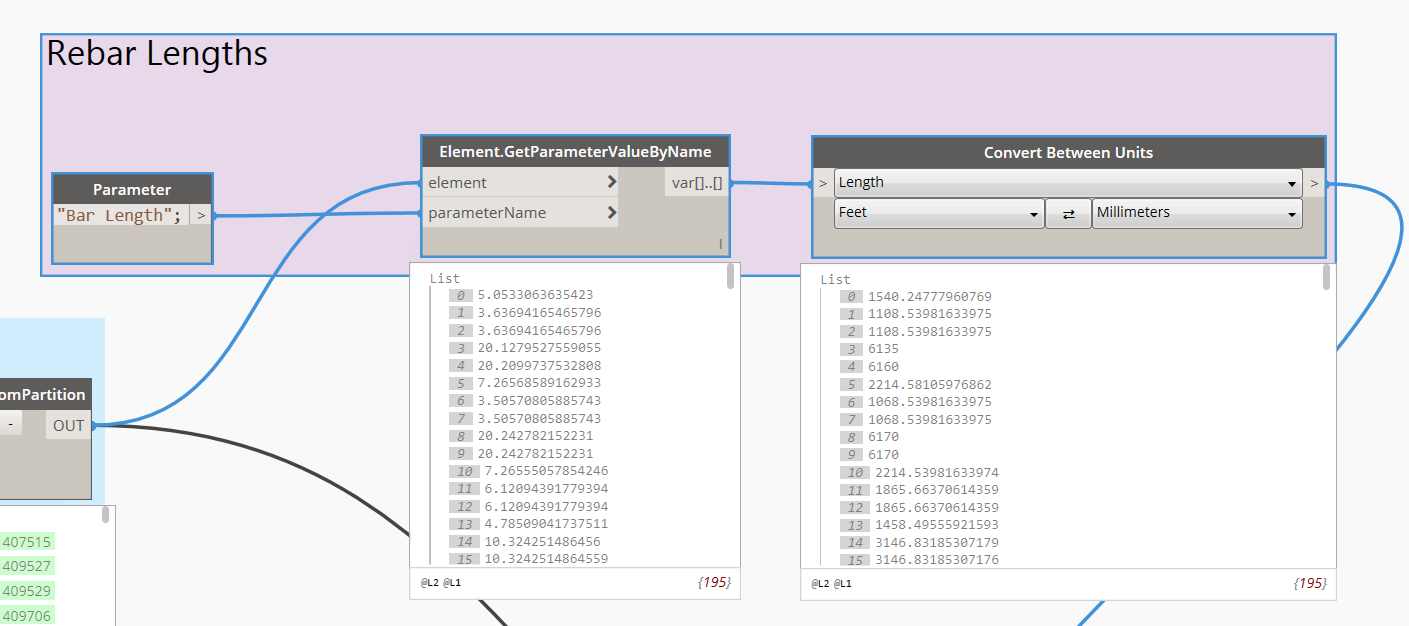
Next, it’s time to get information about the lengths of my rebars. Even though my project is metric I need to make a units conversion to have them presented in millimeters rather than in feet.
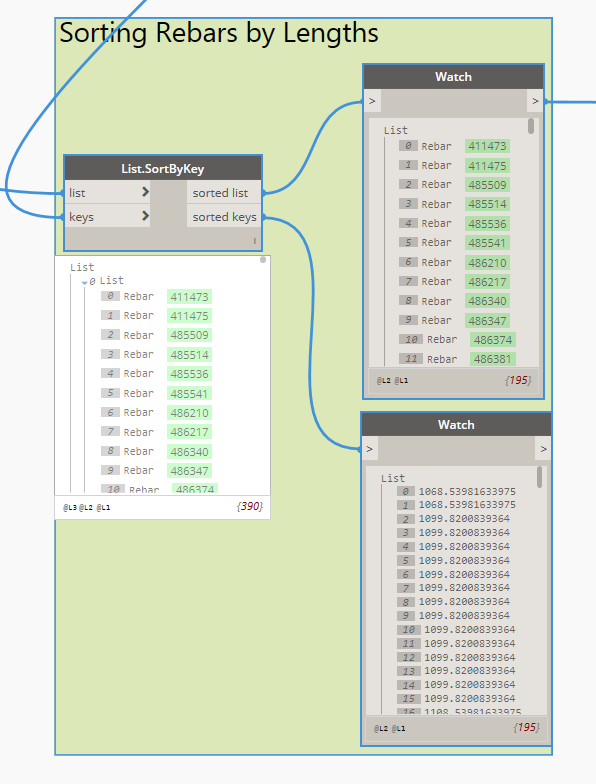
Knowing lengths of my rebars, now I am able to sort the list of rebars by lengths.
… and finally it’s time to renumber the rebars:
Now I can create a rebar bending schedule based on the New Rebar Number parameter!!
For more posts on Revit’s rebar features, check out these past articles on BIM and Beam:


