AutoCAD has several commands that I like to refer to as “kissing cousins”. No, I’m not talking about the Elvis movie from the early 60’s*, but instead what can be defined as “something that is of a very similar character to another thing of the same type” (yes, I got that off the web).
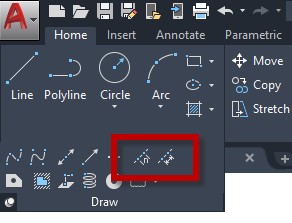
I’ve written about a few of these already in this blog. Fillet and Chamfer come to mind, along with Xline and Ray. Divide and Measure are another pair a lot of people aren’t aware of. You can find them tucked away in the additional commands area of the Draw panel in the Ribbon. Of course, you can just type them into the Command Line as well.
They work in a similar fashion. Divide will create evenly spaced points or blocks along an object, while Measure do the same, but each will be a fixed distance apart. Before we look closer at these commands, you’ll need to know a little about Points and their visual style.
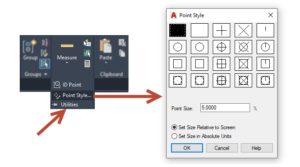
An AutoCAD Point is a non-dimensional object that can be snapped to with the NODE osnap. It appears as a dot on the screen by default. That’s what these two cousins will use, and since the points will be obscured by the object you’re working on, you may want to change their appearance. You do that with the Point Style dialog, which can be found in the pulldown of the Utilities panel in the Home Tab of the Ribbon.

Choose something other than the dot or the blank and say OK. I’ll be using the circle with the X through it for my examples.
Cousin Divide
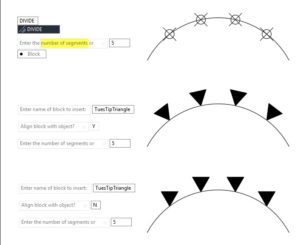
Divide will prompt you to select your object to divide, then ask for the number of segments you want. Specify your number, and points will appear indicating the evenly spaced segments. In my example, I specified 5 segments (which, in turn, makes 4 points).
You also have the option to use a defined block instead of points. Choose the Block option, and you’ll be prompted for the name of the block and then whether you want to align the block with the object. Below, I’ve shown examples of all three options, and their associated prompts.

Cousin Measure
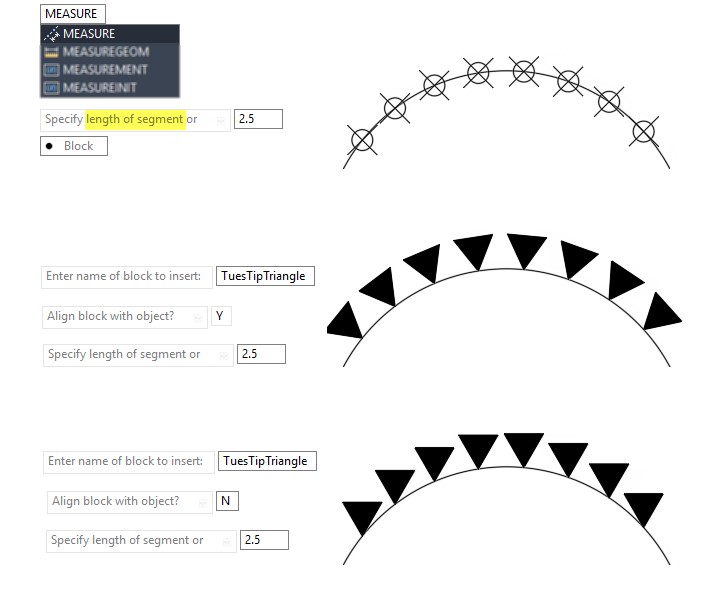
Here’s the good news. Once you’ve learned one command, you’ve learned the other. Thus, their kissing cousin status. Just remember, with Measure, you’re telling it to place the point or block at a defined distance along your object. It will stop when it doesn’t have enough room to place another, so you’ll probably end up with a short segment on the end.
Below I show the same steps as I did with Divide, but instead specify for the point or block to be placed every 2.5 units along the arc.

In Summary
I’ve seen all kinds of ways for people to achieve what we’ve just learned about, simply because they didn’t know about these two commands. Just because they’re hidden in the Draw pulldown, doesn’t make them any less useful. Give them a try next time you need to divvy something up, or place something along regular intervals.
*Disclaimer: For my sharp eyed and even more sharp-witted readers (you know who you are), yes… I know Elvis’s movie was actually entitled “Kissin’ Cousins” with an apostrophe, not a “g.” Please grant me this bit of poetic license.
More Tuesday Tips
Check out our whole Tuesday Tips series for ideas on how to make AutoCAD work for you. Do you have any favorite AutoCAD tips? Tell us in the comments!


