If you’ve worked in this industry for any amount of time, you know one thing: change is inevitable. Whether that change takes the form of new software, new hardware, new teammates, a new vending machine in the breakroom… you can’t avoid it.
But today, I’ll be talking about another kind of change that we all deal with. I’m talking drawing revisions. Whether it’s during the design phase or via a more official Change Order, they will happen.
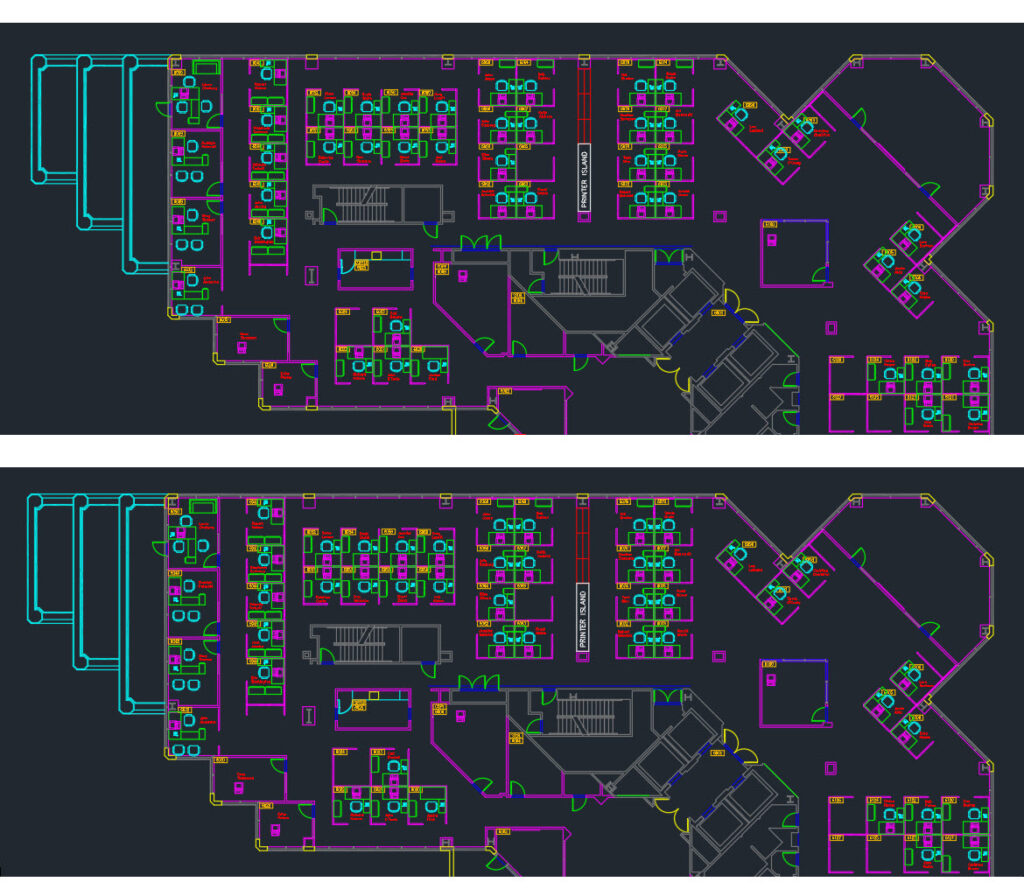
So now you have two versions of the same drawing. Let’s use the Floor Plan sample file as our example. In the images below, we’ll call the top one V1 and the bottom V2. The changes are subtle, but they’re essential to your design. You can’t tell what’s changed, but, obviously, you need to know. There may be a revision table in the title block, but it says something like “updated per CO-13,” – which is no help at all. Yep. You’re going to have to ask somebody.

This often sets off a chain of events that interrupt lots of people. It starts with some combination of phone calls, texts, DMs, etc. that may eventually morph into actually disturbing those involved with your line of questioning.
Here’s the good news. There’s a better way, and the secret is in a feature that’s been in AutoCAD since the 2019 release.
DWG Compare
The DWG Compare tools enable you to quickly identify differences between different versions of your drawing. You can find it in the Compare panel of the Ribbon’s Collaborate tab.

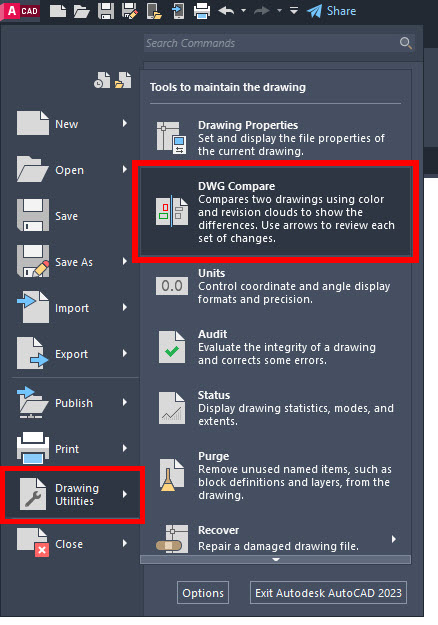
Alternately, it’s in the Application Menu within the Drawing Utilities flyout menu (if there are no drawings active, it’s in the main menu). And, of course, you can always type COMPARE into the Command Line.

When you run the command, you’ll get a file dialog where you can choose the file to compare to the one you have open. If you’re starting with no files open, you’ll do it twice to get (in our case) V1 and V2.
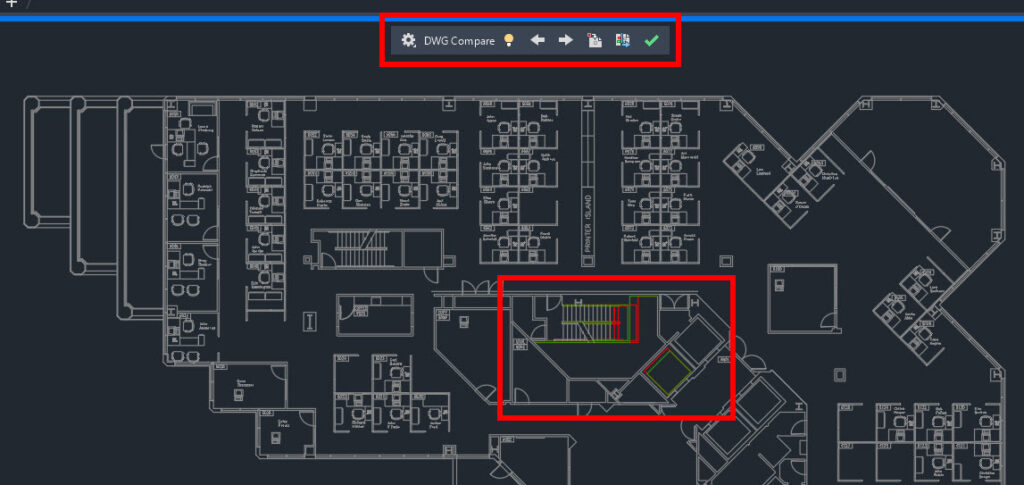
Click OK and your interface will morph into the Comparison screen. A thick blue indicator boundary will be around it, along with the comparison menu. You’ll see the differences highlighted on your drawing depending on your current settings.
Below, we see the differences shown in three colors. Anything gray is in both drawings. Items in red are not in the current drawing, and items in green are only in the current drawing. You can see our results in the next image. The stairwell has been expanded, and an elevator shaft has changed. You could have looked at both drawings side by side for days and probably not noticed these changes. DWG Compare to the rescue!

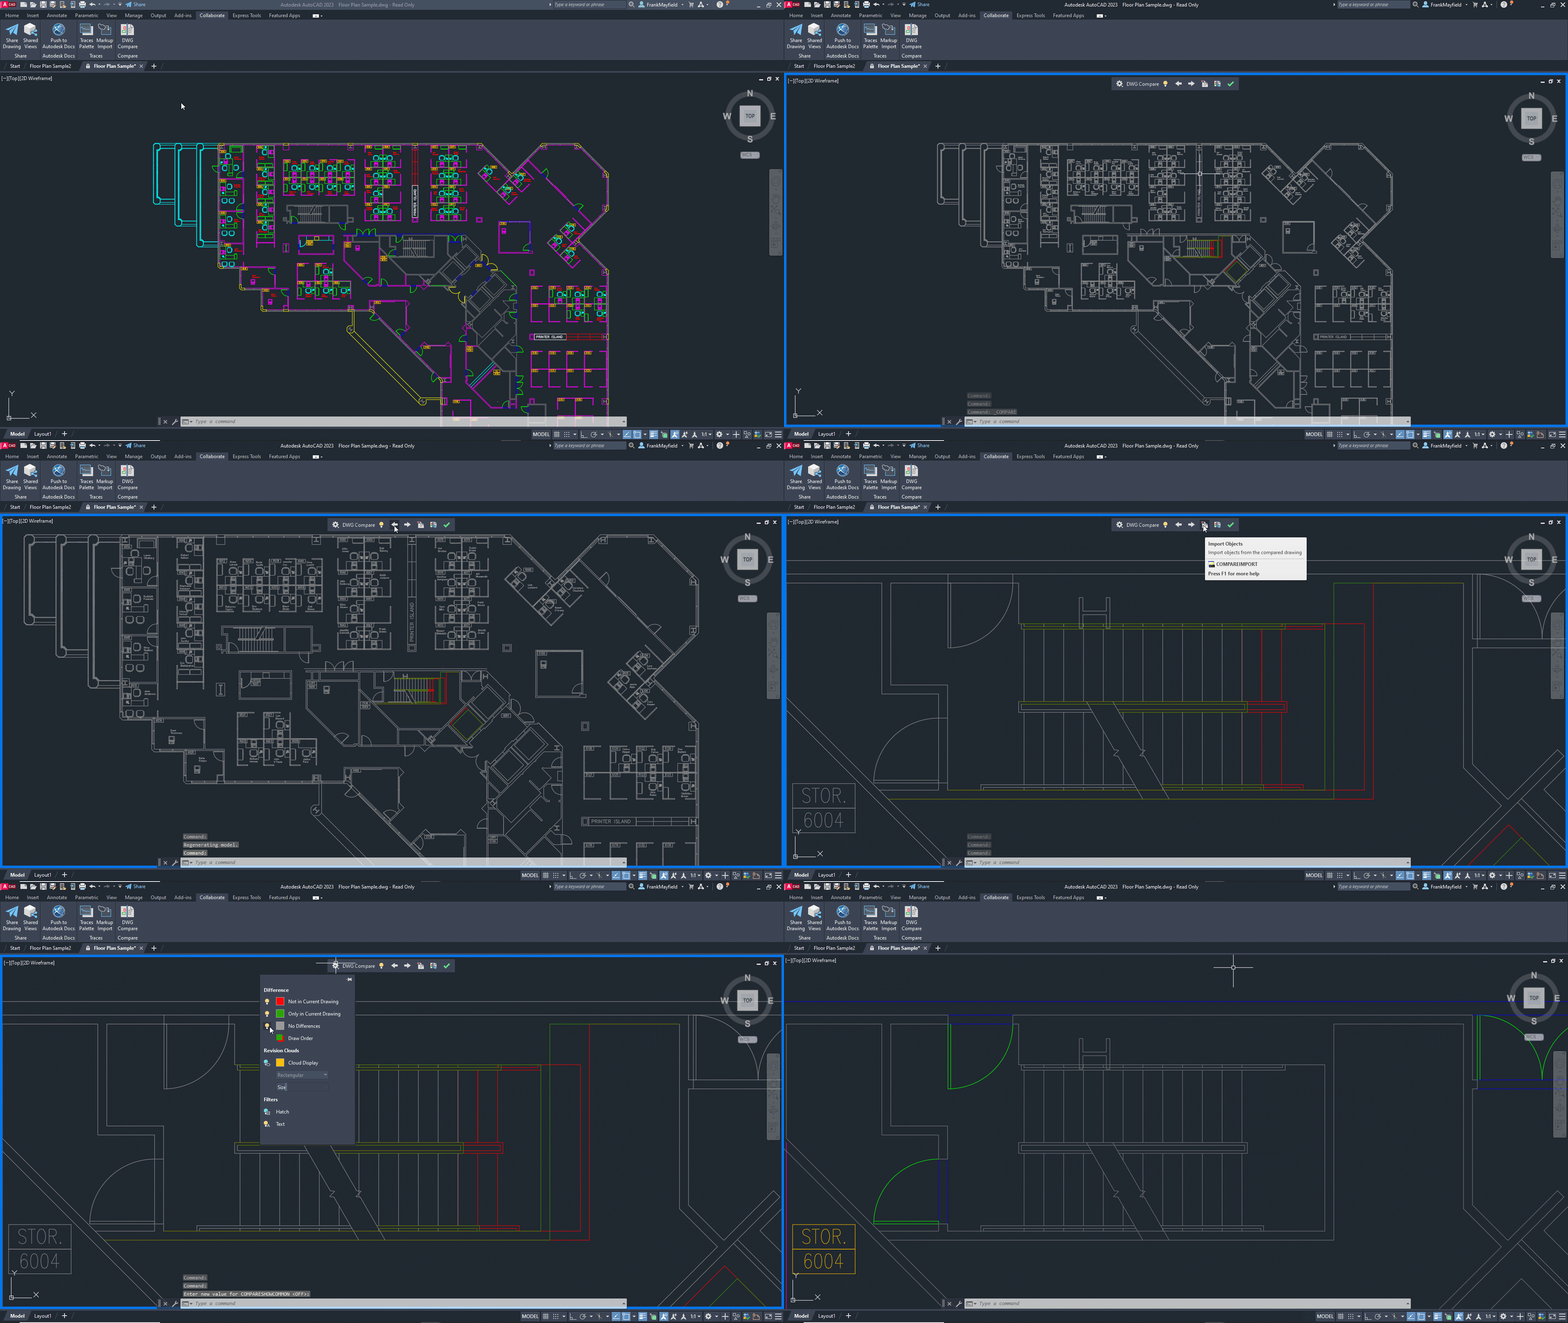
“What’s all that stuff in the toolbar, Frank?” As you might guess… the gear is your settings. You can change colors or enable or disable comparison features. The light bulb toggles the display from the comparison view to a standard view. The arrows are cool. They zoom into the areas with changes, so you can step through them all and understand everything in no time.
Next to the right arrow is a tool that will let you import objects from the compared drawing into your current one. The last tool lets you export and binds the comparison results into a new drawing.
You can also have your changes bounded by revision clouds, which are configurable in the settings box. Wow! That’s a lot of functionality. Let’s see it all in action in the animation below:

But Wait. There’s More!
Here’s another scenario for you. I’ll continue with the AEC example. You’re a plumbing designer on the MEP team of an AEC firm. You Xref the architect’s base into your file so you can design on top of it.
In years past, if the architect changed the base, you’d get a balloon message that tells you something has changed and lets you update the Xref. Handy but not handy. What changed? Now we’re into the same communications boondoggle that I described earlier.
Well, in the 2021 version, the same DWG Compare engine and workflow were added to the Xref update feature, so from the informational balloon, you can compare your drawing and the Xref that changed!
I hope you give DWG Compare a try soon. Whether it’s used between file versions or to manage your design through ever-changing Xrefs, you’ll save time while being more accurate… all without bothering your teammates. That’s a win-win.
More Tuesday Tips
Check out our whole Tuesday Tips series for ideas on how to make AutoCAD work for you. Do you have any favorite AutoCAD tips? Tell us in the comments!


