If editing AutoCAD objects has you going crazy and feeling like you’re livin’ on the edge, it may be time to get a grip. Aerosmith references aside, grips are the foundation for countless editing tasks within AutoCAD. Because of this ubiquity when editing objects, it’s no surprise the more you can get a grip, the more productive you can be inside AutoCAD.
So grab a seat. Get your mouse. And let’s get a grip!
The Basics of AutoCAD Grips
Before diving into the deep end of grip editing, let’s start with the basics.
First, selecting an individual object in AutoCAD will display one or more grips for that object. The number of grips shown varies based on the object type. For example, standard blocks have one grip indicating their insertion point; lines have three marking their start, middle, and end; and polylines have a series of grips for each segment.
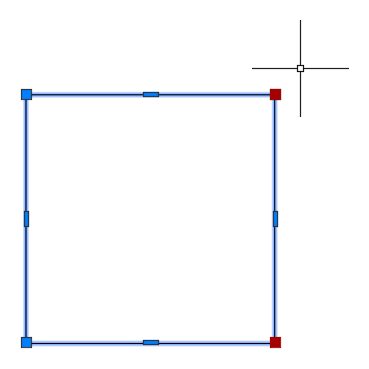
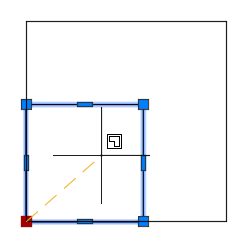
The magic of grip editing occurs when you select one of these grips. Selecting a grip changes its color to red, and lets you begin performing an editing operation. This process of selecting a grip is a behavior we call making the grip “hot.”
In the example below, I’ve selected the grip at a line’s endpoint. Notice how the color of the selected grip is red, and I’ve started the Stretch edit operation on the selected line. Although the specific editing operation may vary between objects, this is the foundational behavior of grip editing in AutoCAD.
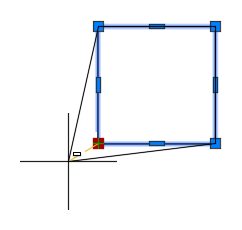
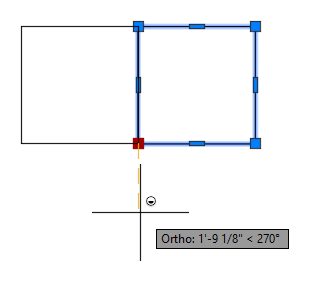
As shown below, we can take this foundational behavior a step further by selecting multiple grips at once. To select multiple grips at once, select an object to display its grips, then press the Shift key as you select the desired grips.
Toggle Grip Command With Space Bar
By default, AutoCAD uses a version of the Stretch command when grip editing an object. While this is sufficient for many grip editing operations, Stretch isn’t always the best command for the job. Despite being the default, did you know Stretch isn’t the only command you have access to?
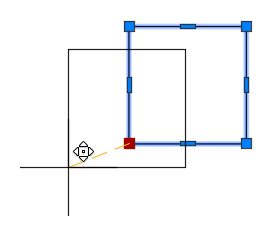
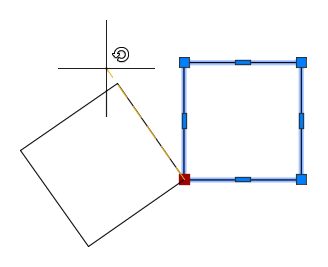
In fact, you can toggle between Stretch, Move, Rotate, Scale, and Mirror with nothing more than the space bar.
How to do it:
1.) Select an object in your drawing to display its grips.
2.) Choose one (or more) grips to begin grip editing the object. By default, the Stretch command is used to begin editing the selected object.
3. Press the space bar to toggle to the Move command.
4. Press the space bar to toggle to the Rotate command.
5. Press the space bar to toggle to the Scale command.
6. Press the space bar to toggle to the Mirror command.
Multi-Function Grips
So far, we’ve talked about things all AutoCAD grips can do. Above and beyond this essential grip functionality is something called multi-function grips.
Multi-function what you ask?
Think of multi-function grips like power-ups for grips. They take what normal grips can do and sprinkle some object-specific pixie dust on top. Best of all, accessing them couldn’t be easier. Just hover over the grip of a compatible object without clicking and choose one of the available options.
Numerous AutoCAD objects offer multi-function grips, but some of my favorites include:
Multi-Function Grips for Lines
Let’s start with Lines. Hovering over an Endpoint grip for a line displays the option to Lengthen or Stretch the Line.
Multi-Function Grips for Multileaders
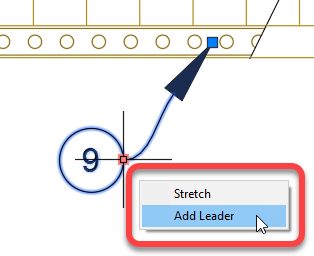
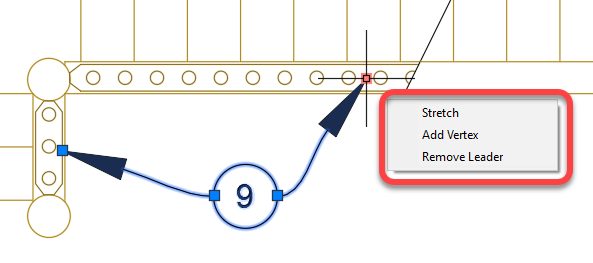
Multileaders have several multi-function grips that make easy work of managing leaders.
In the example below, hovering over the base of the multileader displays the option to add a new leader.
Conversely, hovering over the end of the leader displays an option to remove a leader.
Multi-Function Grips for Dimensions
Dimensions are yet another object where some handy multi-function grips are available.
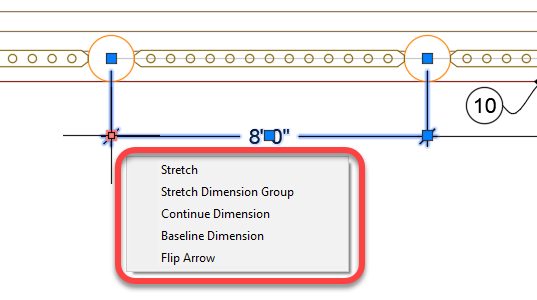
For example, you can quickly complete a run of dimensions by selecting an existing dimension, hovering over the grip at the dimension line, and then choosing Continue Dimension.
It’s even possible to use multi-function grips to add another run of dimensions.
For example, select a starting dimension and then choose Baseline Dimension to add an overall dimension.
Note: Multi-Function Grips Not Working?
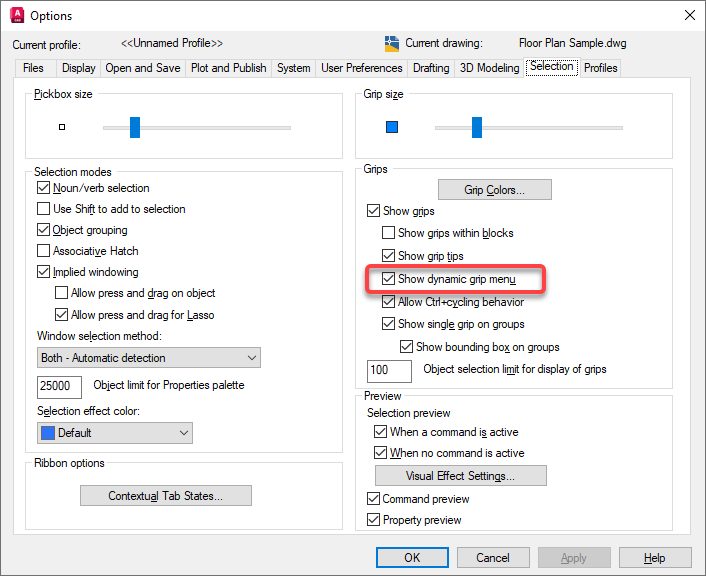
Are you interested in using the awesome power-ups offered by multi-function grips but not seeing the magical menus shown above? The fix is easy:
1.) Launch the Options command
2.) Switch to the Selection tab.
3.) Check “Show Dynamic Grip Menu” within the Grips group of the Selection tab.
Using the FROM Object Snap
Alright, so you agree multi-function grips are awesome, but you want to up your grip game even further? Let’s look at an advanced technique combining grip editing with a lesser-used object snap – FROM.
Ever encounter a situation where two lines that are supposed to parallel are no longer parallel? As great as grips are, this is a case where someone probably got a little crazy with them.
While you could fix such a situation by Erasing and re-Offsetting things, this is also a scenario where grips plus the lesser-used FROM object snap might prove helpful.
How to Do It
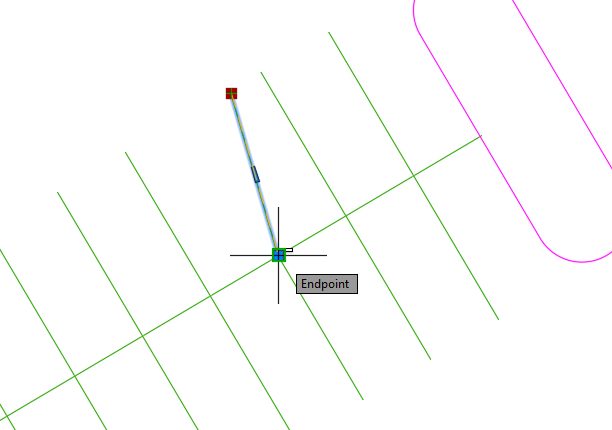
1.) Turn on Object Snaps (OSNAP) from the Status Bar (indicated by a blue background).
2.) Enable the Parallel and Endpoint OSNAPs by clicking the disclosure triangle next to the OSNAP icon in the Status Bar to display the list of Object Snaps.
3.) Select the line and grip to edit.
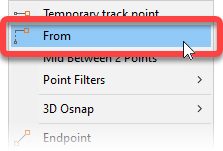
4.) Press Shift + Right-Click to display the contextual Object Snap menu, choose From.
5.) Use the running Endpoint object snap to specify the From Base Point. The From Base Point specified will remain fixed during this operation.
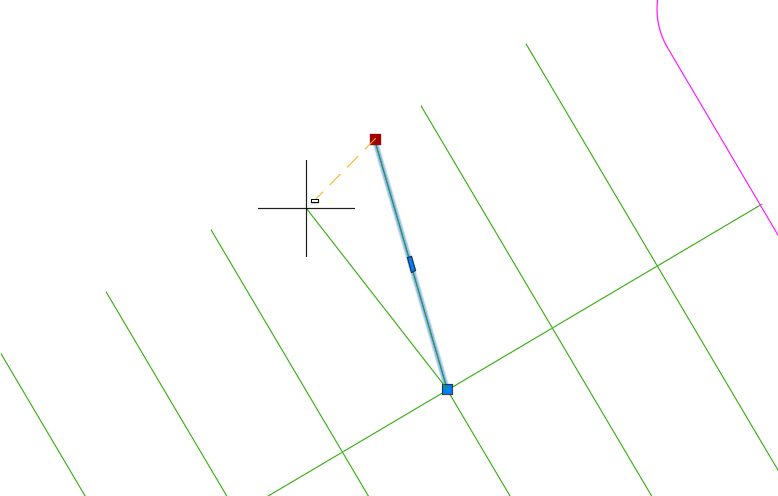
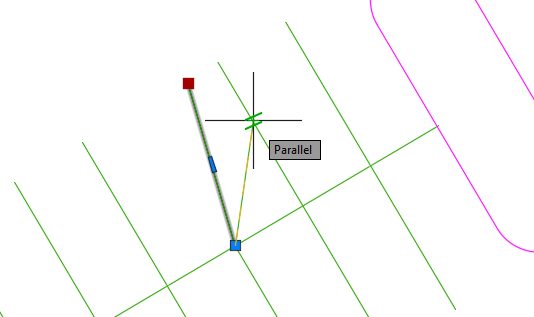
6.) Hover (do not click) over an adjacent line whose angle you would like to match and use the running Parallel object snap to set the desired angle.
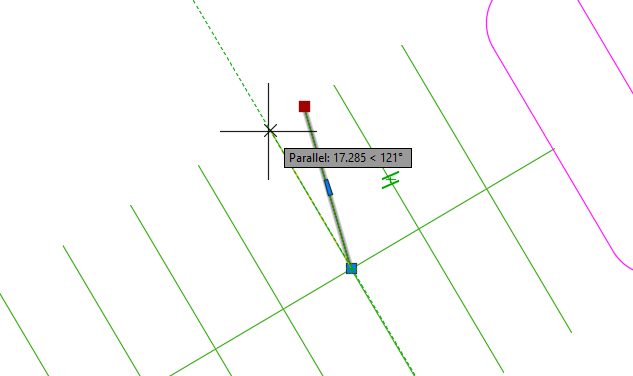
7. Move your cursor near the desired parallel location and leverage Object Snap Tracking to acquire the parallel angle. Click to place the line.
How Do You Get a Grip?
How do you get a grip in AutoCAD? Share your grip tips with me (@TheCADGeek) and the AutoCAD team (@AutoCAD) on Twitter. Likewise, for even more tips, check out The CAD Geek and my award-winning Autodesk University class AutoCAD Tips, Tricks, and the Most Dependable Drafting Techniques.


