
Contributed by Autodesk Community member Arshdeep Singh
In my previous blog post, A Guide to AutoCAD Ribbon Customization, I explained how the built-in commands from AutoCAD can be added to the ribbon to streamline workflows and enhance productivity. This blog is a continuation, where I expand on how to take customization a step further by integrating your own custom AutoLISP commands into the ribbon. This allows you to create a truly personalized and efficient workspace tailored to your unique design needs.
What is AutoLISP?
Before we get started, it’s a good idea to understand AutoLISP. AutoLISP is a very powerful language that has been around for a long time and was designed to allow users to write custom commands that extend the capabilities of AutoCAD. AutoLISP programs are saved as .lsp files. While there are a handful of different methods to load the program into AutoCAD, I particularly like the CUI method where I can also add it to the ribbon after adding.
AutoLISP programs can be loaded into AutoCAD to run as commands. By combining AutoLISP with CUI, you can integrate these commands into the ribbon, making them easily accessible for daily use.
If you are a programming enthusiast, you will love this article by Autodesk where the origins of LISP and AutoLISP are explained: AutoLISP and Visual LISP (AutoLISP)
Writing a Basic AutoLISP Program
We will write a very basic hello world program in which we will add the AutoCAD’s ribbon as a command. Any basic text editor like Notepad can be used to write this program but Visual Studio Code with AutoLISP extension is the recommended way.
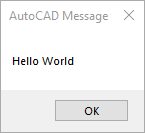
This program displays a message box with the text “Hello World” when the user runs the HELLOWORLD command. You can copy the code below into a text file and save it with the .lsp extension:

Introduction to the Customize User Interface Editor
A cuix file stores all the interface customizations like the menus, ribbon tabs, and workspaces. It controls how the commands are organized and displayed on the ribbon tab. You can also type CUI on the command line to open the Customize User Interface (CUI) Editor.
It’s always a good idea to back up the current customization file before making any changes. The customization file path is listed in the Properties Tab under General ➤ Filename
Browse to the folder and copy the customization file/s to a backup folder of your choice.

Adding LISP files to CUI
1. Launch the Customize User Interface (CUI) Editor.
2. In the left panel, right-click on the Lisp Files option and click on Load File.
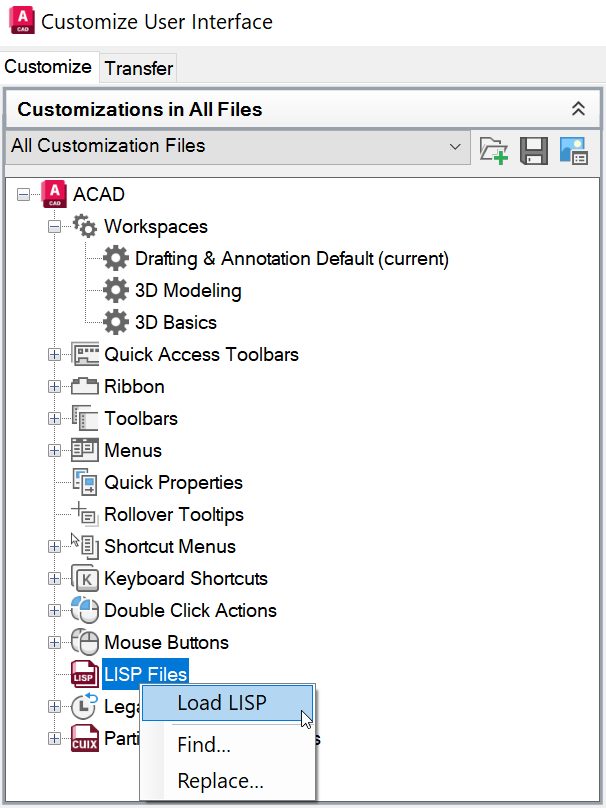
3. Browse to the folder where you have stored the AutoLISP program and select the program.
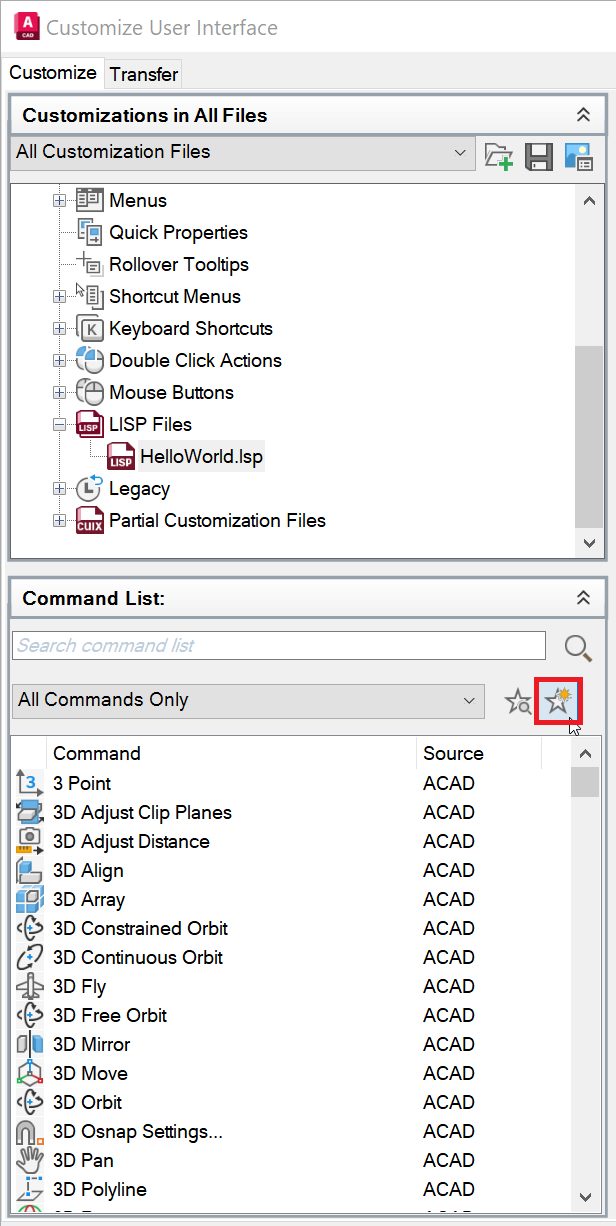
4. Now the program will be listed under LISP files, and it will be automatically loaded every time you start AutoCAD.

5. Click Apply and OK
6. A security warning will appear if the AutoLISP program does not have a CA recognized digital signature installed.
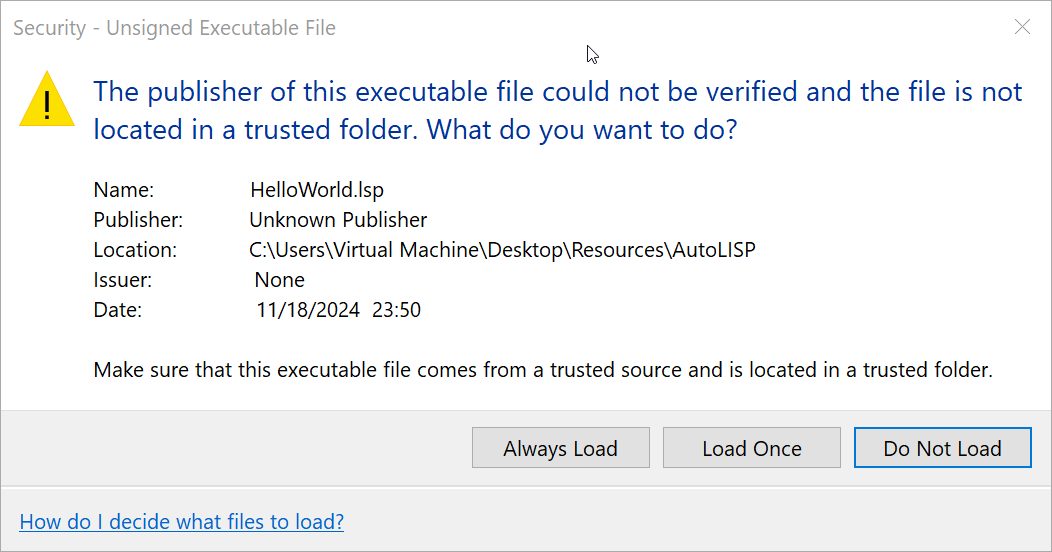
Clicking on “Always Load” will trust the AutoLISP program and the security warning will not be shown again unless the LISP program is modified.
Clicking on “Load Once” will only trust the AutoLISP program for the current instance of AutoCAD and the warning message will be shown every time the program is loaded.
Important Note: Only load AutoLISP files that you wrote yourself or that come from trusted sources. Loading unverified files can pose security risks or compromise your system.
Now at this point, we have successfully loaded an AutoLISP program into AutoCAD and the HelloWorld command can be called from the command line. Next, we will convert this into an AutoCAD command and assign an icon to it.
Creating a Command from AutoLISP Programs and Assigning an Icon
1. Launch the Customize User Interface (CUI) Editor.
2. In the left panel, Under the Command List menu, click on Add new command.
3. Add all the required information like the Name, Description, and Command Display Name.
4. Assign an icon of your preference or browse and upload a custom icon (Optional).
5. Under Macro, add ^C^CHelloWorld.
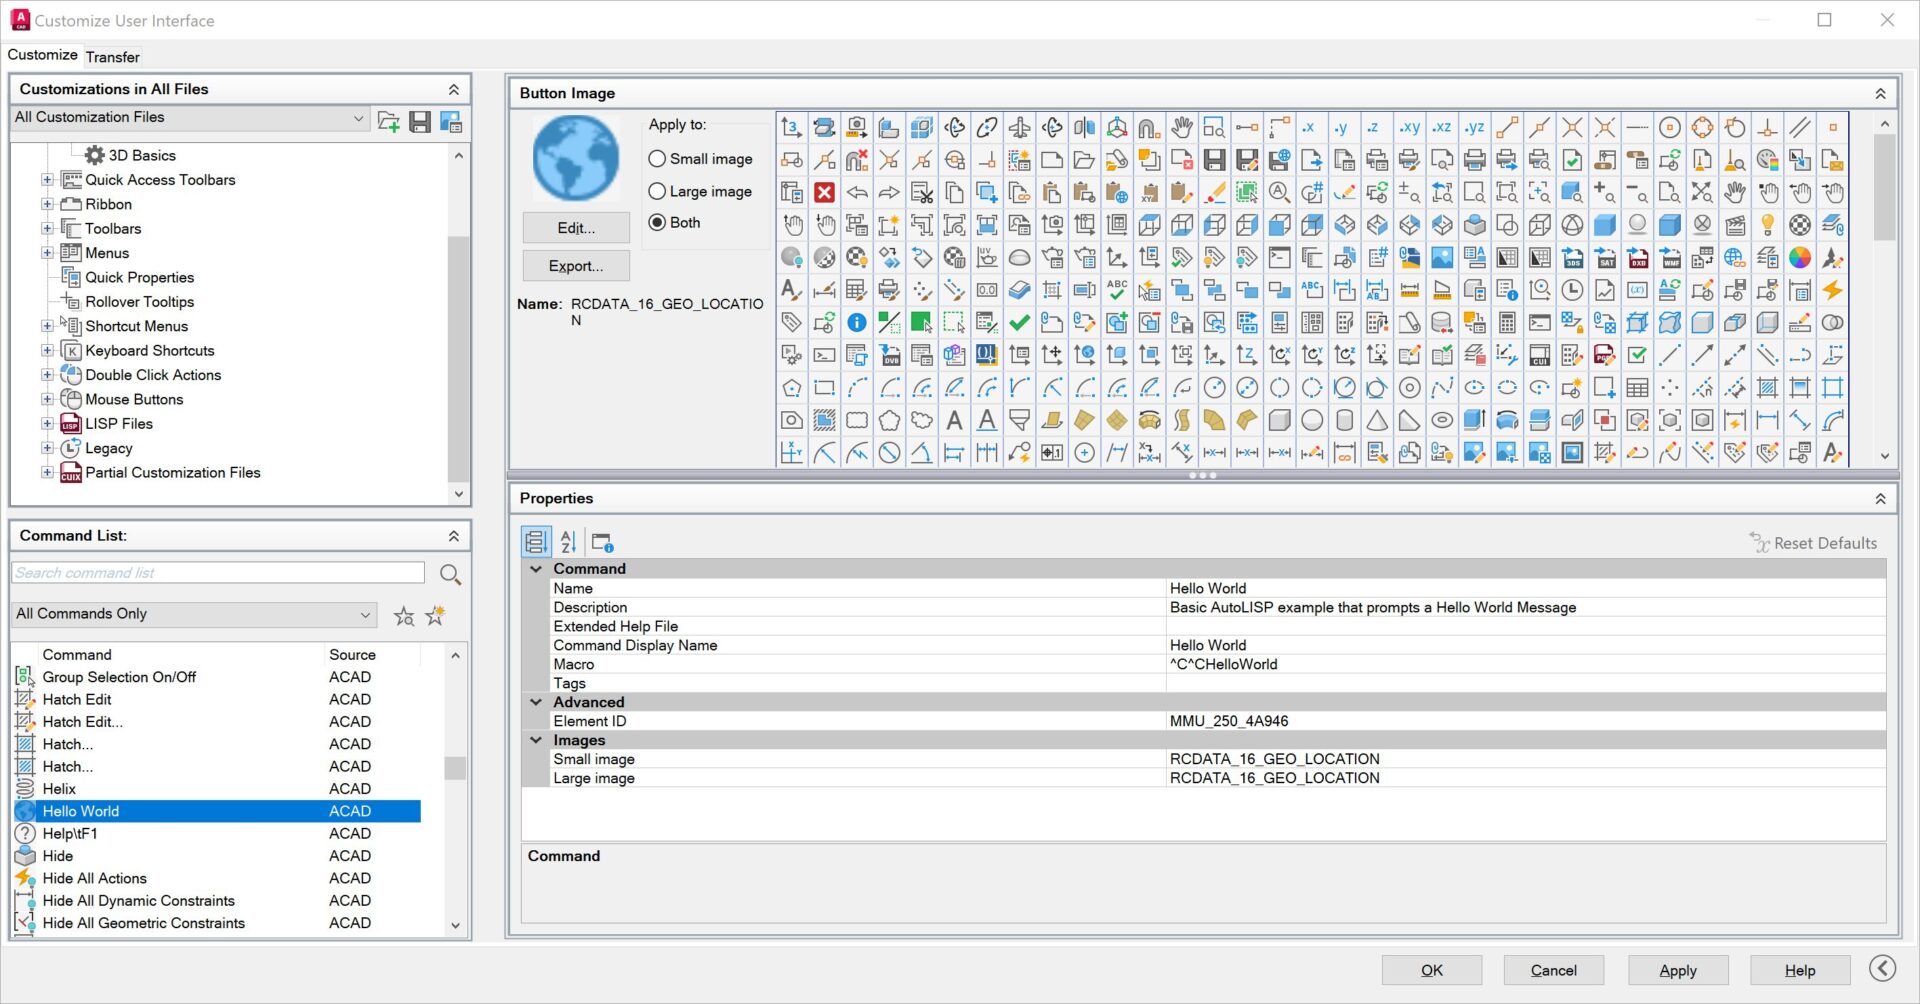
If you are using some other custom program than the one we are using in this example, you should enter the command name for your lisp program. The command name can be identified by opening the lisp program and looking for the following syntax (defun c: HelloWorld )
6. Click Apply and OK
Now at this point, we have successfully created a new AutoCAD command that references our AutoLISP program. Next, we will look into how we can add this command to the ribbon.
Adding the Custom Command to the Ribbon
My previous blog post, A Guide to AutoCAD Ribbon Customization, covers in detail how to add the built-in commands to the ribbon. Please refer to it for more detailed instructions.
1. Launch the Customize User Interface (CUI) Editor.
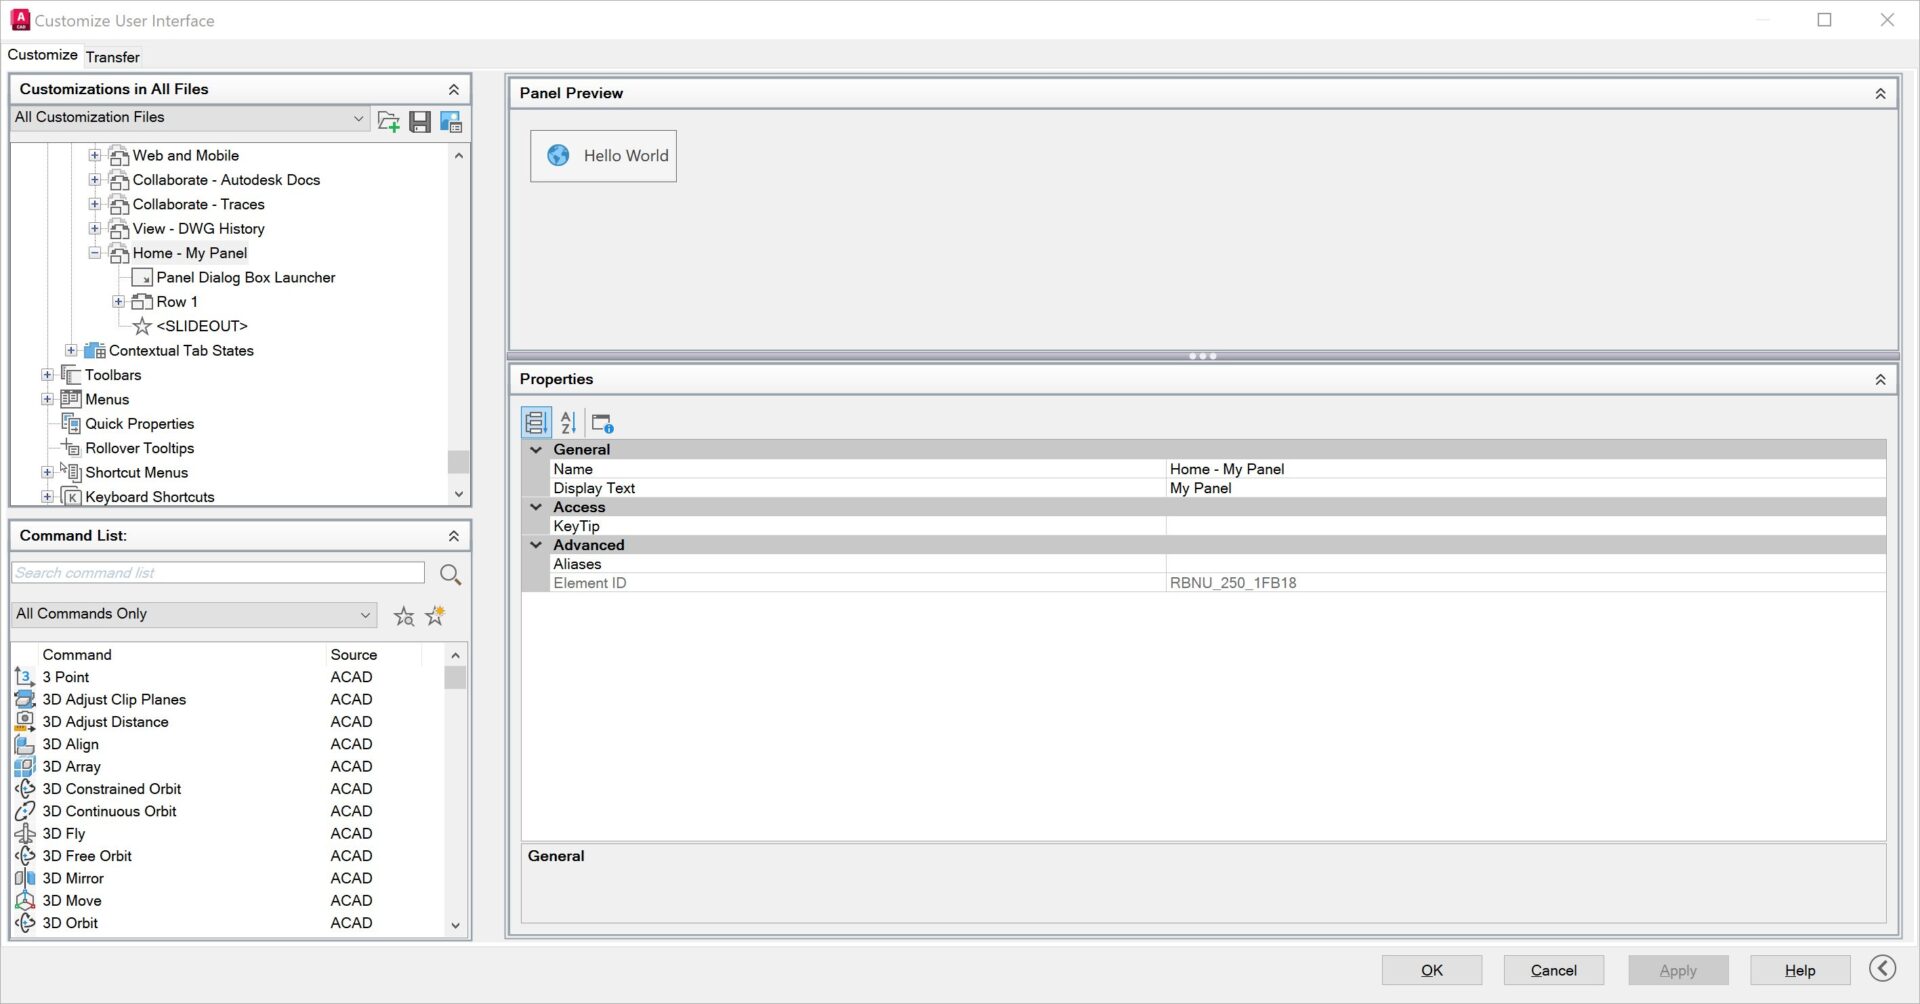
2. In the left panel, expand the Ribbon Tab and expand the Panels Tab.
3. Add a new panel and a row. Give the panel a meaningful name, for example, “My Panel.”
4. Search for our HelloWorld command under the command list and simply drag and drop it to the Row under the new panel we just created.
5. Set the Button style to Large with Text (Horizontal) or your preferred view. Panel Preview window will update the preview on how it would look on the ribbon.
6. Drag and drop or copy the new panel “My Panel” to the bottom of the Home-2D Tab under Ribbon.
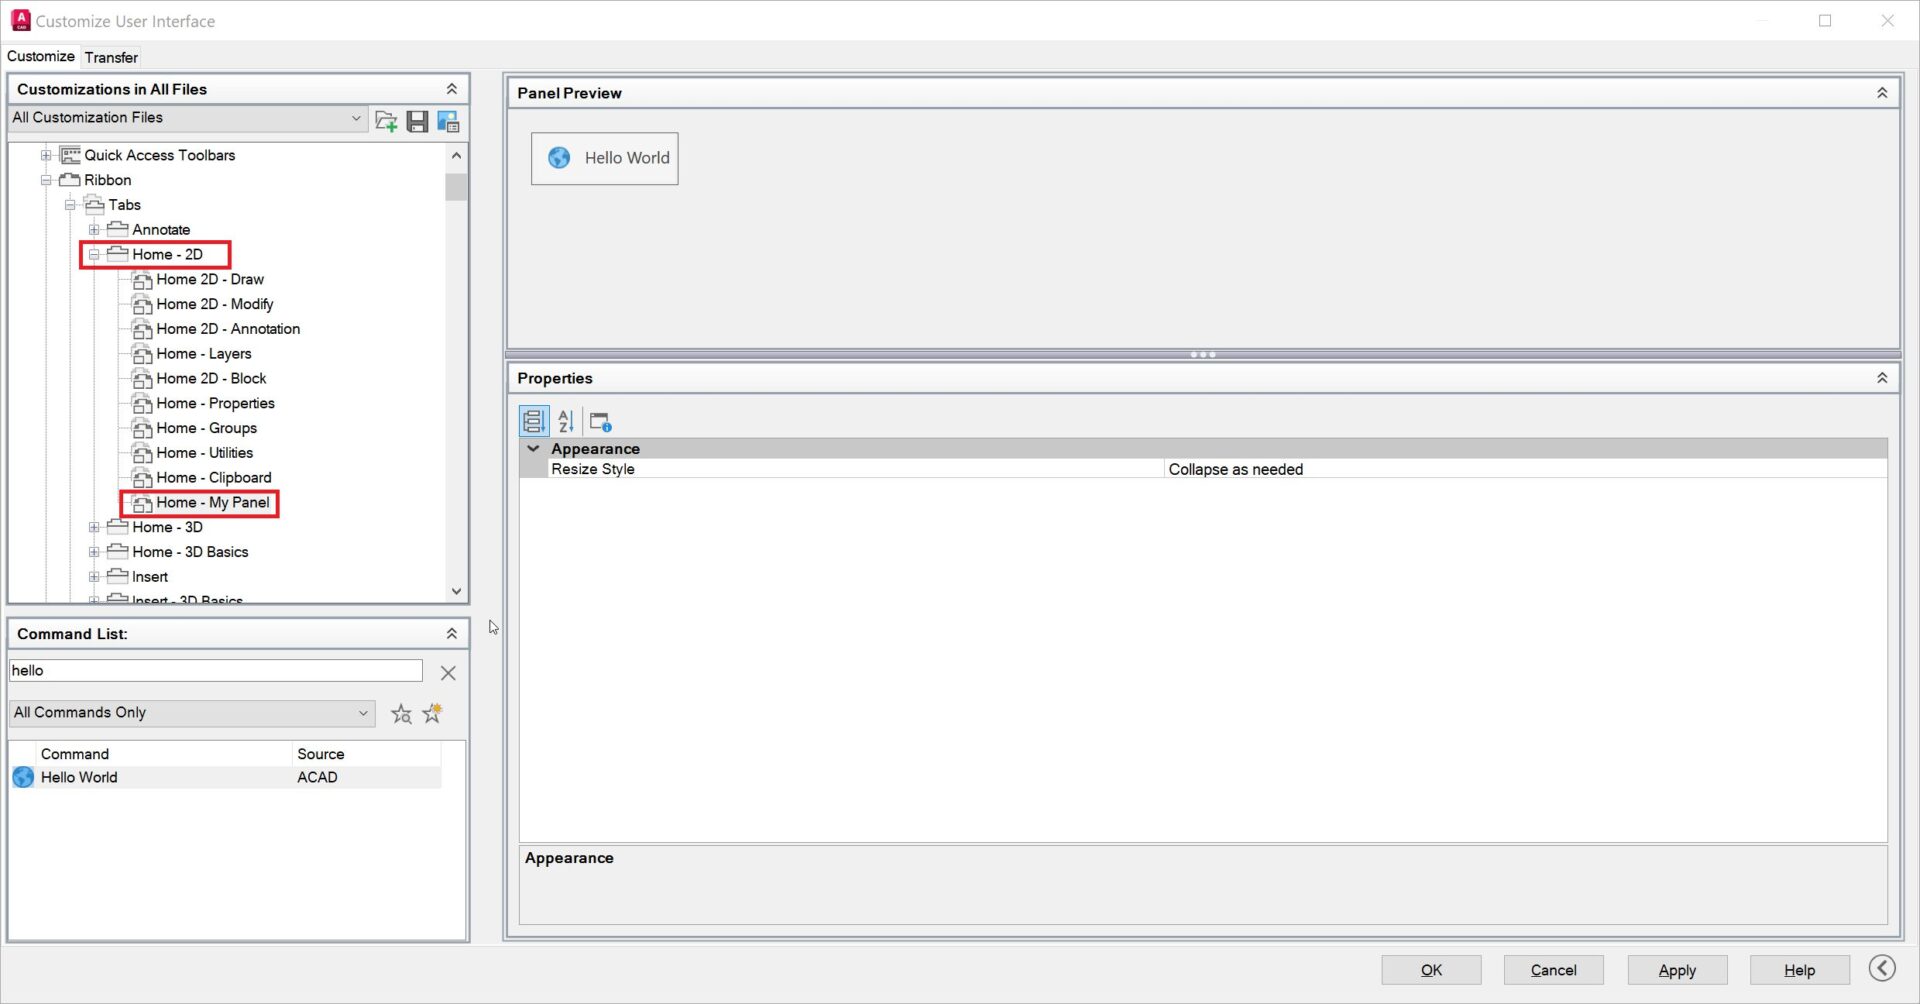
7. Press Apply and OK. Just like that, the new command has been added to the ribbon and is ready to be used.

Keep Going
Integrating AutoLISP commands into AutoCAD’s ribbon not only enhances productivity, but also provides a customized and efficient user experience.
By leveraging the power of AutoLISP and the flexibility of the Customize User Interface (CUI) Editor, you can streamline your workflows and tailor AutoCAD to suit your unique needs. Remember to always verify the source of AutoLISP files to ensure security and avoid potential risks.
The Visual LISP, AutoLISP, and General Customization community forum is a great place to get help with AutoLISP programs from the experts in the Autodesk community. Happy coding and designing!
Learn More
Enjoyed this article? Then check out the Autodesk Community for even more great content from talented users across Design and Make industries.