In today’s tip I wanted to share another one of the many great features included in the Map 3D toolset that is available with your AutoCAD subscription.
As I mentioned in my last Tuesday Tip article about dynamic north arrows, AutoCAD is loaded with benefits like the addition of a wide variety of specialized toolsets including Electrical, MEP, Map 3D, and more. As a civil designer, Map 3D is my go-to toolset of the group and with it comes a whole selection of great additional features. Today I wanted to highlight another one that I use on almost every drawing I produce. It’s dynamic scale bars! (And be sure to check out my video tutorial at the end of the article, too!)
By installing the Map 3D toolset on top of the basic AutoCAD installation, we gain some useful new layout tools that can save us time and effort when creating maps and drawings.
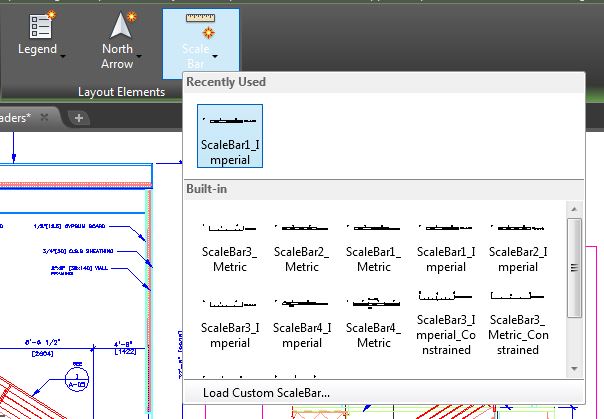
Make sure you’ve installed and opened up the Map 3D toolset. Then open up a drawing of choice and select a layout (paperspace) tab. From here, we can choose the Layout Tools tab along the top of your ribbon where you will see some new Map 3D toolset options, including Scale Bar seen here on the far right.
By clicking on the Scale Bar flyout in the Layout Elements areas, we can choose from the default, built-in scale bars that are available or choose to load a custom one. For this example, choose one of the default scales by clicking on it to move to the next step.
After we’ve selected a suitable scale bar (remember to choose metric or imperial based on your drawing settings), we will be prompted to pick a viewport to link the scale bar. This is what provides our scale bar with its dynamic ability to rotate automatically in order to match our drawing scale automatically. Click on the viewport, and we will be prompted to choose our units as well as the length of each scale bar division. This will dictate the size of the scale bar.
In the example, I chose 5 feet for each scale bar segment. This works for my example but you will need to adjust this depending on the scale of the project. As for the scale ratio, this will populate automatically based on your viewport scale and can be left as is in most cases. Once happy with the scale bar properties, simply hit OK and choose a location for the scale bar on the drawing.
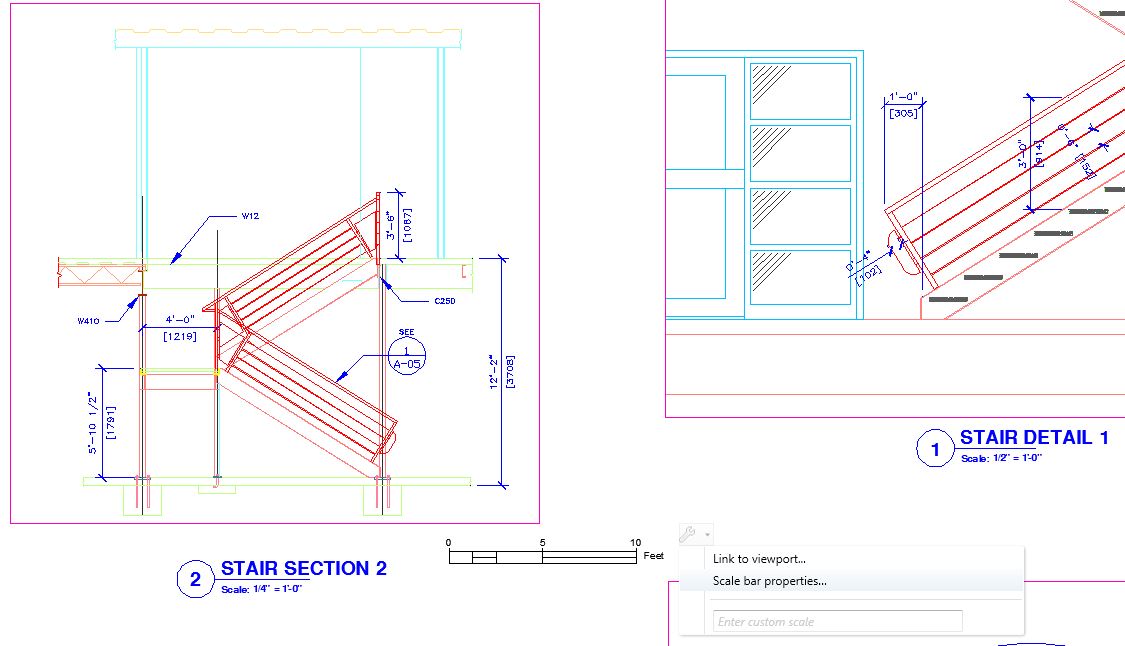
Here, the new scale bar has been inserted and automatically sized based on the 5-foot scale bar division we chose in the properties dialog. From here we can edit our scale bar by choosing scale bar properties when hovering the mouse over it and clicking on the flyout next to the wrench that appears. From the properties, we can fine tune the size based on the division length and units.
Now comes the fun part and real advantage to using a dynamic scale bar: Changing our viewport scale. To see the scale bar in action, simply select the viewport and change the scale to another scale as show below to see the scale bar automatically match the new scale. From there we can go back into the properties and change the division sizing if needed as well. Now, the scale was changed to 3/8” = 1’-0” and the scale bar has dynamically changed to match.

As mentioned earlier, I use these dynamic tools on a regular basis and hope you’ve enjoyed learning a little bit about just a few of great features of the Map 3D toolset. I highly recommend checking it out and trying these tools on your own projects. If you’d like to take your scale automation one step further, be sure to check out my previous post on how to automate scale text labels using Fields here.
To learn more about dynamic scale bars in AutoCAD and see them in action, be sure to check out my YouTube channel and the accompanying video below:
That’s all for today’s Tuesday Tip. I hope you all enjoyed it, and I look forward to the next one!
More Tuesday Tips
Check out our whole Tuesday Tips series for ideas on how to make AutoCAD work for you. Do you have any favorite AutoCAD tips? Tell us in the comments!


