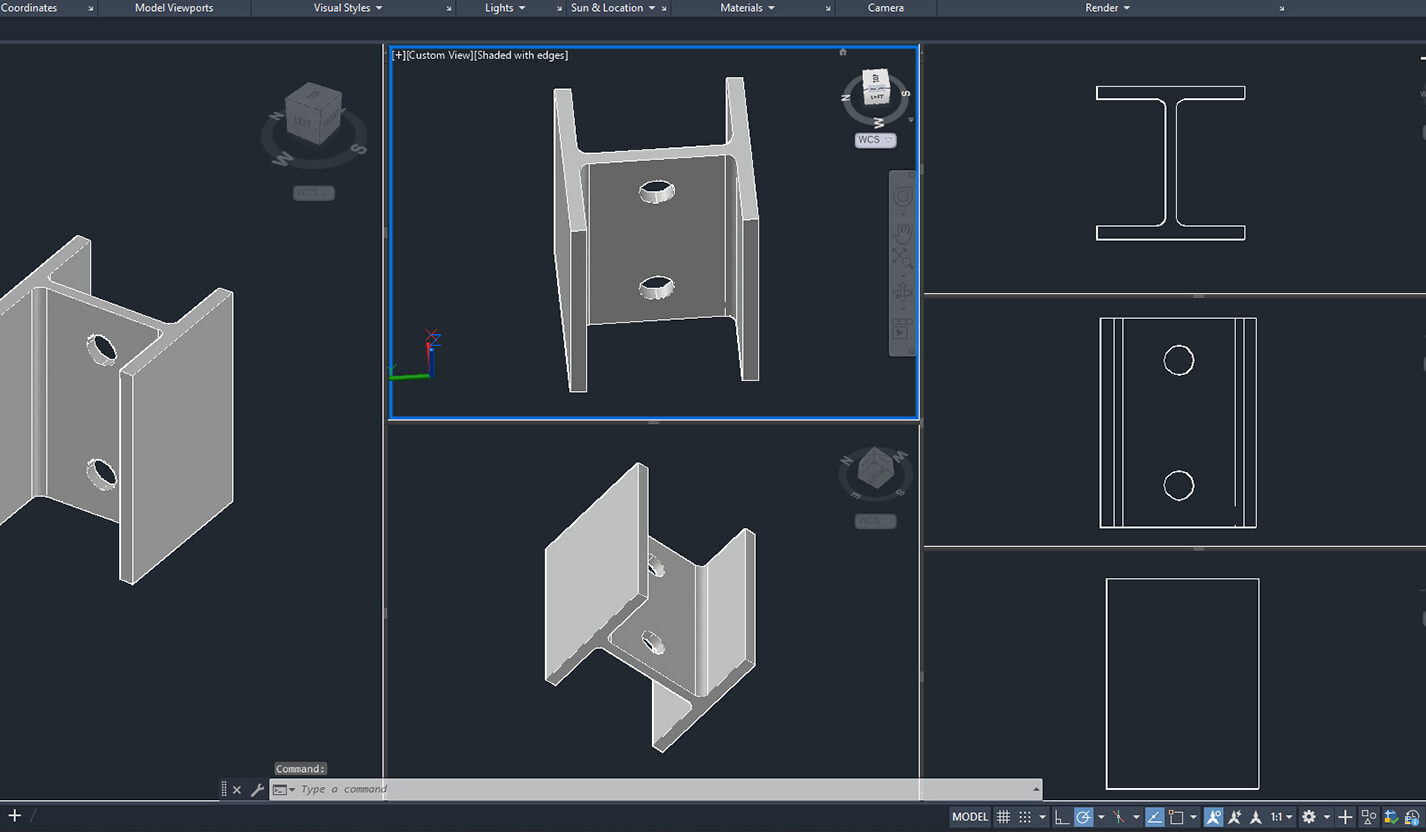
I recently wrote about the basics of layout viewports. I described them as “a magic window that looks back at model space.” Many users don’t realize you can also use viewports in model space.
So, a model space viewport must also be a magic window that looks into paper space, right? Nope. They divide the model space editor into tiled views that can be independently manipulated. If you work in 3D, they’re almost a necessity, but they’re also handy for 2D designs, especially for larger plans.
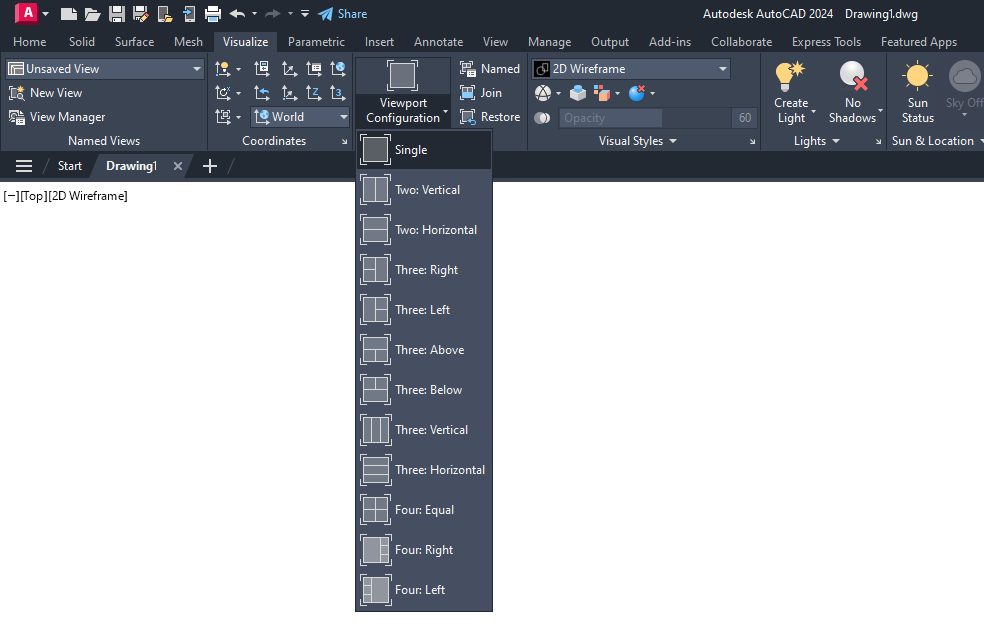
Of course, first off, you’ll need to know how to access the tools to create them. You’ll find them in the Model Viewports panel of the Visualize tab in the Ribbon. If you’re keeping score at home, I’ve probably already thrown you a curve ball.
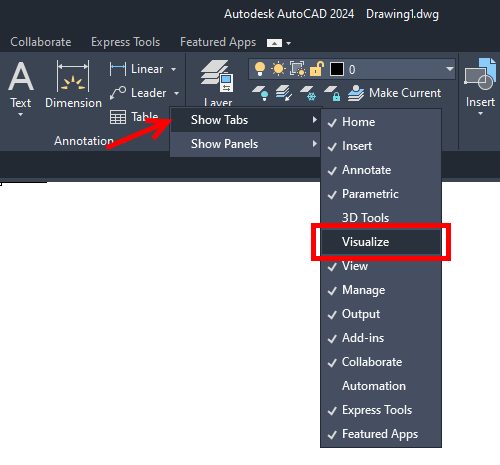
By default, you’ll find the Visualize tab in either the 3D Basics or 3D Modeling workspace. But if you’re working in 2D, you probably use Drafting & Annotation (or a custom workspace that used it as a base); it doesn’t display it.
Don’t worry. It’s easy to access it. Just right-click anywhere on the Ribbon, select Show Tabs, and click on Visualize. Please note that you’ll get various configurations of the right-click popup menu depending on where you click, but Show Tabs will always be there.
There are a couple of ways to configure your viewports. If you want a quick way to create your viewports, I suggest using the Viewport Configuration pulldown menu. Just click and go.
But if you want to set them up before creation, and especially if you’re going to name and re-use the configuration, I suggest you use the Named icon, which calls the VPORTS command.
Here’s another helpful little tip. You can bypass all the ribbon and tab stuff by typing VPORTS into the command line, as I do.

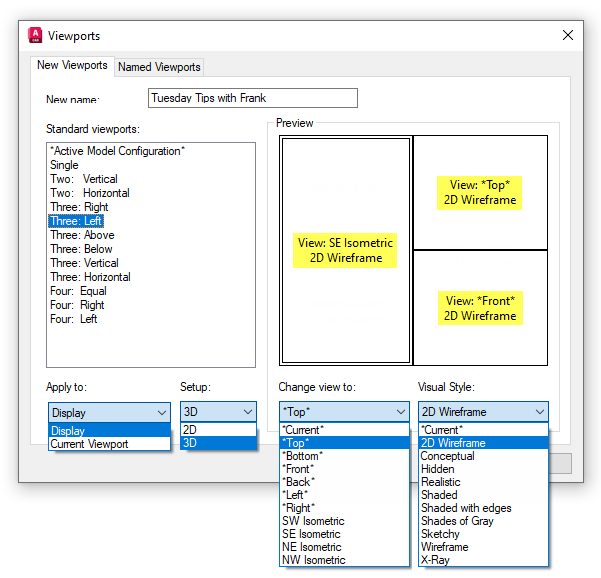
Let’s look at its dialog now that we know how to access the VPORTS command. It will launch with the Named Viewports tab activated. This is where you’ll find a list of all your named configurations for the current drawing. Switch over to the New Viewports tab.
Below is a composite image of the dialog, showing all the built-in configurations and each option pulldown expanded. Give it a name if you think you’ll use it again, but you don’t have to. You can also set up some options for each viewport. I’ve changed the setup to 3D here so you can see the preset view and visual style for the viewports.
Back to my personal preference for a moment. I rarely do any of that… I’ll just choose my configuration and go. Each viewport will have the ViewCube and the Viewport Controls menu displayed, so it’s easy to set them to exactly your preference. Just (single) click within a viewport to activate it. The active viewport is easy to see, as it will have a blue box around it.
The Fun Stuff
Presets are nice, but let’s get on to the fun stuff. Another reason I just choose and go is that I rarely want the exact setup that AutoCAD gives me. Your viewport tiles are totally customizable, and you can even dynamically create your own (or remove them).
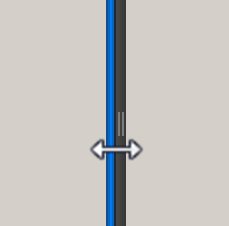
Unlike layout viewports, however many you have displayed will stay connected to each other. Every viewport boundary edge (that isn’t an edge of the editor display) can slide from side to side. You’ll know it can change by the small double-line icon at its midpoint. Hover your mouse cursor anywhere over an eligible edge, and it will change into the move icon. Just press your left mouse button and slide it to a new position.
OK, that’s pretty cool. As I said, the presets make a good starting point but may not fit your needs. What if you need something like the setup shown below? My starting point was “4: Right”, but four viewports are the maximum AutoCAD offers as a preset, and I need six. What’s a blogger to do?
Again, don’t worry. You can use a couple of steps to create this.
Not only do the interior edges let you slide from side to side (or up and down), but if you hold down the CTRL key on your keyboard and duplicate your re-sizing action, instead of the edge sliding, a green line will appear under your cursor. This is going to be a new edge for you. In the image, I created the new vertical edge this way, which turned the largest viewport into two side-by-side vertical viewports.
Since the top and bottom edges aren’t eligible to be modified, I had to recall the VPORTS dialog, change the Apply To menu to Current Viewport, and then select Two Vertical.
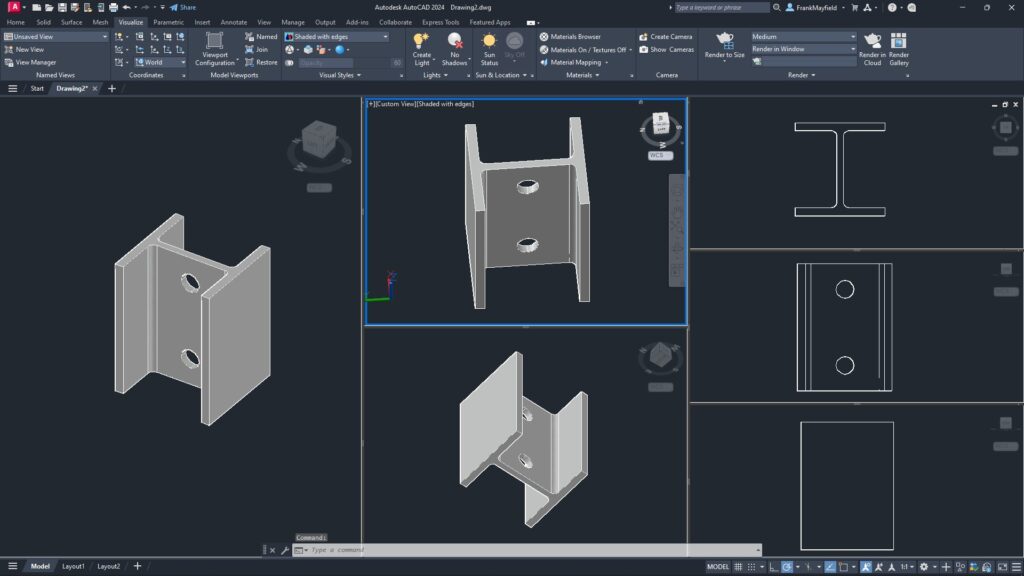
I know that’s really cool, too… not to mention totally useful. But remember I said that you can also remove tiles dynamically? Just redo the addition action, but this time slide the edge all the way to an adjacent edge. The edges will turn white as it gets close, and the viewport will be removed.
But, as they say, seeing is believing, so here’s a brief video to let you see some of this functionality in action.
Summary
If you weren’t aware model space viewports in AutoCAD, now you are! While I was using a simple 3D object as an example, maybe you have a 2D application where they can help.
So, the next time you need another view of your design, don’t forget about viewports. They’re quick, flexible, easy to use, and not just for Layouts anymore.
More Tuesday Tips
Check out our whole Tuesday Tips series for ideas on how to make AutoCAD work for you. Do you have any favorite AutoCAD tips? Tell us in the comments!
