No CAD drawing is an island. That being said, there’s a decent chance the drawing might be of a structure that will be located on an island! Yep, let’s talk about the benefits of setting a geographic location in AutoCAD.
Why You Should Set a Geographic Location
There are a bunch of reasons to add a geographic location to your drawing. Here are a few of them:
- Make the program automatically determine the angle of sunlight when you perform sun and sky simulation (photometric studies)
- Use position markers to mark geographic locations and record related notes
- Export your drawings to use in the Map3Dtoolset, and expect the model to position itself automatically (or automagically)
- Import raster files that contain geographic location information and expect them to position themselves automatically (using the RasterDesigntoolset)
How to Set a Geographic Location
It’s easy! To set a geographic location in your drawing, use the Insert ribbon tab and select the Set Location tool.

Whether you know the latitude and longitude or just want to use a map to set the location, select From Map and then click Yes when it asks if you want to use live map data.
Note: If you want to import existing GIS data from a file, just choose From File and then open your KML or KMZ file.

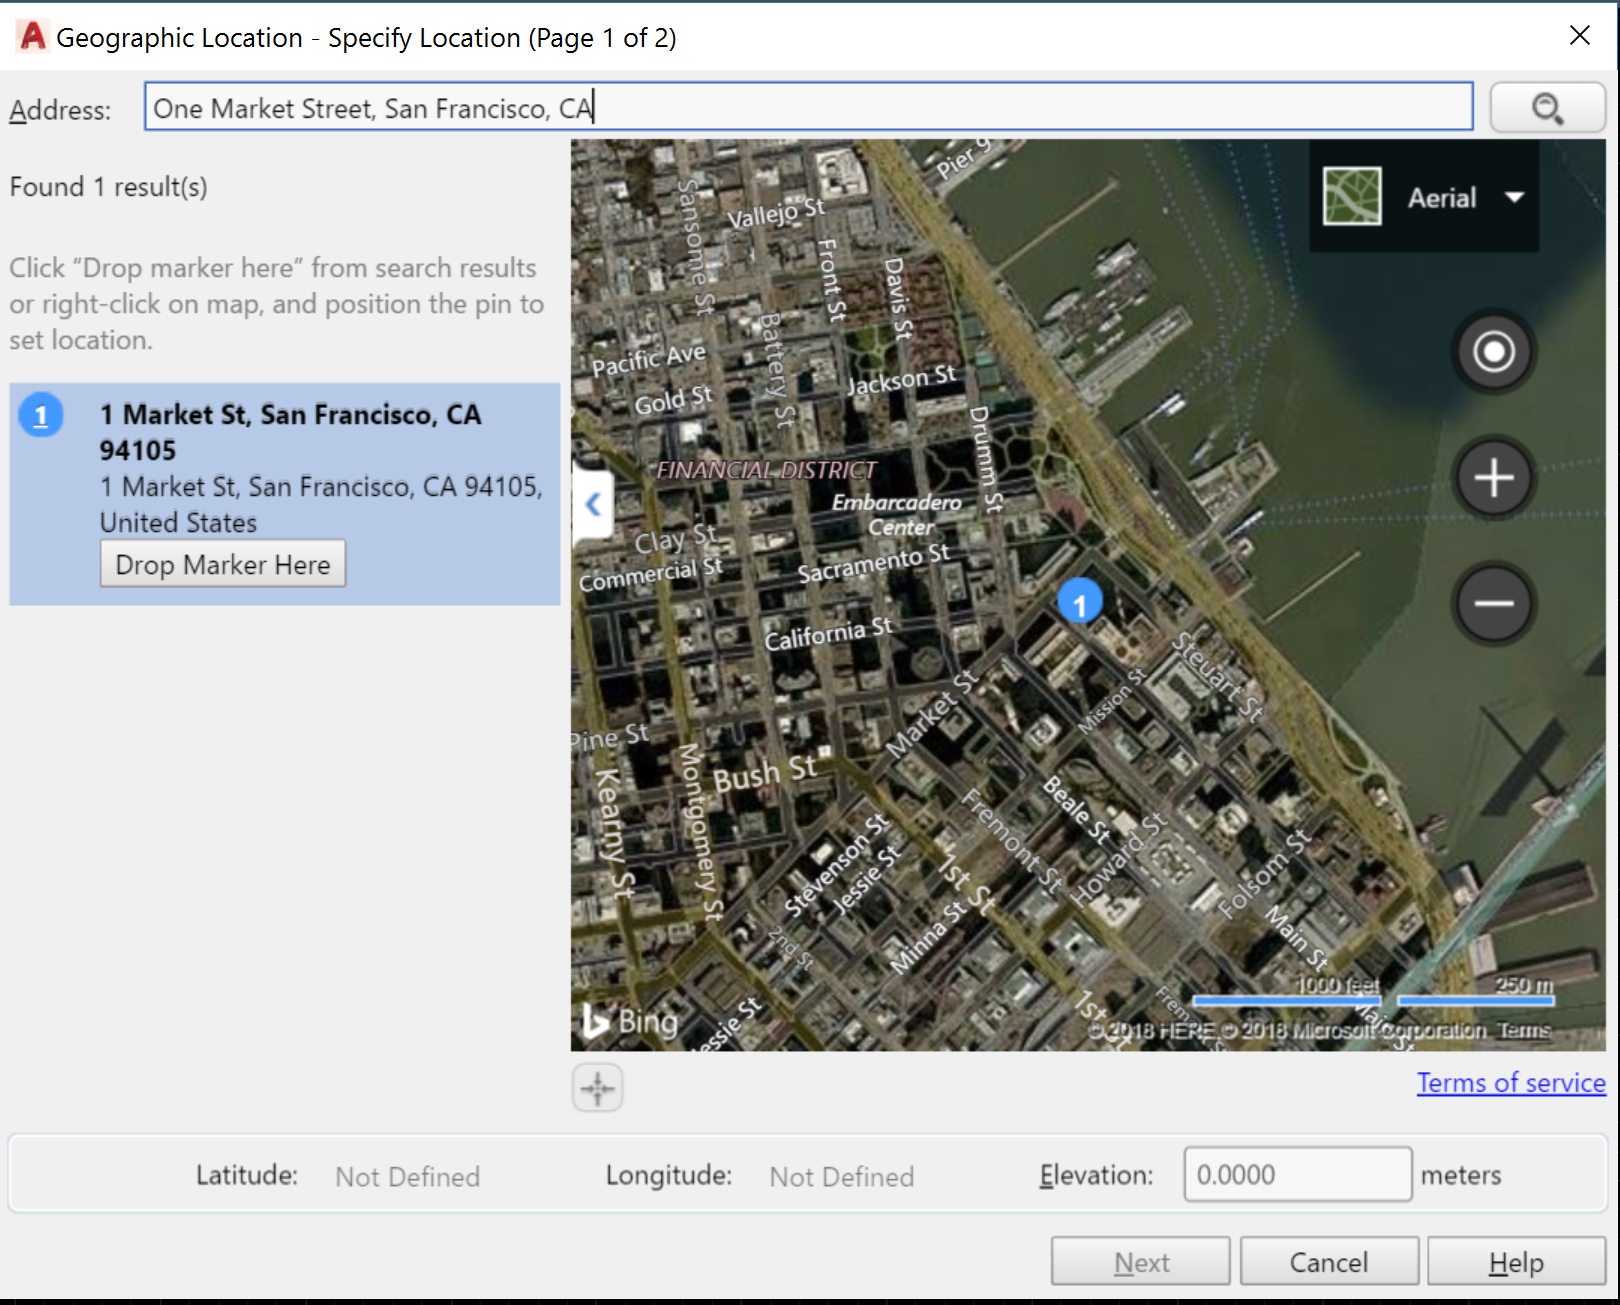
Now you can choose your location, and the good news is that from here it’s pure type-ahead! You can choose a city (useful if the structure doesn’t have an address yet) or use an existing address.
Once you’ve found the location you want to use, click Drop Marker Here. AutoCAD will drop a pin on the map, and latitude and longitude will be automatically applied. You can even set a specific elevation if you’re working on an upper floor. Awesome!

Note: If you need to move a pin after it’s been dropped, the easiest thing to do is right-click on the new map location and choose Move Marker Here.

More Tuesday Tips
Check out our whole TuesdayTipsseries for ideas on how to make AutoCAD work for you.


