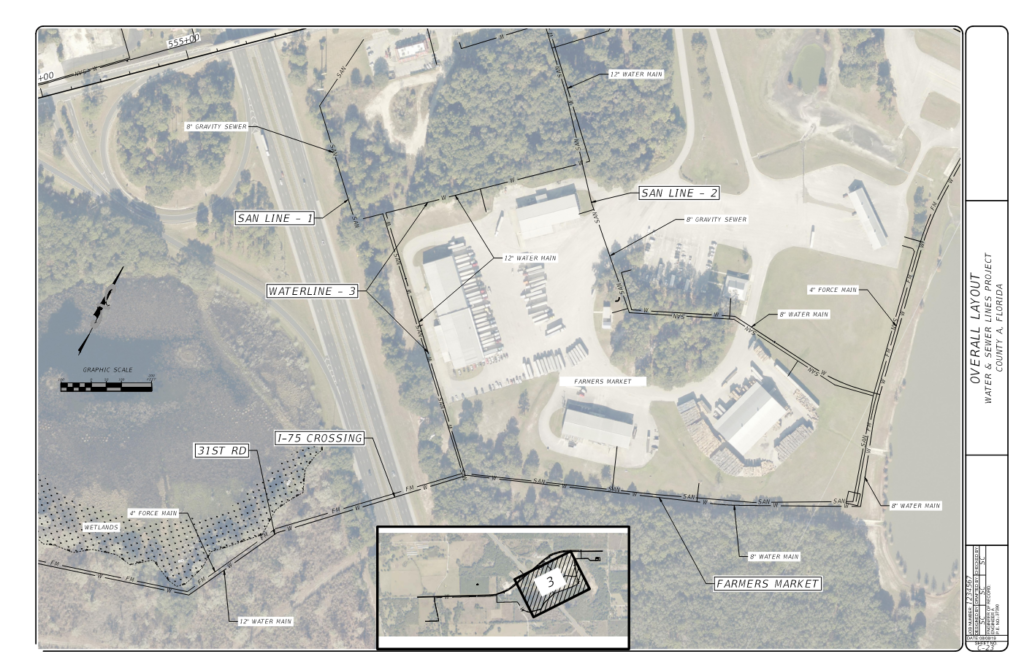
I recently completed a water sewer project—and if you’ve never done a water sewer project, it’s a lot of sheets.
Due to the long nature of this type of project and the design containing many bends and changes in course, a good set of overall site layout sheets is key to helping the contractor bidding on the project. It will help them understand the overall layout. In this article, I will go over some tricks to making site layout sheets in AutoCAD using my recent sewer project as an example.

Creating “Plot View Polylines”
The first thing to aid you into setting up your sheets is to create what I call “plot view polylines.” Plot view polylines will be the actual shape of your plotting area in your layout. If you don’t know what that size is offhand, all you have to do is follow these steps.
3. Now copy this shape to the clipboard (CTRL+C) and delete it from the layout.
4. Figure out the viewport scale that you will be plotting at.
5. Navigate to modelspace (Model tab) and paste the polyline.
6. Run the SCALE command and scale up the polyline by the viewport scale you noted in step number 4.
Here, I am scaling it up by 100 as that will be the scale of my viewport.
How to Create Named Views
To automate the ability to layout your sheets with the correct scale, you want to create named views for each of the sheets. Named views are a “snapshot” of a view and its rotation. You also have the ability to save a layer snapshot with the view so that when you restore it, it will turn on/off and freeze/thaw the layers you want to plot.
Below are the steps to do so:
2. In the View Manager dialog box, click the New (A) button, and give your named view a name (B). Click the Define View Window button (C).
Anytime you want to restore this view in modelspace, you can simply click on it.
How to Rotate View
Now, in the world of civil, the project is never straight up and down. It’s always going every other way but perfectly north. So to rotate the view to one of your sheet’s rotation, use the following steps.
1. Type UCS in the command line.
2. At the Specify origin of UCS prompt, snap to the bottom left corner of the polyline and then the bottom right corner of the polyline.
3. At the Specify point on the XY plane prompt, press ENTER.
4. Type PLAN in the command line and press ENTER for the Current UCS option.
You can simply repeat the steps to create the Named View for this sheet and the rest of your sheets.
How to Create Sheets
Now that you have the named views for all your sheets, this is where all your hard work will pay off. Follow these steps to set the viewport correctly.
1. Navigate to your layout
2. Double-click inside the viewport to activate it and make sure that it is unlocked.
3. Click on the sheet named view for the corresponding sheet.
4. Lock the viewport
5. Now, here’s the really cool part. Check out your viewport scale… It’s already at the correct scale, NICE!
Repeat these steps for the rest of your sheets.
How to Create the Locus Map
The final part that needs to be completed is the locus map for the contractor to know where they are on the current sheet as it relates to the entire project.
First off, you want the same sized viewport to use on all your sheets. However, it may be placed in a different location on each sheet.
Now the scale of this viewport is not really important so zoom to whatever scale looks good. Off to the side, I will create the viewport and fit the entire area of the project. I will also VP freeze everything but the major runs of water and sewer lines.
Now I will place this viewport in the area that fits in that specific sheet. Next, I need to run the viewport clip command to clip the main viewport around the locus viewport. To get to this command, select the sheet viewport, right-click and choose Viewport Clip from the context menu.
Now, in paperspace, create a rectangle (polyline) and trace the sheet that the locus map represents, place a number at its center, and hatch it.
Select the locus viewport, rectangle and hatch, and the sheet number; copy it to the clipboard. Paste it into each of your sheets and set it up for each sheet.
And that’s it! Hopefully you are now ready with these tips and tricks to create an overall set of site layout sheets in AutoCAD.


