After a brief time away, I’m happy to be back on select Tuesdays to bring you some of my favorite AutoCAD tips.
Have you ever been sent a drawing from an outside firm only to feel a bit lost when you open it? It looks nice enough, lots of colors and it seems to be well structured. Typically, to start feeling more at home with it, you’ll first check out its layers to see how they’re organized. Sometimes they make sense. Other times they don’t. The other company may even use a naming convention that’s cryptic to you.
Wouldn’t it be easier to simply isolate each layer to see what’s on it? True, you could do it through the Layer Properties Manager, but that would be tedious at best (not to mention the real possibility of messing up existing settings).
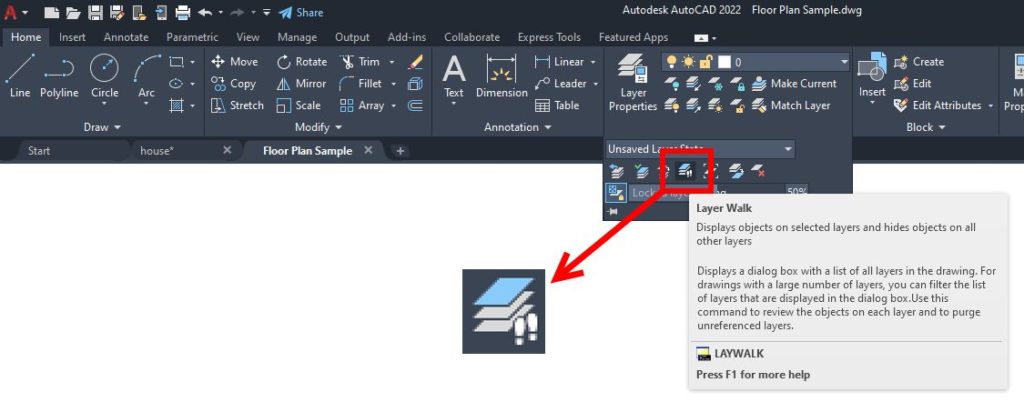
Fortunately, there is such a tool. It’s called Layer Walk. You can find it snugly tucked away in the Additional Tools portion of the Layers panel of the Ribbon. It will be the icon with the typical “stacked sheets” along with a couple of footprints (Layer Walk… get it?). Of course, if you’re a Keyboard Command-er like me, you can just type in LAYWALK.

Take a Tour of Layer Walk
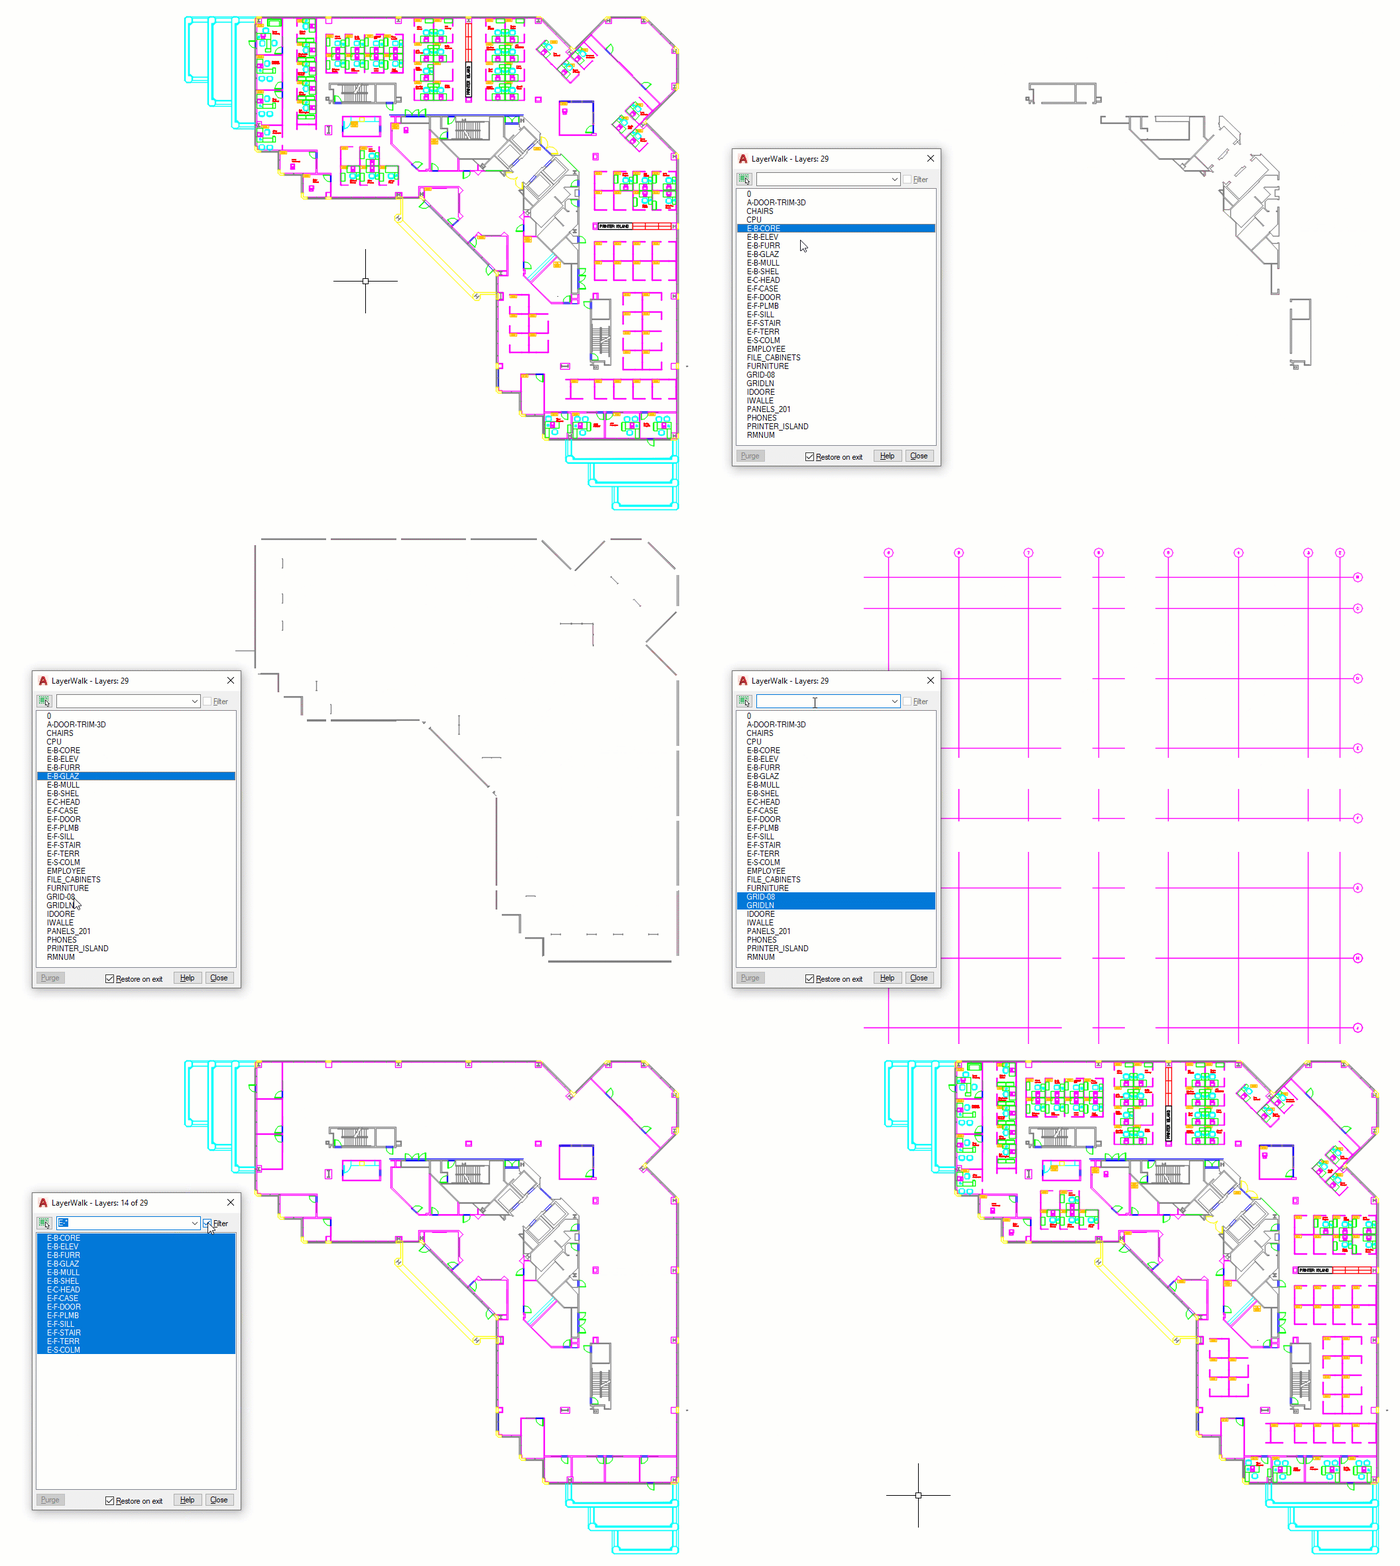
The Layer Walk interface is fairly simple, but it really does provide you with a lot of functionality. You’ll get a list of all the layers in the current drawing, including any that are XRef dependent. Those that are currently visible (either On or Thawed), are highlighted blue.
Here’s how easy it is to use. Just click on a layer name and that layer will become the only one visible. The dialog stays open until you close it, so you can easily and quickly step through the layers, visually taking stock of what’s on each.
You can also select multiple layers. Just depress and hold your left mouse button and drag it across names (or right button for our left-handed mousers out there), or use the Shift key + click for multiple, consecutive layers, or the Control key + click for individual layers. That may all sound complicated in writing, but it’s actually quite intuitive in practice.

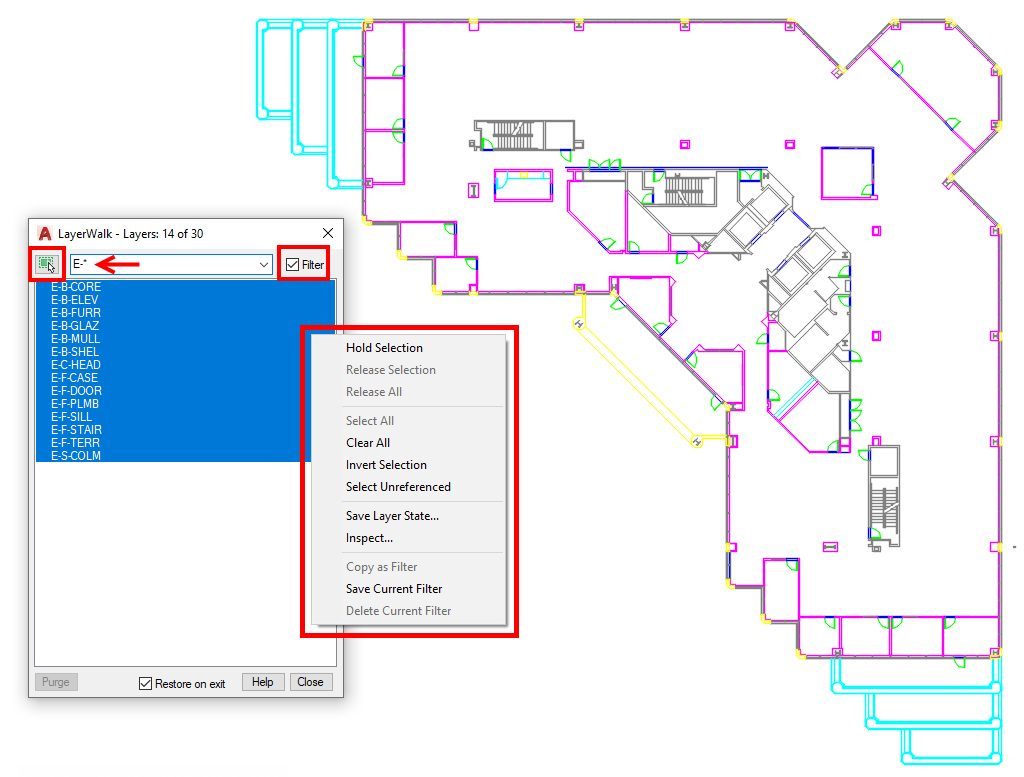
You can even work in the opposite direction if you like. Let’s say the layer names are so puzzling (or maybe in a foreign language) that they’re not even a starting point for you. You can use the Select Objects button found in the upper left corner to select one or more objects that are on the layer in question. The Layer Walk dialog box will temporarily dismiss while you make your selections. Just right-click when you’re done, or press Enter on your keyboard. The dialog will reappear, with the layer or layers you selected now highlighted in blue.
But wait, there’s more. Also near the top is a text box where you can type in a filter By using the asterisk wildcard character, you can have the list display exactly what you want. In our example, we use “E-*” to only see those layers stating with E-. Each filter is saved in the pulldown list for easy retrieval, and you can enable or disable the filter via the checkbox to its right.
And if that’s not enough, right-clicking on the layer list will display a popup menu with a dozen more options for you! Among other things, you can invert your selections, or my favorite, create a new Layer State right from the Layer Walk interface!

OK, just two more things. Since Layer Walk lists all layers in your drawing, some may not contain any geometry. If this is the case, the Purge button will light up, so you can go ahead and remove it from there. That’s a nice shortcut.
Remember how I said changing the layer’s visibility from the Layer Properties palette could introduce the negative effect of changing the original settings? Layer Walk solves that problem as well. As long as you keep the Restore on Exit control checked (at the bottom of the dialog), Layer Walk will restore the layer settings it used prior to you running the command.
Summing Up
Wow! How’s that for a powerful tool? I geared the post around exploring an external file that you’re not familiar with, but now that you know how it works, no doubt you’ll find your own use for Layer Walk. Personally, as a CAD Manager, I’ve used it to perform random audits on project files.
It’s nice to be back with you, sharing some of my favorite AutoCAD tips. Keep your eye out for us, returning soon, to a Tuesday near you.
More Tuesday Tips
Check out our whole Tuesday Tips series for ideas on how to make AutoCAD work for you. Do you have any favorite AutoCAD tips? Tell us in the comments!


