Welcome to the first entry in our What’s New in AutoCAD 2019 series! Prepare to dive deep into AutoCAD 2019’s powerful new functionality, starting with a huge timesaver: DWG Compare.
Getting to Know DWG Compare
The new DWG Compare tools in AutoCAD 2019 enable you to easily identify differences between two revisions of any drawing. This is particularly helpful for quickly viewing changes, identifying clashes, reviewing constructability, and more. Let’s see what this looks like in practice by considering these two versions of a floor plan. What’s different between them? The change is small, but critical.
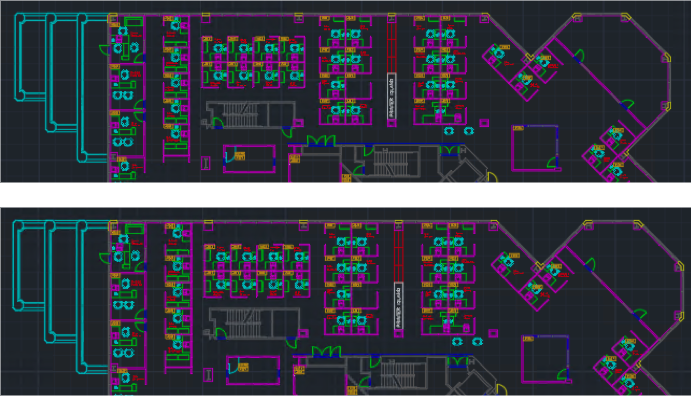
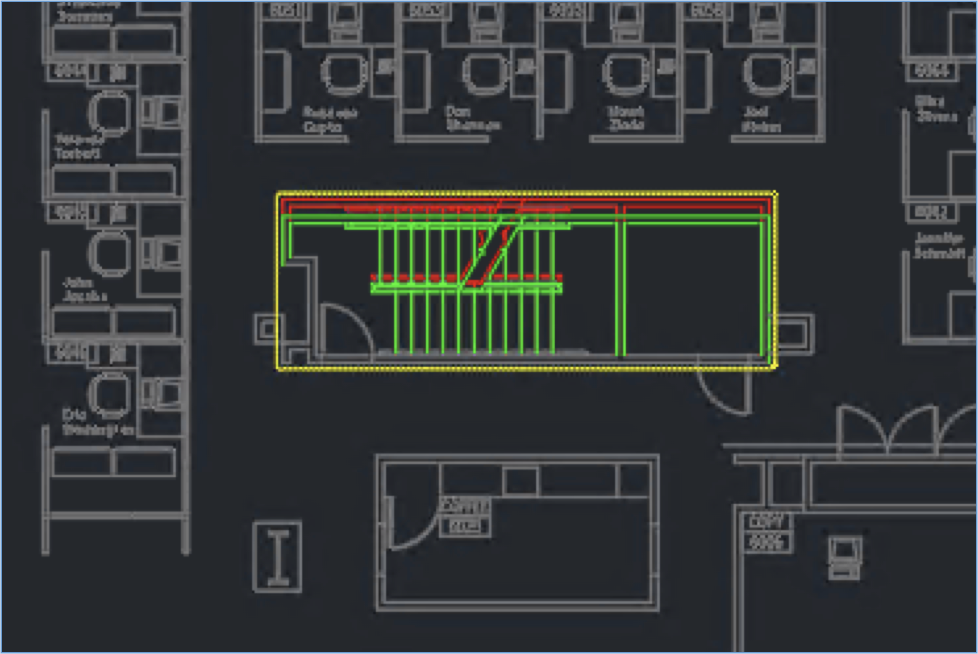
When you use the DWG Compare functionality, this is what you can see:

The green and red graphics highlight the differences between the first version of the drawing (green) and the second version (red). All unchanged elements are shown in grey. Having displayed this important difference, you can adjust the positions of the cubicles adjacent to this exit stair to maintain the required clearance.
Starting a DWG Comparison
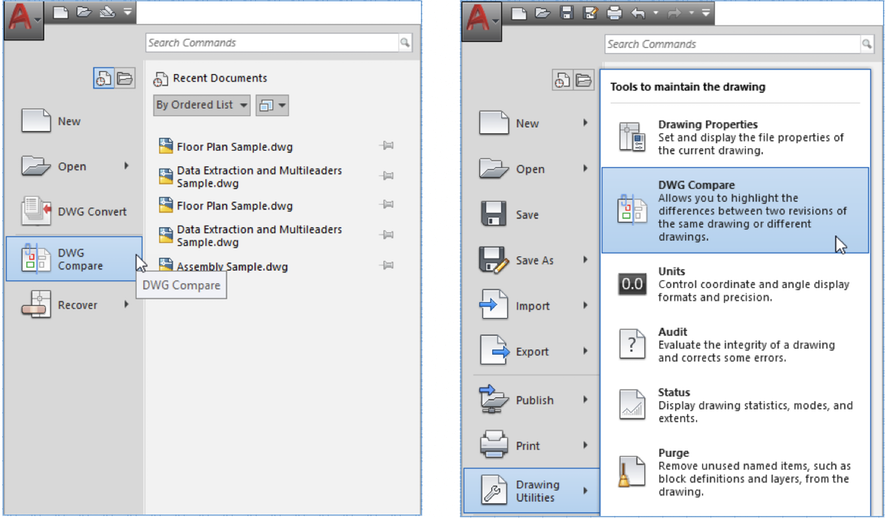
Can’t wait to use it? Let’s start at the beginning: DWG Compare can be accessed from the AutoCAD Application menu, the Collaborate Tab on the ribbon, or directly from the command line (“COMPARE”).
It’s available in the main Application menu when no drawing is active, or under Drawing Utilities when there is an active drawing.
And here’s what it looks like in the new Collaborate ribbon tab:

The dropdown list provides easy access to current and recently opened drawings. If the current drawing has been saved, it is used as DWG1 in the DWG Compare dialog box. You can also use the browse buttons […] to select a drawing from the file navigation dialog box:

Viewing Results
Don’t worry; running DWG Compare won’t alter any of your existing files. In fact, the results of the comparison are displayed in a third drawing. Three categories of objects (or parts of objects) are displayed: those which are located only in the first drawing, those which are located only in the second drawing, and those which are identical in the two drawings.
FYI: The default name of the new drawing is “Compare_DrawingOne vs DrawingTwo” (where these are the names of the two drawings being compared), but you can change it if and when you save the comparison result drawing.
A contextual Compare ribbon tab lets you control the appearance of the results:

This tab has three groups of controls: Comparison, Compare Filter, and Change Set.
Comparison
To show or hide any of the three categories of comparison graphics, click the lightbulb icon in front of the appropriate category. To change the color of one of the categories, click on the adjacent color tool. This will allow you to select any color for that category. To change which drawing is displayed in front, click “Draw Order.”
When you click the folder icon, the drawing will either open (if it is found with the same name, in the original folder path), or, if it’s already open, it will be set as the current drawing.
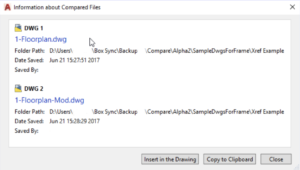
Click “Drawing Information” to display a dialog that contains the identities of the two drawings being compared. From this dialog box, you can add a table to the Compare result drawing with this information, or copy the text to the clipboard for use in other documents. The identities of these drawings (folder path, date saved, and saved by) are preserved with the result drawing.
Compare Filter
To include text in — or exclude text from — the comparison result, click the Text button. This covers all text, such as block attributes and dimension text. To include or exclude hatch in the comparison result, click the Hatch button. The boundary of the hatch (if any) will still appear and will be compared. The settings for these two filters are saved with the drawing.
FYI: The default is to have Text included, and Hatch not included.
Change Set
The first button controls whether the automatic Revision Clouds are displayed. Even when they’re turned off, the change sets remain.
The bottom line of the tools contains the number of the current change set, and the total number of change sets, based on the other controls. Use the left and right arrow buttons to zoom from one group of differences to another.
To determine how Revision Clouds (change sets) combine with each other, adjust the”Margin,” the setting that represents extra space around the bounding box of the individual difference graphics. When individual differences plus the margin overlap, they will be merged into a single change set. Dragging the slider to the left will separate changed entities from each other, resulting in more total change sets. Dragging the slider to the right will merge them together, resulting in fewer total change sets.
The Revision Cloud Shape controls whether the merging of individual changes results in a single larger rectangle, or whether the individual rectangles of each change are merged into a polygonal shape. This setting is saved with the comparison result drawing.
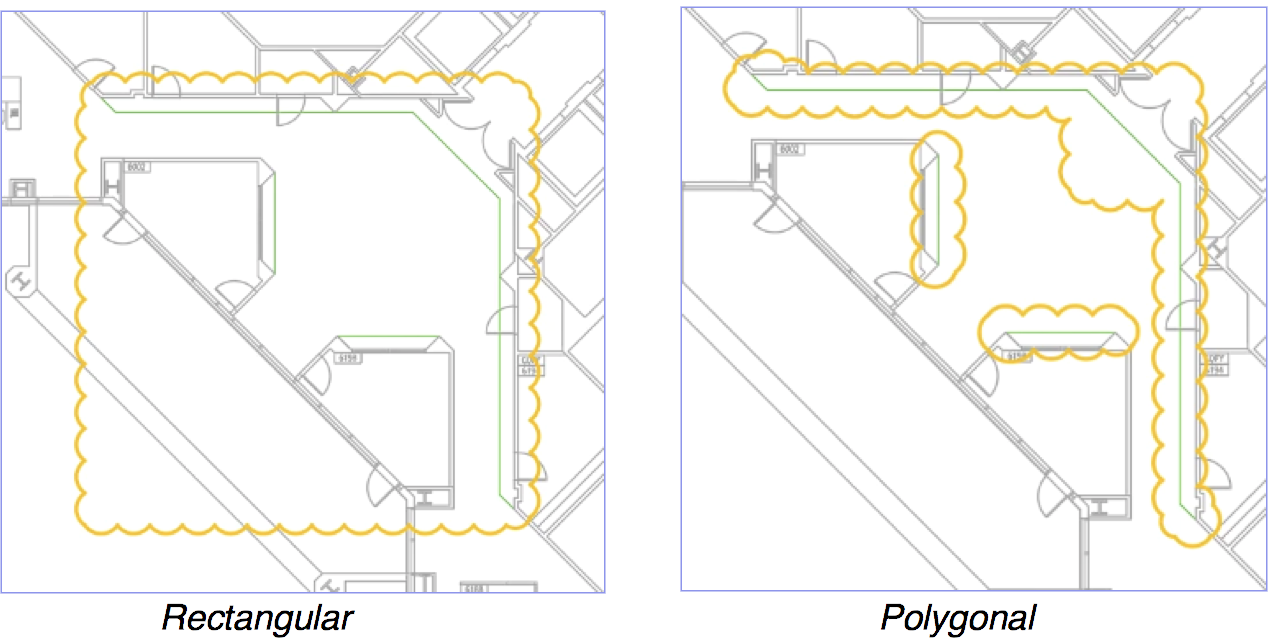
FYI: The default shape setting is Rectangular.
Commands and System Variables
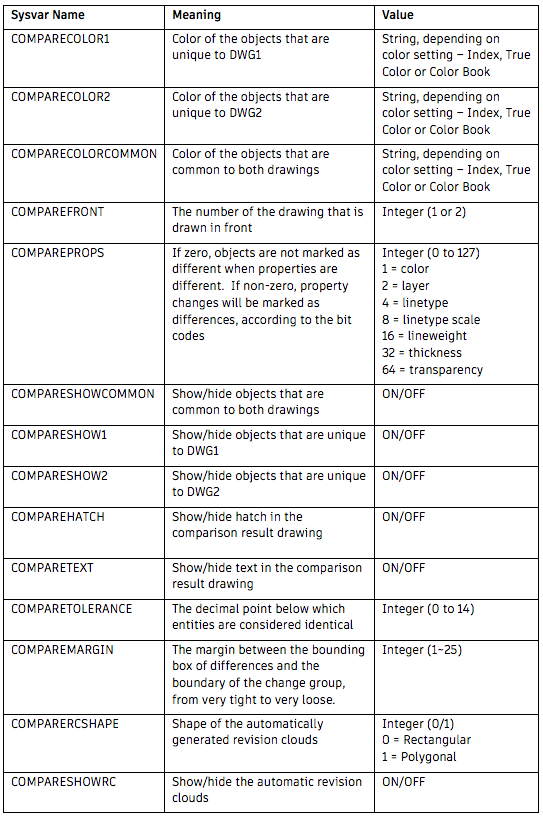
To support the powerful new DWG Compare functionality in AutoCAD 2019, the following new commands and system variables have been added:

More New Features in AutoCAD 2019
In the next entry, we’ll be tackling one of our new favorites: Shared Views. Can’t wait? Check out the Preview Guide now!


