00:01
Before an account administrator can add members in a project template.
00:06
They must first add the members and any needed companies or roles to the account
00:11
or hub using the members companies and
00:14
roles tool in the account administration product.
00:18
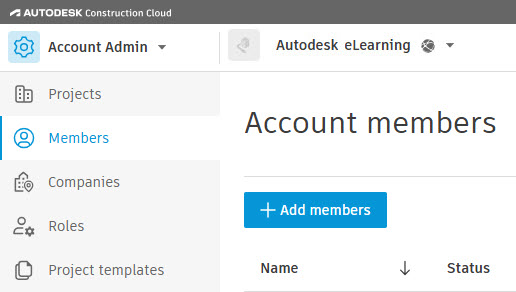
First, we'll review how to add and manage members.
00:22
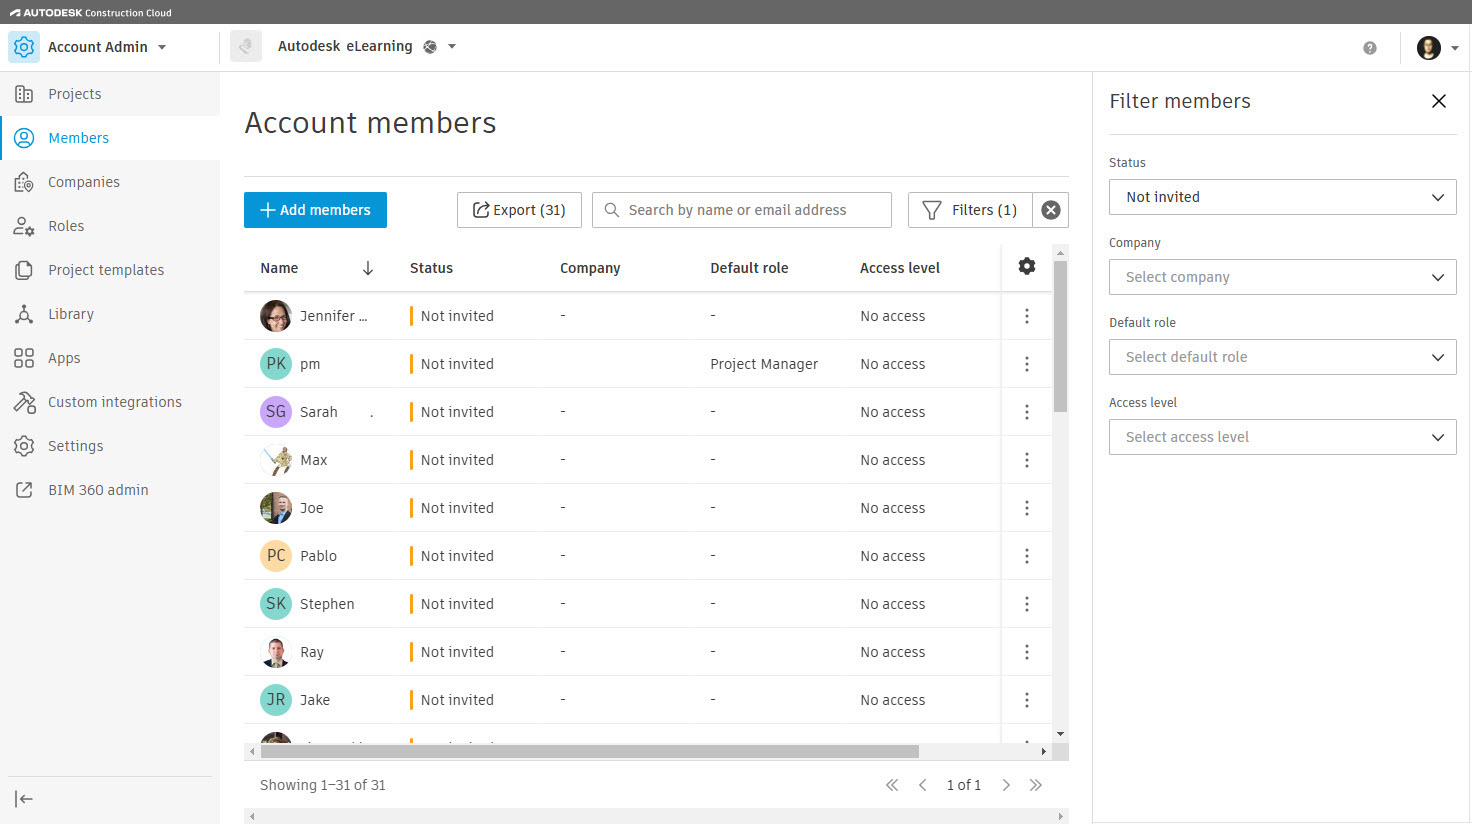
In the Account Admin product, select the members tool.
00:26
On the account members page, click add members.
00:31
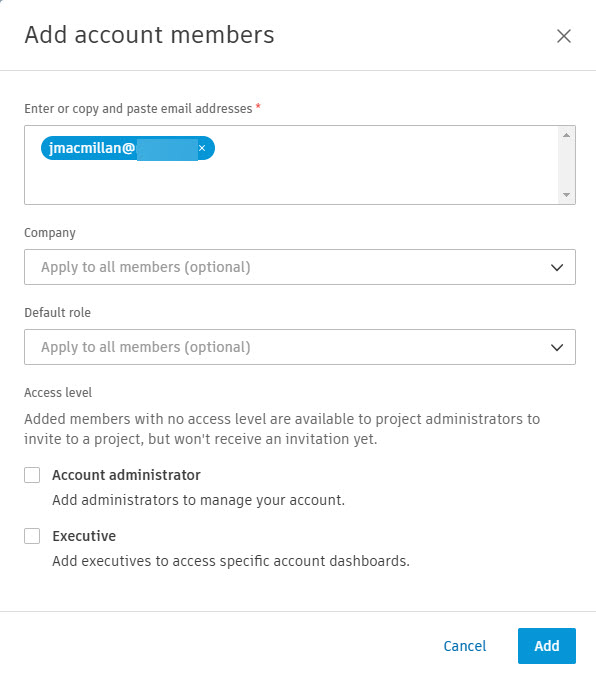
In the add account members dialog box, enter one or more email addresses.
00:38
you have the option to assign a company and a default role to the user.
00:42
You can also assign an access level.
00:46
If you do not assign an access level,
00:48
the user will be added to the account but will not get an email invitation.
00:53
Those users will display in the members list as not invited.
00:58
Click add and the user will be added to the member's
01:01
list and their status will be indicated in the status column.
01:06
Not invited means the member has been added to the
01:09
account but has not been invited to any projects.
01:13
Active means the member has been invited,
01:16
has accepted the invitation by clicking on the link
01:19
in the invitation email and has accessed the project.
01:24
Invited means the member has been invited but has not accepted
01:28
the invitation by clicking on the link in the invitation email.
01:33
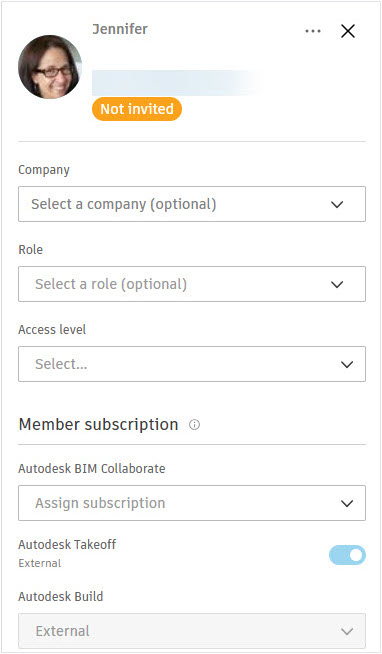
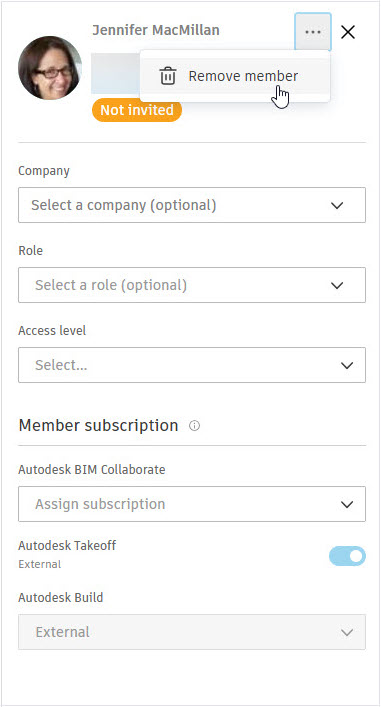
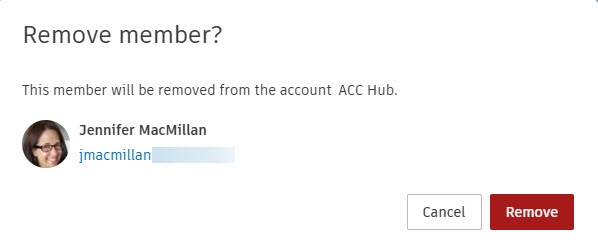
To edit or remove an account member, select the member's name.
01:38
In the account members fly out,
01:40
edit any of the user's information
01:42
or click the ellipsis in the upper right corner and select remove member.
01:48
Then in the remove member dialogue box, click remove.
01:53
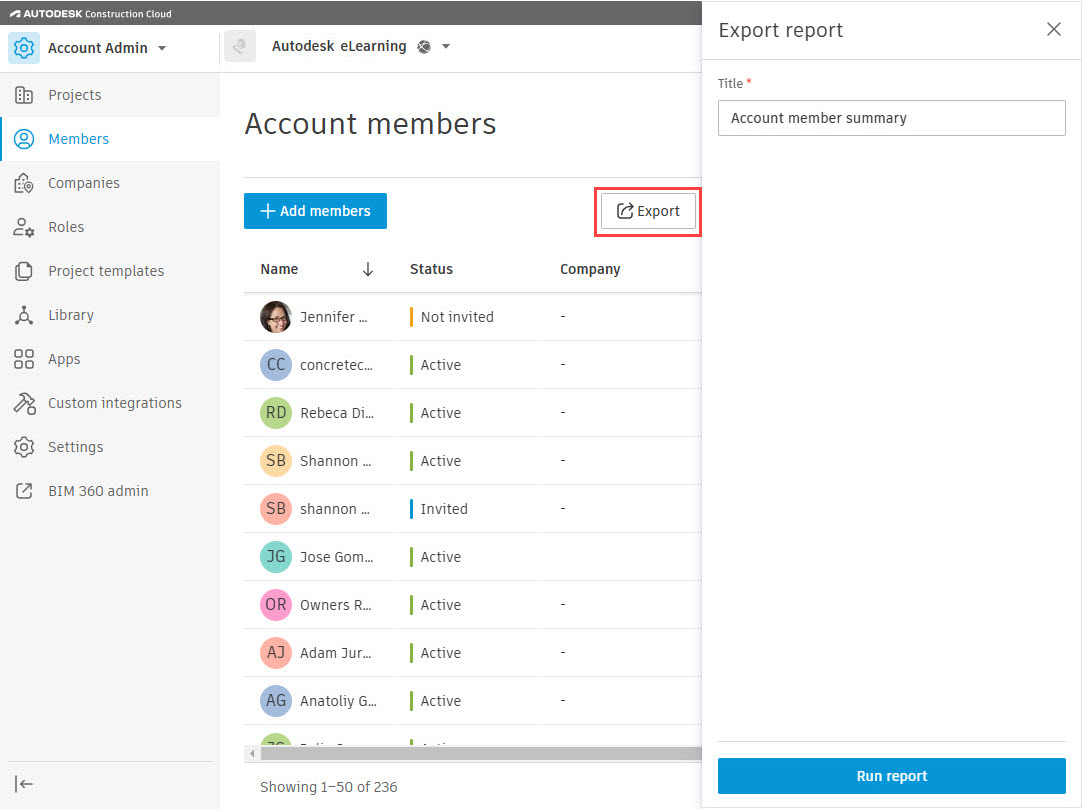
You can export a list of account members that displays each member's name,
01:58
email, status, company, default role,
02:02
access level, and the date they were added by clicking export.
02:07
In the export report fly out,
02:09
enter a title for the report and click run report.
02:14
The report will generate in the background,
02:16
so you can either stay on this page or you can close the fly out and continue working.
02:22
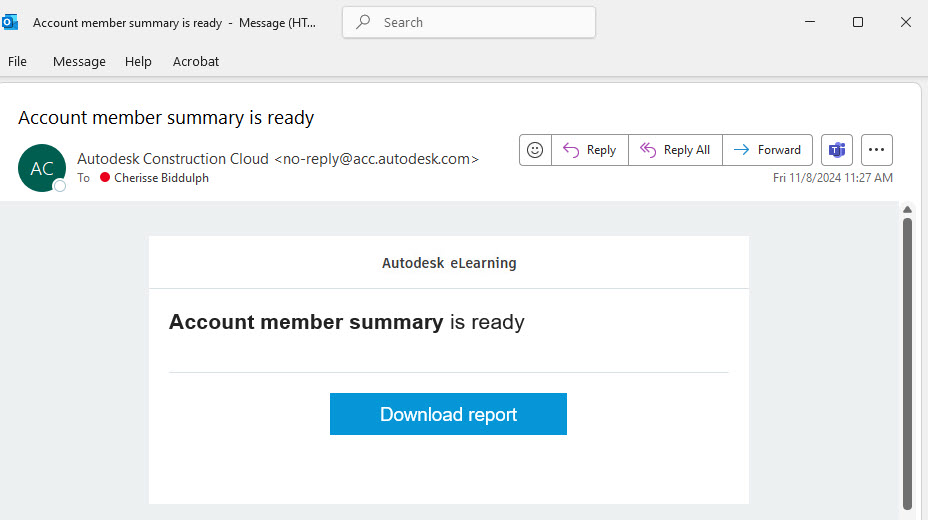
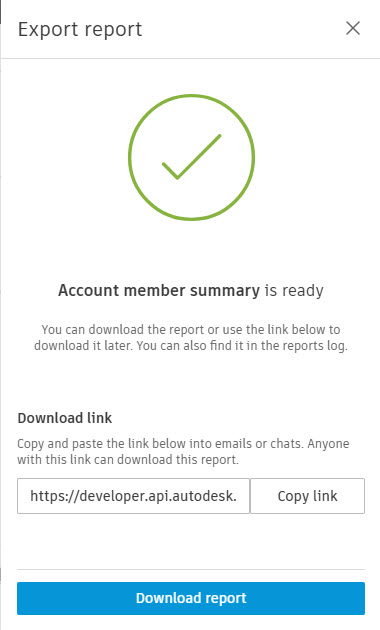
To retrieve your report,
02:23
click download report or copy the link and paste it into an internet browser.
02:29
If you close the export report fly out,
02:32
you can access the report by clicking on download
02:35
report in the email that was sent to you.
02:39
If you want to filter the account members list before exporting a report,
02:43
click the filter icon in the upper right corner.
02:47
In the filter members fly out,
02:49
you can filter the members list by status, company, default role, or access level.
02:56
Once the filters are selected,
02:58
you can export the filtered list of members by clicking export.
03:03
When finished, close the fly out by clicking the X in the upper right corner.
03:09
To clear the filters, click on the X next to filters.
03:14
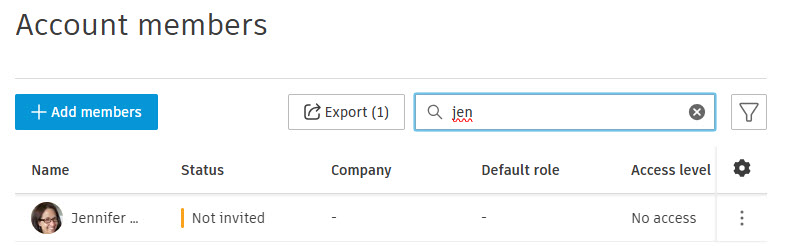
You can also search for a specific member by typing a user's name
03:18
or email address in the search by name or email address box,
03:23
at the top of the account members list.
03:26
The list will display only members who match the search criteria.
03:31
When finished searching, click the X in the search box to clear the search.
03:36
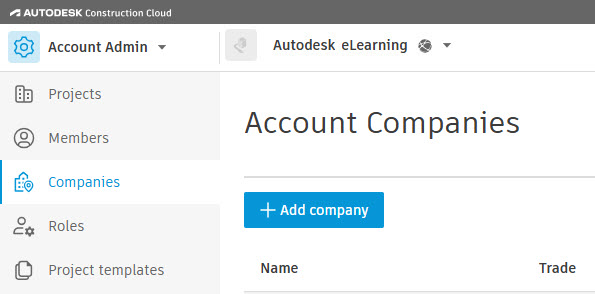
Next, we'll look at the company's tool,
03:39
which provides a directory of all companies that are associated with the account.
03:44
Account administrators can add, manage, and remove companies using this tool.
03:50
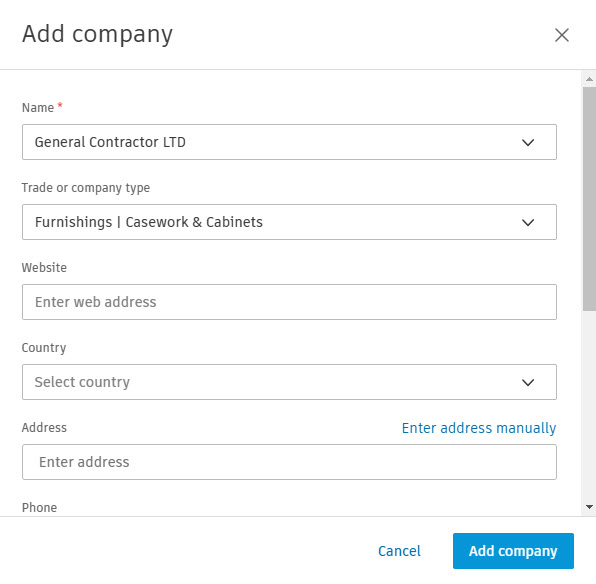
To add a company, click add company on the account companies page.
03:55
In the Add company dialogue box,
03:58
enter the company's information and click add company.
04:02
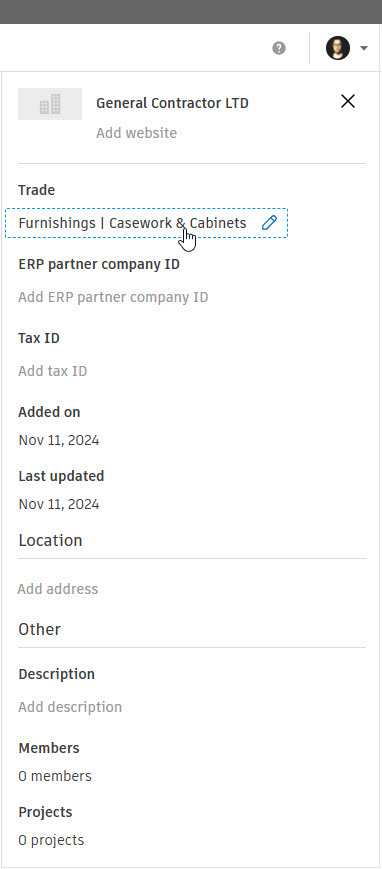
Tto modify the company,
04:04
click on the company name
04:07
in the company's flyout. Click on any of the various items to edit them.
04:13
click the X in the upper right corner of the company flyouts to close it.
04:19
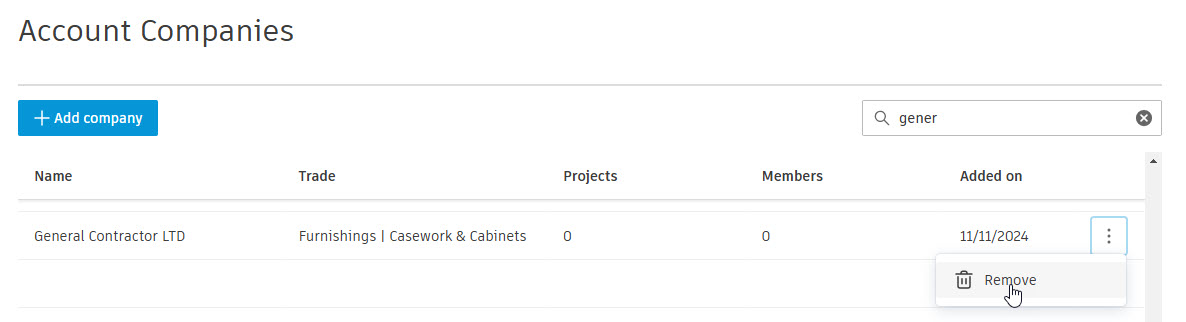
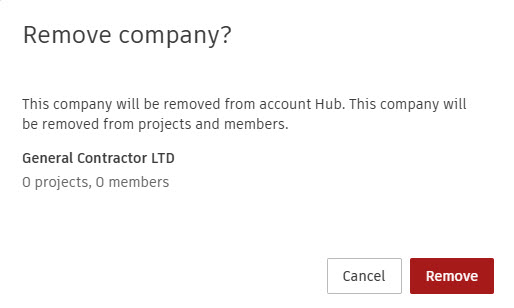
To remove a company,
04:20
click the ellipsis next to the company to expand the option and select remove.
04:27
In the remove company dialog box, click remove.
04:31
Finally, let's take a look at the rules tool.
04:34
Account administrators can create manage and remove roles using the rules tool.
04:41
To create a role, click add role on the roles page.
04:45
In the add role dialog box, enter a role name and click add role.
04:52
If the role name already exists, you will not be able to add it.
04:57
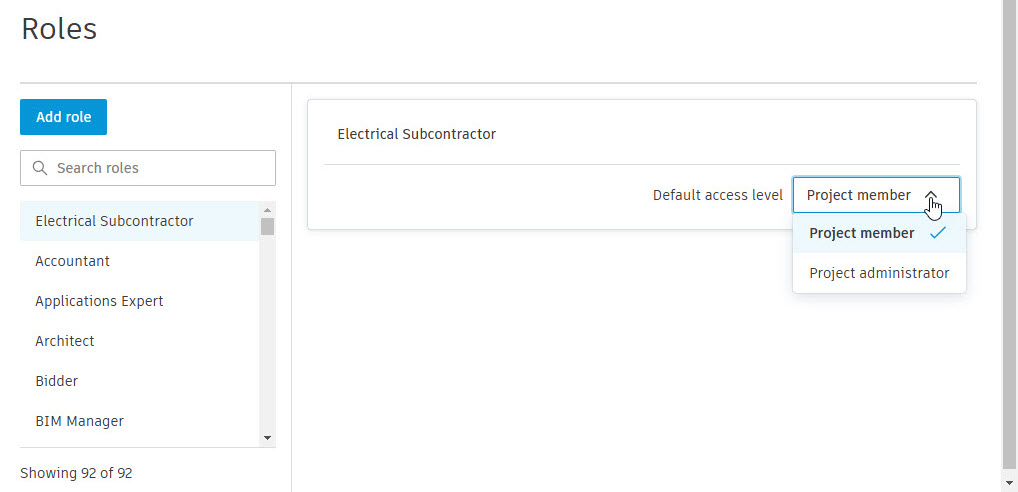
On the role page, expand the default access level drop down list
05:02
and select either project member or project administrator.
05:05
The access level for a role can be changed after a role is created.
05:11
You can search for a specific role or scroll through the list of existing roles.
05:17
expand the default access level drop down list to change its access level.
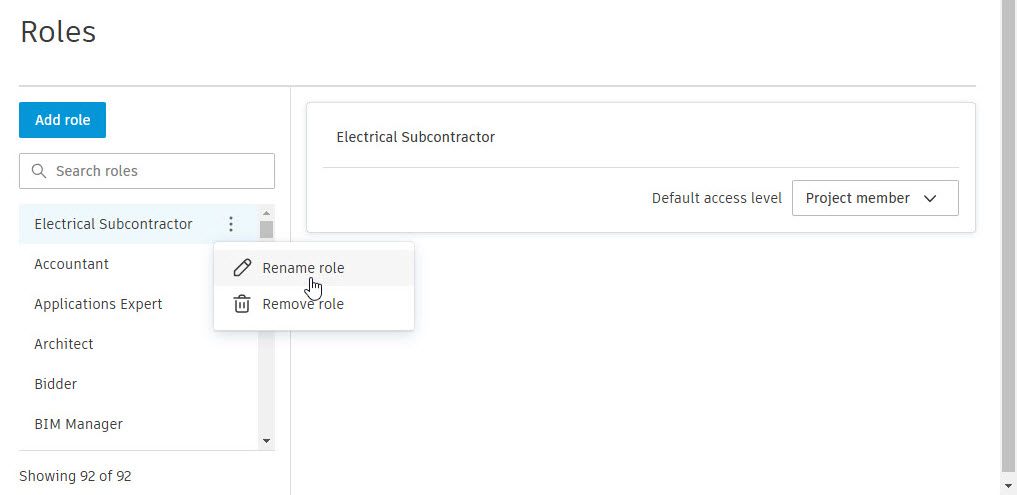
05:24
To rename a role, click the ellipsis next to the role
05:28
to expand the options and select rename role.
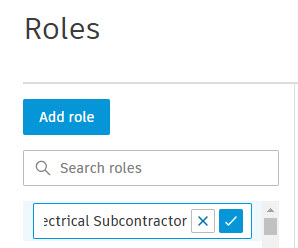
05:32
Enter the new name and click the blue check mark to accept the changes.
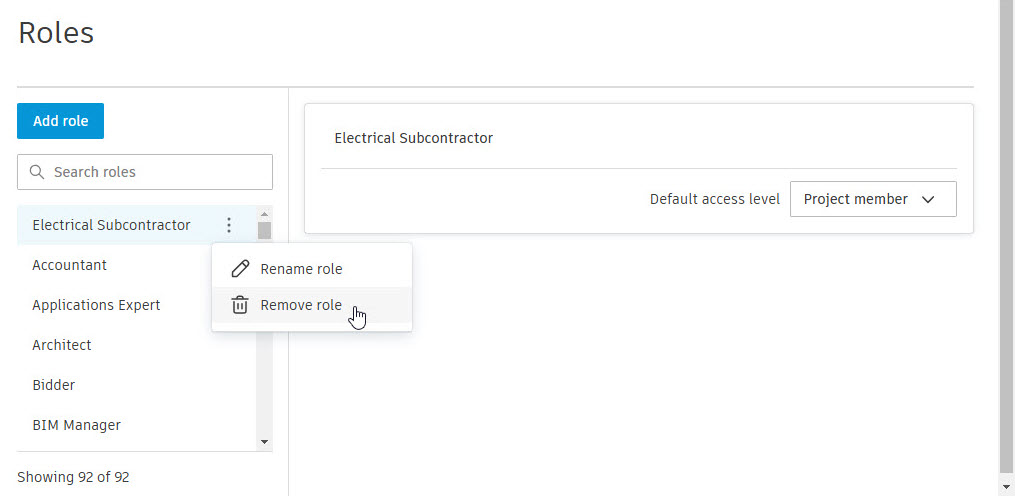
05:38
To remove a roll, click the ellipsis next to the role and select remove role.
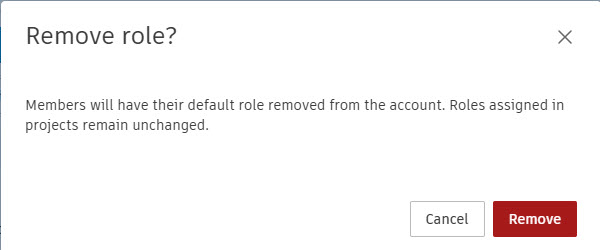
05:44
In the remove role dialog box, click remove.