00:01
Teams are established in Design Collaboration to represent either
00:05
a company or a particular function within it.
00:08
These folders are crucial to the data exchange workflow
00:12
and should not be deleted.
00:15
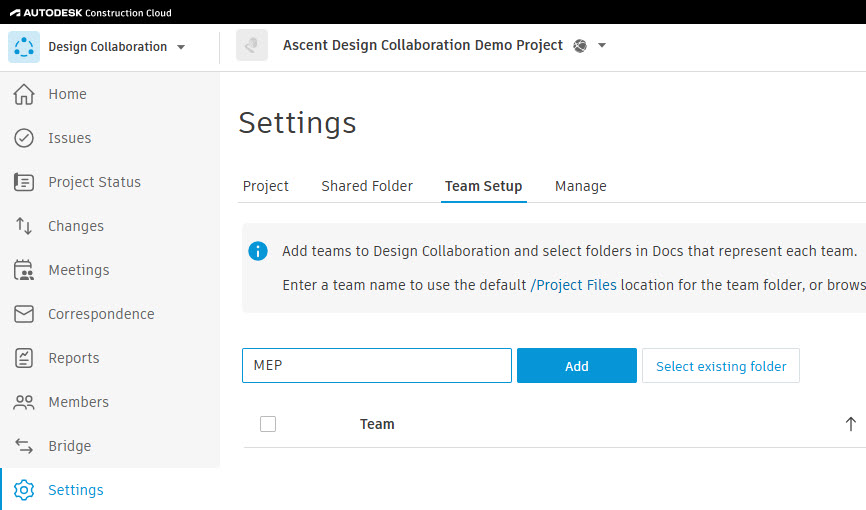
Let's look at the ways you can configure teams.
00:19
The first method is to set up project file sub folders when creating teams.
00:25
In the Design Collaboration product,
00:27
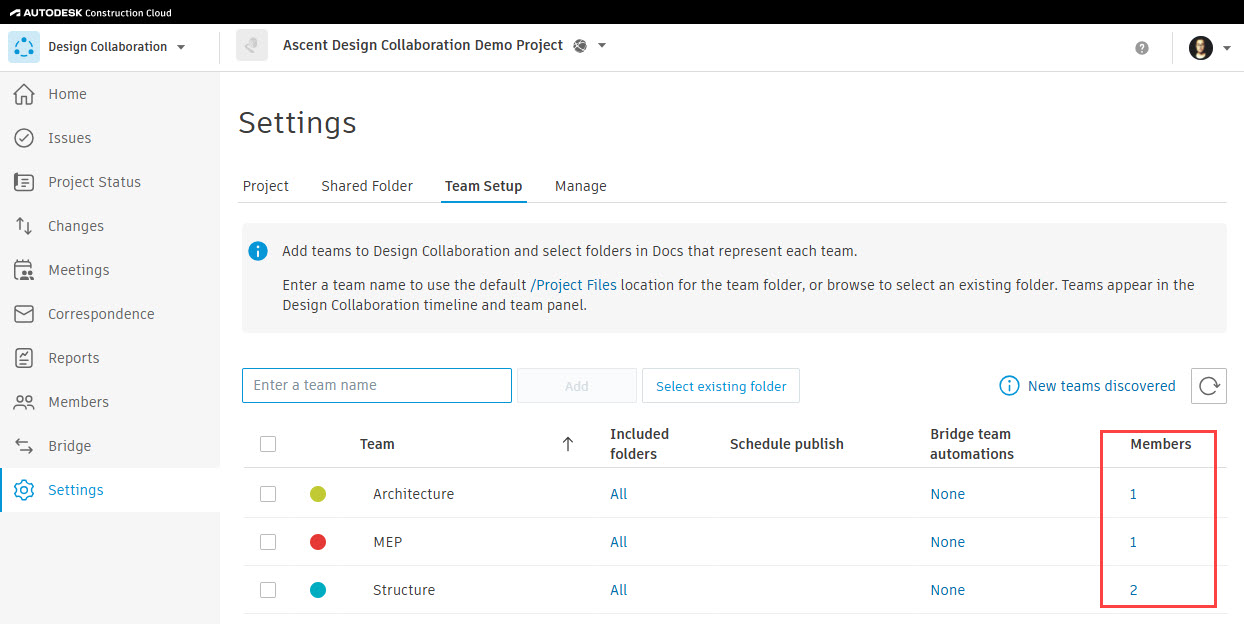
select the setting tool, then click on the team set up tab.
00:33
Click in the box that says enter a team name and enter a name. Then click add.
00:39
The team is displayed below.
00:41
You can select on the color dot to change the team's color.
00:46
You can also select the team name to edit the name.
00:50
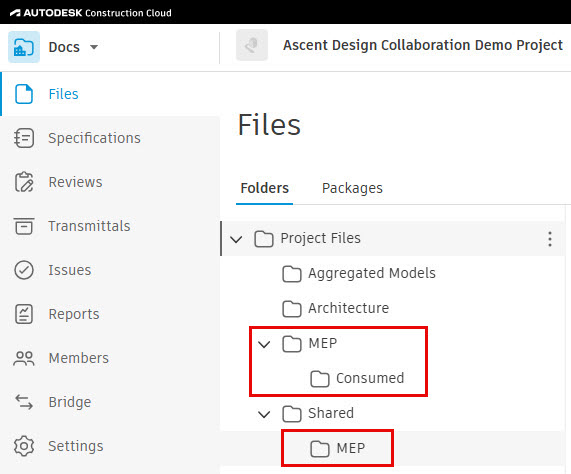
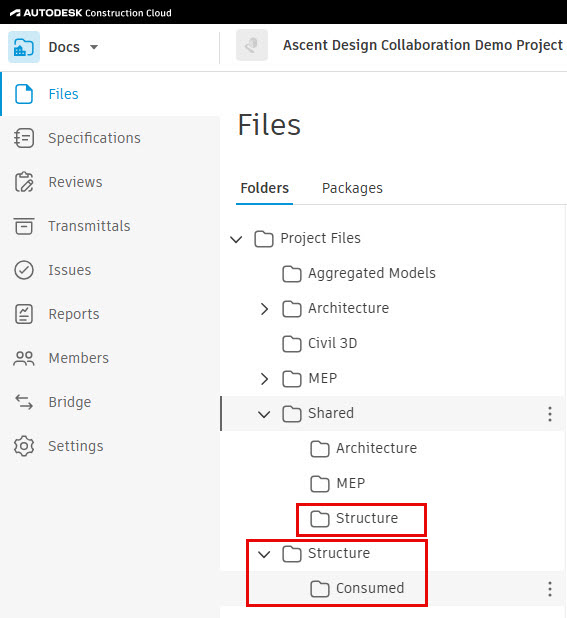
To verify the folders were created, switch to the Docs product,
00:55
expand the project files folder,
00:57
and you will see the new folder that was created in the team's set up,
01:02
as well as a sub folder called Consumed.
01:05
Expand shared folder to see the new team subfolder.
01:10
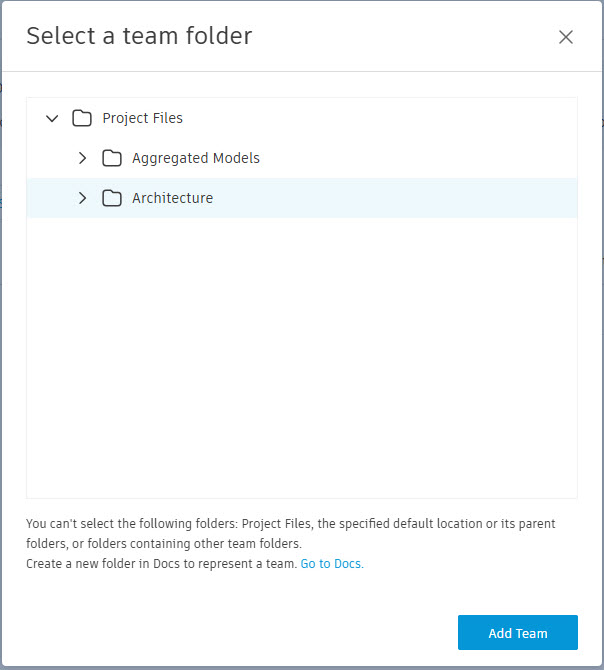
The second method is to create teams from an existing folder.
01:15
Click select existing folder.
01:19
In the selected team folder dialog box,
01:22
expand project files and select the folder you want to use to create the team.
01:27
Note that the folder you select cannot already be associated with a team.
01:35
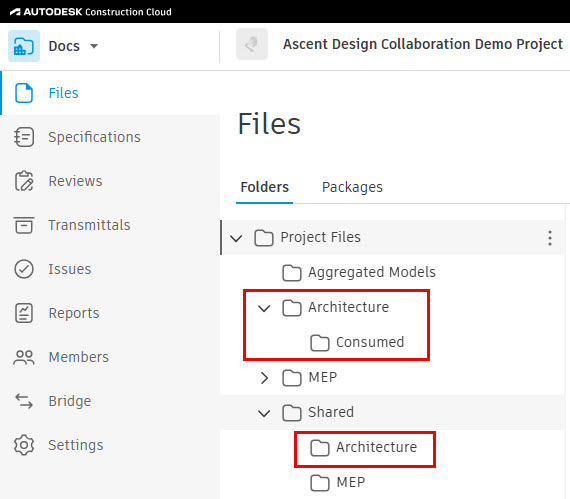
to verify the sub folders were created.
01:38
Switch to the Docs product,
01:40
expand the project files folder in the
01:43
existing folder to see the subfolder called Consumed.
01:47
Expand shared folder to see the new team subfolder.
01:52
The third method is to create teams by scanning for new teams.
01:57
Design Collaboration will scan for any new team folders that contain
02:01
supported cloud models and are not associated with a team.
02:05
You can also manually start a scan by clicking on the refresh icon
02:10
in the upper right side.
02:14
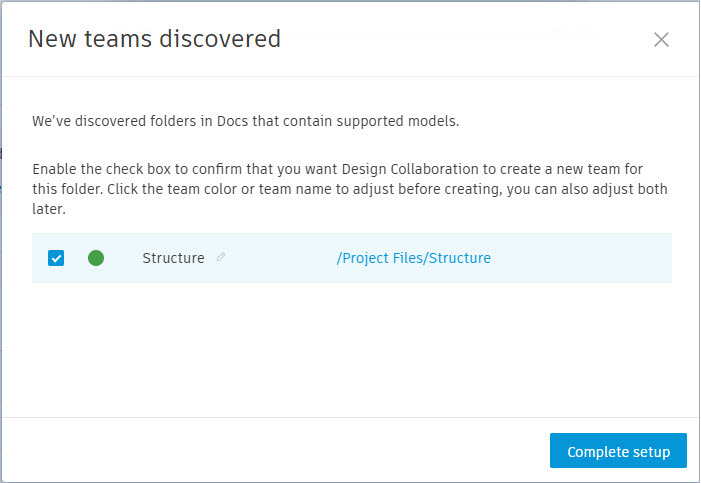
click the new team's discovered link to open the new team's discover dialog box.
02:21
Check the check box next to the team name.
02:25
In this dialogue box, you can also change the team's color or edit the team name.
02:30
Then click complete set up to add the team to the team set up list.
02:37
To verify the folders were created, switch to the Docs product,
02:41
expand the project files folder
02:44
and you will see the new folder that was created in the teams set up,
02:48
as well as a sub folder called Consumed.
02:51
Expand shared folder to see the new team subfolder.
02:56
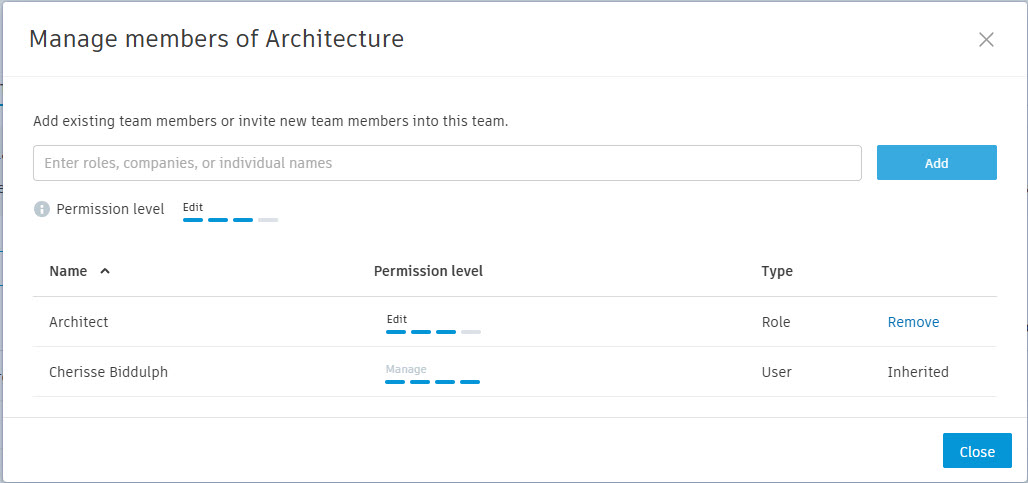
Let's review how to add team members and assign permissions.
03:01
Before adding team members through the team set up tab,
03:04
the role, companies, and members must already be established in the project.
03:11
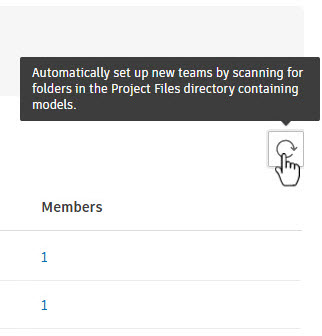
In the members column,
03:12
click on the number for the team name you want to add a member to.
03:19
you can click the box next to the team name and
03:22
click manage team members at the bottom of the team's list.
03:27
In the manage members dialogue box,
03:30
you can enter a name, company, or role.
03:34
Click on permission level to expand the options.
03:38
Select a level of permissions and click add.
03:42
After members are added through the manage members dialog box,
03:46
you can edit their permission or remove them by clicking remove.