00:02
Project administrators can use the template tools in the
00:05
project admin product to further customize a project template.
00:10
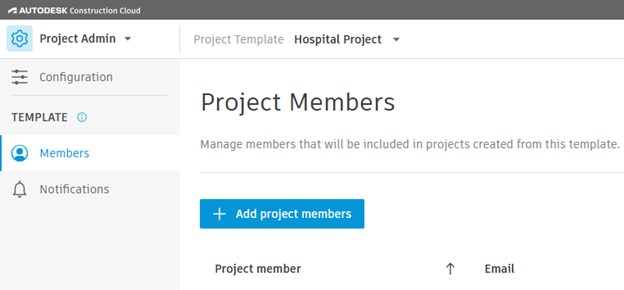
The members tool is used to add project members to a template
00:14
by adding members to the project template.
00:17
You can establish a predefined list of team members who will
00:21
automatically be included when a new project is created using that template.
00:27
To add members to a project template,
00:30
from the project admin product,
00:32
click on the members tool
00:34
and then click add project members on the project members page.
00:40
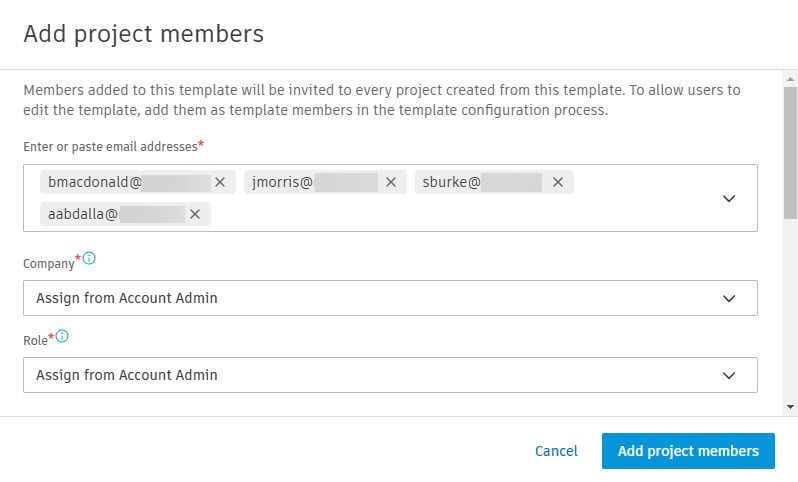
In the add project members dialogue box, enter the member's name or email address.
00:47
You can add more than one member at a time.
00:51
In the company section, select a company name or leave it as Assign from Account Admin.
00:58
In the roles section,
01:00
select a role that the member will fall under or leave it as Assign from Account Admin.
01:07
If the company or role is assigned from the account admin,
01:11
the individual members assigned companies and roles will
01:15
be carried over from their account settings.
01:18
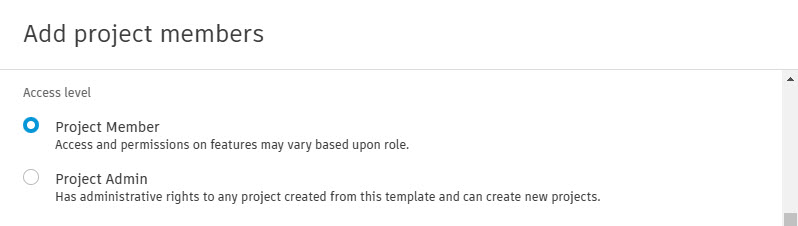
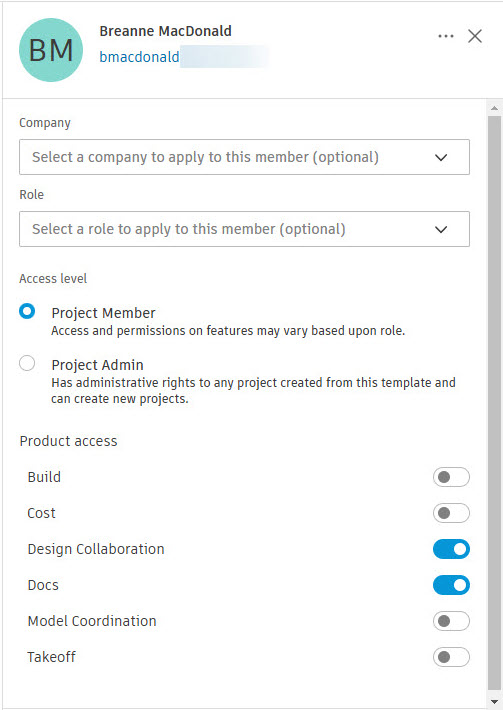
In the access level section, select either project member or project admin.
01:24
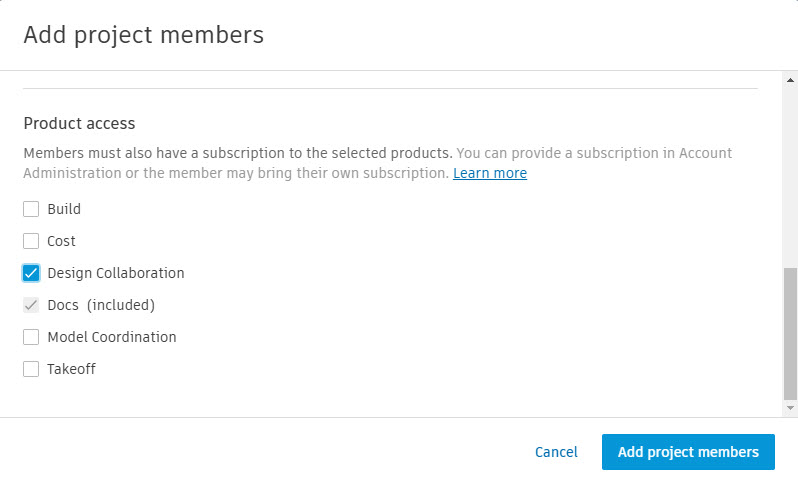
In the product access section,
01:26
check the check box next to the products the members will need access to.
01:31
When finished, click add project members.
01:35
To modify a project member, select a member from the project members list.
01:40
In the member's flyout,
01:42
you can edit the member's company role, access level, and product access as needed.
01:51
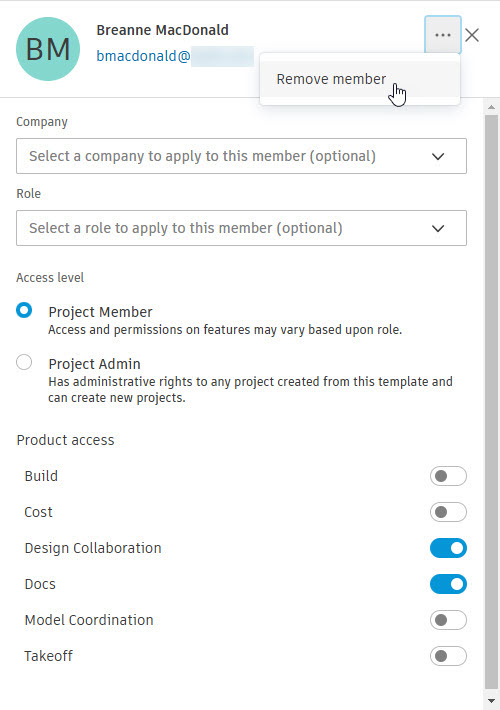
click the ellipsis next to the member's name and select remove member.
01:56
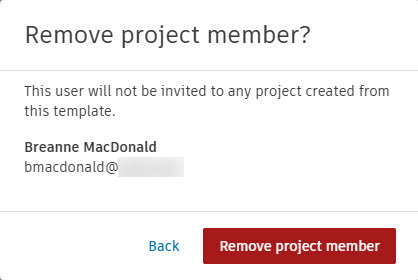
In the remove project member dialogue box, click remove project member.
02:02
Now let's take a look at the notification tool,
02:05
which allows administrators who are setting up project templates
02:09
to modify or create different types of notifications.
02:13
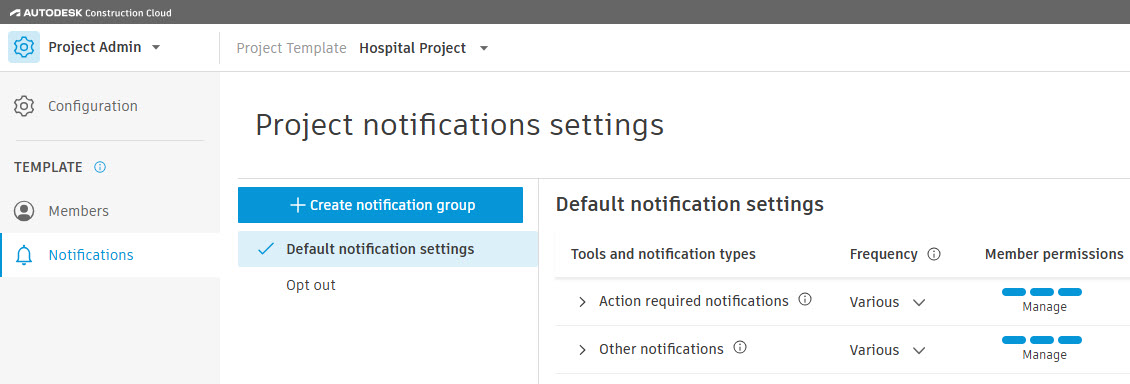
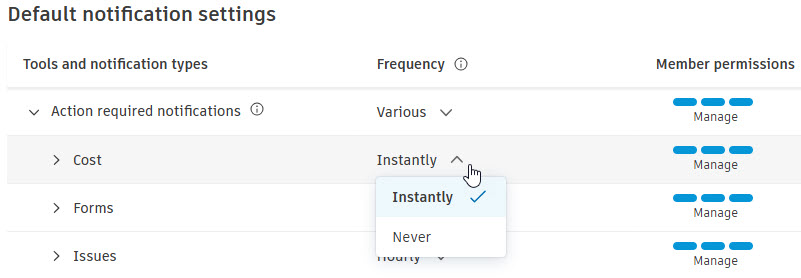
On the project notification setting page,
02:16
select default notification settings to display the default notifications.
02:22
Expand action required or other notifications to see
02:26
the available tools and their notification types.
02:31
Expand the drop down list in the frequency column
02:34
to change the frequency of each type of notification.
02:39
Expand the drop down list in the member's permission column
02:42
to change the permission levels for the notification type.
02:47
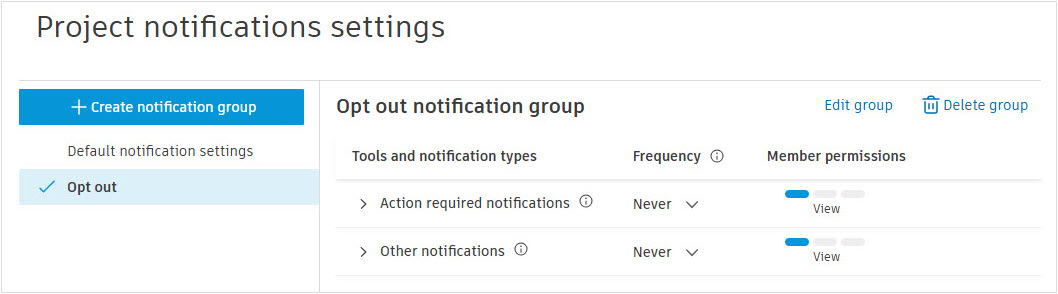
Similarly to the default notification settings group,
02:51
you can select opt out to edit or modify the opt out notification group.
02:57
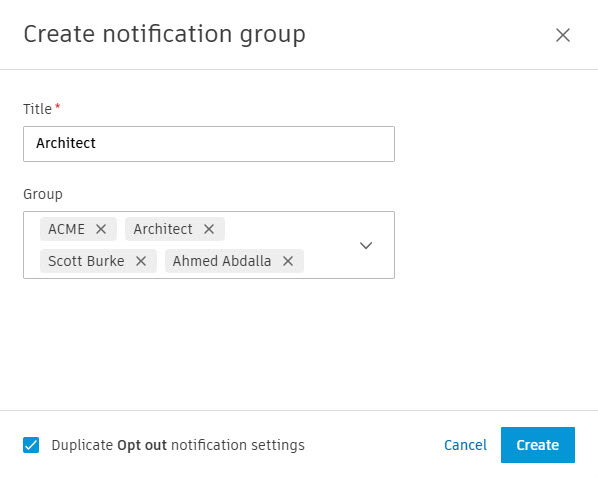
Project templates also allow you to create notification
03:00
groups for members, companies, or roles within a project.
03:05
To create a new notification group, click create notification group.
03:11
In the create notification group dialogue box,
03:15
enter a title and add members, companies, or roles to the group.
03:20
In the lower left corner,
03:22
you can check or uncheck the option to duplicate the opt out notification settings.
03:30
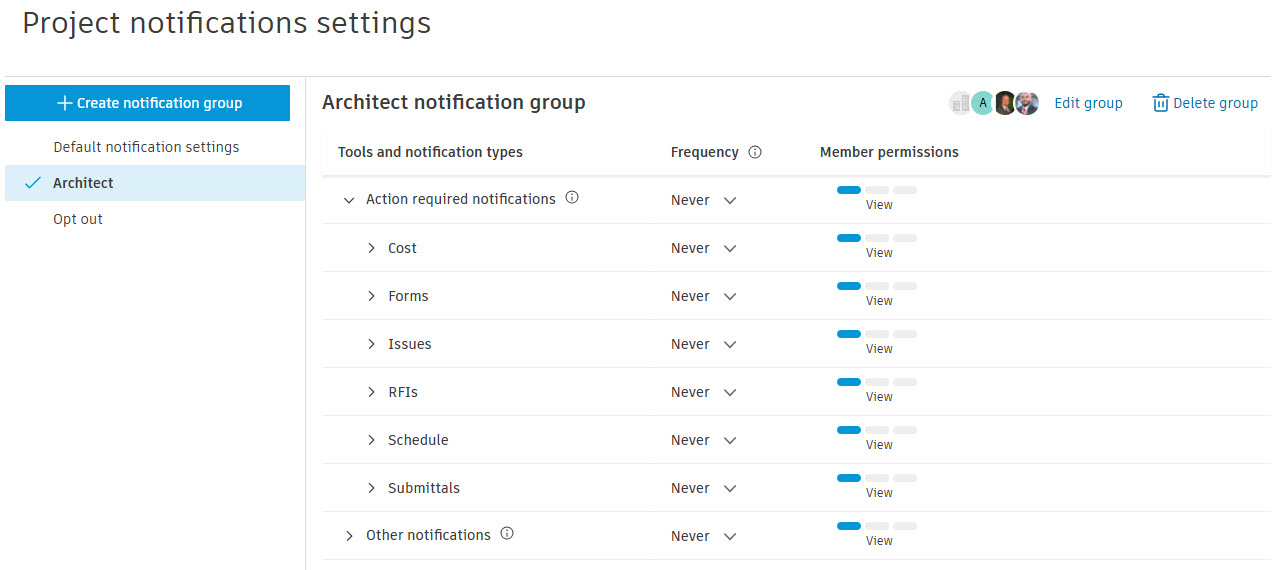
The newly created notification group will be displayed
03:33
in the list under default notification settings.
03:37
You can now edit the frequency of
03:39
the notification and member permissions for the group.
03:43
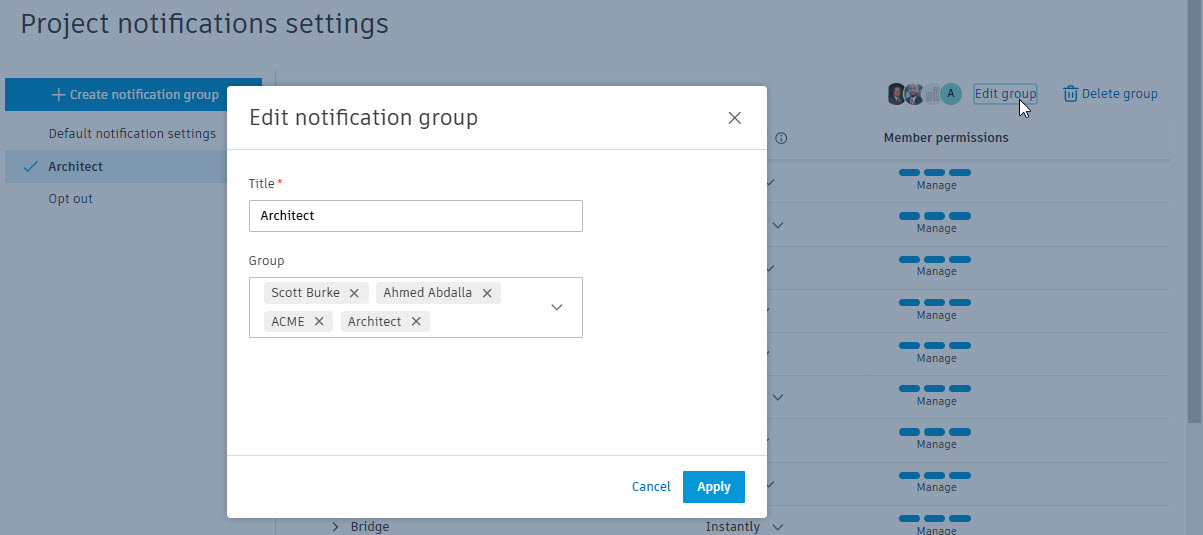
To edit a new notification group,
03:46
click on edit group from the upper right side.
03:49
In the edit notification group dialogue box, edit the title or the group
03:56
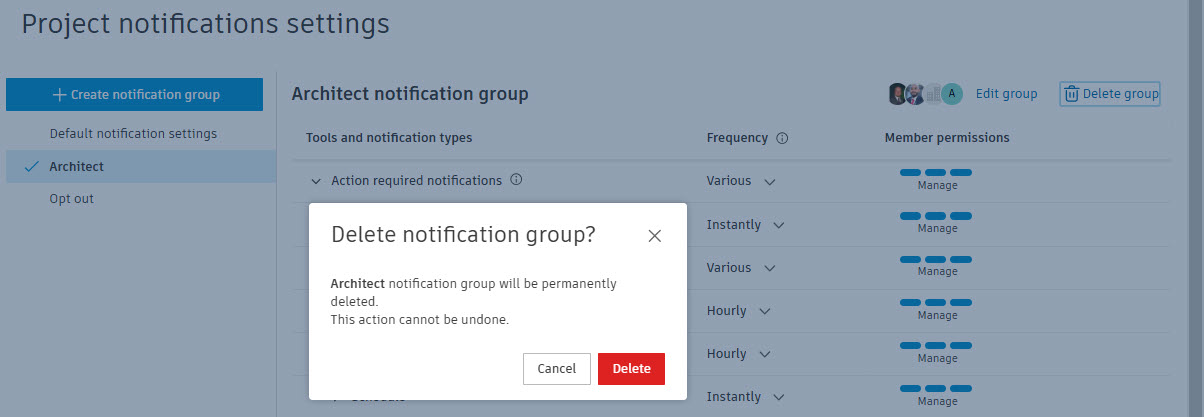
To delete a notification group, click delete group from the upper right side.
04:02
In the delete notification group dialog box, click delete.