00:03
Within a project template, you can set up the Design Collaboration product.
00:08
This involves setting up the shared folder location,
00:12
organizing team structures,
00:14
assigning roles and permissions,
00:16
and enabling DWG file compatibility.
00:20
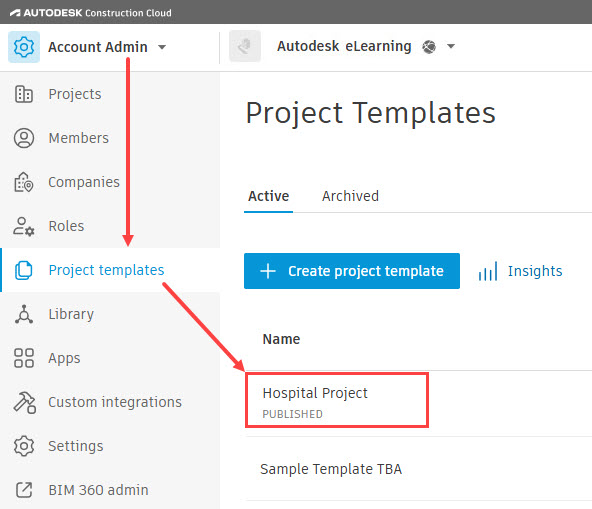
In the Account Admin product,
00:23
select the project templates tool, then select the project template from the list.
00:30
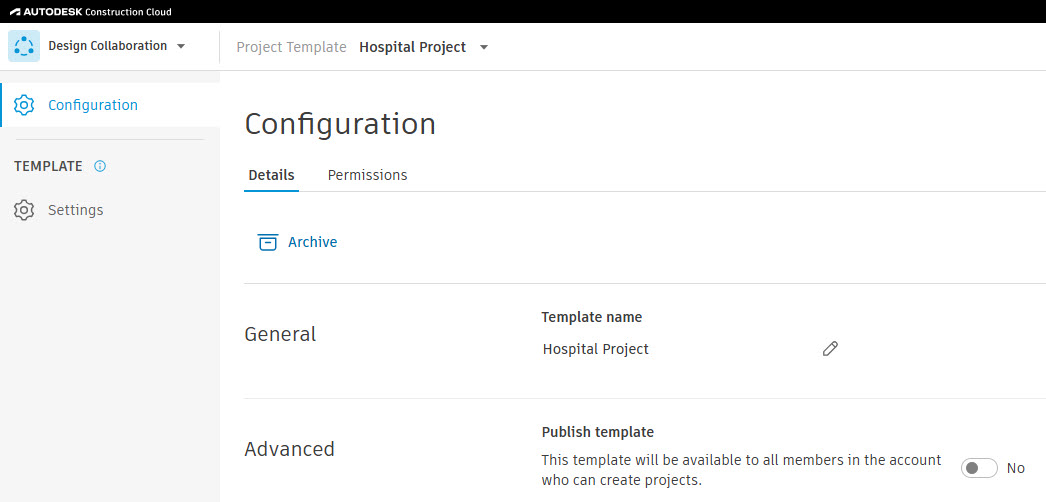
In the product selector, select Design Collaboration.
00:34
You will be sent by default to the configuration page where
00:38
you will have access to the details and permissions tabs.
00:43
You will also see both the configuration and settings tools along the left side.
00:49
The details tab allows members to archive the project template,
00:53
rename the project template,
00:55
and publish the project template for anyone in the hub to use to create new projects.
01:02
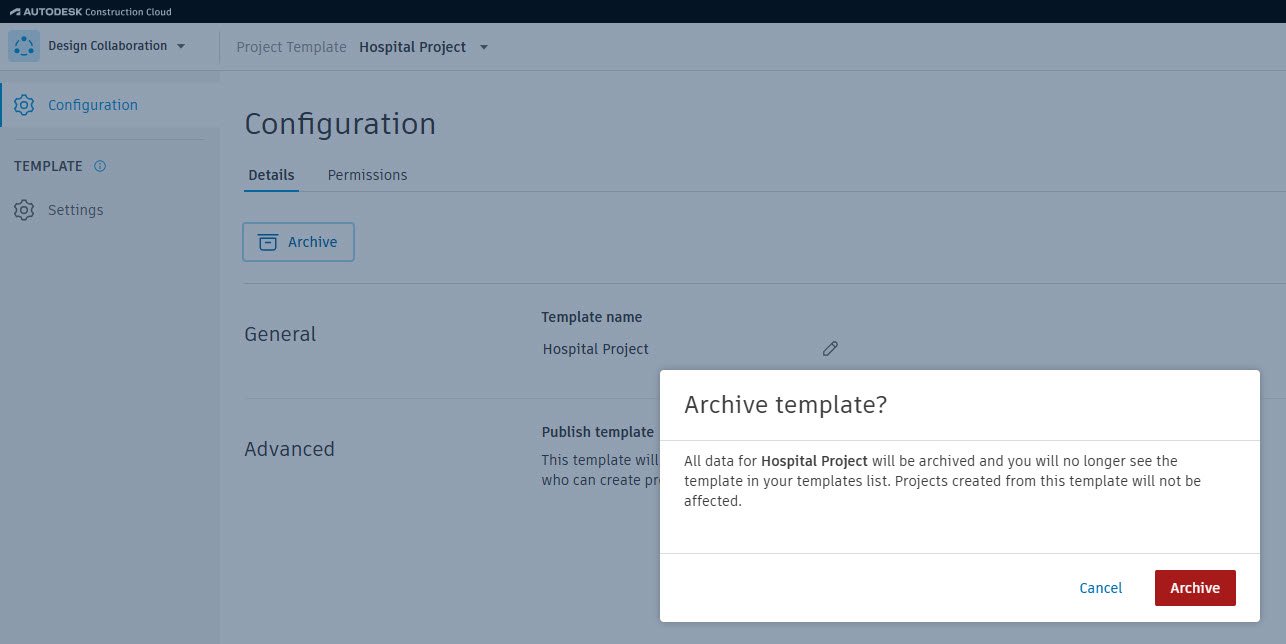
To archive a project template, click archive.
01:06
In the archive template dialog box, click archive.
01:10
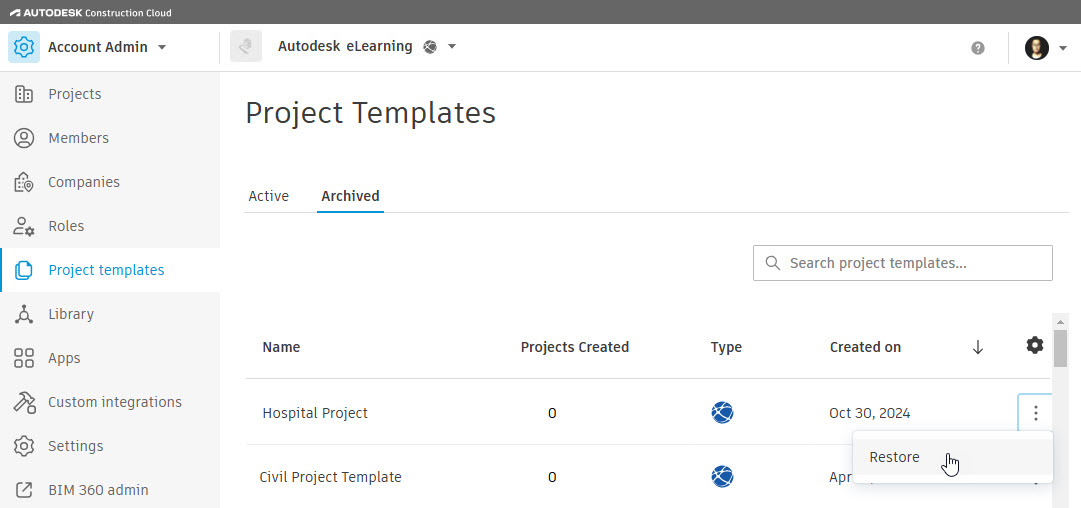
To restore the project template, go to the Account Admin product
01:15
project templates tool,
01:17
click on the archive tab, and find the project template.
01:22
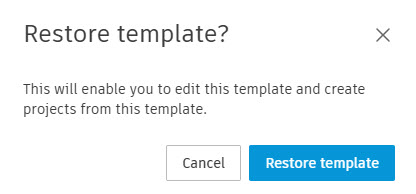
Click on the ellipses and select restore.
01:26
In the restore template dialog box, click restore template.
01:31
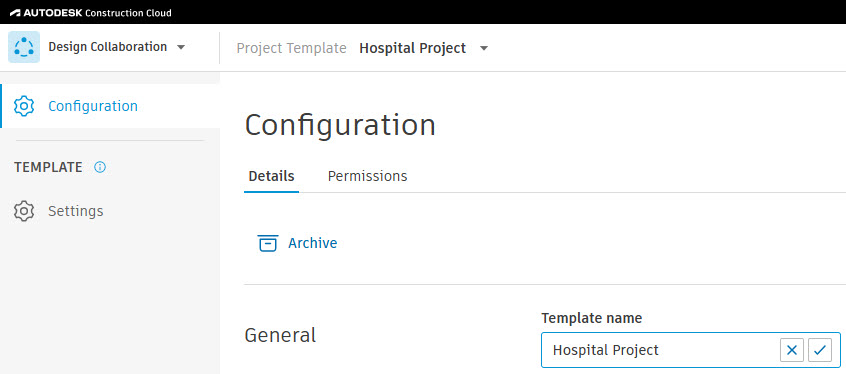
If you want to change the name of the template, return to Design Collaboration,
01:36
click the pencil icon next to the template name in the general section,
01:41
edit the template name, and click the checkmark icon when finished.
01:46
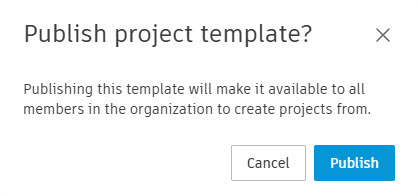
When you are ready to publish the project template,
01:49
go to the advanced section and click the publish template toggle.
01:53
In the published project template dialog box, click publish.
01:59
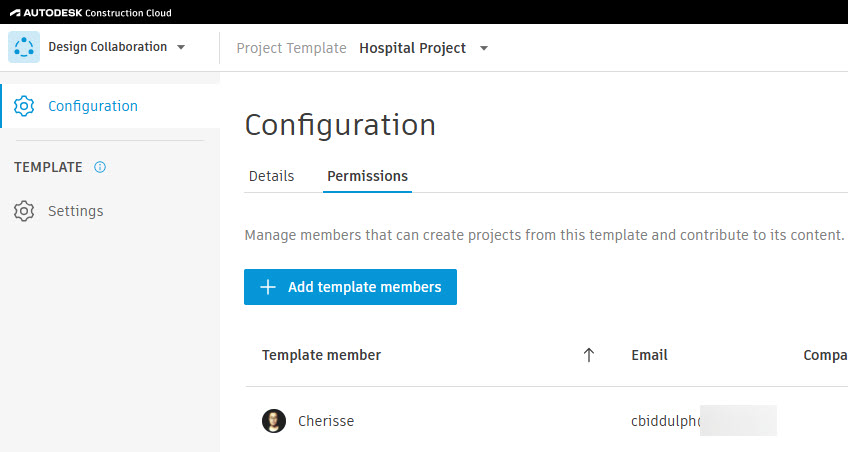
The permissions tab allows you to add, edit, or remove
02:03
template members who can create a project using this template.
02:07
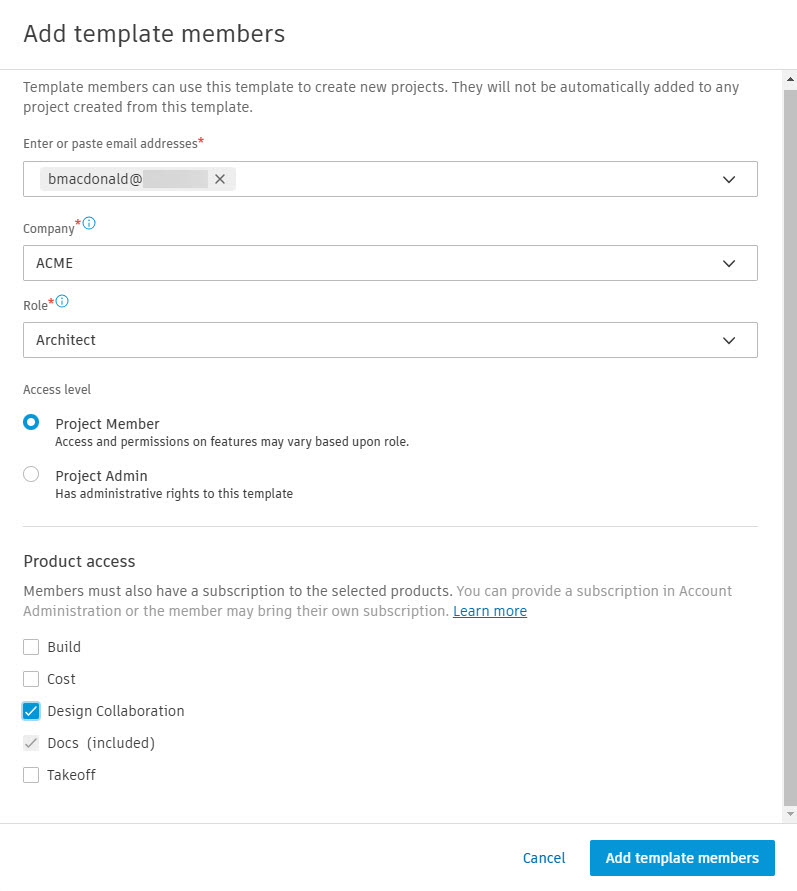
To add template members, click add template members.
02:11
In the add template members
02:12
dialog box, enter members' email address,
02:16
then select the company role access level and product access.
02:22
When finished, click add template members.
02:25
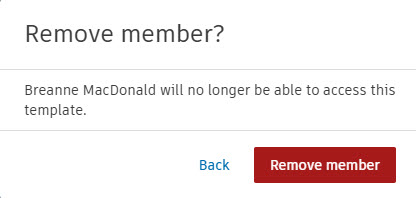
If you want to edit or remove a template member from a project template,
02:29
click on the template member's name.
02:32
In the template members fly out,
02:34
edit any of the user settings or click the ellipsis
02:38
in the upper right corner and select remove member.
02:42
Then in the remove members dialogue box, click remove member.
02:48
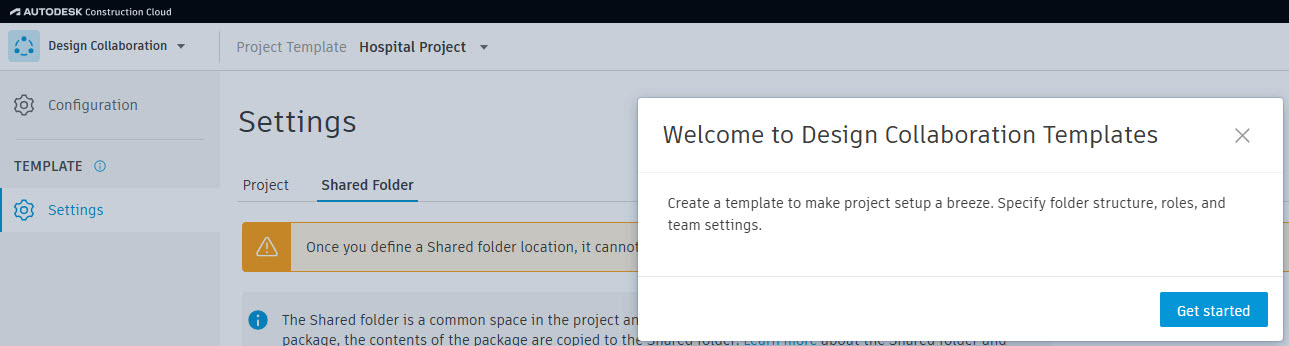
The settings tool allows you to specify folder structure,
02:51
roles, and team settings for the project template.
02:55
When you select the settings tool for the first time in the template,
02:59
the welcome to Design Collaboration templates dialogue displays.
03:06
Under select shared folder location,
03:08
you can accept the default location which is the project files shared folder,
03:14
or you can specify a different folder by
03:16
clicking on the pencil icon to edit the location.
03:20
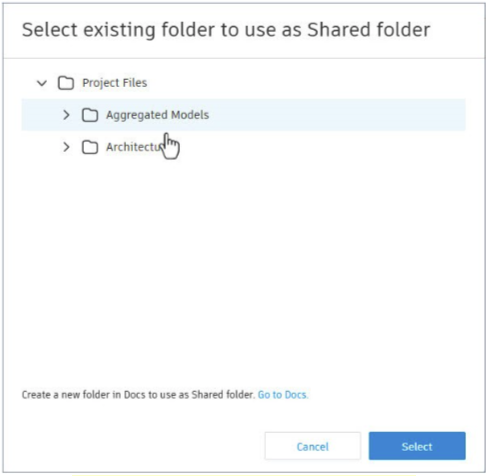
In the select existing folder to use as shared folder dialog box,
03:25
you can either expand the project files folder to navigate to a folder you want to use,
03:30
or click go to docs to create a new folder to use.
03:35
Once you select the folder, click select.
03:39
If you want to revert to using the default folder,
03:42
after selecting a different folder,
03:45
click use default location under select shared folder location.
03:51
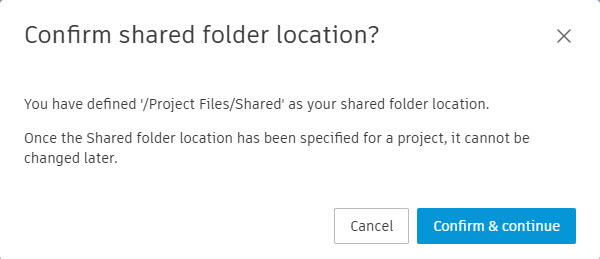
Click next in the lower right corner of the shared folder tab.
03:55
Then in the confirm shared folder location dialog box, click
03:59
confirm and continue.
04:02
Let's review the ways that you can configure teams.
04:06
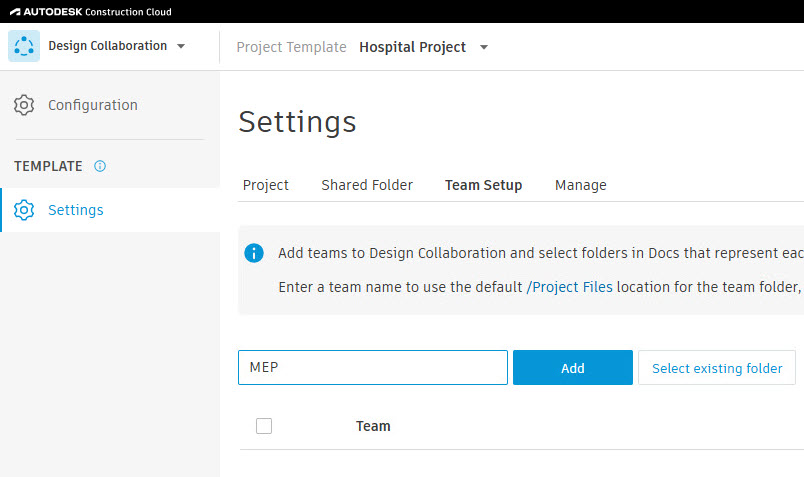
For the first method,
04:08
you will set up a project files subfolder. When creating teams,
04:12
click in the box that says enter a team name and enter a name,
04:20
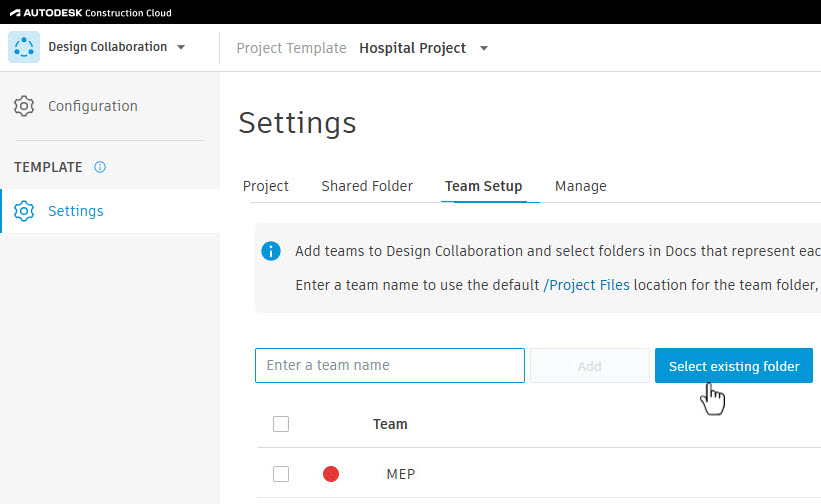
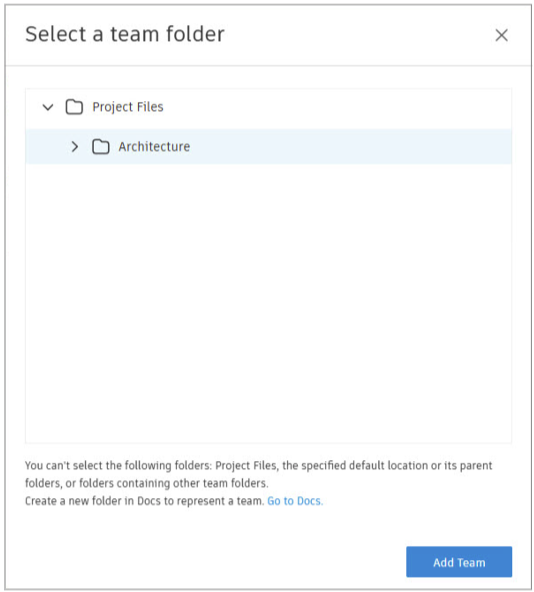
The second method is creating a team from an existing folder.
04:24
Click select existing folder.
04:27
In the select a team folder dialog box,
04:30
expand project files and select the folder you want to use to create a team.
04:38
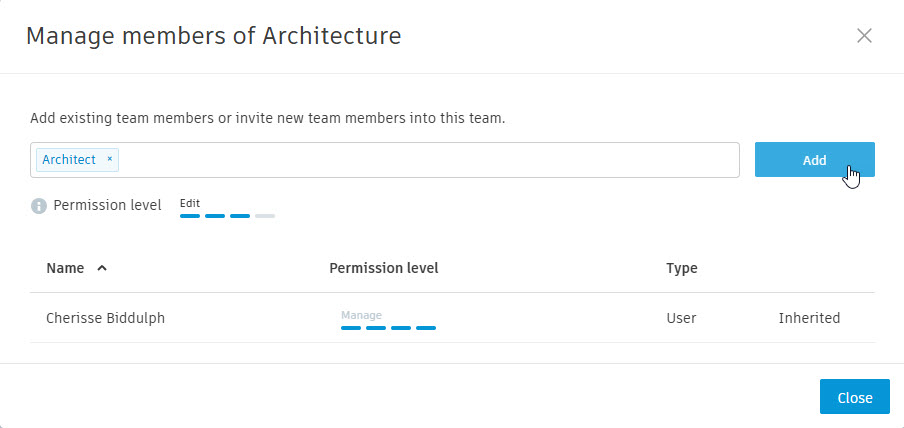
To add team members to a team,
04:40
remember that the role, companies, and members
04:43
must already be established in the project template.
04:47
In the members column,
04:49
click on the number for the team name you want to add members to.
04:53
Alternatively, you can check the check box next to the team name
04:57
and click manage team members at the bottom of the team's list.
05:02
In the manage members dialogue box, you can enter a name, company, or role,
05:08
then click on permission levels to expand the options.
05:11
Select a level of permission and click add.
05:15
After members are added, you can edit their permission or remove them by clicking
05:21
Click close when you are finished adding members.
05:26
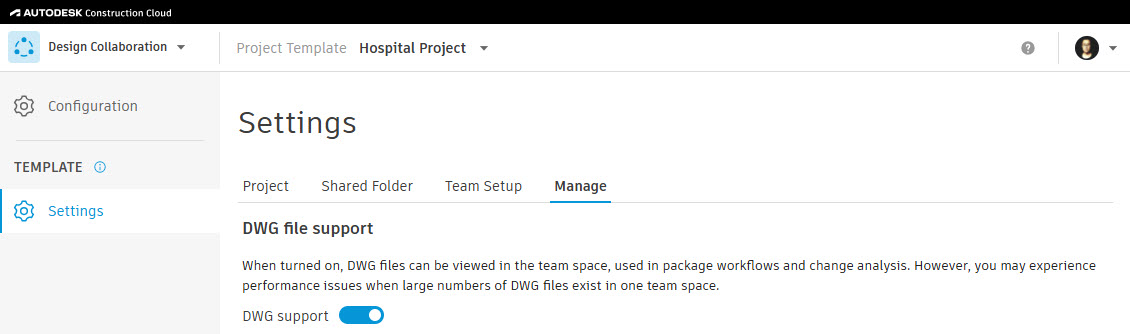
You can also manage DWG support for a project template,
05:30
select the manage tab, and in the DWG file support section,
05:35
toggle DWG support on or off.
05:39
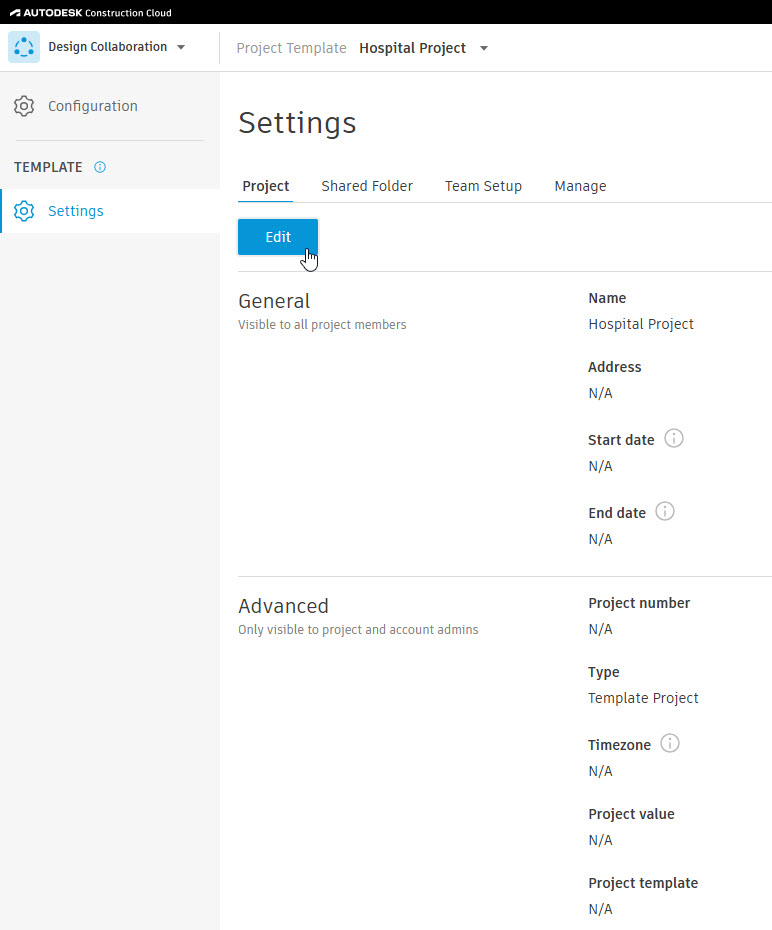
In the settings tool,
05:40
there is also the project tab which contains
05:43
the general and advanced project template information.
05:47
This will be used when creating a new project.
05:50
You can click edit to edit each category or leave it as is
05:54
and let the project administrator who creates a project using this template
05:58
fill it out themselves.