00:03
Administrators can create project templates
00:05
with typical configurations of members,
00:09
permissions, teams and entitlements
00:12
that can be used in multiple projects. For quick set up
00:16
account admins can then give access to the templates to project
00:20
admins who can modify the templates and create projects from them.
00:25
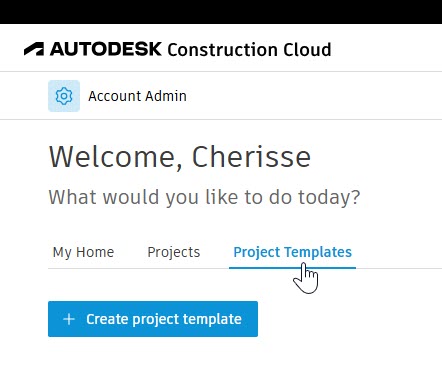
Let's look at creating a new project template in
00:28
the Autodesk Construction Cloud. From the my home page,
00:32
click on the project template tab.
00:35
You can also access project templates from the
00:38
Account Admin product and select project templates.
00:43
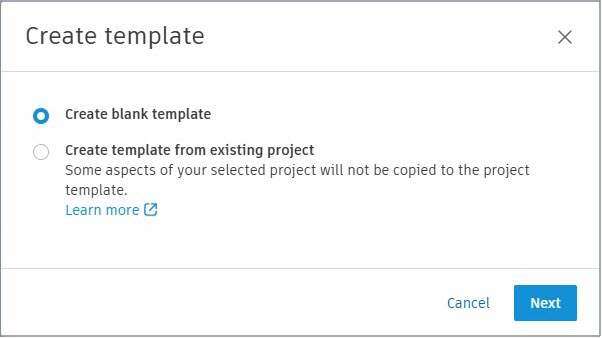
Click create project template.
00:46
In the create template dialog box, select create blank template, then click next.
00:53
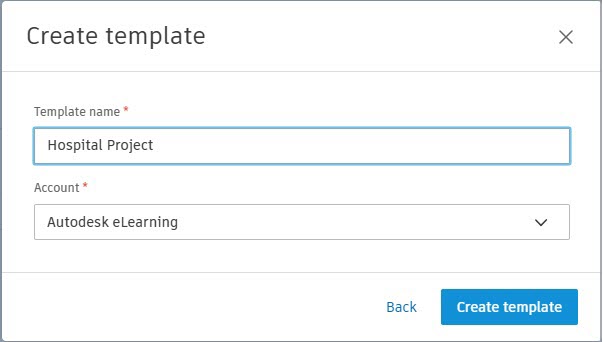
Enter a template name and expand account drop down list to
00:57
select the hub for which you are creating a template.
01:01
Then click create template.
01:03
Note that the template that is created is
01:06
only available for use in the selected account.
01:10
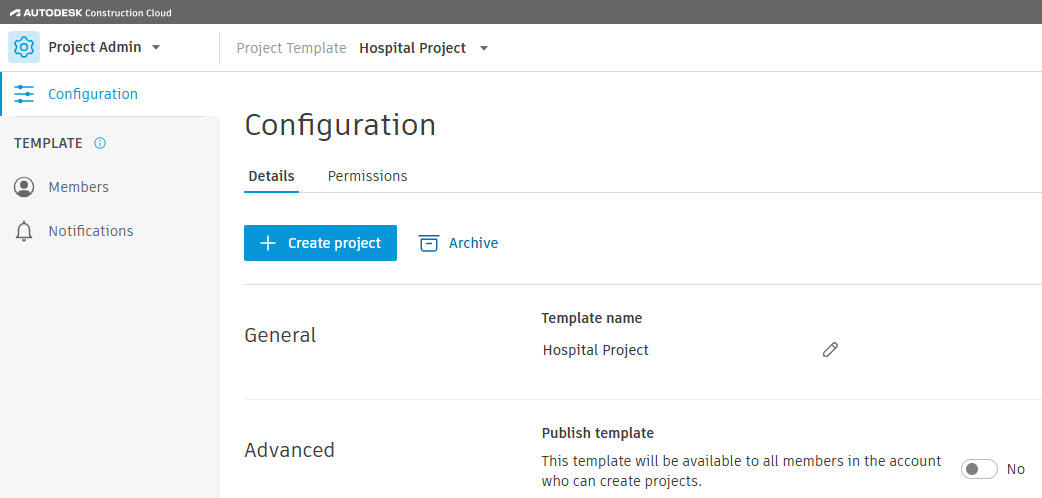
The configuration page will display,
01:12
giving you access to the details and permissions tabs.
01:16
Let's take a look at what you can do in each of these tabs.
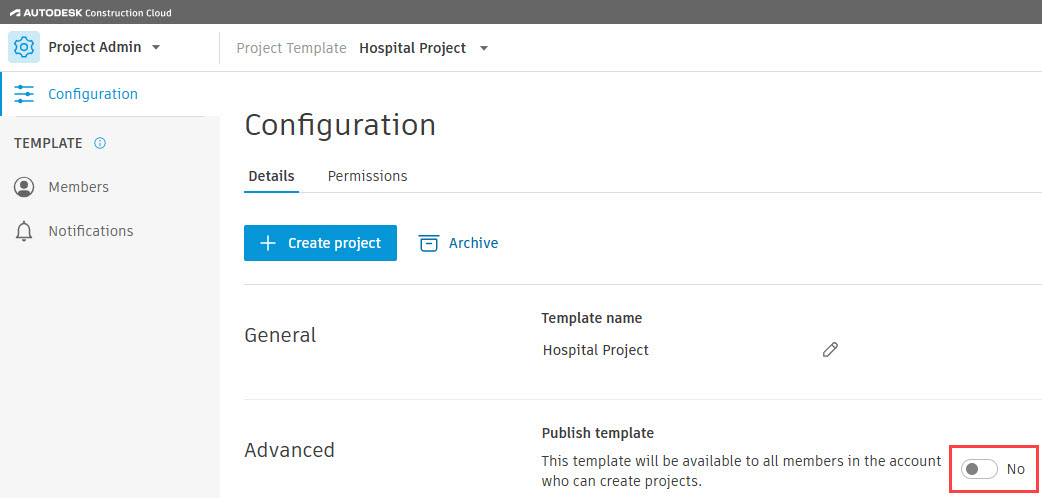
01:20
The details tab allows members to create a project from the project template,
01:25
archive the project template,
01:28
rename the project template
01:30
and publish the project template
01:32
so anyone in the hub can use it to create a new project.
01:35
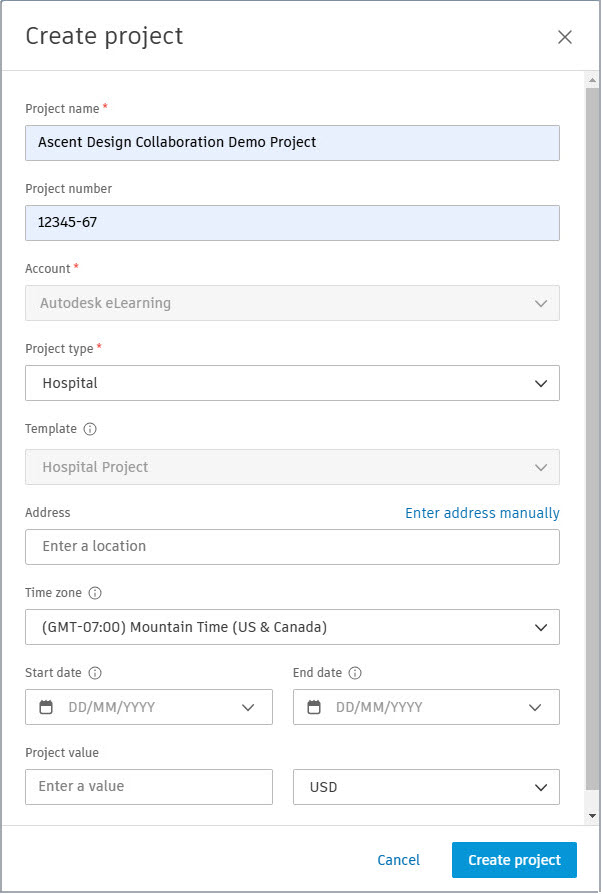
To create a project from the project template,
01:38
verify that the correct project template is selected at the top of the page,
01:43
then click create project.
01:46
In the create project dialog box,
01:48
enter all information necessary for your project and click create project.
01:55
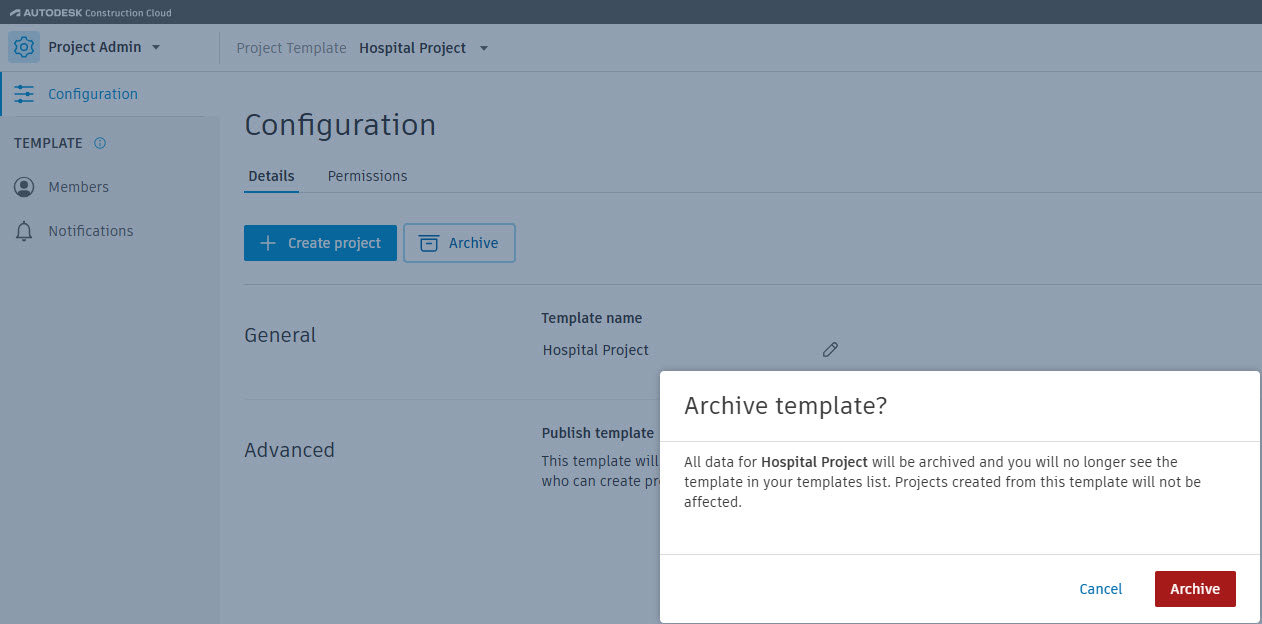
To archive a project template,
01:59
In the archive template, dialogue box, click archive.
02:04
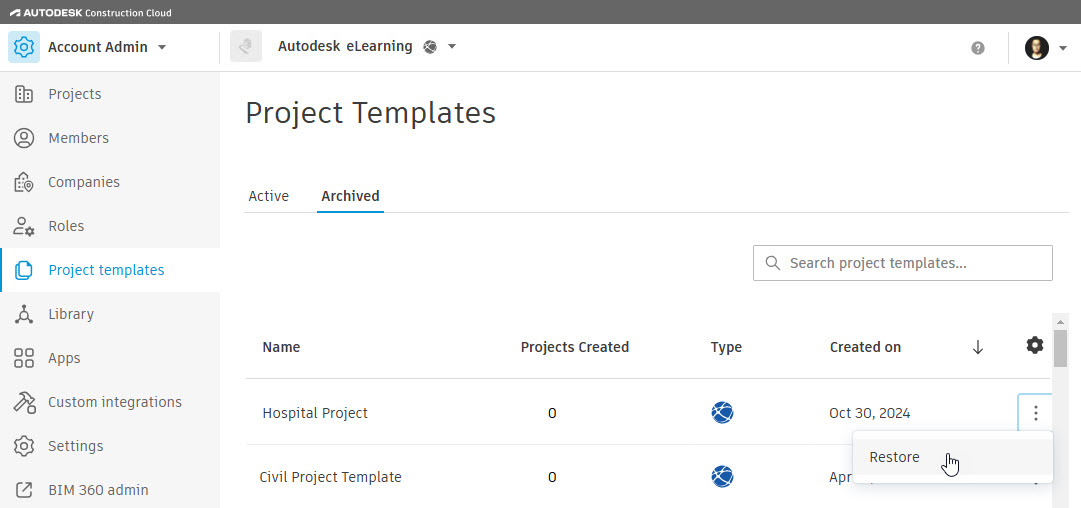
To restore the project template,
02:06
verify you are in the account admin product project templates tool,
02:12
click on the archive tab and find the project template.
02:16
Click on the ellipsis and select restore.
02:21
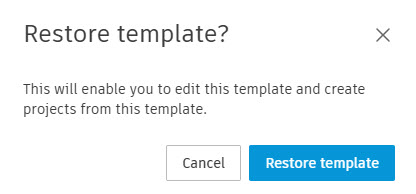
In the restore template dialog box, click restore template.
02:26
If you want to change the name of the template,
02:29
click the pencil icon next to the template name in the general section.
02:34
Edit the template name and click the checkmark icon when finished.
02:40
When you are ready to publish the project template so that all
02:43
members in the account that can create projects can see the template,
02:48
go to the advanced section and click the publish template toggle
02:52
to change it to yes. In the publish project template
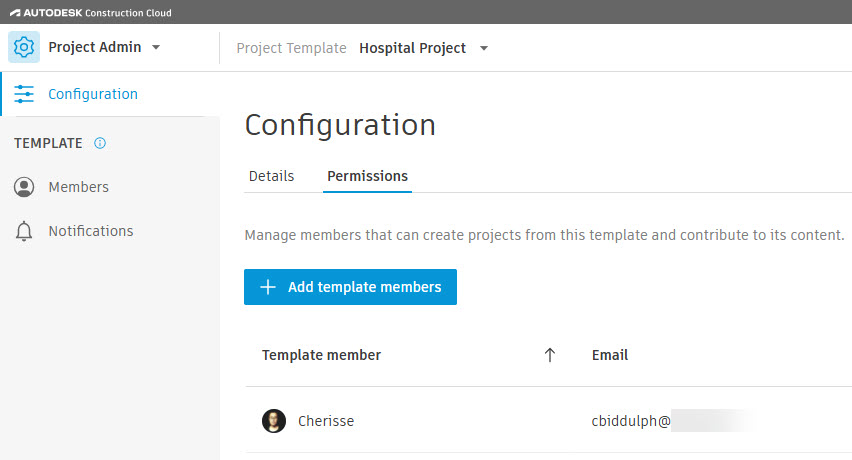
02:60
The permissions tab allows you to add, edit, or remove
03:03
template members who can create a project using this template
03:07
or modify the template.
03:09
To add template members, click add template members.
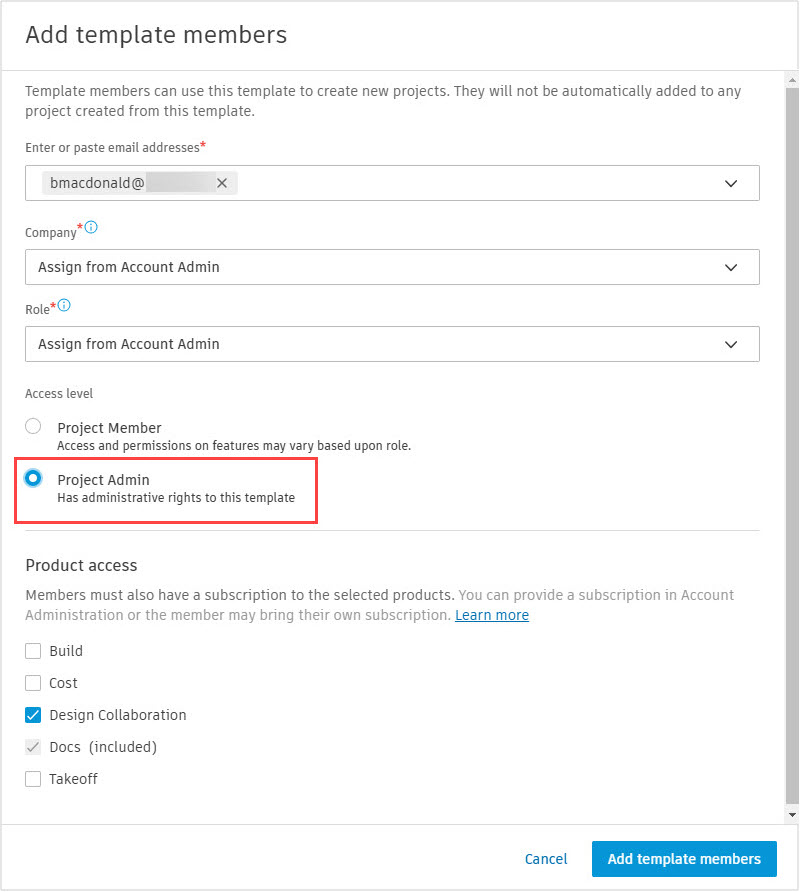
03:14
In the add template members dialogue box, enter the member's email address,
03:18
then select their company and role.
03:21
You can also accept the assign from account admin option
03:25
and the members assigned company and role will
03:28
carry over from their account settings.
03:31
In the access level section,
03:33
set the member's access level.
03:35
If you want to allow the member to modify the project template, select project admin.
03:42
Next, set the product access option to automatically
03:45
give the member access to the checked products,
03:48
when a project is created using this template.
03:52
When finished, click add template members.
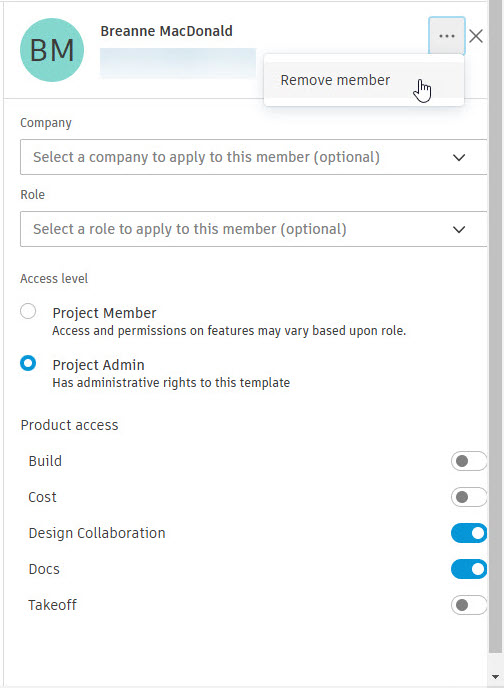
03:56
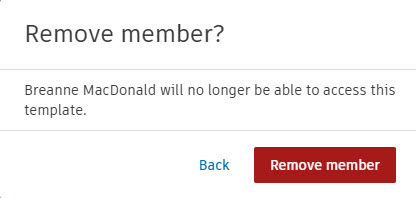
If you want to edit or remove a template member from the project template,
03:60
click on the template member's name
04:03
in the template member's flyout,
04:05
edit any user setting, or click the ellipsis in
04:08
the upper right corner and select remove member.
04:12
Then in the remove member dialog box, click remove member.