Connecting sloped piping in Revit - Exercise
In this practice, you are going to connect pipes into sloped piping using several different techniques including modifying the length of a pipe, adding a pipe fitting and copying a group of pipes to a new location, and then aligning them for the correct location.
Task 1: Connect pipes by lengthening a pipe
- Open the practice file 001-Small Medical Center-Connect Slope.rvt.
- Open the 01 Ground Floor Sanitary Plan and Exam Room Plumbing Section and tile them.
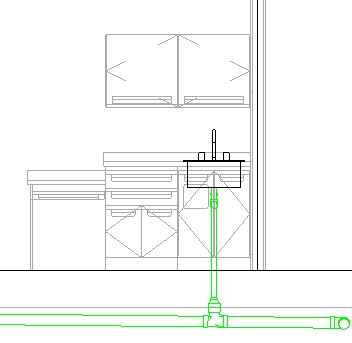
- In the section, zoom in on the sink on the right.
- Lengthen the vertical pipe so it touches the sloped pipe. The intersection automatically cleans up just like any other connection and applies the correct fitting. So, in this case, there is no difference between working with sloped pipe and pipes with no slope.
- Pan over to the next set of sinks. You can see that the sinks are already setup with piping including a p-trap for each of the sinks.
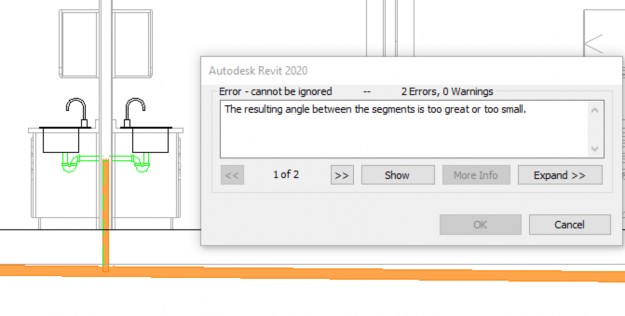
- Lengthen this vertical pipe to touch the sloped pipe and you get an error that cannot be ignored as shown below. Read both errors and then click Cancel.
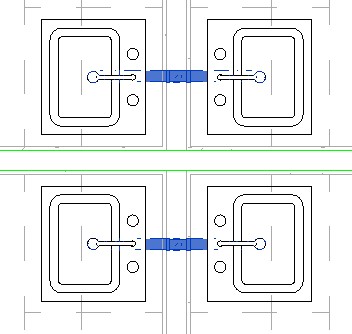
- In the plan view, zoom in on the same set of four sinks so you can see that there are two sets of vertical pipes that need to be connected.
- Save the project.
Task 2: Use a pipe fitting to connect the pipes
- Continue working in the plan view.
- In the Systems tab > Plumbing & Piping Panel, click Pipe Fitting.
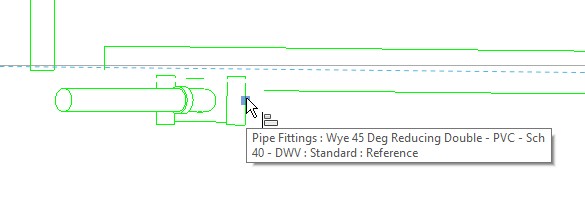
- In the Type Selector, select Wye 45 Deg Reducing Double – PVC: Standard.
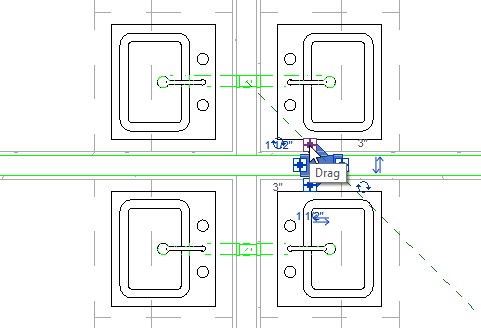
- Place the fitting on the sloped pipe but you can see it is going the wrong way, as shown below.
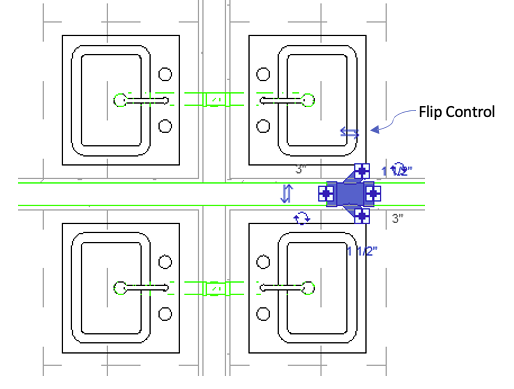
- Press Modify to end the command and then select the fitting again. Then click the Flip control, shown above, to have it face the other direction.
- In the section view, you can see that the fitting follows the slope of the pipe.
- Working in the Plan view, add a 45-degree Reference Plane. In the Systems tab > Workplane panel, click Ref Plane.
- Select the endpoint of the vertical pipe shown below and draw the reference plane 45 degrees from this, as shown below.

- Select and gently drag the fitting to the reference plane, as you can see below.
- Right-click on the same control on the angled part of the fitting and select Draw Pipe.
- In the Modify | Place Pipe tab > Sloped Piping panel, click Slope Off.
- Draw a short pipe coming off the end of the fitting but do not try to connect to the other pipes.
- Repeat the process on the other side, as shown below.

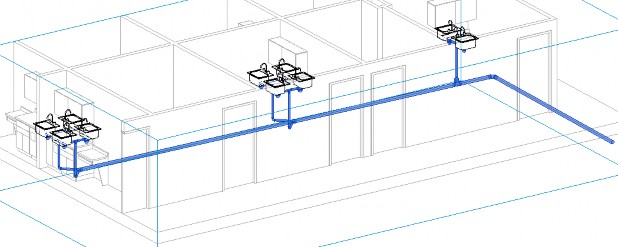
- Open the 3D Plumbing section view. This 3D view has a section box around it so you are just seeing this part of the building.
- Zoom, Pan, and rotate the view so you can see the fitting and pipes as well as the pipes coming from the sink.
- Start the Trim/Extend to Corner tool and use it to create the connection of the pipe from the Wye and the vertical pipe, as shown below.
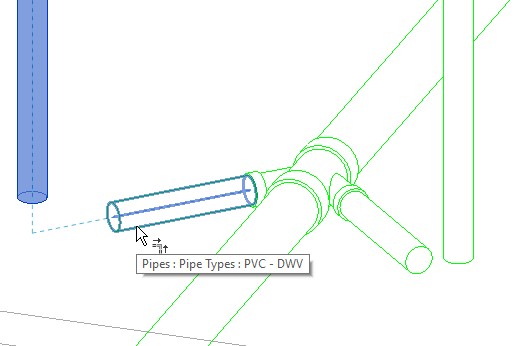
If you are not getting the pipes to connect then the fitting isn’t in the exact place. Undo back and move the fitting again and verify that it is aligned directly with the ref plane.
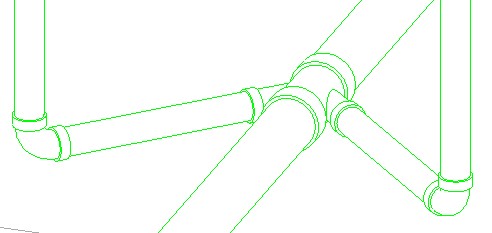
- Repeat the process on the other side. The connections should be similar to the example below.
- Save the project.
Task 3: Copy and align pipes
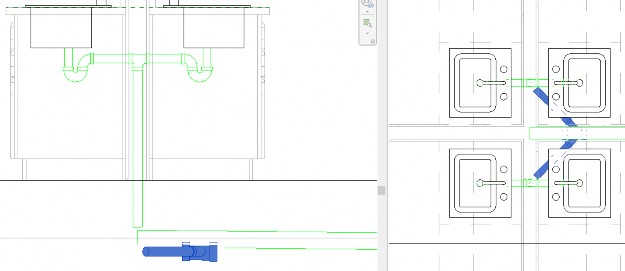
- In the plan view, select the Wye fitting and the pipes connected to the Wye but not the connection to the sinks.
- Copy these elements from the corner of one of the sinks to the corresponding corner of the sink in the other rooms. This looks fine in plan but not quite right in 3D or section. You can see that the Copy command did not recognize the slope of the pipe.
- Use the align tool to get the fitting in place as shown below.
- In the plan view, drag the end of the horizontal pipe back to the beginning of the Wye.
- In the 3D view, use Trim/Extend to corner or extend the horizontal pipes to connect the pipes.
- Hover over one of the pipes and press <tab> to verify that all the pipes are cleaning up and working as one, as shown below.
- Save the project.


