Working with interference checking in Revit
Interference checking - Exercise
Task 1: Run an interference check and export the report
- Open the practice file 001-Small Medical Center-Interference Check.rvt.
- In the 3D HVAC view review the pipes and ducts showing in this view.
- Open the Coordination > 3D Views > 3D Ground Level Coordination view. You can see that the lights are also visible as are pipes for plumbing. This is a 3D view shown in Top mode, but you can also rotate this view.
- Open the Coordination > 3D Views > 3D Second Floor Coordination view.
- In the Collaborate tab > Coordinate panel, expand Interference Check and click Run Interference Check.
- In the Interference Check dialog box, review the files you can chose from, as shown below, and the categories that you can test.
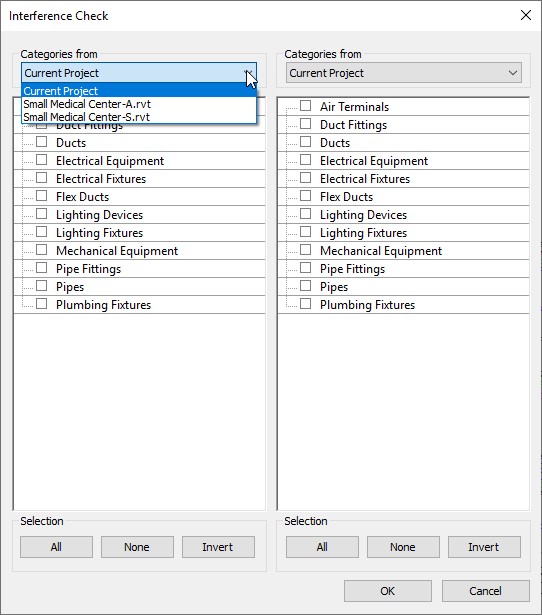
- Click Cancel because you do not want to check all potential clashes. This would take too much time.
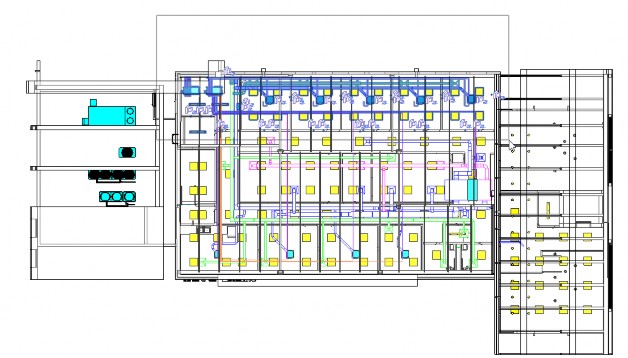
- Draw a window selection box around some of the elements along the back of the building, as shown below.
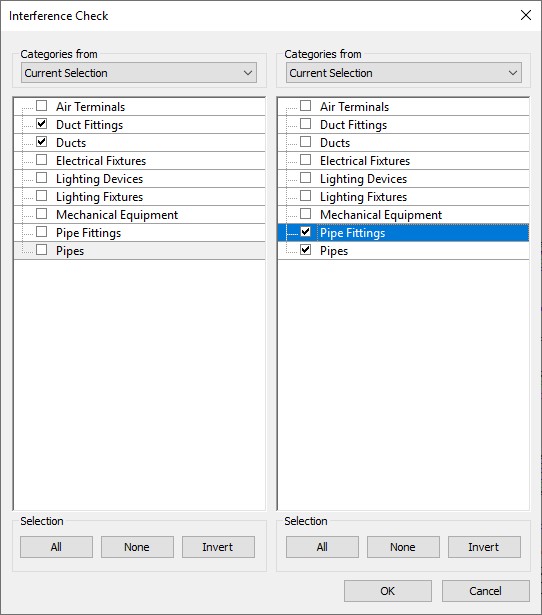
- In the Collaborate tab > Coordinate panel, expand Interference Check and click Run Interference Check. You will see that you are just prompted to check Categories from the Current Selection.
- On the left side of the dialog box, select Duct Fittings and Ducts and on the right side select Pipe Fittings and Pipes, as shown below, and then click OK.
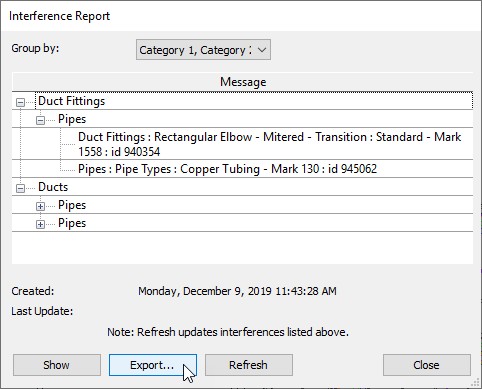
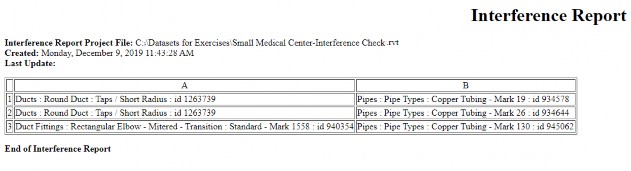
- In the Interference Report dialog box, review the clashes and then click Export…, as shown below.
- Save the html file to the exercise folder using the default name.
- Close the Interference Report dialog box.
- In Windows Explorer, open the Small Medical Center-Interference Check.html file and review it.
- Return to Revit.
- Save the project.
Task 2: Identify and correct interferences - Duct fitting and pipe
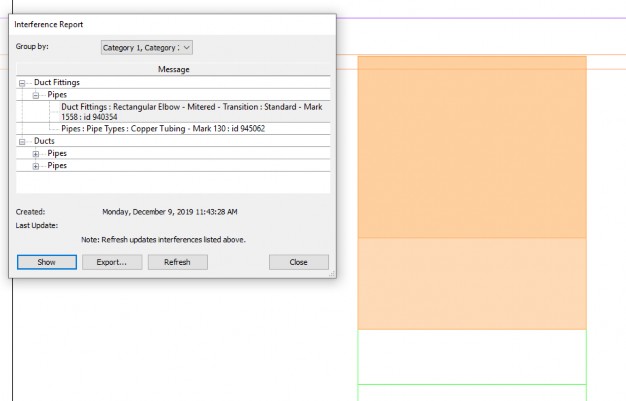
- In the Collaborate tab > Coordinate panel, expand Interference Check and click Show Last Report. This reopens the Interference Report.
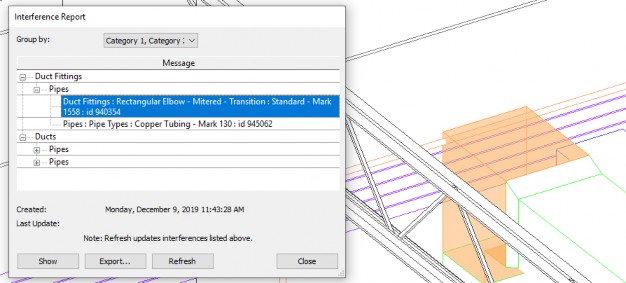
- Expand the first interference and select the Duct Fitting information. Then, click Show. This zooms in on the fitting, as shown below.
- Zoom out and rotate around so that you can see the fitting and the pipe both in the 3D view. Select the elements to see each highlight in the view, as shown below.
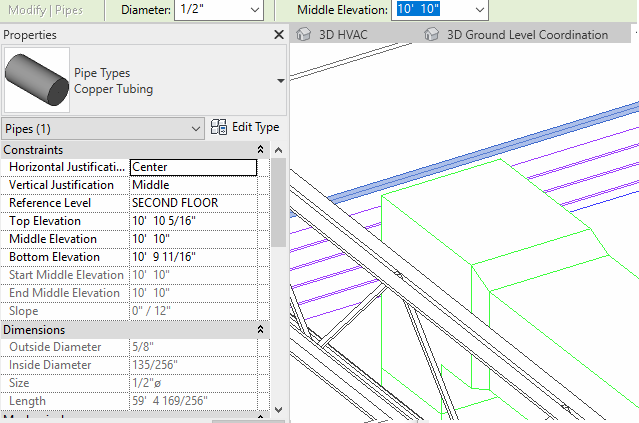
- Move the Interference Report over if needed and select the pipe that is running through the duct fitting.
- In the Options Bar, change the Middle Elevation of the pipe to 10'-10". This raises the pipe above the fitting, as shown below.
- In the Interference Report dialog box, click Refresh. The report updates and shows that the interference is no longer present.
- Save the project.
Task 3: Identify and correct interferences - Ducts and parallel pipes
- Switch to the 3D HVAC view so you are just seeing the ducts, pipes, and other HVAC equipment.
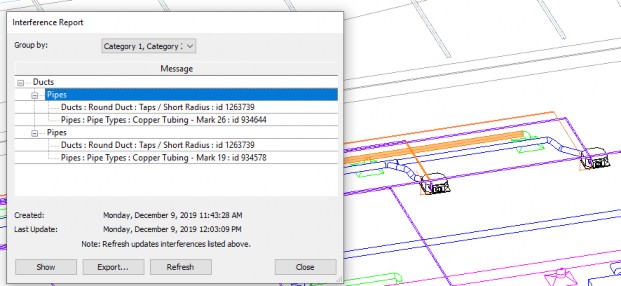
- In the Interference Report dialog box, select and show the other interferences, as shown below. These pipes are part of a run of parallel pipes and therefore the entire set needs to be modified.
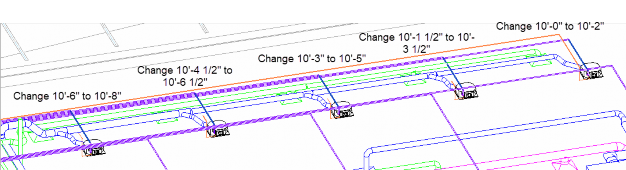
- Select the pipe to the far left, as shown below, and change the Middle Elevation of the pipe from 10'-6" to 10'8".
- Continue down the line of pipes, adding 2" to each elevation, as shown below.
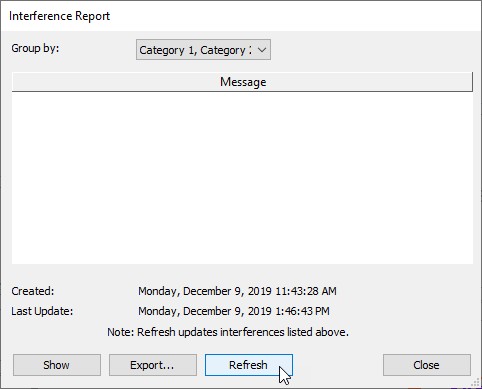
- When you are finished updating the height of the pipes, in the Interference Report dialog box click Refresh.
- All the interferences in this selection are corrected, as you can see below.
- Close the dialog box.
- Save the project.


