Creating and modifying parallel pipes in Revit
Parallel pipes - Exercise
Task 1: Set up and run parallel pipes
- Open the practice file 001-Small Medical Center-Parallel Pipes.rvt.
- Open the Mechanical > HVAC > Floor Plans 02 2nd Floor HVAC Plan view. We are focusing on the Liquid Refrigerant lines and want the Gas Refrigerant lines turned off in this view for clarity.
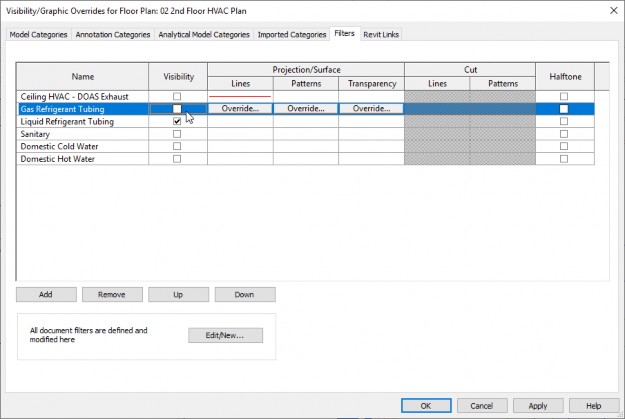
- Type VG to open the Visibility/Graphic Overrides dialog box.
- On the Filters tab, clear the check from the Visibility column next to gas Refrigerant Tubing, as shown below, and click OK.
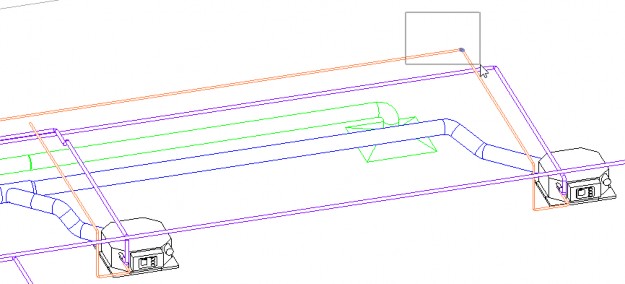
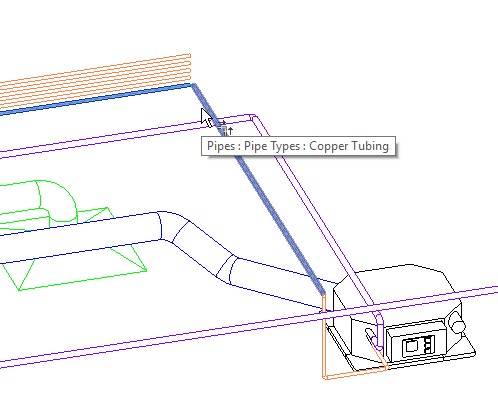
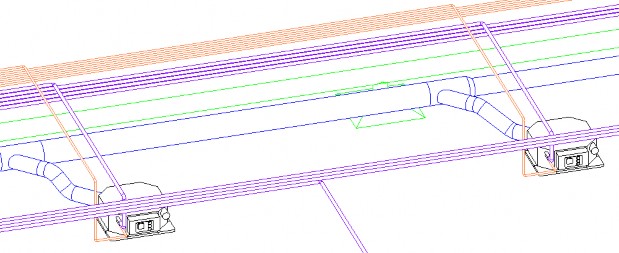
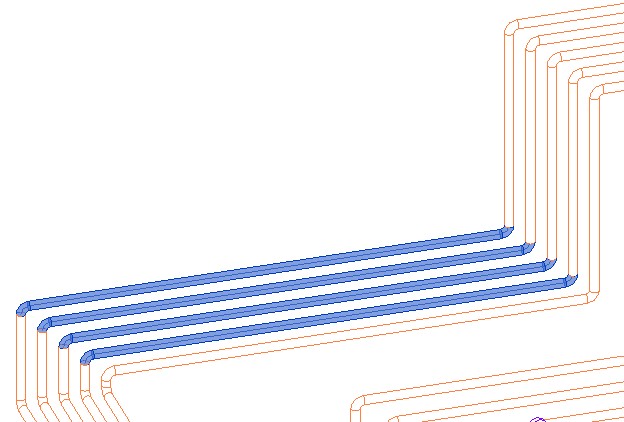
- We are going to add Liquid Refrigerant lines using parallel pipes following the existing run of pipe highlighted below.

- The parallel pipes need to connect to the units shown above.
- Return to the 3D HVAC view and zoom in on the area close to the air conditioner on the far right of the group.
- Delete the elbow shown below. This will give you more flexibility in checking the pipe and then modifying it as needed.
- In the Systems tab > Plumbing & Piping panel, click Parallel Pipes.
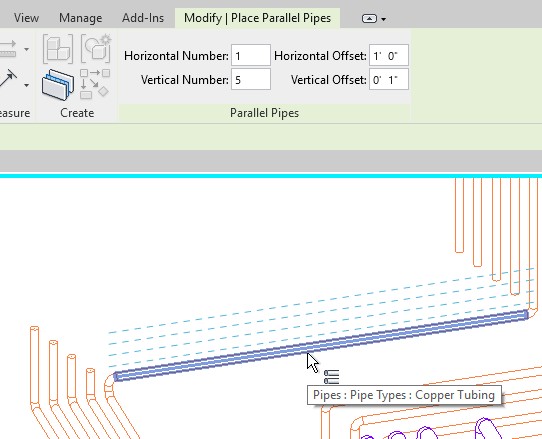
- In the Modify | Place Parallel Pipes tab, set up the array of the pipes. Set the Vertical Number to 5, the Horizontal Number to 1, and the Vertical Offset of 1 ½". The number of parallel pipes includes the existing pipe run.
- Zoom out so you can see the entire pipe run from Air Conditioning Unit to controller.
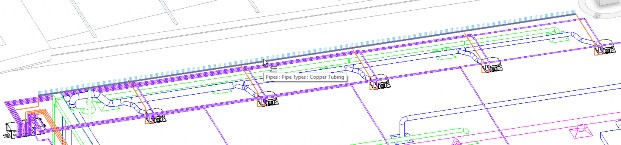
- Hover over the main pipe run and you can see where the parallel pipes will be placed, as shown below.
- Then press <Tab> so that the entire pipe run is selected, as shown below.
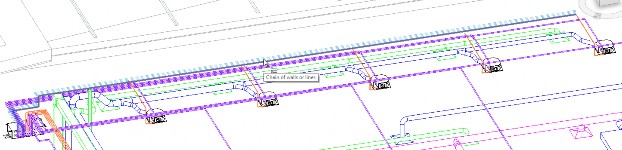
- Click to select the pipe run and place the parallel pipes.
- Click Modify to end the command.
- Save the project.
Task 2: Clean up parallel pipe intersections
- Zoom in and clean up the intersection of the original pipe run using Trim/Extend to Corner, as shown below, so that the elbow is added back into the run.
- Pan over to the next unit.
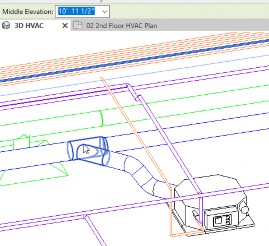
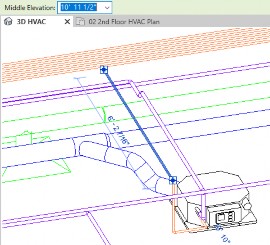
- Before using Trim/Extend to Corner, identify the Middle Elevation of the appropriate parallel pipe, as shown in the first image below. Then change Middle Elevation of the connecting pipe to match, as shown in the second image.
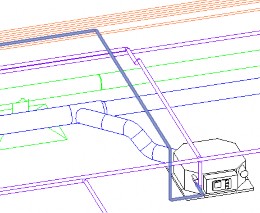
- Then, use Trim/Extend to Corner to clean up the intersection, as shown below.
- Repeat the process down the line, setting the Middle Elevation and then using Trim/Extend to Corner to clean up the intersection, as shown for the final two units below.
- Save the project.
Task 3: Modify parallel pipe distances
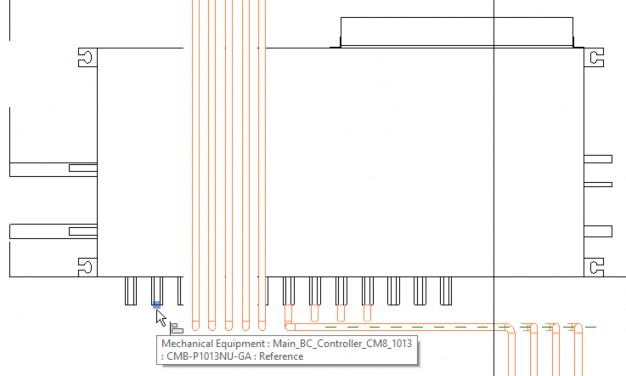
- Pan over and zoom in on the controller.
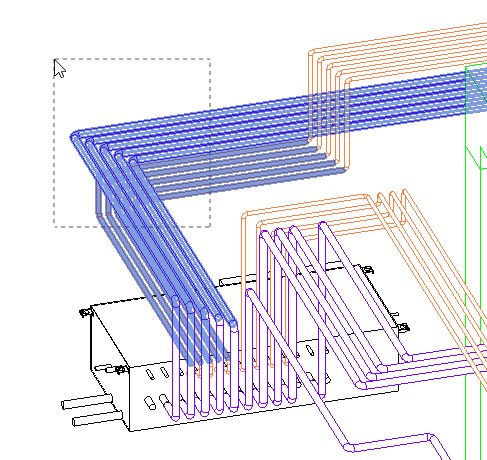
- Use a crossing window to select the parallel pipes shown below.
- In the Collaborate tab > Coordinate panel, expand Interference Check and select Run Interference Check.
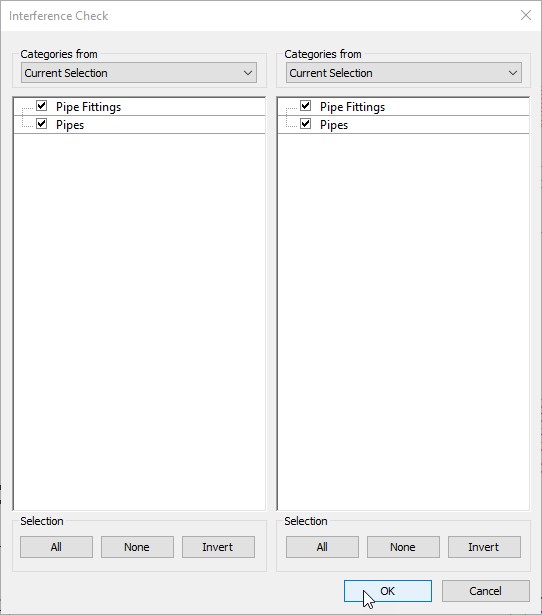
- In the Interference Check dialog box, you can see that you can only check Pipes and Pipe Fittings because that is all you have selected, as shown below. Click OK.
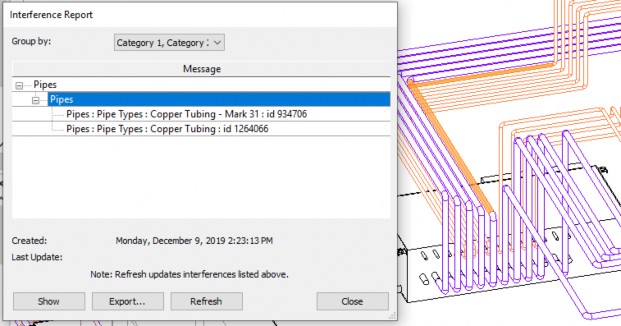
- You can see that there is one interference, as shown below. Two of the Gas and Liquid Refrigerant lines overlap.
- Move the Interference Report dialog box over to the side.
- Select the Gas Refrigerant pipes in this area and temporarily hide the elements (not the category because that would turn off all the pipes).
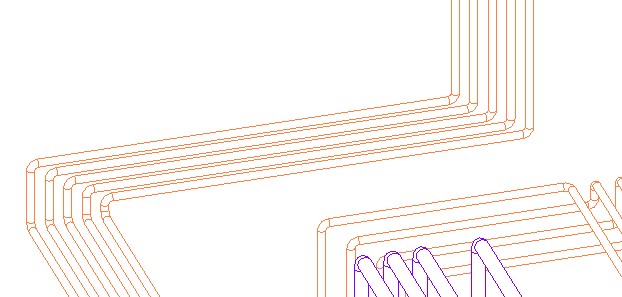
- Erase the pipes and elbows that need to be relocated, as shown below.
- In the Systems tab > Plumbing & Piping panel, click Parallel Pipes.
- In the Modify | Place Parallel Pipes tab, verify that the Vertical Number is 5 but now change the Vertical Offset to 1" (The original 1 ½" is too far apart for this location).
- Click on the remaining pipe, as shown below, to place the parallel pipe.
- Use Trim/Extend to Corner to clean up and add the new elbows, as shown below.
- Reset Temporary Hide/Isolate to display the Gas Refrigerant Lines.
- In the Interference Report dialog box, click Refresh the Interference. The pipes are no longer interfering with each other. Close the dialog box.
- Save the project.
Task 4: Align parallel pipe to controller connections
- Return to the 02 Second Floor HVAC plan.
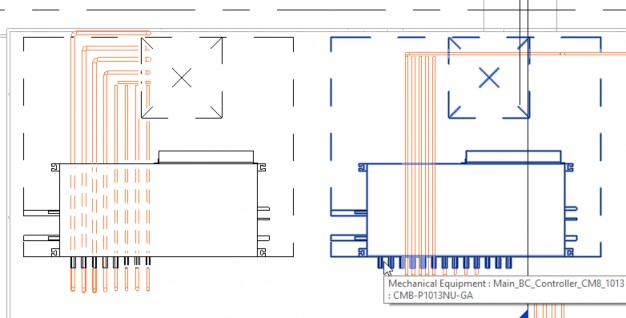
- Zoom in on the controller on the right, as shown below. You can see that the parallel pipes are not directly in line with the output connections.
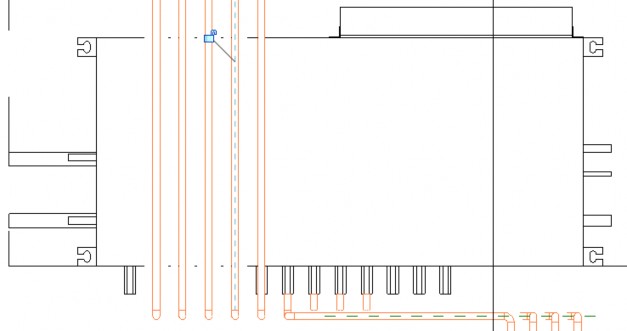
- Start the Align command and align the leftmost pipe to the reference point on controller shown below.
- Repeat the process until all the pipes are aligned, as shown below.
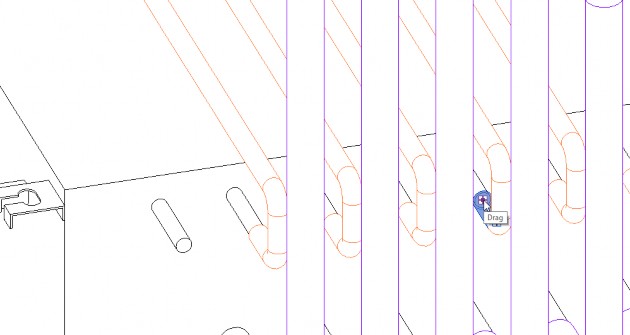
- Return to the 3D HVAC view and slightly drag each of the ends of the pipes to connections, as shown below. They are basically in place but need to be connected.
- Zoom out and verity that the parallel pipes are all working as a unit.
- Save the project.


