Initiate Revit cloud worksharing for a model

00:01

Revit cloud worksharing

00:02

enables users to collaborate seamlessly

00:06

on projects with team members across multiple firms.

00:10

To initiate Revit cloud worksharing,

00:12

you will first start a new model or you can open an existing one.

00:17

Then, in the collaborate tab manage collaboration panel, select Collaborate.

00:24

In the collaborate dialog box, select in the cloud and click OK.

00:30

In the save as cloud model dialog box,

00:32

verify you are in the correct hub and project, select project files, and

00:37

then navigate to the appropriate sub folder in which to save your model.

00:42

Verify the file name and click save.

00:46

Click close in the save as cloud model dialog box to continue.

00:52

Notice that there are now works sets that can be set up

00:55

according to the work that will be done within the project.

00:60

Alternatively,

01:01

if the model is an existing file-based workshared

01:04

model, which is collaborated on through a local area network,

01:09

you will click

01:10

collaborate in cloud and proceed to verify the hub, project,

01:14

and folder to save your model to the cloud.

01:18

Once this is done,

01:19

the model is stored on the cloud for other team members to access and work on.

01:25

Let's take a look at the three ways to upload a Revit non-workshared model.

01:31

Method one:

01:32

open a non-workshared model from the file tab,

01:36

expand save as, and click cloud model.

01:41

In the save as cloud model dialog box,

01:43

verify that you are in the correct project

01:46

and navigate to the desired project file subfolder.

01:50

Verify the file name and click save.

01:54

Method two:

01:56

open a file explorer window and select Autodesk

01:60

docs in the left hand pane.

02:03

Select the correct project folder and navigate to the desired project file

02:07

subfolder.

02:09

Srag the model and drop it into the desired folder.

02:15

On the Autodesk Construction Cloud website,

02:18

verify the model successfully copied to Autodesk Docs by selecting the

02:22

Docs product from the drop down list in the top left corner,

02:26

and navigate to the corresponding project files subfolder.

02:31

Method three:

02:33

on the

02:34

Autodesk Construction Cloud website,

02:36

navigate to the desired project files

02:38

subfolder, drag and drop the model into the subfolder.

02:44

Alternatively, click upload files.

02:48

In the upload files. Dialog box, click from your computer.

02:53

In the open dialog box, navigate to your Revit model and click open.

02:59

In the upload files

02:60

dialog box, click done and the upload will continue in the background.

03:05

To open a model, you can open them from the recent files page.

03:11

The icons in the lower left corner of the file thumbnail show that it is either a Revit

03:17

cloud model,

03:19

a locally saved model that will have no icon,

03:23

a Revit

03:23

cloud workshared model,

03:26

and a local area network central model.

03:29

To open a Revit cloud workshared model, it is best to open from the Autodesk Docs page.

03:35

This allows you to verify if it's the most recent model.

03:39

Cerify the hub and project name are correct

03:42

and navigate to the correct project file sub folder,

03:45

and click on the file name link to open the model.

03:49

When the model has changes to share with the rest of the team,

03:52

you need to synchronize with central by going to the collaborate tab,

03:57

synchronize panel,

03:59

expand your options,

04:01

and click synchronize now.

04:03

This synchronized your design changes without relinquishing

04:07

any work sets or borrowed elements.

04:10

Select synchronize and modify settings,

04:13

and this opens up the synchronize with central dialog box.

04:18

Check the available check boxes to return

04:21

borrowed elements or user created worksets,

04:24

add a comment if applicable and click OK.

04:29

To open a Revit

04:30

cloud model,

04:31

which is a non-workshared model,

04:33

from the Revit home screen,

04:35

click on recent files,

04:37

and click on the model with the cloud model icon.

04:41

To open a Revit model that was dragged and dropped from a file explorer window,

04:47

within Revit, click open

04:49

and navigate to Autodesk docs. Navigate to the project and project file sub folder

04:55

and open the model.

Video transcript

00:01

Revit cloud worksharing

00:02

enables users to collaborate seamlessly

00:06

on projects with team members across multiple firms.

00:10

To initiate Revit cloud worksharing,

00:12

you will first start a new model or you can open an existing one.

00:17

Then, in the collaborate tab manage collaboration panel, select Collaborate.

00:24

In the collaborate dialog box, select in the cloud and click OK.

00:30

In the save as cloud model dialog box,

00:32

verify you are in the correct hub and project, select project files, and

00:37

then navigate to the appropriate sub folder in which to save your model.

00:42

Verify the file name and click save.

00:46

Click close in the save as cloud model dialog box to continue.

00:52

Notice that there are now works sets that can be set up

00:55

according to the work that will be done within the project.

00:60

Alternatively,

01:01

if the model is an existing file-based workshared

01:04

model, which is collaborated on through a local area network,

01:09

you will click

01:10

collaborate in cloud and proceed to verify the hub, project,

01:14

and folder to save your model to the cloud.

01:18

Once this is done,

01:19

the model is stored on the cloud for other team members to access and work on.

01:25

Let's take a look at the three ways to upload a Revit non-workshared model.

01:31

Method one:

01:32

open a non-workshared model from the file tab,

01:36

expand save as, and click cloud model.

01:41

In the save as cloud model dialog box,

01:43

verify that you are in the correct project

01:46

and navigate to the desired project file subfolder.

01:50

Verify the file name and click save.

01:54

Method two:

01:56

open a file explorer window and select Autodesk

01:60

docs in the left hand pane.

02:03

Select the correct project folder and navigate to the desired project file

02:07

subfolder.

02:09

Srag the model and drop it into the desired folder.

02:15

On the Autodesk Construction Cloud website,

02:18

verify the model successfully copied to Autodesk Docs by selecting the

02:22

Docs product from the drop down list in the top left corner,

02:26

and navigate to the corresponding project files subfolder.

02:31

Method three:

02:33

on the

02:34

Autodesk Construction Cloud website,

02:36

navigate to the desired project files

02:38

subfolder, drag and drop the model into the subfolder.

02:44

Alternatively, click upload files.

02:48

In the upload files. Dialog box, click from your computer.

02:53

In the open dialog box, navigate to your Revit model and click open.

02:59

In the upload files

02:60

dialog box, click done and the upload will continue in the background.

03:05

To open a model, you can open them from the recent files page.

03:11

The icons in the lower left corner of the file thumbnail show that it is either a Revit

03:17

cloud model,

03:19

a locally saved model that will have no icon,

03:23

a Revit

03:23

cloud workshared model,

03:26

and a local area network central model.

03:29

To open a Revit cloud workshared model, it is best to open from the Autodesk Docs page.

03:35

This allows you to verify if it's the most recent model.

03:39

Cerify the hub and project name are correct

03:42

and navigate to the correct project file sub folder,

03:45

and click on the file name link to open the model.

03:49

When the model has changes to share with the rest of the team,

03:52

you need to synchronize with central by going to the collaborate tab,

03:57

synchronize panel,

03:59

expand your options,

04:01

and click synchronize now.

04:03

This synchronized your design changes without relinquishing

04:07

any work sets or borrowed elements.

04:10

Select synchronize and modify settings,

04:13

and this opens up the synchronize with central dialog box.

04:18

Check the available check boxes to return

04:21

borrowed elements or user created worksets,

04:24

add a comment if applicable and click OK.

04:29

To open a Revit

04:30

cloud model,

04:31

which is a non-workshared model,

04:33

from the Revit home screen,

04:35

click on recent files,

04:37

and click on the model with the cloud model icon.

04:41

To open a Revit model that was dragged and dropped from a file explorer window,

04:47

within Revit, click open

04:49

and navigate to Autodesk docs. Navigate to the project and project file sub folder

04:55

and open the model.

Initiate Revit cloud worksharing for a model - Exercise

Revit cloud worksharing is a collaboration feature in Autodesk Revit. The project is hosted on Autodesk Construction Cloud instead of relying on a local server, allowing real-time access and updates across the team. As changes are made, they are synchronized, ensuring that everyone is always working on the project's latest version. This streamlines collaboration, simplifies file management, and enhances the efficiency of remote teams.

How to Create a Revit cloud workshared model

Note: This can be done with a non-workshared model or an existing file-based workshared model.

  1. In Revit, open the model you want to upload to Autodesk Docs on Autodesk Construction Cloud.
  2. In the Collaborate tab>Manage Collaboration panel, select Collaborate.


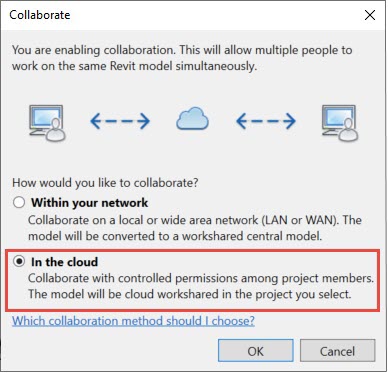
  3. In the Collaborate dialog box, select In the cloud and click OK.


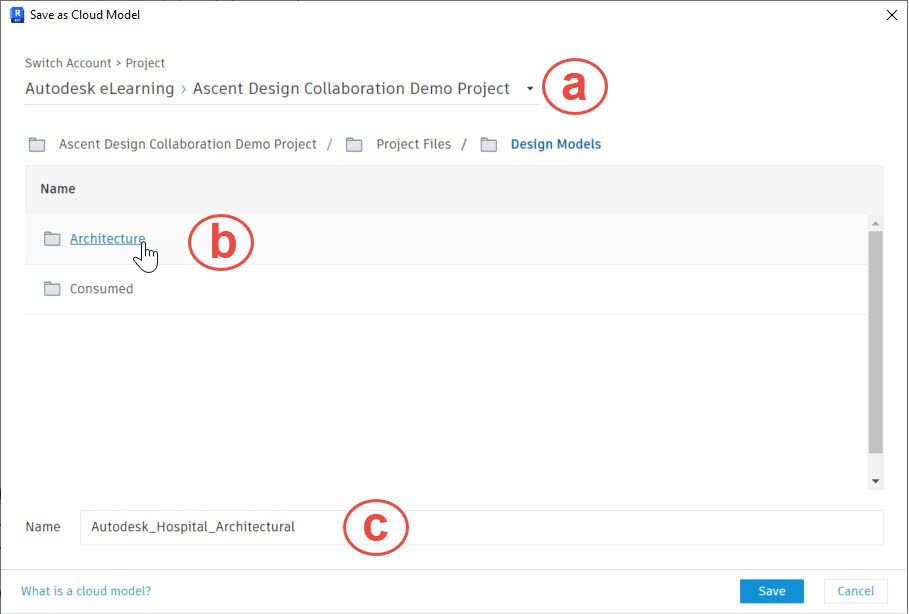
  4. In the Save as Cloud Model dialog box, verify the following and click Save:
    1. The correct hub and project are selected.
    2. The correct Project Files folder is selected.
    3. The model name is correct.


  5. In the Save as Cloud Model dialog box, click Close.
  6. If needed, add additional worksets to the model.
    1. In the Collaborate tab>Manage Collaboration panel, click Worksets.
    2. In the Worksets dialog box, create additional worksets related to the elements in the model.


  7. If any changes were made, in the Collaborate tab>Synchronize panel, select Synchronize Now to synchronize your design changes without relinquishing any worksets or elements or Synchronize with Central Settings to relinquish worksets or elements.
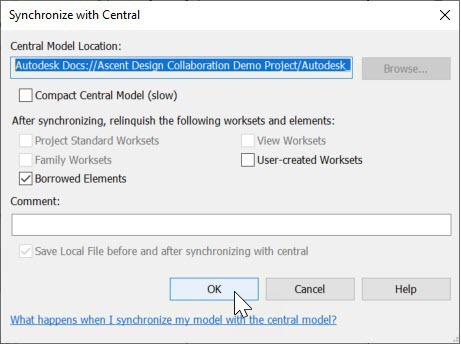
  8. In the Synchronize with Central dialog box, check the available checkboxes to return borrowed elements or user-created worksets, add a comment, and click OK.


  9. Close the model.

How to upload a Revit non-workshared model to the cloud

There are three ways to upload a Revit non-workshared model.

Method 1:

  1. From the File tab, expand Save As and click Cloud Model.


  2. In the Save as Cloud Model dialog box, verify that you are in the correct project and navigate to the desired Project Files folder.
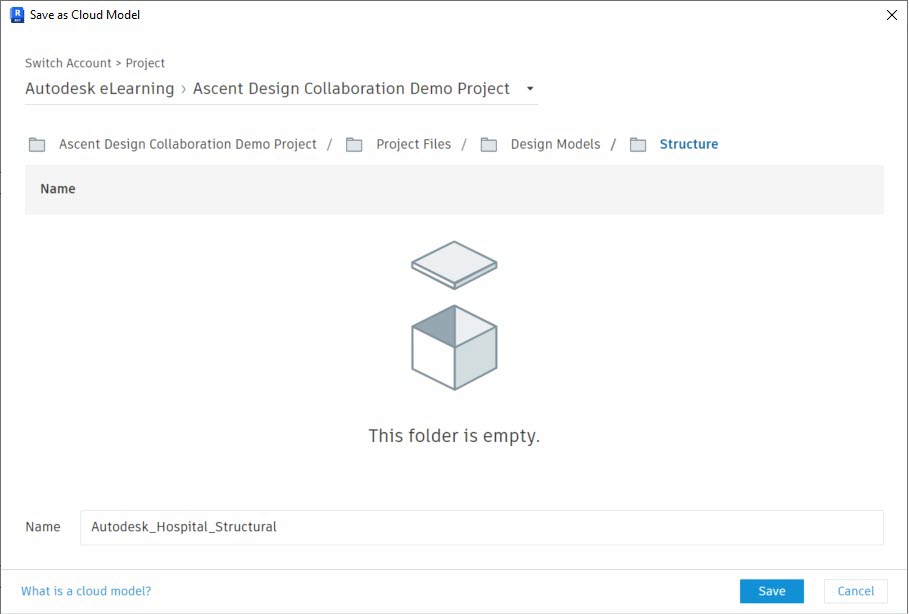


  3. Click Save.

Method 2:

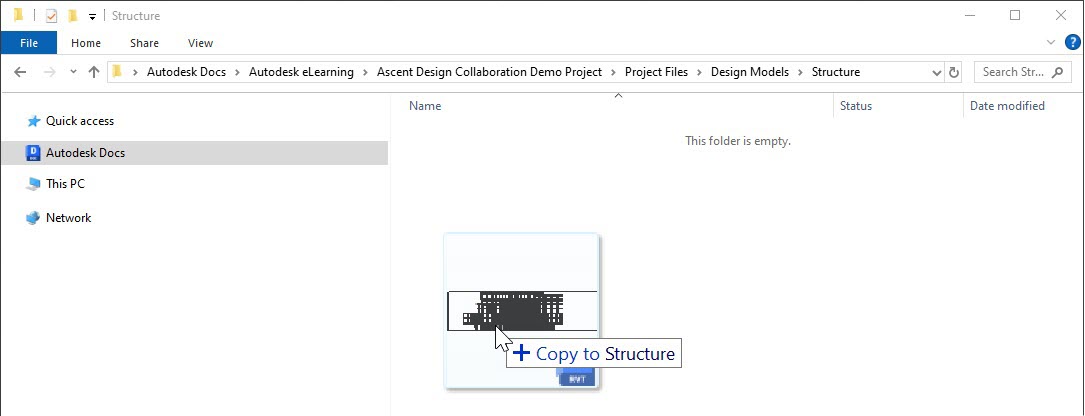
  1. Open a File Explorer window and select Autodesk Docs in the left-hand pane. Select the correct project folder and navigate to the desired Project Files subfolder.
  2. Drag the Revit model and drop it into the folder.


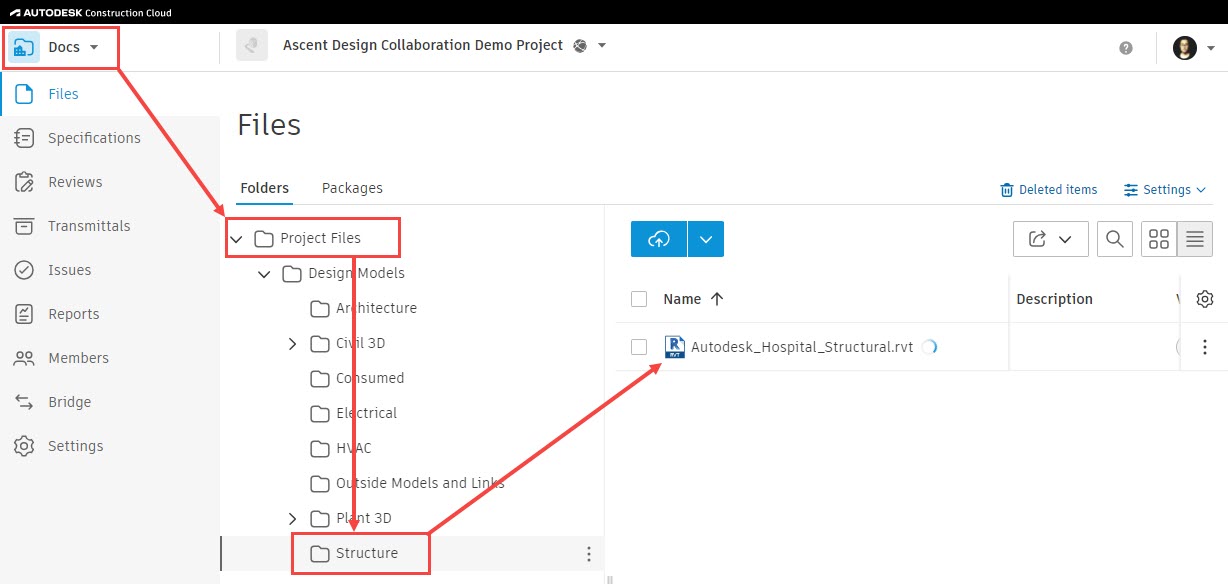
  3. On the Autodesk Construction Cloud website, verify the model successfully copied to Autodesk Docs by selecting the Docs product from the drop-down list in the top-left corner and navigating to the corresponding Project Files subfolder.

Method 3:

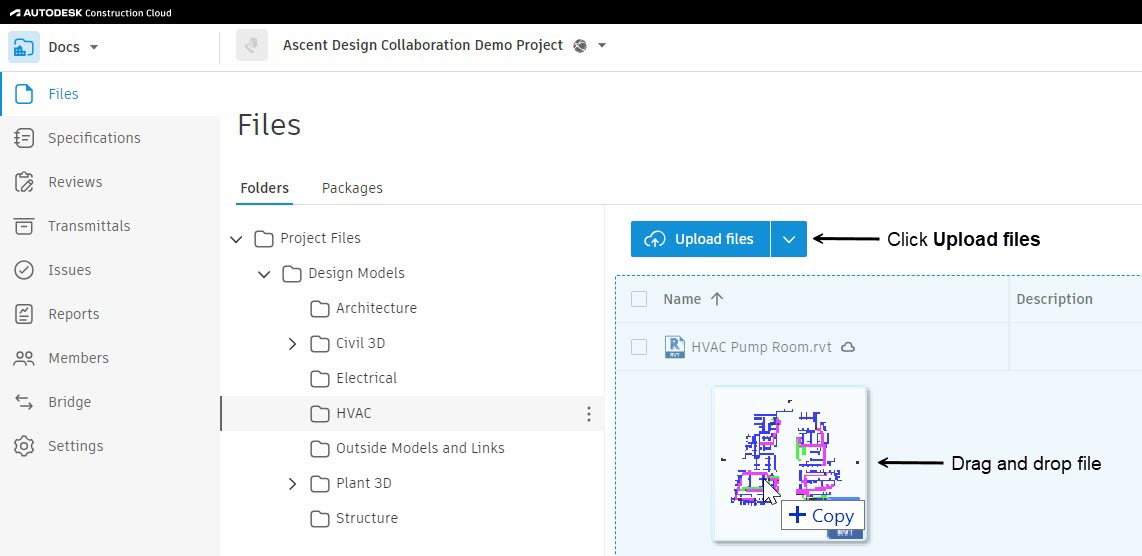
  1. On the Autodesk Construction Cloud website, select the Docs product from the drop-down list in the top-left corner and navigate to the desired Project Files subfolder.
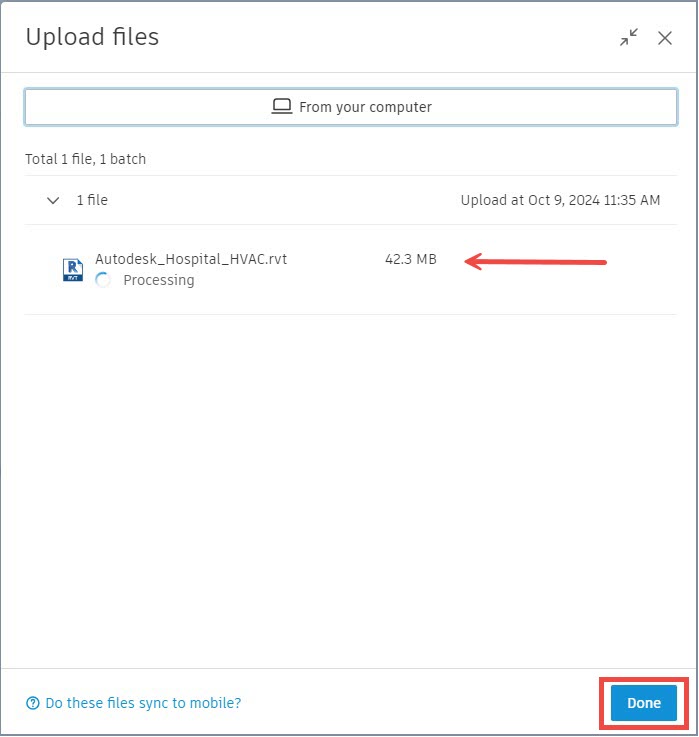
  2. Drag and drop the model into the subfolder. Alternatively, click Upload files and continue with the following steps.


  3. In the Upload files dialog box, click From your computer.


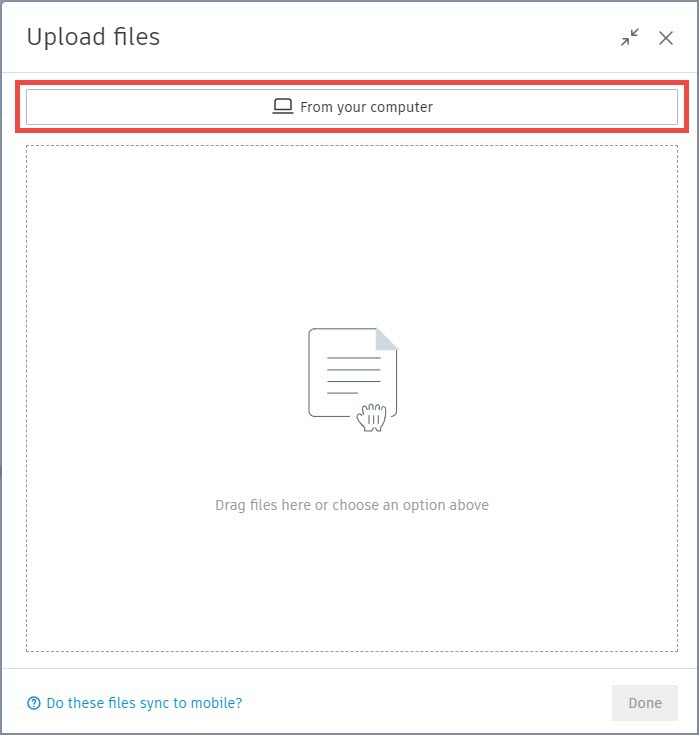
  4. In the Open dialog box, navigate to your Revit model and click Open.
  5. In the Upload files dialog box, click Done.


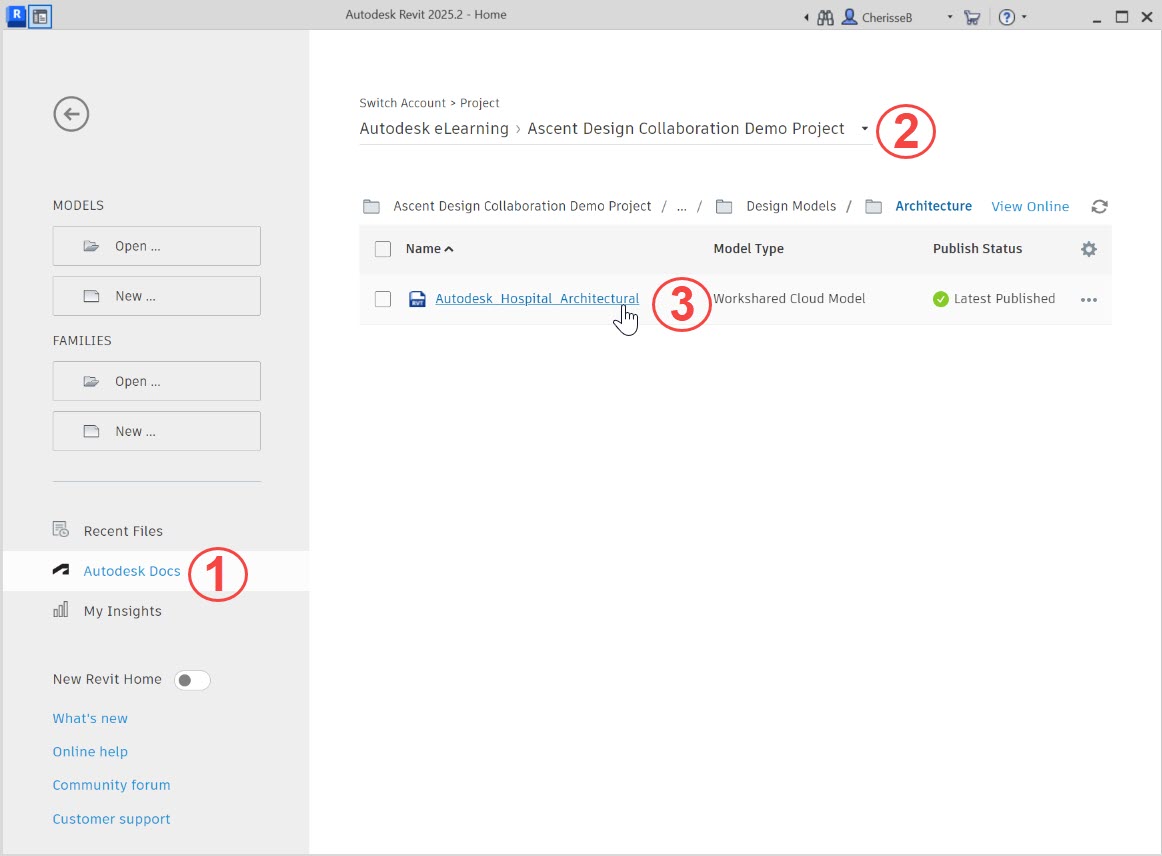
How to open a Revit cloud workshared model

  1. On the Revit Home page, select Autodesk Docs.
  2. Verify that you are in the correct hub and project.
  3. Navigate to the Project Files folder where the Revit model is stored and click on the file name link to open the model.

Note that when the cloud model is opened, a local cache model is created. Unlike file-based worksharing, you do not access the local model when working on a Revit cloud workshared model. You always open the model from Autodesk Docs on the Revit Home page.

Was this information helpful?