Share Civil 3D files to the cloud - Exercise
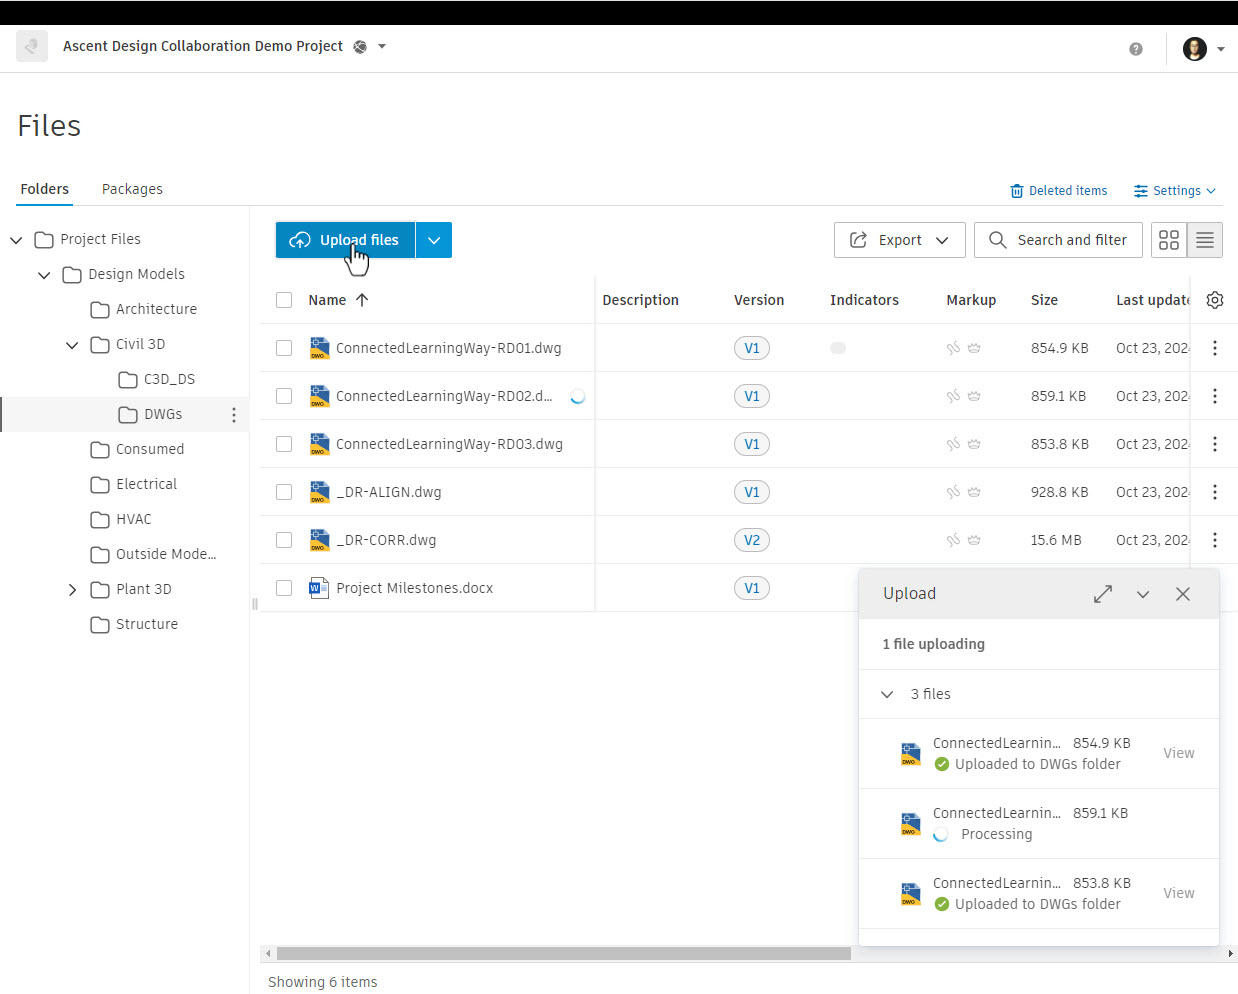
When you save a Civil 3D file to the cloud through Desktop Connector, the file is saved to your local cache and then is uploaded to the cloud. Every time updates to the file are saved, a new version is created; this is reflected by the version number shown in Autodesk Construction Cloud. To upload files to the cloud, drag and drop them to the connected drive via a File Explorer window. The files are automatically uploaded to Autodesk Docs, making them accessible to other project team members. This process also detects referenced files, such as Xrefs and data shortcuts, which may be uploaded to a Related Data folder to preserve their links and ensure proper referencing.
How to save files to Autodesk Docs within Civil 3D
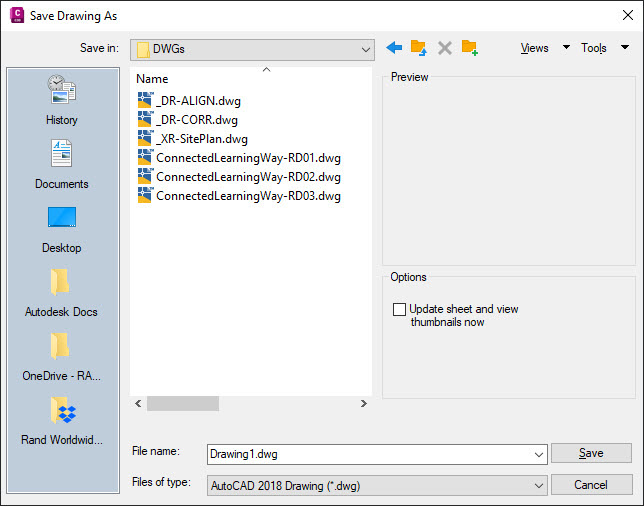
- In Civil 3D, when you are ready to save a new drawing to Autodesk Docs, select Save As from the application menu.
- In the Save Drawing As dialog box, in the left pane, click the Autodesk Docs connected drive.
- Navigate to the correct hub, project, and Project Files subfolder.
- Click Save.
After you have saved the file to the cloud, in the Toolspace>Prospector tab, the file now indicates that it is a cloud file. If the file is open, it is locked to protect it from being opened and edited by another team member. The following are ways you can verify that your file is locked:
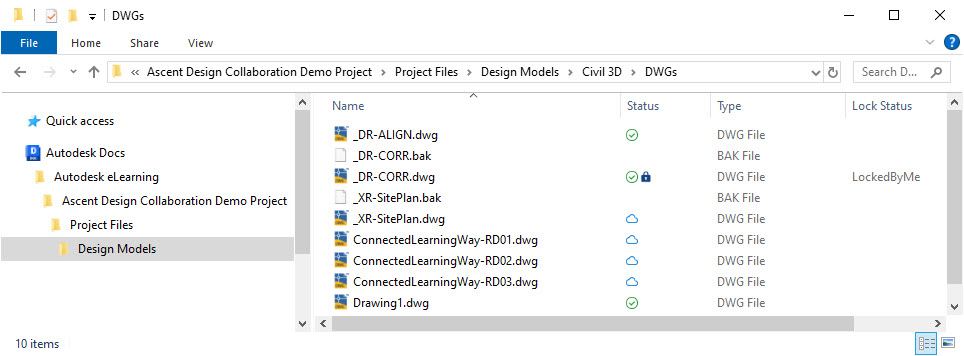
- In a File Explorer window, select Autodesk Docs and navigate to the correct hub, project, and Project Files subfolder. Next to the file name, a lock icon displays in the Status column and LockedBYMe displays in the Lock Status column.
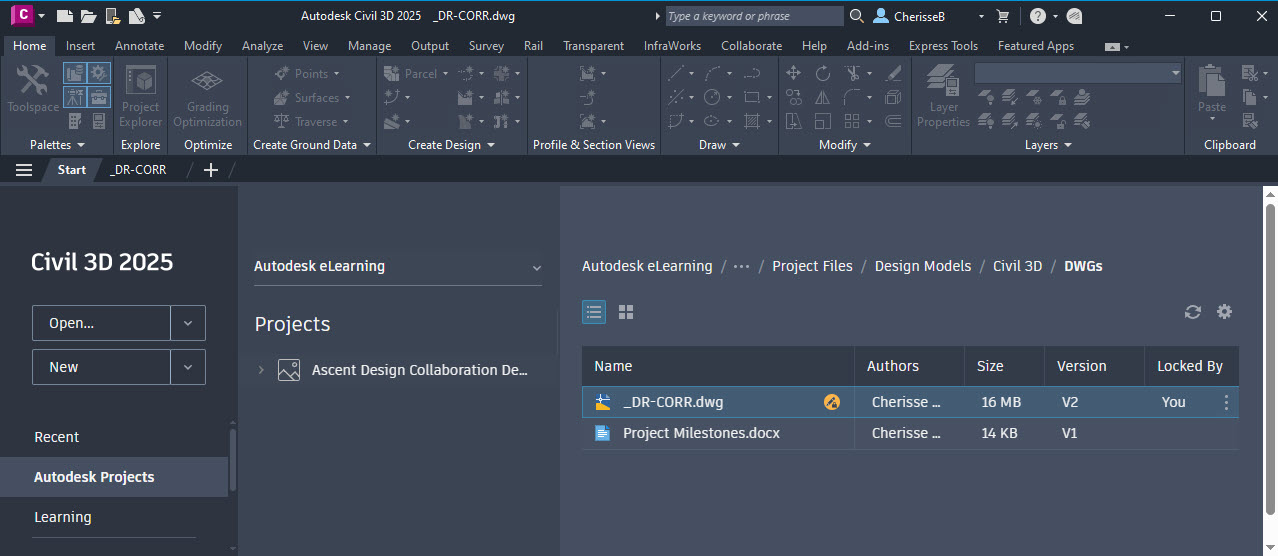
- In Civil 3D, select the Start tab. Select Autodesk Projects and verify the correct hub and project are shown. Navigate to the correct Project Files subfolder. A lock icon displays next to the file name and You displays in the Locked By column.
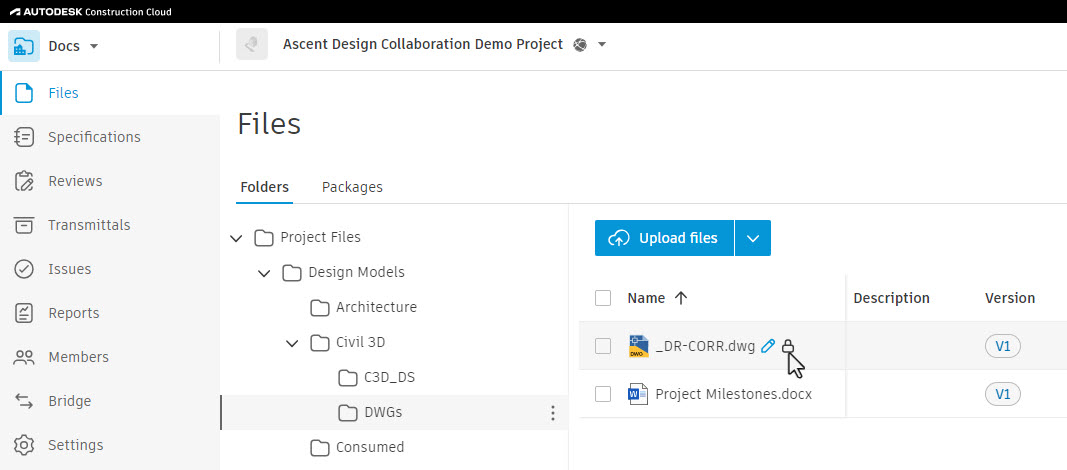
- In Autodesk Construction Cloud, expand the products menu in the upper-left corner and select Docs. Navigate to the correct Project Files subfolder. The lock icon displays and the version number for the file is indicated in the Version column.
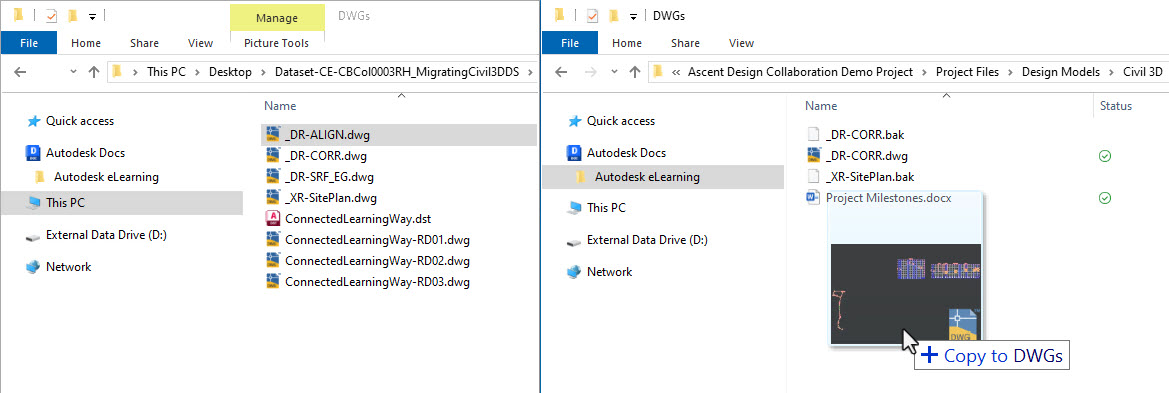
How to upload files through Desktop Connector
- Open a File Explorer window and navigate to the local file.
- Open a second File Explorer window. In the left pane, click Autodesk Docs and navigate to the correct hub, project, and Project Files subfolder.
- Drag and drop the local file to the selected Autodesk Docs Project Files subfolder.
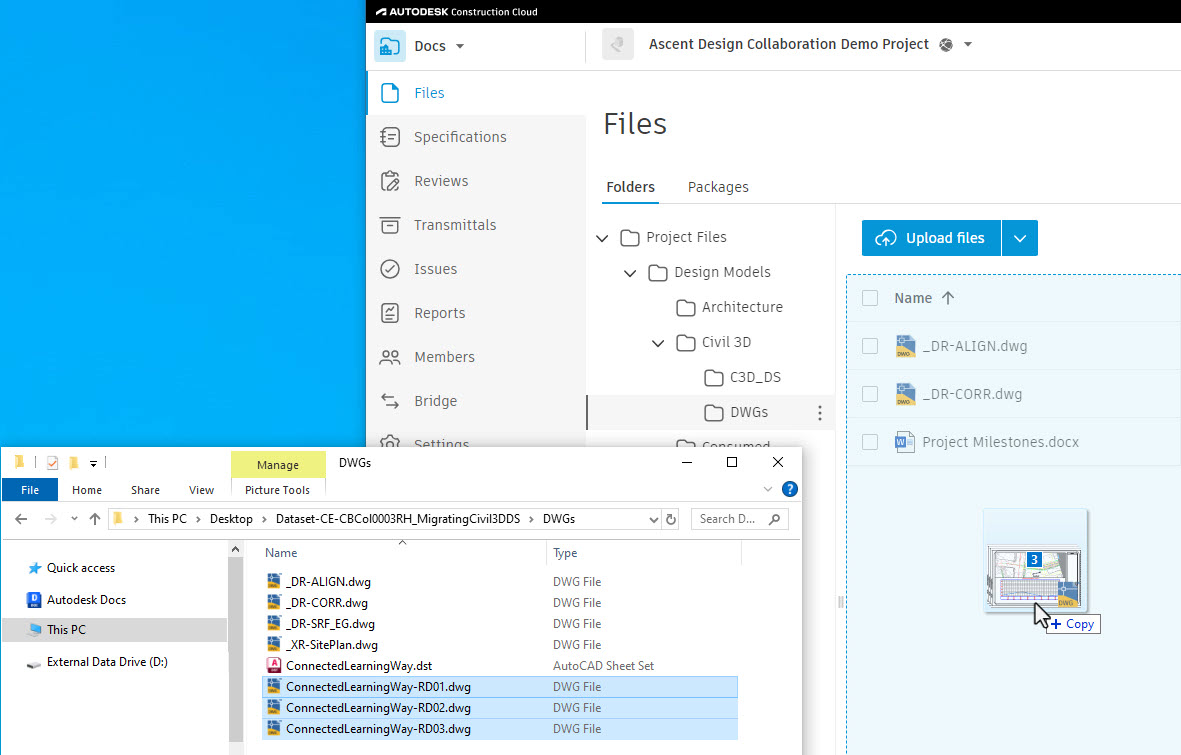
How to upload files to Autodesk Construction Cloud
- Open a File Explorer window and navigate to the local file.
- In Autodesk Construction Cloud, expand the products menu in the upper-left corner and select Docs.
- Navigate to the correct Project Files subfolder.
- Drag and drop the local file to the folder.
- The Upload files dialog box will display. Click Done and the files will continue to upload in the background.
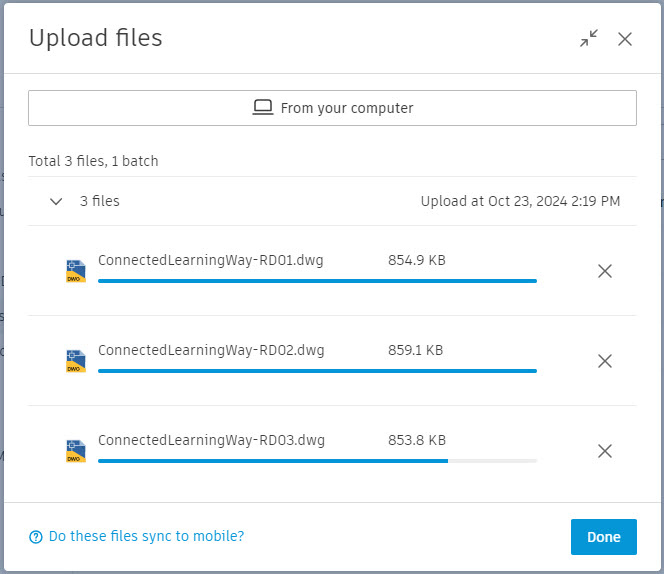
- Alternatively, click Upload files and continue with the following steps.
- In the Upload files dialog box, click From your computer.
- In the Open dialog box, navigate to your Civil 3D file and click Open.
- In the Upload files dialog box, click Done and the files will continue uploading in the background.


