Create data shortcuts in an Autodesk Docs Project - Exercise
Data shortcuts in Civil 3D allow users to import reference copies of objects from one drawing into another, enabling flexible sharing at the object level. Shortcuts can be managed via the Prospector tab in the Toolspace palette to share surfaces, alignments, profiles, corridors, pipe networks, pressure networks, and view frame groups.
Best practices for data shortcuts include creating them from the source drawing, organizing them clearly, and storing them in a network location accessible to all team members. This ensures smooth collaboration and project management.
How to create data shortcuts in an Autodesk Docs project
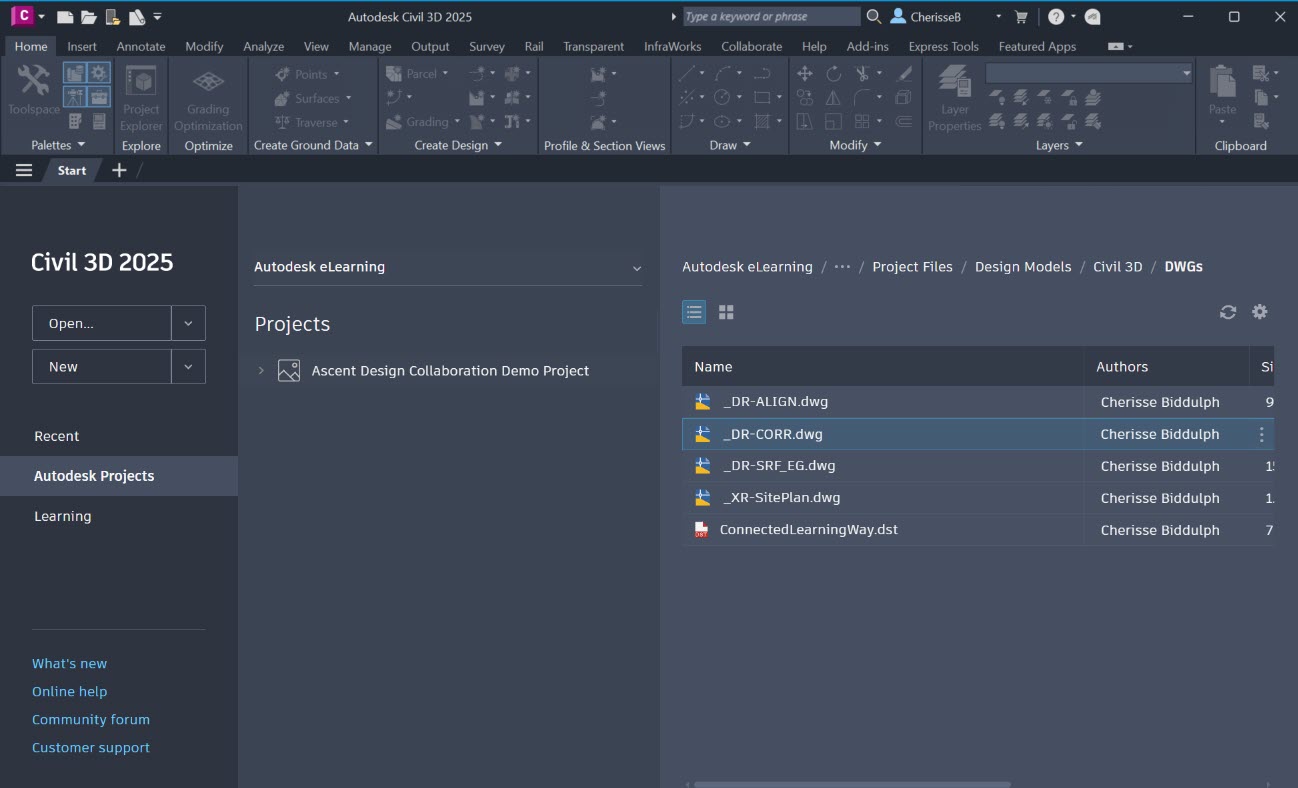
- Open Civil 3D. On the Start tab, select Autodesk Projects.
- Select the correct hub and project name, then navigate to the Project Files folder where the .DWG files are stored.
- Open the desired .DWG file.

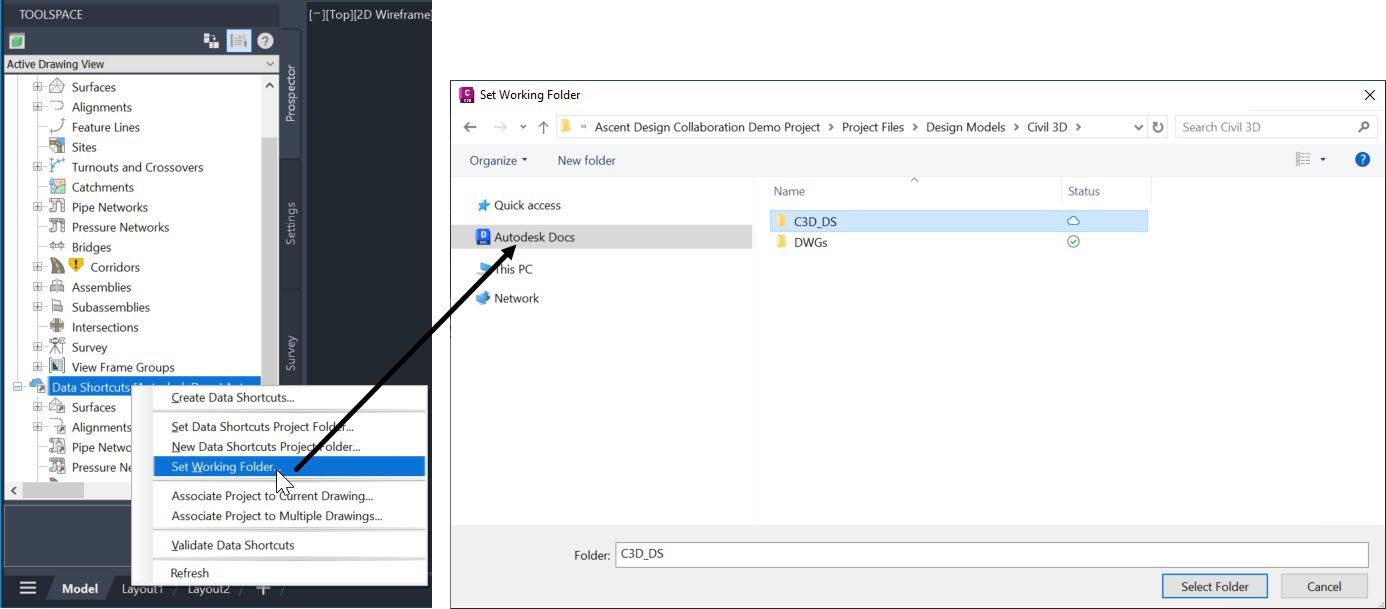
- In the Toolspace>Prospector tab, right-click on Data Shortcuts and select Set Working Folder….
- In an Autodesk Docs environment, the working folder must be located in a specific project.
- In the Set Working Folder dialog box, click Autodesk Docs, then navigate to the project's Project Files folder and select the folder containing the subfolder(s) for the data shortcuts.

- In the Toolspace>Prospector tab, right-click on Data Shortcuts and select New Data Shortcuts Project Folder….
- In the New Data Shortcut Folder dialog box, specify a name and description and click OK to create a new project folder. This folder will store the data you want to share in the source drawing.
- In an Autodesk Docs environment, the data shortcuts folder is flexible. It can be named after the project, the project number, or even the phase or zone of the project if the project is complex.
- Create the data you want to share in the source drawing and save the drawing in your Autodesk Docs project.
- In the Toolspace>Prospector tab, right-click on Data Shortcuts and select Associate Project to Current Drawing….
- In the Associate Project to Current Drawing dialog box, ensure that the proper project is selected and click OK.
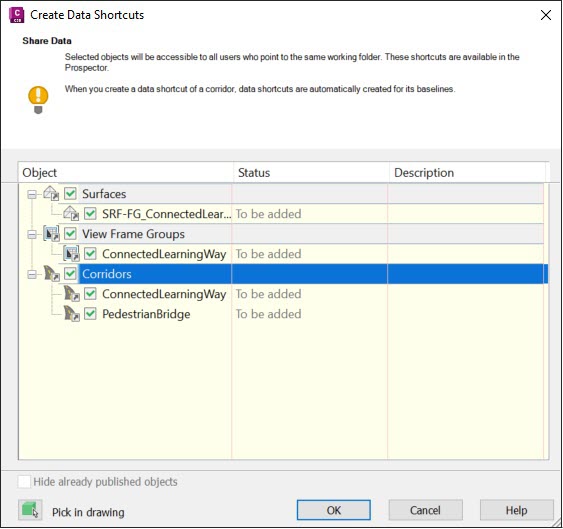
- In the Toolspace>Prospector tab, right-click on Data Shortcuts and select Create Data Shortcuts….
- In the Create Data Shortcuts dialog box, select all the items you want to share, such as surfaces, alignments, profiles, etc., and click OK.

- Save the source drawing in your Autodesk Docs project.
- Create a new drawing in your Autodesk Docs project or open an existing drawing from your project to receive the shortcut data.
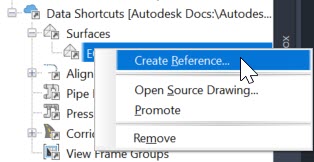
- In the Toolspace>Prospector tab, expand the Data Shortcuts collection and the relevant object trees (Surfaces, Alignments, Pipe Networks, View Frame Groups, etc.).
- Highlight an item to be referenced, right-click, and select Create Reference. Repeat for all of the objects, as required.

- You are prompted for the styles and other settings required to display the object in the current drawing.
- If required, add an Xref to the source drawing if there are additional AutoCAD objects that you want to display in the downstream drawing.


