Collaboration for AutoCAD Plant 3D

00:01

Autodesk's Collaboration for AutoCAD Plant 3D gives project team

00:05

members the ability to collaborate on Plant 3D projects.

00:10

To share a project to the cloud, in Plant 3D, open a project.

00:15

In the collaborate tab > plant collaboration panel, click share project.

00:22

In the collaboration for Plant 3D dialog box, click get started.

00:27

Verify you are in the correct hub,

00:30

then navigate to the

00:31

Autodesk Docs project you want to share the project to

00:35

and select the desired

00:36

subfolder.

00:38

Click upload project.

00:40

Once the project is uploaded, click close.

00:44

Your project is now collaboration-ready.

00:48

To open a collaboration project from the project manager,

00:52

select open collaboration from the current project drop down list.

00:58

In the collaboration for plant 3D dialogue box,

01:01

verify the hub and project name are selected at

01:04

the top and choose the plant project and click open.

01:07

The folder structure updates in the project manager.

01:11

In the collaborate tab plant collaboration panel,

01:15

click check out to prevent another team member

01:18

from accessing the same file and making changes

01:21

at the same time.

01:23

You can also right click on the file and select check out or double click on the file.

01:29

When finished,

01:30

click check in to save and relinquish control of the file.

01:34

You can also right click on the file and select check in.

01:38

In the check in dialog box,

01:40

you can specify to keep the file open for editing after check in, clean up cache

01:45

files, and add a comment to associate with the check in version.

01:49

To attach reference files, in the collaborate tab > plank collaboration panel,

01:55

click attach.

01:58

In the attach external reference dialog box,

02:01

select the file you want to reference and click attach.

02:05

When attaching reference files,

02:07

it's important to attach files that are in the cloud.

02:10

This ensures that everyone is working with the most up to date information,

02:15

promoting accurate and efficient collaboration.

Video transcript

00:01

Autodesk's Collaboration for AutoCAD Plant 3D gives project team

00:05

members the ability to collaborate on Plant 3D projects.

00:10

To share a project to the cloud, in Plant 3D, open a project.

00:15

In the collaborate tab > plant collaboration panel, click share project.

00:22

In the collaboration for Plant 3D dialog box, click get started.

00:27

Verify you are in the correct hub,

00:30

then navigate to the

00:31

Autodesk Docs project you want to share the project to

00:35

and select the desired

00:36

subfolder.

00:38

Click upload project.

00:40

Once the project is uploaded, click close.

00:44

Your project is now collaboration-ready.

00:48

To open a collaboration project from the project manager,

00:52

select open collaboration from the current project drop down list.

00:58

In the collaboration for plant 3D dialogue box,

01:01

verify the hub and project name are selected at

01:04

the top and choose the plant project and click open.

01:07

The folder structure updates in the project manager.

01:11

In the collaborate tab plant collaboration panel,

01:15

click check out to prevent another team member

01:18

from accessing the same file and making changes

01:21

at the same time.

01:23

You can also right click on the file and select check out or double click on the file.

01:29

When finished,

01:30

click check in to save and relinquish control of the file.

01:34

You can also right click on the file and select check in.

01:38

In the check in dialog box,

01:40

you can specify to keep the file open for editing after check in, clean up cache

01:45

files, and add a comment to associate with the check in version.

01:49

To attach reference files, in the collaborate tab > plank collaboration panel,

01:55

click attach.

01:58

In the attach external reference dialog box,

02:01

select the file you want to reference and click attach.

02:05

When attaching reference files,

02:07

it's important to attach files that are in the cloud.

02:10

This ensures that everyone is working with the most up to date information,

02:15

promoting accurate and efficient collaboration.

Collaboration for AutoCAD Plant 3D - Exercise

Autodesk Collaboration for AutoCAD Plant 3D gives project team members the ability to collaborate on Plant 3D projects.

How to share a Plant 3D project to the cloud

  1. Start Plant 3D.
  2. In the Home tab>Project panel, expand Project Manager and select Open Project.
  3. In the Open dialog box, navigate to the project's location, open the Project.xml file, and click OK.
    • Alternatively, you can expand the drop-down list in the Project Manager palette and select the file name of the project you want to open. You can also enter OPENPROJECT at the command prompt.
  4. In the Collaborate tab>Plant Collaboration panel, click Share Project.
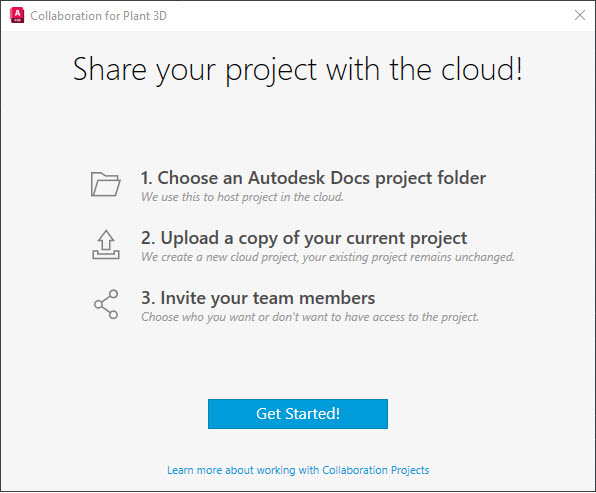
  5. In the Collaboration for Plant 3D dialog box, click Get Started!.


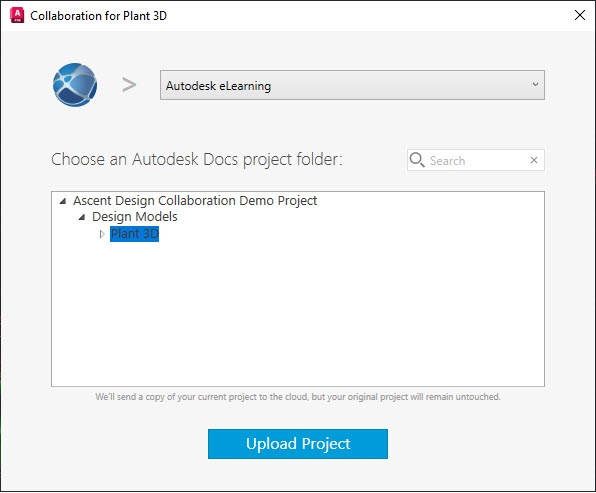
  6. In the Collaboration for Plant 3D dialog box, verify you are in the correct hub, then select the desired subfolder under the correct Autodesk Docs project.
  7. Click Upload Project.


  8. In the Collaboration for Plant 3D dialog box, click Close. Your project is now collaboration ready.

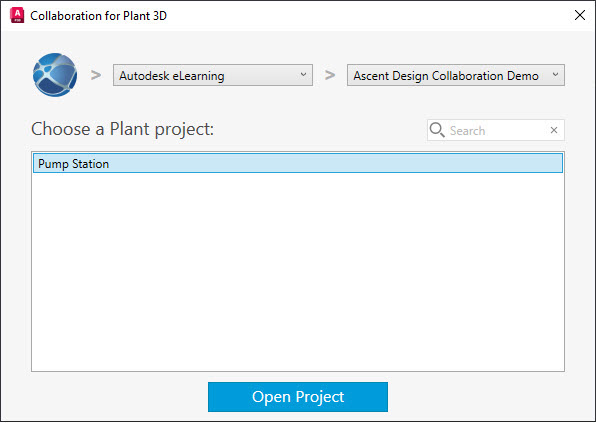
How to open a project from the cloud

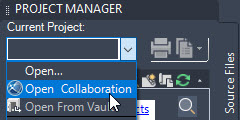
  1. In the Project Manager, expand the Current Project drop-down list and select Open Collaboration.


  2. In the Collaboration for Plant 3D dialog box, verify the hub and project name are selected at the top, then choose the Plant project from the list and click Open Project. The folder structure will update in the Project Manager.


  3. In the Collaborate tab>Plant Collaboration panel, click Check Out to prevent another team member from accessing the same file and making changes at the same time.
    • Alternatively, you can right-click on the file and select Check Out or double-click on the file.
  4. When finished making changes, in the Collaborate tab>Plant Collaboration panel, click Check In to save and relinquish control of the file.
    • Alternatively, you can right-click on the file and select Check In.
  5. In the Check In dialog box, you can specify to keep the file open for editing after check in, clean up cached files, and add a comment to associate with the check in version.

How to attach reference files to a Plant 3D project

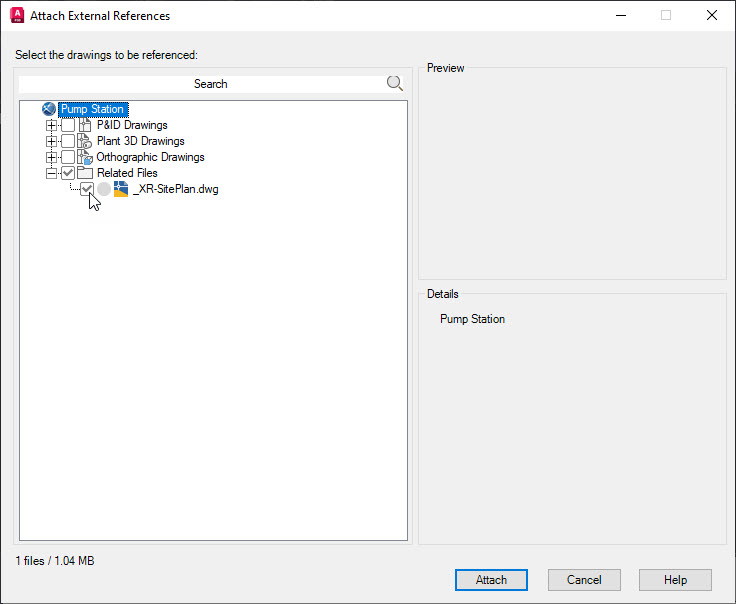
  1. In the Collaborate tab>Plant Collaboration panel, click Attach.
  2. In the Attach External References dialog box, select the file you want to reference and click Attach.

Was this information helpful?