00:01
The public and other stakeholders can stop a project from being built at any point in the design or construction phase.
00:07
Make sure that they fully understand the design intent, so that the project can continue on schedule.
00:13
Learn how to create, and for work storyboards, to feature full motion animations with titles and captions to better communicate the design intent.
00:22
And we can communicate that in several different ways as we learn about different ways of doing presentations.
00:28
First, we're going to look at snapshots.
00:29
Very simple way to create presentations, images.
00:33
And then we're going to look at storyboards to create more of a motion picture, 3D fly-through type presentation.
00:41
A snapshot is very simple.
00:43
We're going to take a quick look here at how to create a snapshot.
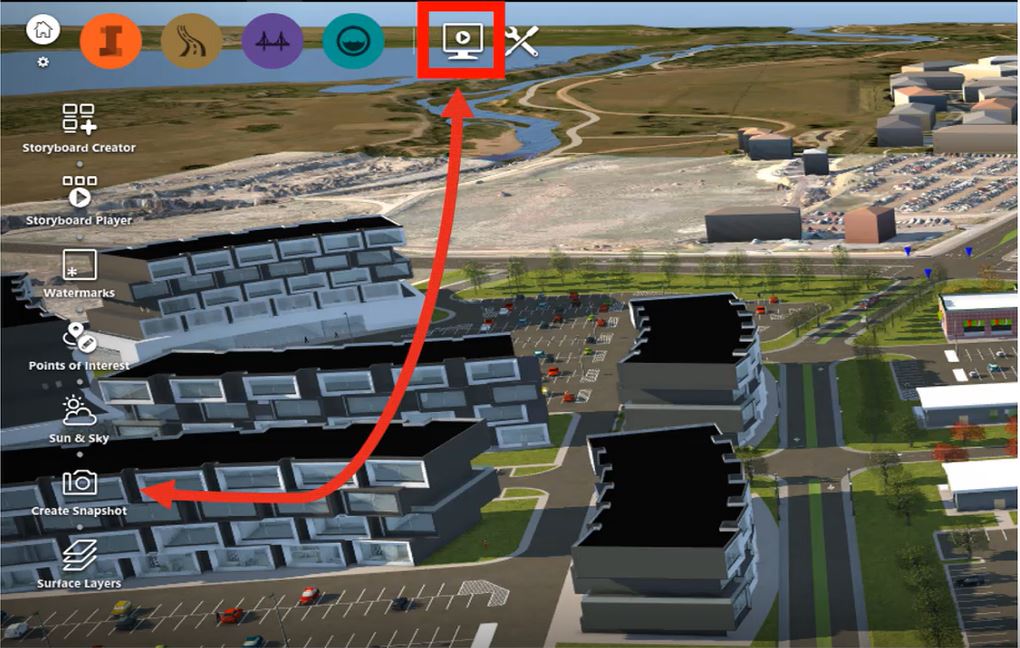
00:47
Inside InfraWorks, if you go to the Presentation tool, you'll see that there is a "Create Snapshot" option.
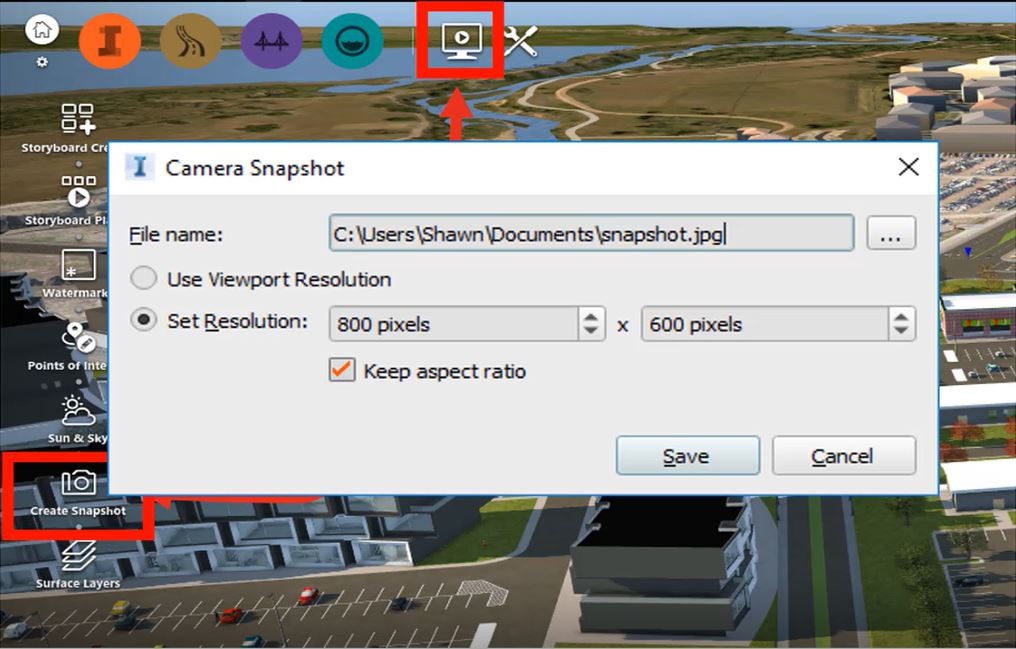
00:55
Once you select "Create Snapshot", you can give it some parameters.
00:59
You can save it. You can set a resolution. You can use the Viewport Resolution. Very simple.
01:04
You then select "Save".
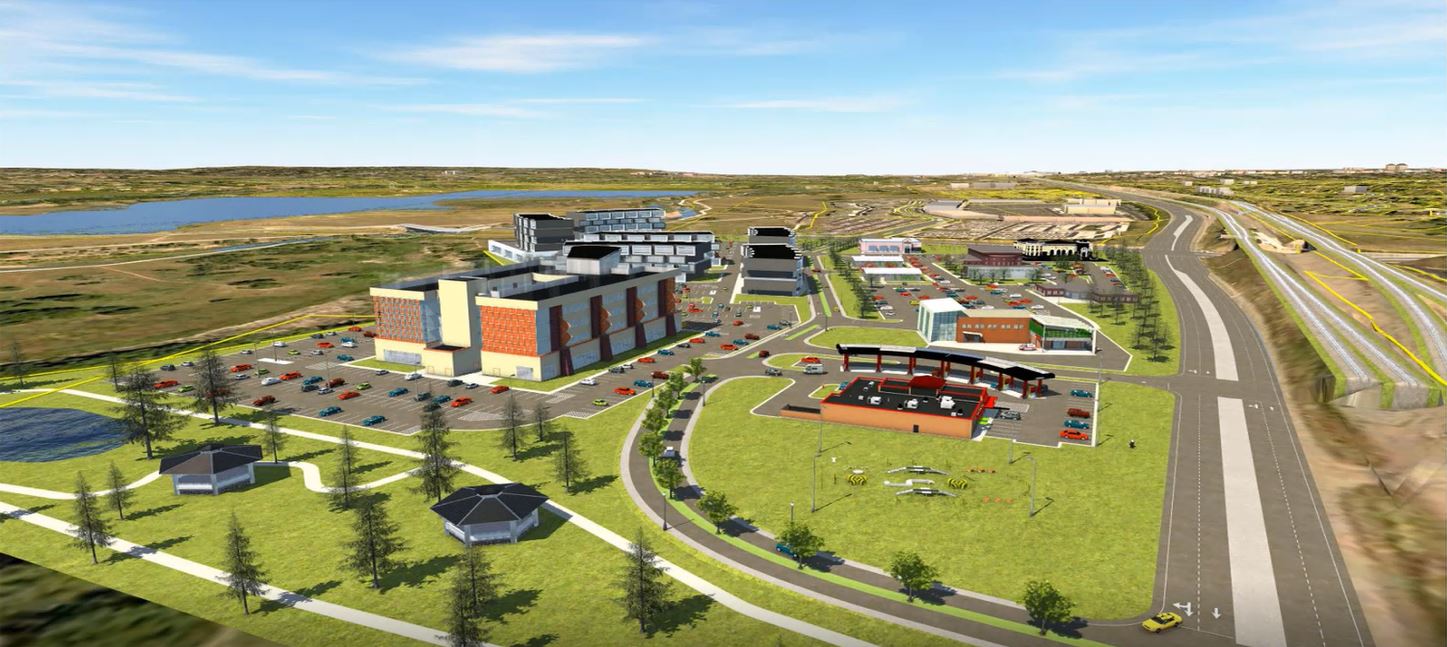
01:06
And from those snapshots, create these very nice still shot images.
01:10
You can email them. You can post them.
01:12
Very easy way to get a few different views of the site just using a still shot image.
01:18
But we're going to take a more detailed look at creating a storyboard inside InfraWorks.
01:23
And a storyboard can be a series of snapshots, or it can be a dynamic video.
01:28
It can be a design road that you drive down to the design road.
01:32
It's very easy to create.
01:34
You create a new storyboard.
01:38
From there, you start giving it key frames.
01:40
You give it captions. You give it animation pass.
01:43
You give it more information on how to transition from one to the other.
01:47
It's very simple. There's not an easier way to create a 3D fly-through video than using Autodesk InfraWorks.
01:54
So, let's move over to InfraWorks and see how it's done.
01:59
So, we're now back inside InfraWorks, and we're going to create a quick storyboard and a 3D video.
02:05
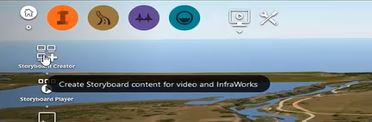
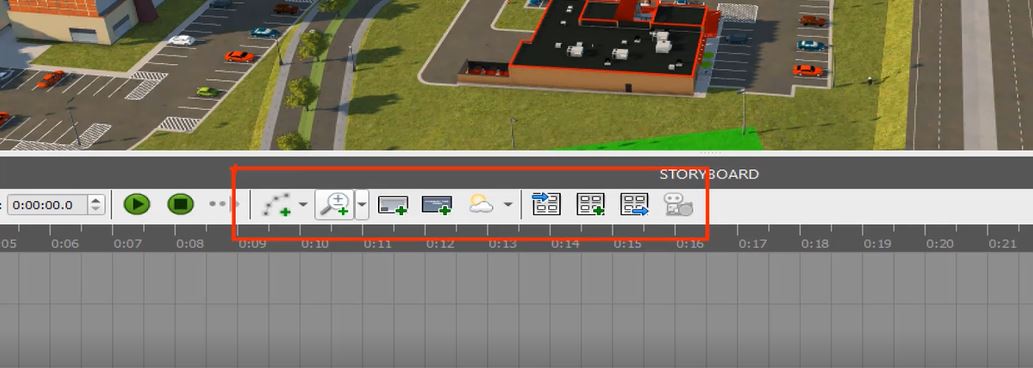
So, I want to come here to the presentation tool on the top.
02:11
And from there, we're going to choose "Storyboard Creator", the very top option.
02:19
On this storyboard, we can do a number of things.
02:22
We want to first name it.
02:23
So, I'm going to first name this one. Let's call it Story 1.
02:31
From there, we start adding information.
02:33
So, if I come here to my options, I've got several options here.
02:38
This is what we'll use to create the storyboard.
02:42
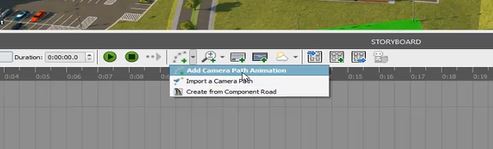
So, we can add a camera path animation.
02:46
We can import a camera path.
02:47
Or from a component road, we can drive a road.
02:50
So, let's start first with the camera path animation.
02:56
So, once I select that, you can see we have an item here on the bottom.
02:60
And it has all the properties here on the right side.
03:03
We can input information.
03:04
We can input duration of that.
03:07
We've got a starting point, a duration, a speed, or a time to the next keyframe.
03:14
So, there's going to be three seconds transitions from one to the next.
03:19
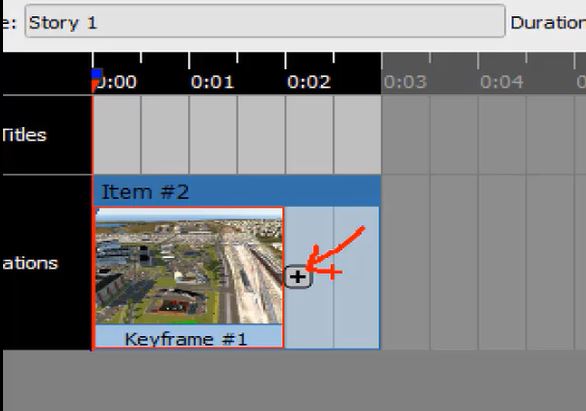
So, I'm going to move around here. Let's just twist our view, maybe zoom in a little bit.
03:24
And right here next to our item, our first keyframe, we're going to go ahead and select that plus symbol.
03:30
And that's going to add an additional keyframe.
03:35
Let's do a couple more here.
03:39
Zoom in a little bit.
03:43
Select "Add the keyframe" again.
03:45
We're going to leave the default for the properties on the right side.
03:48
Let's move around a little bit.
03:50
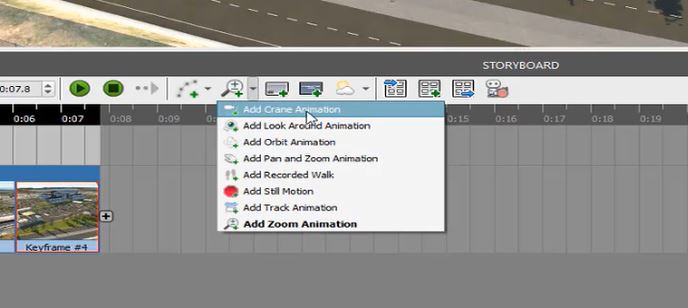
We also have some animation tools.
03:52
We can add a crane animation.
03:54
We can add an orbit, a pan and zoom animation, a recorded walk, and so forth.
03:59
So, several different animation options here.
04:02
Let's go ahead and do.
04:03
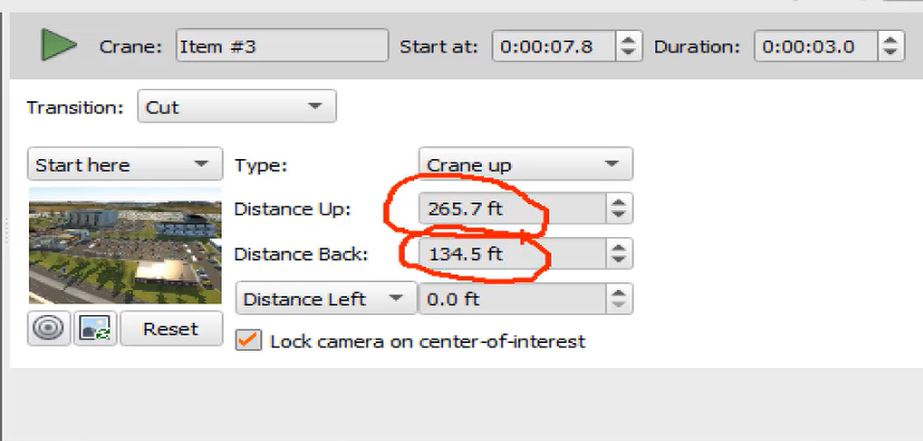
Let's zoom around a little bit more and do a crane animation.
04:08
And what that's going to do, if I look here on the right side, it's going to give me a type.
04:13
So, we're going to do a crane.
04:14
We're going to higher it.
04:16
And then we're going to come back down, so the distance up and the distance back.
04:23
We're going to go ahead and just leave that default.
04:26
And then I'm going to add an additional.
04:28
Let's move around here a little bit.
04:30
Let's add camera path.
04:37
One more camera path.
04:41
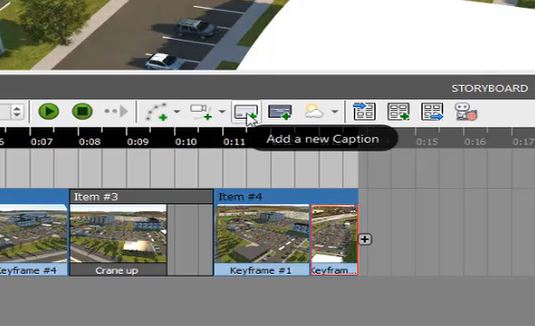
Maybe we want to add some captions.
04:42
So here on the right side of the animation options, we have Add a New Caption and Add a New Title.
04:49
I'm going to place a caption here.
04:51
I'm going to move this to the beginning.
04:56
And our caption, we're going to change the text here.
04:59
We're going to say, New Site Proposal 1.
05:07
That's going to fade in over a second and fade out over a second.
05:10
So, it's just going to be there for a couple of seconds.
05:13
If we want to add more.
05:14
So, let's zoom in here.
05:15
Maybe we want to see the front and highlight the new health center.
05:20
I'm going to add a new keyframe.
05:23
I'm going to add a new caption.
05:26
I'm going to move this over a little bit.
05:29
And I'm going to say, New Health Center.
05:38
And maybe I'm going to zoom way out here, and I'm going to be okay with that.
05:42
I'm going to add one final animation.
05:47
So very quick. I've got this 17-second video.
05:49
I'm going to select Play here.
05:54
And we're going to let this play.
05:55
And as you can see, as it transitions around from one screen shot to the other screen shot,
06:01
we're going to have our crane thing go up, go back down, and zoom in on that new health center.
06:10
So, in a matter of just a couple minutes, we now have a 3D fly-through of our site that we can export out,
06:16
we can give to external stakeholders, and they can really see the design intent of this project.