& Construction
Integrated BIM tools, including Revit, AutoCAD, and Civil 3D
& Manufacturing
Professional CAD/CAM tools built on Inventor and AutoCAD
Transcript
00:01
Combining Parameters in Schedules.
00:03
In this video, we'll combine existing parameters to create one new parameter column in a schedule.
00:11
I'm working in a Small Medical Center project in a 3D View.
00:16
We're going to make a change to a window schedule.
00:18
You can see that many of the openings in the buildings are curtain walls.
00:23
But when we rotate around the side and back, you can also see that some are windows.
00:29
To open the Schedule, I'm in the Project browser and clicking "Schedule Quantities" and then "Window Schedule".
00:36
So, here's an existing schedule that we have.
00:40
You can see that we have Levels, Marks, Types and then sizes for width, height and sill height.
00:47
I want to change these three with height and sill height to one combined parameter.
00:53
First of all, I'm gonna make a couple changes to the Schedule.
00:59
In the Sorting and Grouping tab, I'm going to add a header.
01:06
And then in the Formatting tab, on "Level", I'm going to change this to a "Hidden Field".
01:13
And you can see here I now have my headings as opposed to a separate column.
01:19
Next, I want to go ahead and add a new field, a new parameter.
01:24
So, I'm gonna pick "Fields", "Edit" and then combine parameters.
01:33
In the Combine Parameters dialog box, notice that you can select two or more parameters to combine the values.
01:42
I can choose from the parameter types that are connected to the Schedule.
01:48
And then I can choose any of the schedule parameters that are available.
01:52
I don't have to just work with the ones that I've already added to the field.
01:57
So, in this case, I want to add my three parameters, as I had mentioned before that I already have.
02:04
I want to add width, height and sill height.
02:10
There are actually two sill heights in here and what happened is one window type brought in a different sill height than the other.
02:18
So, I'm just gonna pick the first one and see what happens.
02:20
We may need to come back and make some modifications.
02:25
Now, in the Combine Parameters, you can add prefixes, SO, for example, I'm just putting in plus or minus here.
02:33
And you can see down in the preview it puts that right in front of it.
02:36
So, I don't need a prefix or suffix right now, but you could add them.
02:42
I'm gonna change my separators.
02:43
The first separator I want is a lower case x.
02:47
The second one I want is an @ symbol, and the third one I want to just remove.
02:52
I don't need any separator after this.
02:54
When I click back in the other separator, you can now see a preview.
02:58
And it looks like we really do need to add some spaces.
03:03
So, the separators do not automatically apply spaces.
03:06
So, I'm gonna add a space in front and after each of my separators and yeah, that looks a whole lot better now.
03:15
Let me go ahead and name the combined parameter, and I'm going to call it Size and Sill Height.
03:25
When I'm happy with that, I'm gonna click "OK".
03:28
Here's my new parameter in the list and click "OK" again.
03:34
Well, as you can see, there does seem to be something wrong with the sill height information.
03:39
It really should be at 3' or 3' 4".
03:42
So, we need to make a change here, I just need the different parameter.
03:46
So, I'm gonna go back into Fields Edit, I'm going to select the new combined parameter and click the Edit Parameter button.
03:56
I'm going to come in and select my second sill height and add that to my list and then remove my first sill height.
04:05
Let me get rid of the separator, which I don't need, and I'll click "OK", and "OK" again.
04:13
And sure enough, that was the right sill height parameter for us to use for the correct values here.
04:20
Now, I don't need width or height, so I'm going to delete these columns.
04:26
Now, when you delete columns, you're removing them from the entire schedule, unlike hiding them like we did with the level.
04:34
If I want to have an order change, I need to go to my Fields tab and edit that and then I can go ahead and move my comments down to the end.
04:44
My schedule is looking better, since I've combined several parameters into one column.
Practice: Combining parameters in schedules
In this practice you will combine existing parameters to create one parameter column in a schedule.
1. Open the Small Medical Center-Combining.rvt project in the 3D view.
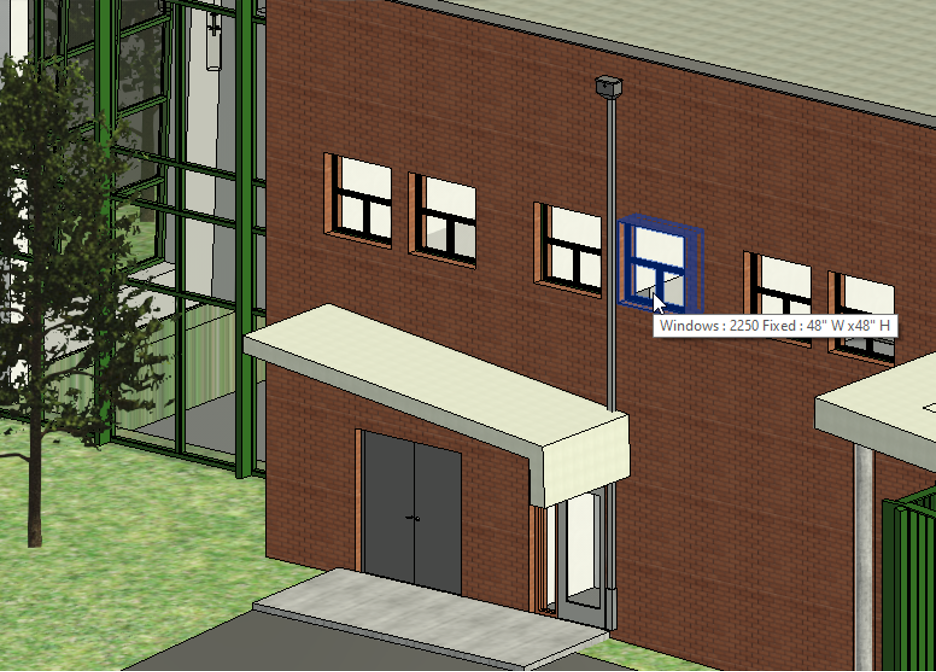
2. Notice that many of the openings in the building are curtain walls. But rotate around to the side and back of the room and you can see some windows, as shown below.
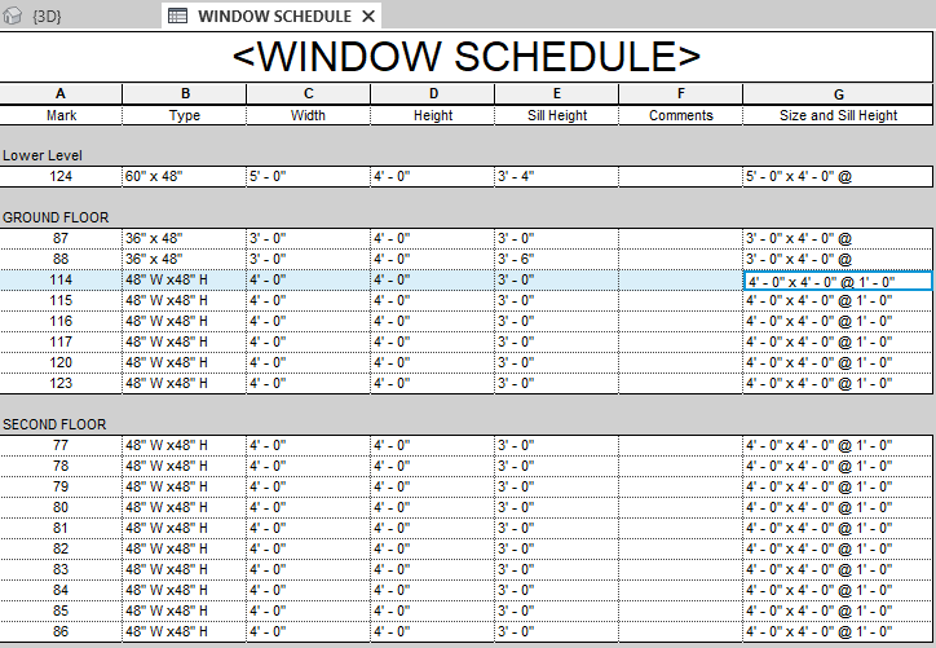
3. In the Project Browser, expand Schedules/Quantities and double-click on WINDOW SCHEDULE to open it.
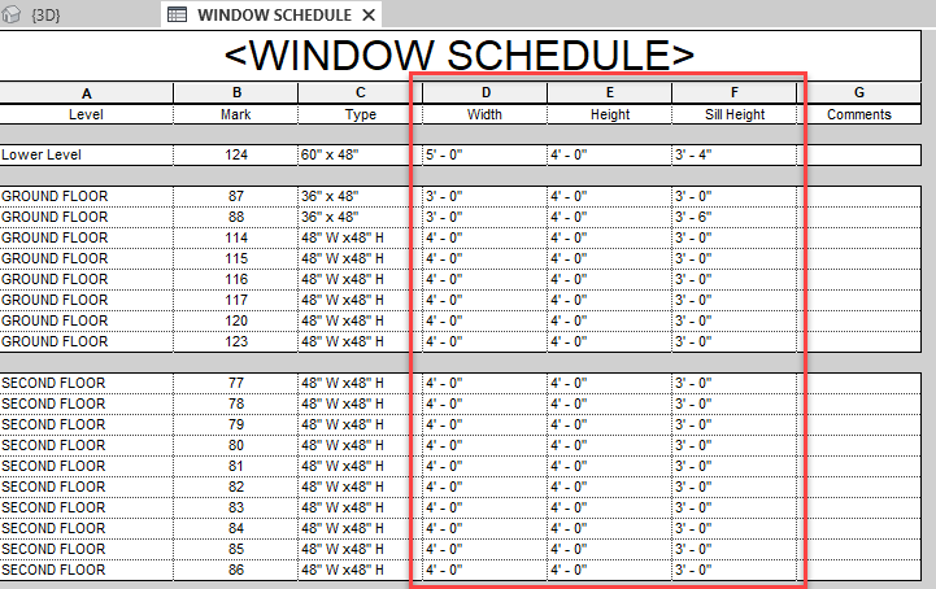
4. You can see that there are three fields: Width, Height, and Sill Height that are all describing the size and sill height of the windows based on the location above the level, as shown below.
5. In Properties, beside Sorting/Grouping, click Edit…
6. In the Schedule Properties dialog box in the Sorting/Grouping tab under the Sort by: Level, select Header.
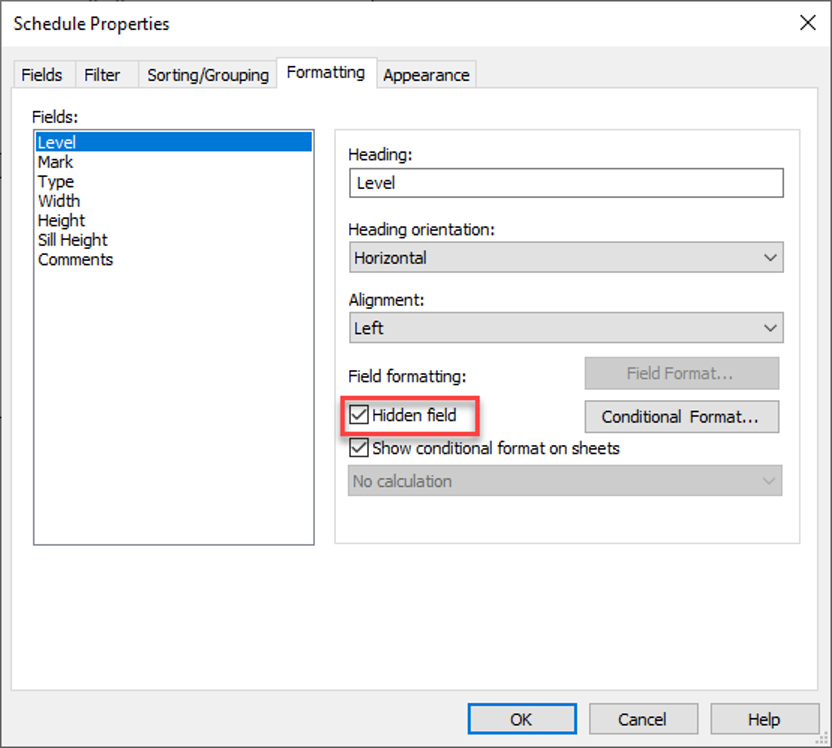
7. Click on the Formatting tab, verify Level is selected and then select Hidden field, as shown below.
8. Click OK.
9. In Properties, beside Fields click Edit.
10.In the Schedule Properties dialog box, Fields tab select (Combine Parameters).
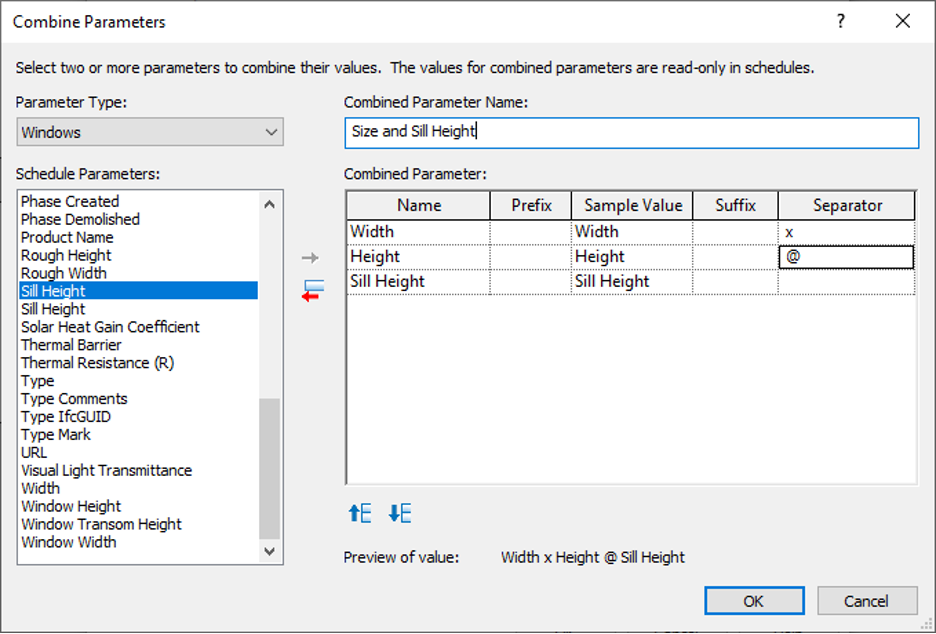
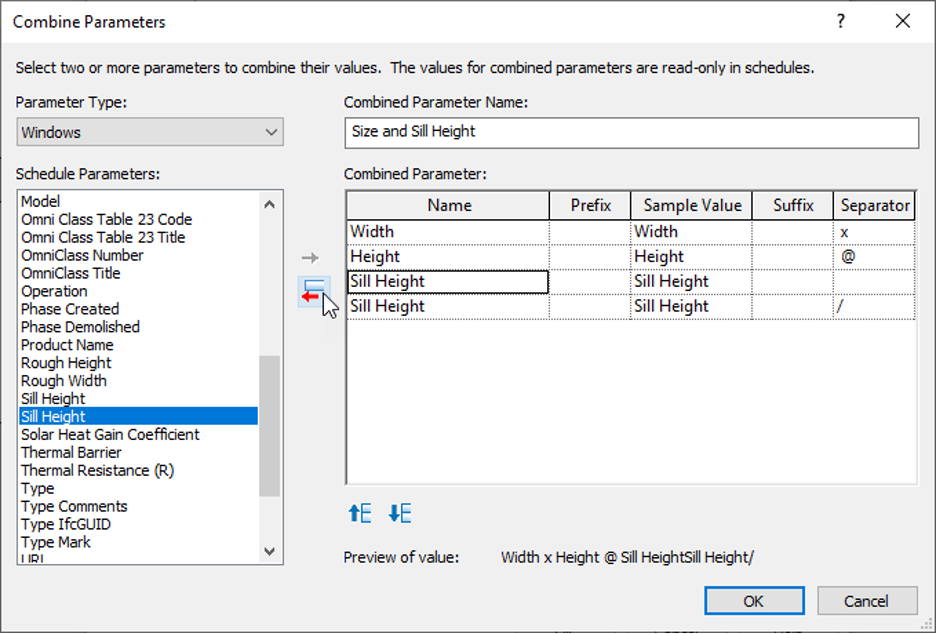
11.In the Combine Parameters dialog box, select Width, Height, and Sill Height and add them to the Combined Parameter box, as shown below.
12.For the Combined Parameter Name type Size and Sill Height.
13.Change the first Separator to a lower case x.
14.Change the second Separator to the @ symbol.
15.Delete the third Separator and click back to one of the others to see the Preview.
16.Spaces between the separators are not automatic. So, go back and add a space in front of and behind each separator. The final information is shown below.
Notes: You can choose from all the different parameters whether or not they have been added to the fields list.
There are two Sill Height parameters. Some of the window families were created with a duplicate parameter for this option.
You can modify the look of the value by adding a Prefix, Suffix, or Separator.
At the bottom of the dialog box you can see a Preview of the value. By default, each parameter has a slash (/) as a separator.
17.Click OK and OK again to add the parameter to the schedule.
18.The Sill Height is not coming out as expected. Therefore, we need to edit the Combined Parameter.
19.In the Schedule Properties dialog box, on the Fields tab, select Size and Sill Height and click (Edit parameter).
20.Select the second Sill Height in the list of parameters and add it to the Combined Parameter. Remove the other Sill Height parameter, as shown below.
21.Delete the default Separator and click OK.
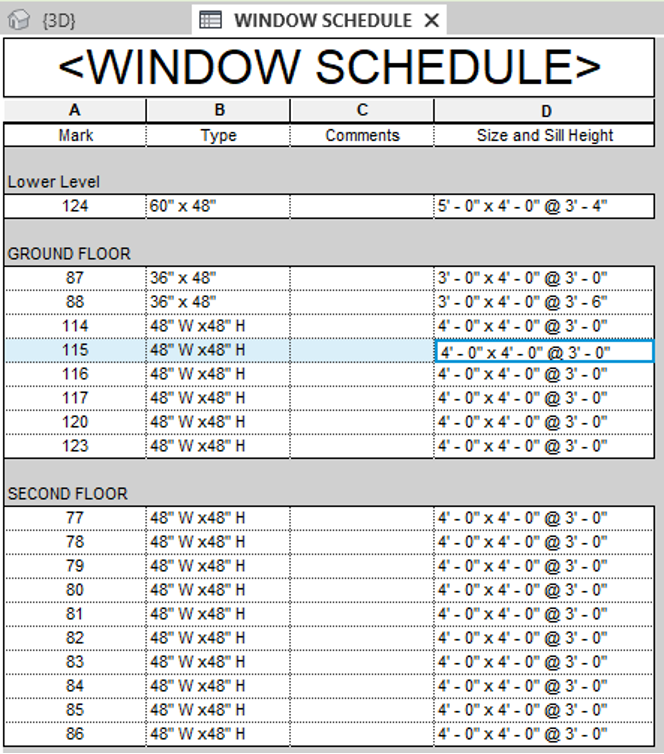
22.The New combined parameter is now available, and you can delete the original separate Width, Height, and Sill Height parameters from the table, as shown below.
23.Click OK .
24.The final schedule displays, as shown below.
25.Save the project.