00:02
In this video, I'd like to alter the elements that reside in different option sets we have chosen.
00:09
So let's get into Revit, and see how that's done.
00:14
As before, in the recent files, we click on the architectural model.
00:20
It is a central model and we'll be creating a local copy of that.
00:25
And we want to overwrite the existing local copy.
00:31
Revit starts up in that starting view that we had configured earlier.
00:36
So let's pan around.
00:41
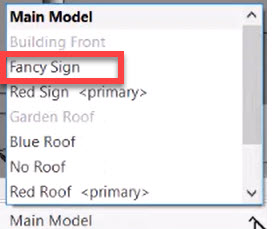
And I want to work on the building front option set.
00:48
So in my drop down here, I select "Fancy Sign".
00:54
And now you notice that everything else is grayed out except for the elements that are in the option set.
01:01
And I can revise these.
01:04
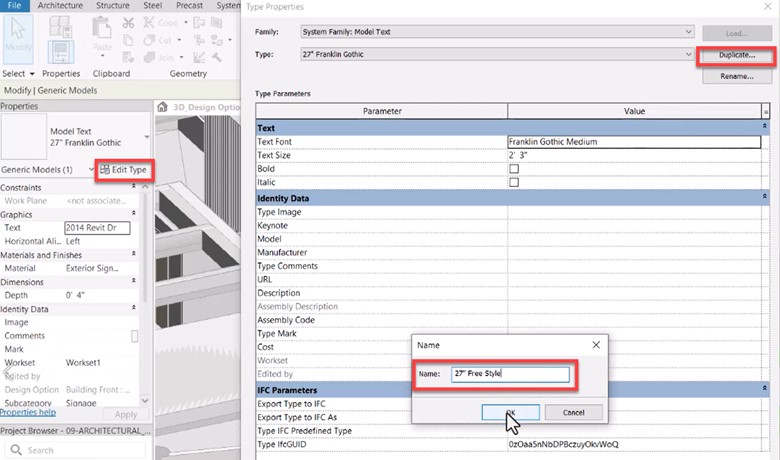
So let's click on this "2014 Revit Dr" sign, and let's change the type.
01:16
I wanna duplicate this, and call it "27-inch free style".
01:24
And for the font, on the drop down list, pick the freestyle script font.
01:33
The text size can remain 2 ft 3. Click "OK".
01:40
And now you see that the sign has changed.
01:44
But let's also change the text of it.
01:48
Click on the box to edit the text, and in the Edit Text Dialog box, call it "21st Century Revit Drive," and click "OK".
02:04
Hit the "Modify" button, or hit "ESC" a couple of times to clear the selection.
02:10
Now, this looks quite nice. However, I don't quite like the red.
02:13
So let's change the material.
02:16
Go back and reelect that sign, and in our properties go down to material.
02:22
Click on the browse button, and let's try glass.
02:28
Transparency is set to 75.
02:31
Let's reduce that a little bit, around 50, and click Ok.
02:40
Ok. Click the modify button or escape. Yeah, that looks nice.
02:45
Ok, let's try it out. This is my fancy sign. I'll zoom out a little bit, and this is my red sign.
02:54
Let's go back to our fancy sign, and let's also change these curtain wall windows,
03:01
hold the control key down to select the first one, and select the second one.
03:07
Again, you have to hover around a little bit until you see the blue box around the curtain walls.
03:15
You notice in my properties, it says walls too.
03:18
So I know I have the two curtain walls selected, and under my type,
03:24
let's select exterior lazing ribbon windows.
03:31
Yeah, that's quite nice.
03:34
Ok, let's go back to our main model.
03:40
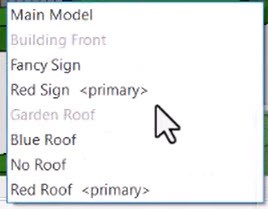
You notice in my main model, it reverts back to the red sign because the red sign is the primary.
03:51
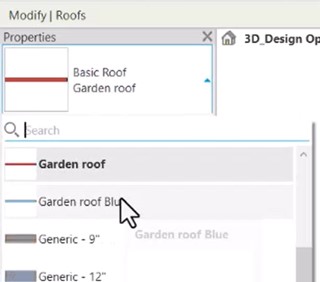
Let's pan up to the garden roof, and let's set our design options to blue roof.
04:05
and we're going to change our type from garden roof to the one that we made previously garden roof blue.
04:15
Escape a couple of times. Yeah, looks interesting.
04:21
Ok. We assigned the blue roof to the blue roof, and let's go to no roof.
04:28
And my drop down, I select the no roof design option.
04:34
Here, I simply select the roof hit the delete, delete key, hover until the wallet is selected.
04:43
Tap the tab key. So the chain of walls is selected, click it.
04:49
In my filter, I see four which are my four walls, and delete as well.
04:58
OK. This is for the no roof.
05:04
This is my blue roof, and this is my red roof, which is the primary.
05:13
Now, what I want to do is change the primary design options.
05:19
So I go back to my design options. I like the blue roof the best.
05:24
So I'm going to select blue roof under garden roof.
05:27
Oh, I'm still in the design options.
05:30
So I'm gonna click on finish editing, and now I can change my blue roof to make that the primary.
05:38
We see it appear in my main model.
05:41
And I also want to make my fancy sign the primary, I get the same error message that I got before,
05:49
that the walls don't quite join up because it's a wall from a design option, joining up with a wall from a main model.
05:56
For now, we can ignore that.
05:59
So I close out of my design options, and I'm going to close out of my warnings.
06:05
Ok. We've set our design options.
06:08
Now, the next thing is to find a proper way how we can present these different design options to our clients.