00:04
With the mass in place, we can now start to add Revit elements to the face of that mass.
00:10
In our case, I'd like to add a roof.
00:14
Since it's a weird shaped roof, I'd like to add some transparent material to let in some natural sunlight.
00:21
So let's get started.
00:25
In Revit, as before, we click on the central model, and we are informed that it needs to create a local copy of the central model.
00:37
And I want to override the existing copy, just to make sure that I have all the latest information from the central model.
00:45
We find ourselves in the Startup view. So let's go to the 3D view we created. Garden Roof 3D.
00:55
And let's change our visual style to consistent colors.
01:03
You notice that our mass does not show up.
01:07
That is because when we created the mass, it only enabled the mass visibility temporarily.
01:19
If I go to my Massing Insight, I have the ability to Show Mass by View Settings.
01:25
However, I'm going to go to my Visibility Graphics and turn it on there. So I type in VG as my keyboard shortcut.
01:35
And I scroll down to Mass. And I put a checkmark next to the Mass, Apply, and OK.
01:46
Okay, now we can see the mass.
01:52
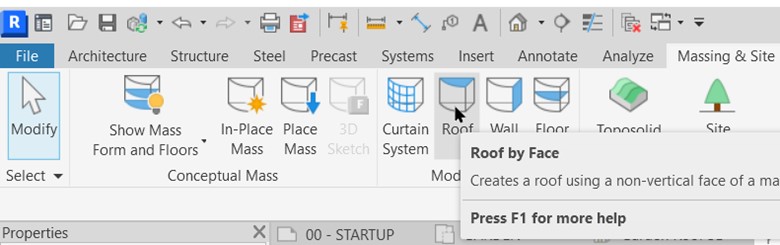
Now let's add a roof. You will notice that in the Massing & Site tab,
01:58
we have the ability to model by face, either Curtain Systems, Roofs, Walls, or Floors.
02:05
We also have that ability on the Architecture tab,
02:10
on the various pull-downs, Roof by Face, Floor by Face, etc.
02:17
We'll go from the Massing & Site tab and select Roof under Model by Face.
02:25
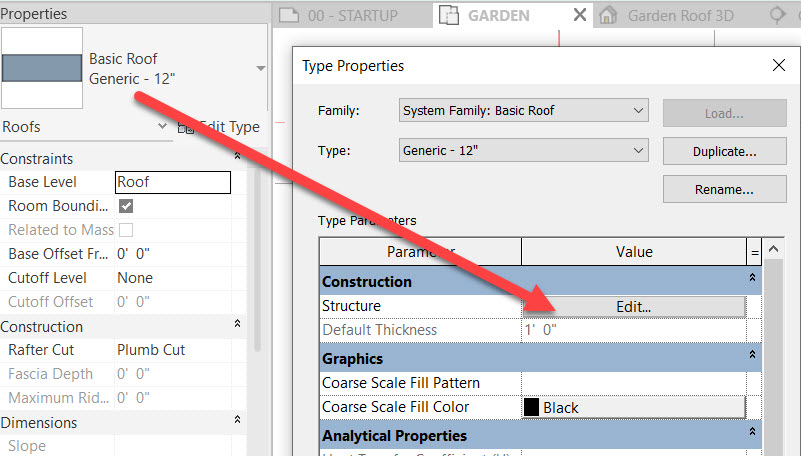
Let's go with a basic roof, generic 12-inch, and let's edit the type.
02:33
And what we want to do is duplicate that type. So I click on Duplicate and call it Garden Roof.
02:42
And then I click on my Edit tab.
02:46
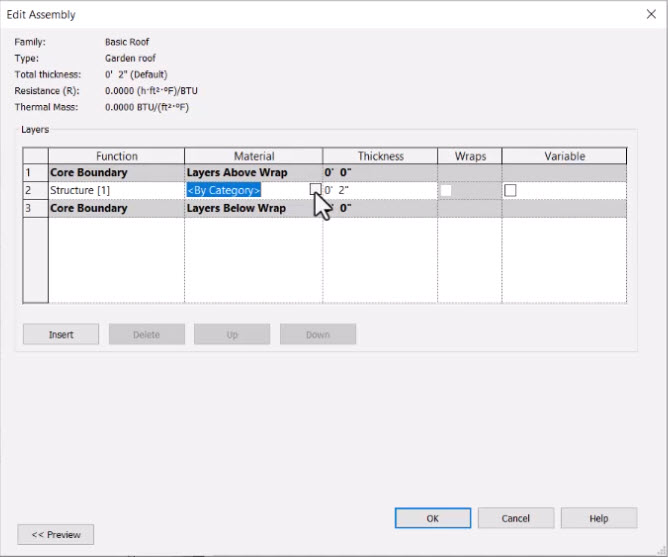
We'll make the thickness of the roof 2 inches. Be sure you add an inch symbol.
02:54
And for the material, click on the little Browse button, and let's create a new material.
03:02
On my drop-down list below, I go to Create New Material.
03:08
Right-click to rename it, Garden Roof.
03:16
Click on the Appearance tab.
03:21
I want to see an image, so when I click on No Image Selected, the hyperlink,
03:28
it does not go to the folder where all my materials are.
03:32
So cancel out of this, and here's a bit of a shortcut.
03:37
I click on an existing material that has an image,
03:44
and I click on the image, and it browses out to the right folder.
03:52
All I need to do is cancel out of this.
03:54
Go back to my Garden Roof, and now it knows which folder to find the materials in, and now I can find the material that I want.
04:05
I'm going to change my views to thumbnails, and I can right-click and see large icons.
04:18
I want to find Fabric, start typing it in, and I want to find Fabric Red.
04:27
Fabric Wire Red. So I click on that and click Open.
04:35
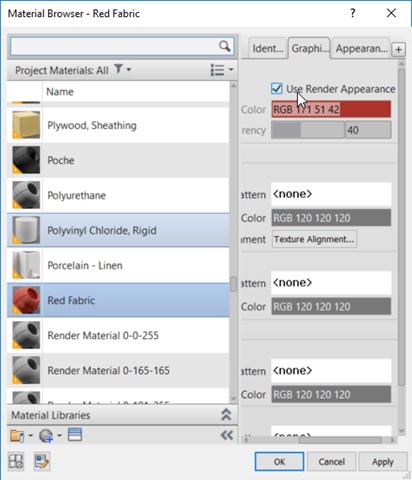
My thumbnail updates, but I want to make this transparent and translucent.
04:43
So I expand my Transparency,
04:47
check it on, and make the transparency about 40%.
04:55
Could use a slider or simply type in 40.
04:59
And the Transparency amount should be about 40 as well. Once again, I'll type it in.
05:08
On the Graphics tab, I can simply say to Use Render Appearance.
05:14
And for the Patterns, Foreground, Background, for my Cut and my Surface Patterns, we can just leave those as they are.
05:27
And that material is now assigned to my Garden Roof. Basic Roof.
05:33
We'll click OK, and OK once again to dismiss the Type Properties dialog box.
05:45
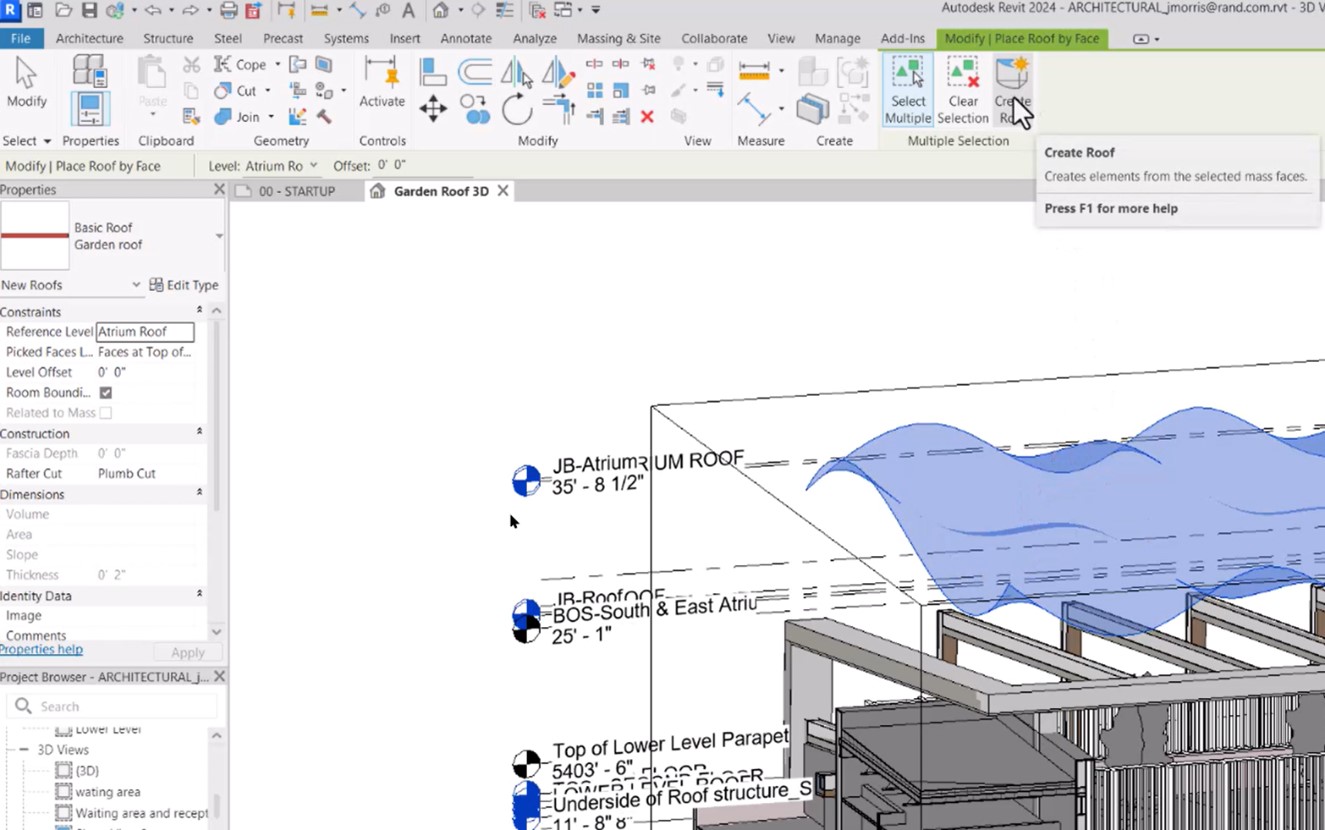
Now with the type selected, now Revit is looking for a mass to create the roof.
05:54
So I click on the mass. It highlights, and in my contextual ribbon, I click on Create Roof.
06:03
And the roof is created from the mass.
06:06
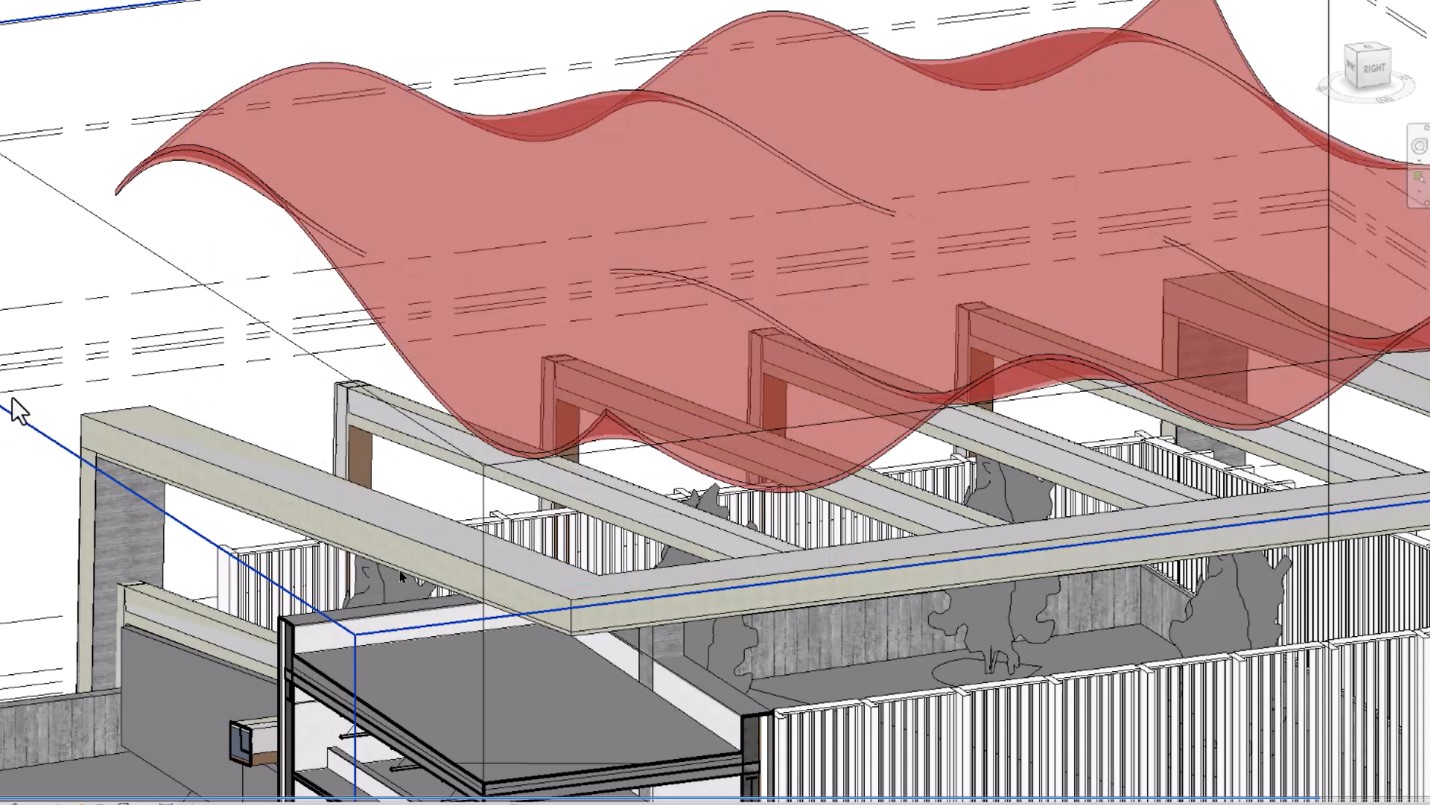
Our visual style is currently set to Consistent Colors. So let's change that to Textures.
06:14
And you recall that we had turned on the mass in the Visibility Graphics.
06:20
So let's turn that off by typing in VG at the keyboard, go down to Mass, and uncheck that.
06:31
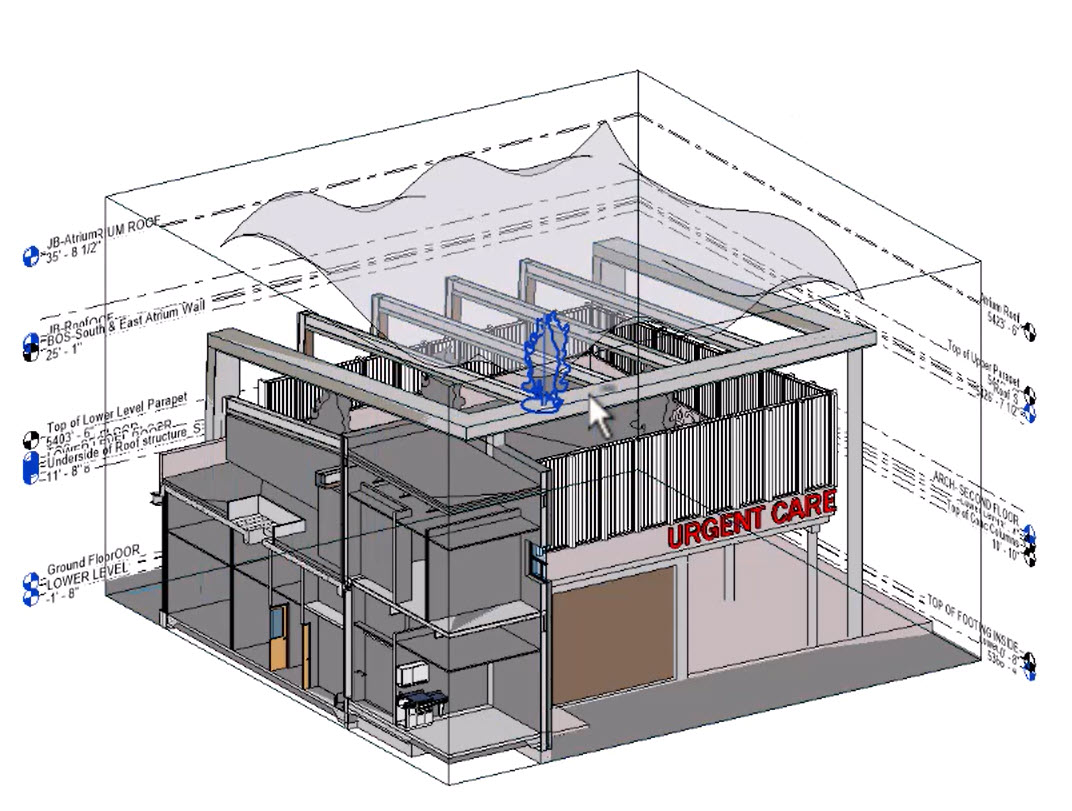
And here is our roof created from the mass.
06:45
Now it's kind of floating in midair, so we need to start generating some walls, which we will do next.