00:00
Creating Project Parameters in Revit.
00:02
Project parameters hold information used only within one project.
00:09
They are hosted by elements in that project.
00:11
And these can be displayed in schedules, but not in tags.
00:15
Typically, use a project parameter when the information is only needed within the current project.
00:22
If you need to share it with other projects, then shared parameters are a better solution.
00:28
So let's jump into Revit to see how this works.
00:32
So here we are in Revit 2024.
00:35
And let's open up our small medical center parameters file.
00:39
It opens up in the ground floor plan.
00:42
But let's switch to our default 3D view, so you'll understand better what we're trying to do here.
00:49
So this medical center basically has two functions.
00:52
One is for urgent care, and the other one is the health center.
01:01
Back in our ground floor, the urgent care sector is to the left,
01:07
and the health center resides in the right part of the building.
01:12
So we want to differentiate for each room what building sector it belongs to.
01:18
And this is not a typical requirement.
01:20
Therefore, it is an ideal candidate for a project parameter.
01:24
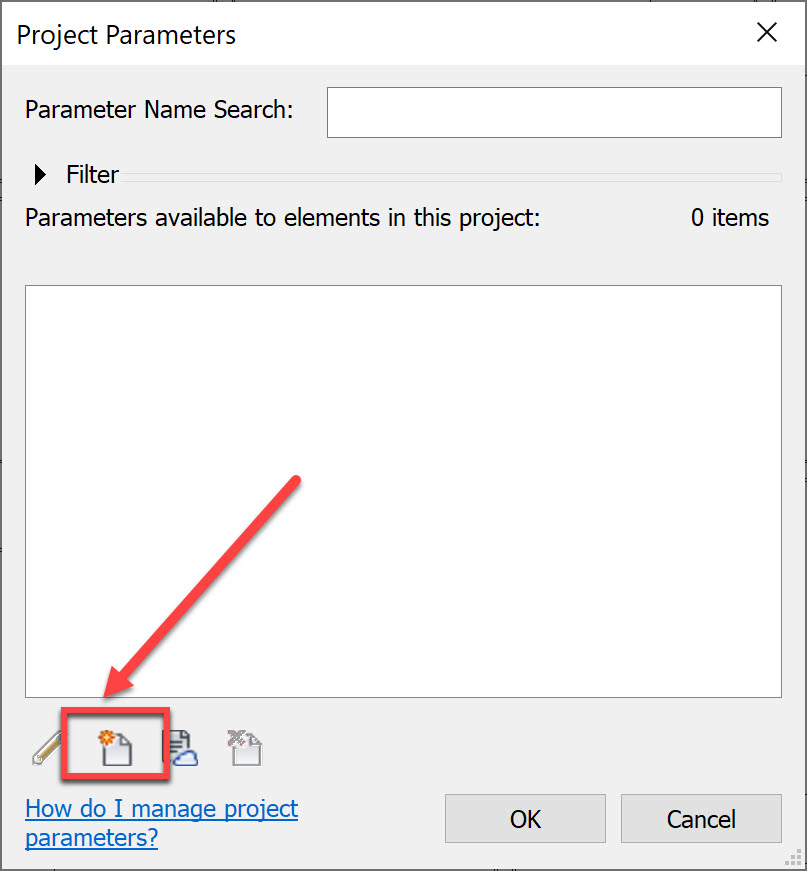
So in my Manage tab, I click on "Project Parameters".
01:29
And you'll see that we currently have no project parameters because this list is empty.
01:34
I want to create a new parameter.
01:36
So I click on the "New Parameter" icon.
01:39
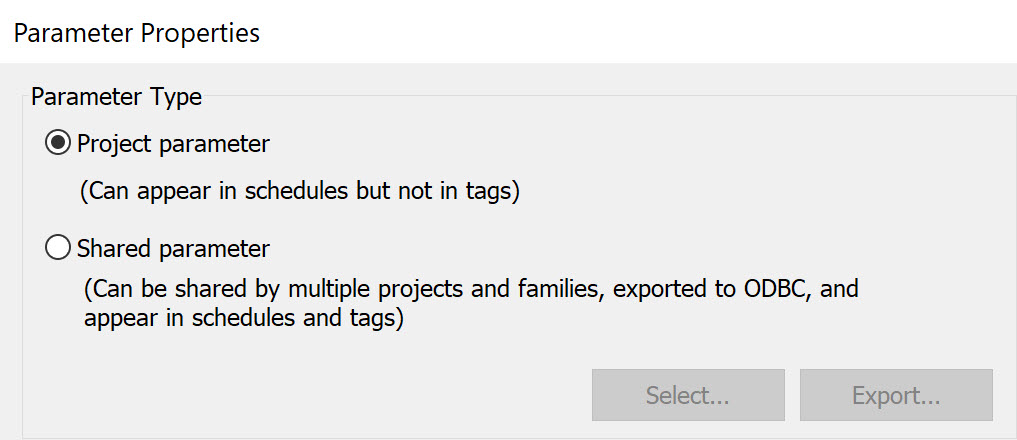
This is the dialog box we looked at earlier.
01:42
And you notice once again that the project parameter can appear in schedules, but not in tags.
01:49
So let's create a project parameter.
01:51
And let's call this one "Building Sector".
01:55
And it is an instance parameter, which means that each room that we apply this to can belong to different building sectors.
02:04
The discipline is common because it can belong to multiple disciplines.
02:08
The data type will be text, and we want to group this parameter under Identity Data.
02:15
Last thing we need to do is to tell it what category this belongs to.
02:21
First thing I'm going to do is I'm going to make sure that it's only set to Architecture to make this list a bit shorter,
02:28
and we're going to search for Rooms.
02:32
So I click on Rooms.
02:34
So what this means now is that each room will have the additional parameter of Building Sector.
02:43
And now when I select a room in my Properties, you will notice under Identity Data, I have a Building Sector.
02:52
I'm going to type in Urgent Care, and you notice the little tooltip that says No Matches.
02:59
This means that this is the first entry that I put in.
03:02
And it can't find any match for this particular Building Sector, which is fine because it's the first one we entered.
03:09
Select another room, the X-Ray.
03:12
And now in the Building Sector, I have a dropdown list, and notice that it says Urgent Care.
03:20
When I come over to my Health Center, and I click one of these exam rooms, I now need to type in Health Center.
03:29
Again, the tooltip says No Matches.
03:34
And once again, if I select another exam room, now in my dropdown, I have both my Health Center or my Urgent Care.
03:46
Now, I could go around and select all these different rooms individually.
03:51
But a better way of doing that is simply selecting this entire wing, for the Health Center.
04:00
With all these selected, I need to filter them.
04:04
So I want to check None, and only select the Rooms.
04:11
I have 28 rooms selected.
04:13
So I can simply come down to Building Sector, and assign Health Center for this.
04:22
I'm going to repeat the process, for the left-hand side.
04:28
Once again, filter only for the Rooms.
04:35
And then notice that the Building Sector is currently set to Varies because some of these rooms were already assigned to the Health Center.
04:44
So I'm going to set this to Urgent Care.
04:49
Now, remember that project parameters can be used in schedules.
04:53
So let's open up the room schedule.
04:58
Notice the room schedule is divided into levels, and there's all sorts of fields here,
05:05
which are another word for parameters,
05:08
but the Building Sector isn't part of the schedule.
05:13
I go to my Fields to edit them.
05:17
And here I find my Building Sector.
05:21
I want to have that go below my Room Styles, and I click on Add, and click OK.
05:29
Let me pan over a little bit.
05:31
Now you notice for my Lower Level, one of these actually belongs to Health Center, and that doesn't seem quite right.
05:37
So I know that this one actually belongs to Urgent Care.
05:41
So another nice thing about this is in my schedules, I can change these parameters.
05:49
On my Ground Floor level, I have some of these that are set to Health Center, some of them set to Urgent Care,
05:55
and that doesn't seem to make much sense either.
05:58
What I can do is I can select this particular row, and I can highlight this in my model.
06:04
Now Revit is telling me that there's other views where this is available from, but this is good enough.
06:10
Simply going to close out of this.
06:13
This is my staff restroom.
06:15
I can pan out to see exactly where it belongs. So no, in this case, this belongs to my Health Center.
06:24
If I go back to my room schedule, note that the nurse station, the stairs, is basically the same.
06:32
So I can select both of these and change them over to the Health Center.
06:38
If I scroll down to the second level, you notice that none of these are yet assigned to the Health Center.
06:46
So I can select one row, as I did before, highlight it in the model, there is no open views.
06:53
So it's going to search for a proper open view, and I'm going to close this because this is the proper view that I need.
06:60
And as before, I'm just simply going to select all the rooms through my filter,
07:07
and select Health Center, for the Building Sector.
07:12
Go back to my room schedule, and notice that everything is now properly assigned.
07:20
So to summarize, project parameters are quite useful when there's a unique requirement only for one particular project.
07:28
If you have parameters required for multiple projects, then your best bet is to use a shared parameter, which we'll be looking at next.