00:00
Adding Shared Parameters to Projects in Revit.
00:04
Finally, we come to Shared Parameters.
00:08
As I mentioned in other videos, Shared Parameters are the most versatile type of custom parameters in Revit.
00:16
But with that versatility comes a need for focused planning, including naming schemes, text file locations, etc.
00:25
A lot of coordination is required for creating Shared Parameters.
00:30
In this video, we will review an extensive set of Shared Parameters from an international standards group,
00:37
and then we'll create two Shared Parameters of our own in a separate file.
00:42
So let's jump back into Revit to see how this is done.
00:47
So once again on the homepage of Revit 2024, let's open up our small medical center parameters to look at these Shared Parameters.
00:56
It opens on the ground floor plan.
00:59
And on the "Manage" tab, let's go to "Shared Parameters".
01:02
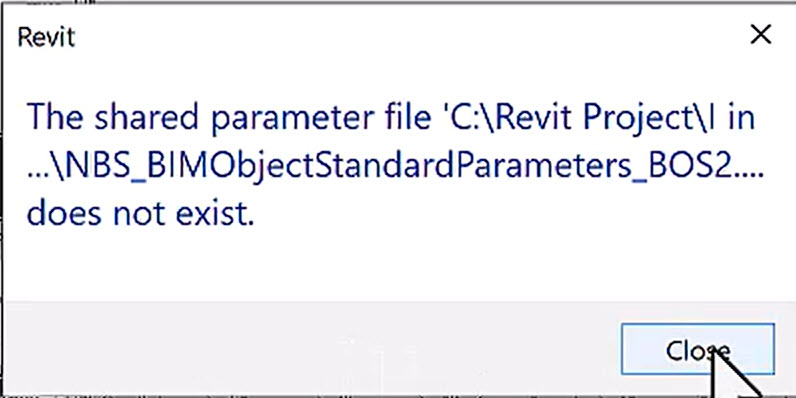
Oh, Look at this. The Shared Parameter file cannot be found.
01:06
I told you it takes coordination to create these Shared Parameters.
01:10
So I'll click "Close".
01:12
And that sprouts out to where the Shared Parameters file resides.
01:18
It's in the Ascent Configuration folder.
01:21
And here's the text file. So this is a regular text file I right click and edit this text file.
01:28
But please do not try to edit this manually.
01:31
It's far better to edit it through Revit itself.
01:34
Otherwise, chances are you will break it.
01:37
So I click "Open", it takes a while to read this.
01:40
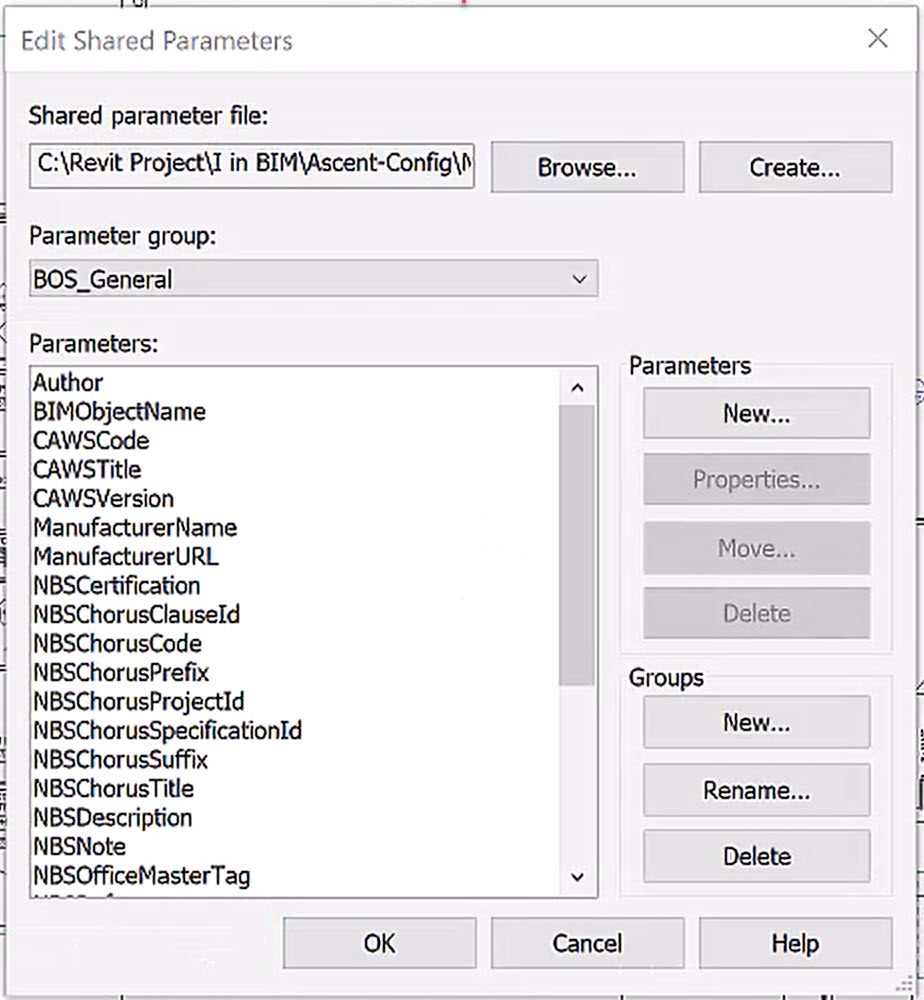
So this is a very extensive Shared Parameters file from the National BIM Library.
01:47
Notice different groups that I have. This is for General, COBIE.
01:53
These are different parameters that might be useful for COBIE categorization.
02:00
Materials, different materials that might be able to be used.
02:05
So a very extensive multi-purpose Shared Parameters file that can be used in multiple projects and even in families.
02:15
But we want to create our own Shared Parameters file for our own office.
02:19
So I click on "Create".
02:21
It goes to the configuration, and I'm going to call this one "Facilities".
02:28
So now this is my Facilities Parameters file.
02:31
And since it is a new file, obviously there's no Shared Parameters yet.
02:36
The first thing I need to do is to create a new group.
02:39
So in this example, we're going to create a couple of parameters that can be used by Facilities Management,
02:45
Inventory Control Discipline and Inventory Control Number.
02:50
These parameters need to be used across the link projects including Architecture,
02:55
Interior, Mechanical, Electrical, and Plumbing as well as other disciplines.
02:60
Therefore, it needs to be a Shared Parameter.
03:03
So the group we're going to create is going to be called "Inventory Control", and I click "OK".
03:10
And now I'm going to create a new parameter.
03:12
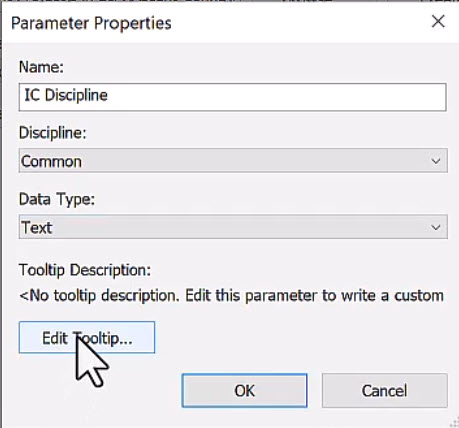
So for the name of this new parameter, "IC Discipline" with IC meaning Inventory Control.
03:21
It's going to be under my Common Discipline, and the data type is going to be text to accept alphanumeric characters.
03:30
I do want to edit my Tooltip.
03:33
I'm going to call it "Inventory Control Discipline" since many people may not know what IC is abbreviation for.
03:44
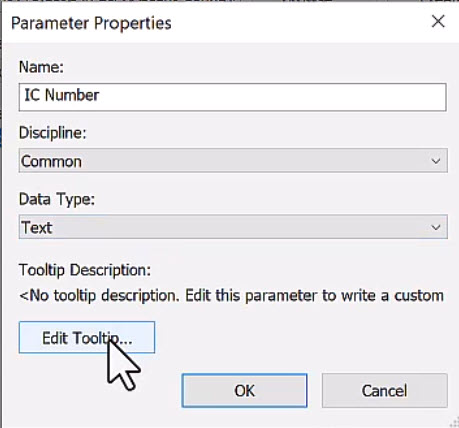
Let's create another new parameter and call this one "IC Number". Again, it's a Common Discipline.
03:52
Once again, I'm going to be using Text.
03:55
Even though it is a number,
03:57
Text will allow me the ultimate flexibility if I don't need to do any formulas or mathematical calculations with it.
04:06
Once again, I'm going to edit my Tooltip, and call this "Inventory Control Number".
04:16
And now I have two parameters for my Inventory Control.
04:20
So for example, I select IC Number and go to Properties, and notice that this is all Read Only I can't make any changes.
04:29
Now, this makes sense because this is a Shared Parameter that is going to be used across multiple disciplines.
04:36
So if you need to make any changes, it could corrupt existing data.
04:40
Therefore, it is highly recommended that you ensure that everything is set up properly.
04:44
The first time before you start sharing this parameter.
04:48
If you do need to make changes, the only thing you can do is to delete the parameter, and create a new parameter.
04:54
So if I do need to delete a parameter from my Shared files, a warning appears basically stating that.
05:02
Are you sure you want to delete this Shared Parameter because it could be used in multiple projects in schedules and takes,
05:10
I'm going to say No, I'm clicking OK to close out of my Shared Parameters file.
05:16
So that was really step one, setting up the Shared Parameters file and or loading the Shared Parameters file.
05:26
Step number two is to use this in this particular project.
05:30
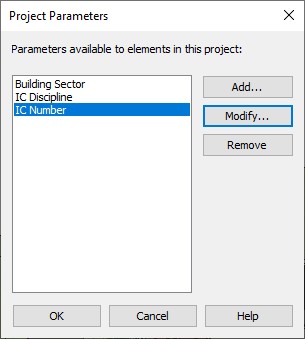
So on my Manage tab, I go to Project Parameters,
05:36
you notice that the Building Sector Project Parameter exists from the previous video.
05:42
And I want to create a new parameter.
05:44
This one is a Shared Parameter. So I click on Shared Parameter, and go to Select, and under my Inventory Control.
05:53
I want to select IC Discipline and click OK.
05:57
Now there's not too much I can change here because it is a Shared Parameter, but I do want to group it under Identity Data.
06:06
Also, this is going to be a Type Parameter because of all the casework and furniture systems of this type will have the same discipline.
06:15
Once again, I'll filter my list to Architecture, and I will select Casework for this to belong to as well as Furniture Systems.
06:27
Now we have the IC Discipline.
06:30
Let's repeat the same for IC Number. So I click on New Parameter.
06:34
It's a Shared Parameter.
06:36
I'll select the Shared Parameter from Inventory Control.
06:40
So which is IC Number? And we'll group that again under Identity Data.
06:46
But this will be an Instance Parameter because every piece of casework will have a unique number.
06:53
Once again, I'm gonna apply this to my Casework and Furniture Systems and click OK.
06:58
or click OK to dismiss my Project Parameters.
07:03
Since these Project Parameters are now set up based on the Shared Parameter file.
07:09
OK. Let's see how this works now.
07:11
Let's zoom in and select a particular Casework.
07:17
And in my Properties under Identity Data,
07:21
you will see here that we have IC Number going to make this 001.
07:27
But you notice we don't have IC Discipline because that is a Type Parameter,
07:33
and I can edit that through going through my Edit Type in my Edit Type under Identity Data.
07:40
We have IC Discipline, and let's make that capital A.
07:46
Let's try another Casework. No IC Numbers assigned to this. So I'll make this one 002.
07:55
And if I go to edit my Type because it's the same type, it's already set to A.
08:02
If I were to change this to B, it will also change all the Casework to B.
08:09
Now, these are based on Shared Parameters.
08:11
So let's look at creating Project Parameters based on these Shared Parameters in a different file in this Interiors file.
08:21
I'll make the second floor view active.
08:24
And as before I want to make some Project Parameters based on that Shared Parameter.
08:30
So I go to the Manage tab under Project Parameters.
08:35
I want to add a new Project Parameter.
08:38
It's going to be from a Shared Parameter.
08:41
It will be the IC Discipline just as we did before.
08:45
Group this under Identity Data, this is a Type.
08:50
And for this one again, I'll set it to Casework in addition to Furniture,
08:56
Furniture Systems, and Specialty Equipment.
09:00
Click OK. Create one more for the IC Number, which is from my Shared Parameter.
09:10
I'm going to group this under Identity Data.
09:14
It's an Instance Property, and select my Casework, Furniture, Furniture Systems,
09:23
and Specialty Equipment.
09:25
Click OK and click OK again.
09:28
And now, so for some of this Furniture, I can now set my IC Number to 101.
09:36
And if I go to edit my Type, IC Discipline, we'll make this one I for Interior,
09:44
so I can go about and make the Casework,
09:47
different Furnitures, different Specialty Equipments, and assign the parameters for the IC Number, or the Type Parameter for IC Discipline.
09:58
So this was in one Revit file, what we did earlier was in a different Revit file,
10:05
and we managed to associate the Shared Parameters in both files.
10:11
Also note that for the two different Revit files,
10:14
I could assign different categories for these Project Parameters that are based off the common Shared Parameters.
10:22
I'll close out of the Interiors Project since we're done with that.
10:27
Let's look at another example.
10:29
In this case, I'll be opening up my Mechanical Systems Project, and in my 3D Ground Level Coordination View,
10:38
I have a variety of systems here for Electrical and Mechanical.
10:43
Let's create some more Project Parameters for this file.
10:47
We want to create a new one.
10:49
It's based on Shared Parameters.
10:52
I'll select the Discipline, and as I did previously, I'm going to group it under Identity Data.
11:01
Now for my Filter List, I'm going to check Mechanical and Electrical and uncheck Architectural.
11:07
And let's just add some Categories,
11:11
Conduits, duct fittings, ducts, electrical fixtures, and electrical equipment.
11:20
These are all type parameters because they all have the same discipline.
11:24
I'll add another new project parameter based on my shared parameters.
11:28
This one will be IC number. It will be grouped under identity data. This will be an instance.
11:36
It remembers my selection from last time.
11:39
So once again, I can select my conduits ducts, duct fittings,
11:48
electrical fixtures and electrical equipment. Click. Ok.
11:52
And now when I select one of these ducts in our properties under identity data, I have my IC number 233.
12:02
And if I edit my type, I have my IC discipline, let's make it H for HVAC.
12:10
Now, if I select another duct, it has a new IC number 234.
12:19
But the IC discipline is already set H for H VAC because it is the same duct family that we said earlier.
12:28
So there you have it, we looked at shared parameters and how versatile they are.
12:34
We create a shared parameter file that can be loaded into different Revit projects.
12:39
And from these shared parameters, we generate project parameters,
12:44
custom shared parameters can be used in multiple projects to keep consistency in standards,
12:50
and to leverage the information in the model for a full BIM experience.
12:55
Shared parameters are very powerful, but they do require coordination and consistency.