00:01
Understanding Custom Parameters in Revit.
00:05
Custom parameters can be created in a project using global and project parameters.
00:11
In families, you can create parametric labels and other family parameters.
00:16
But the most powerful type of custom parameters is the shared parameter.
00:21
And this can be used both in projects and families and with schedules and tags.
00:28
So let's jump into Revit to look at these custom parameters.
00:32
First, we're going to look at global parameters.
00:36
Global parameters are created in projects and are typically used for dimension and formulas.
00:42
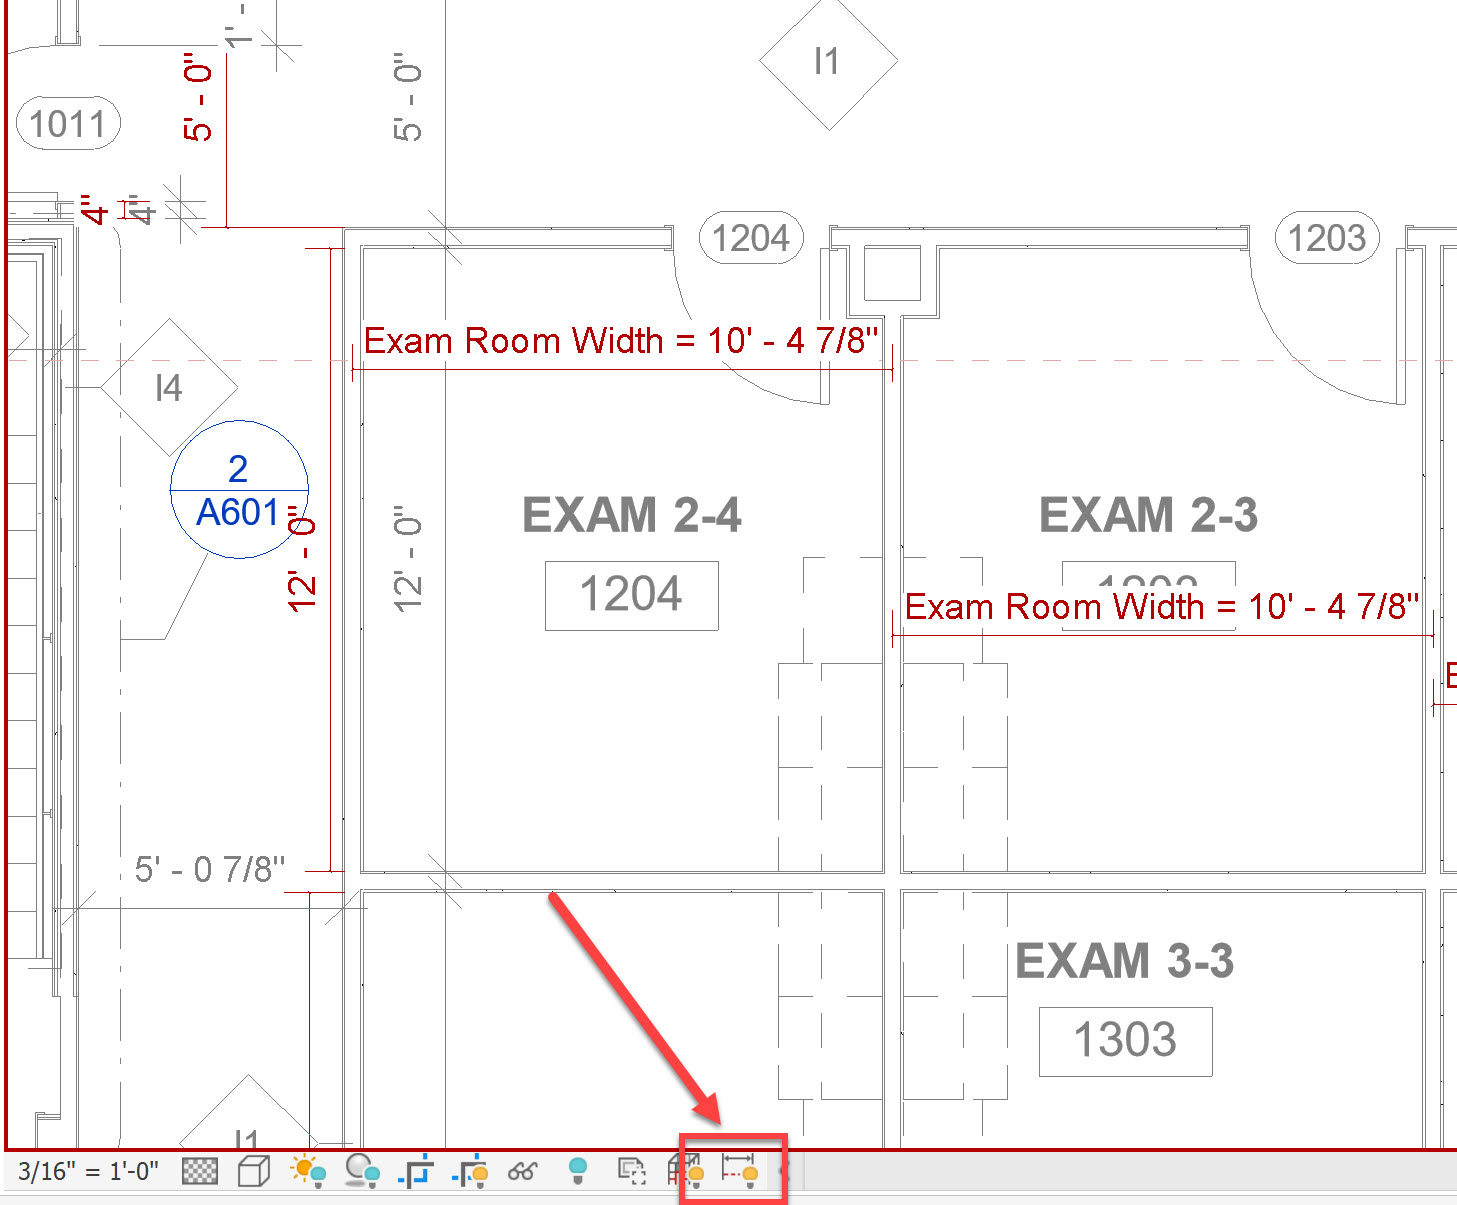
Notice I'm in the ground floor plan, and down in the View Control bar, there's an icon for revealing constraints.
00:52
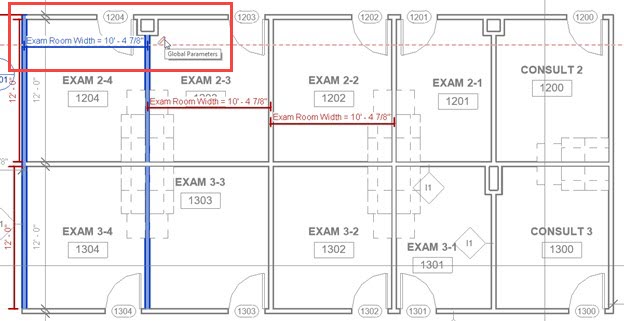
When I click on that, I zoom into the exam rooms, and you'll notice these dimensions in a red tone.
00:59
And these are the global dimension constraints.
01:03
Notice that we've assigned the exam room width to each exam room.
01:08
So I can click on one, and I have my edit button. So, I can edit that global constraint.
01:15
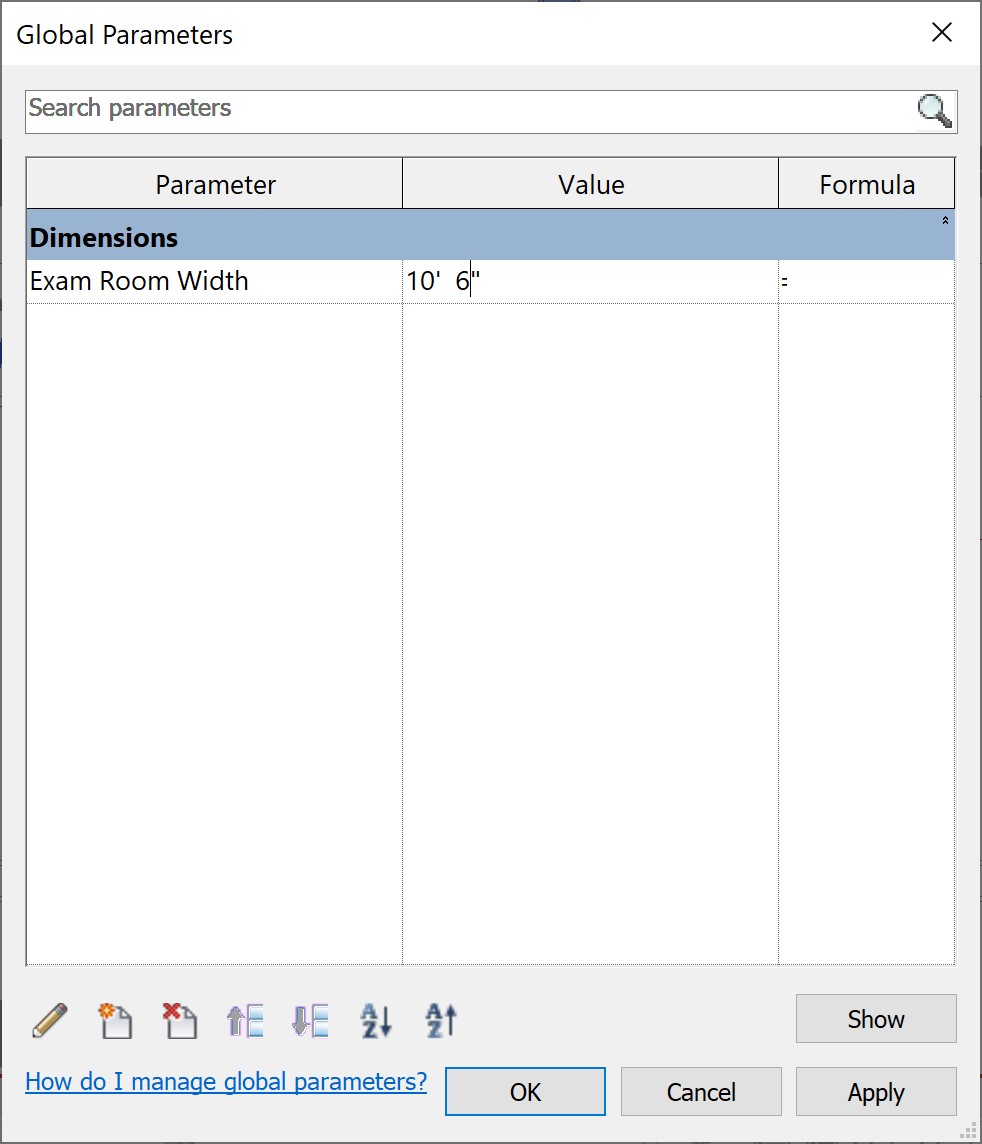
And in the global parameters, I can change the value simply by clicking on it,
01:21
and typing "10 space 6" which Revit interprets as 10 foot 6.
01:28
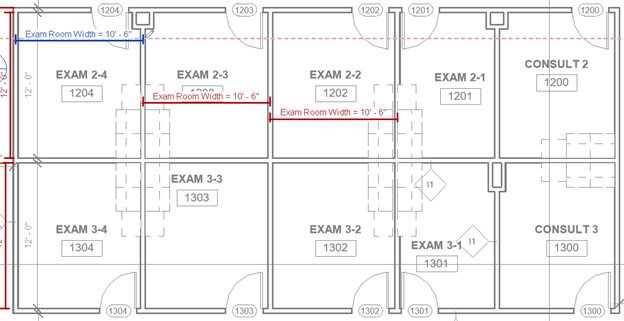
I click "Apply," and "OK".
01:30
And now you notice that all the exam rooms that have that global parameter assigned to it are now 10 foot 6.
01:40
Now that's quite a drastic change. So I'm simply going to undo that to revert back to the original dimension.
01:49
Also notice over here that the length of the exam rooms is in red.
01:54
So this 12 feet is also a constraint.
01:57
Another way of getting to the global parameters is by going to the Manage tab
02:03
and clicking on Global Parameters.
02:06
And the same dialog box opens, I no longer need to see these constraints.
02:11
So back on the View Control Bar, I disable my Reveal Constraints.
02:18
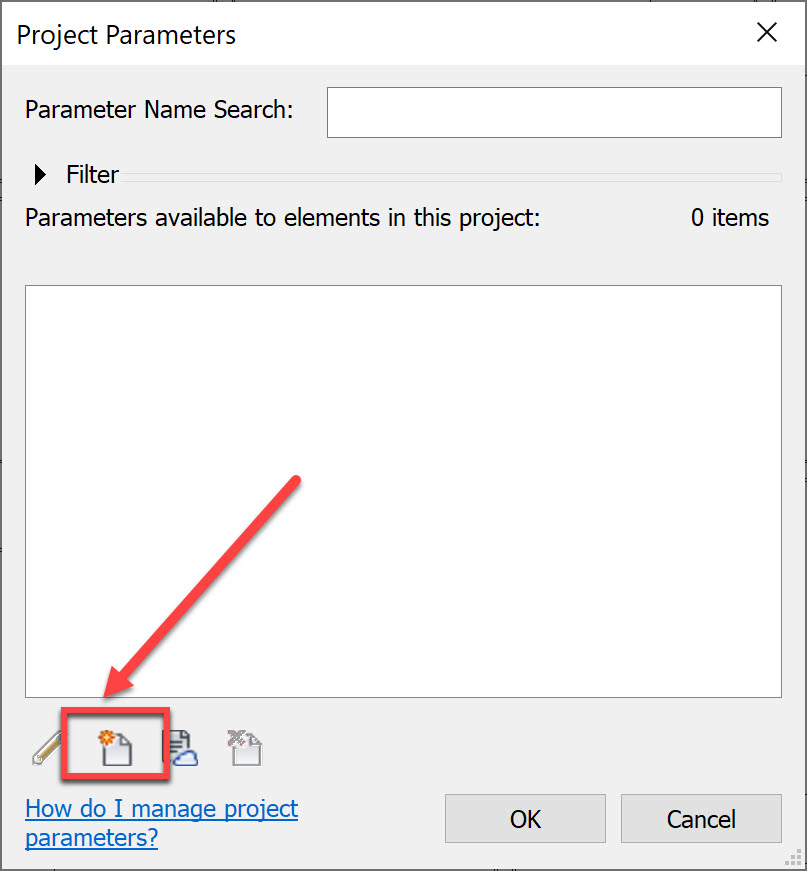
When I go to the Manage tab, I can select Project Parameters.
02:24
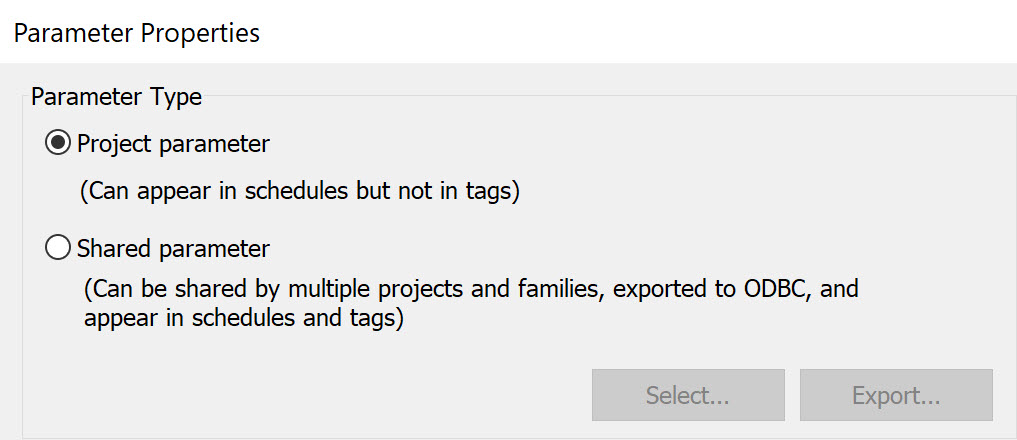
And if I go to the New Parameter, notice that I have Parameter Types, which are for Project Parameters.
02:31
And these can appear in schedules but not in tags.
02:35
And Project Parameters are used only for this particular project.
02:39
Whereas shared parameters can be used in multiple projects and families,
02:44
they can be exported to an ODBC file, and they can appear in schedules and in tags,
02:51
these are much more useful. Project parameters are used seldom.
02:56
In later exercises, we'll look at how to set up project parameters and shared parameters.
03:01
So for now, we'll just cancel out of that, or family parameters.
03:06
Let's double-click on one of these casework elements that launches our Family Editor.
03:14
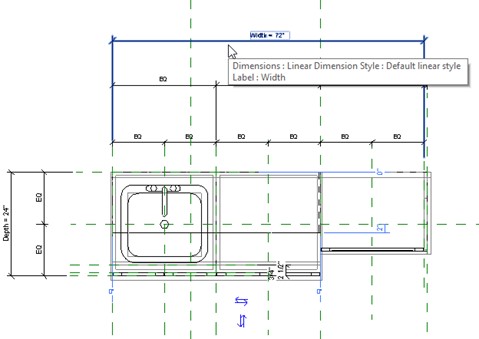
I'm going to go to my floor plan view, the reference level.
03:19
And here you will note that there are some dimensions that have labels next to them.
03:23
For example, width, and depth.
03:26
And these control the parametric nature of these families.
03:31
If I click on one of these dimensions, notice that it is a label,
03:37
these are the different labels that I have in my family.
03:43
Label is yet another term for parameter.
03:47
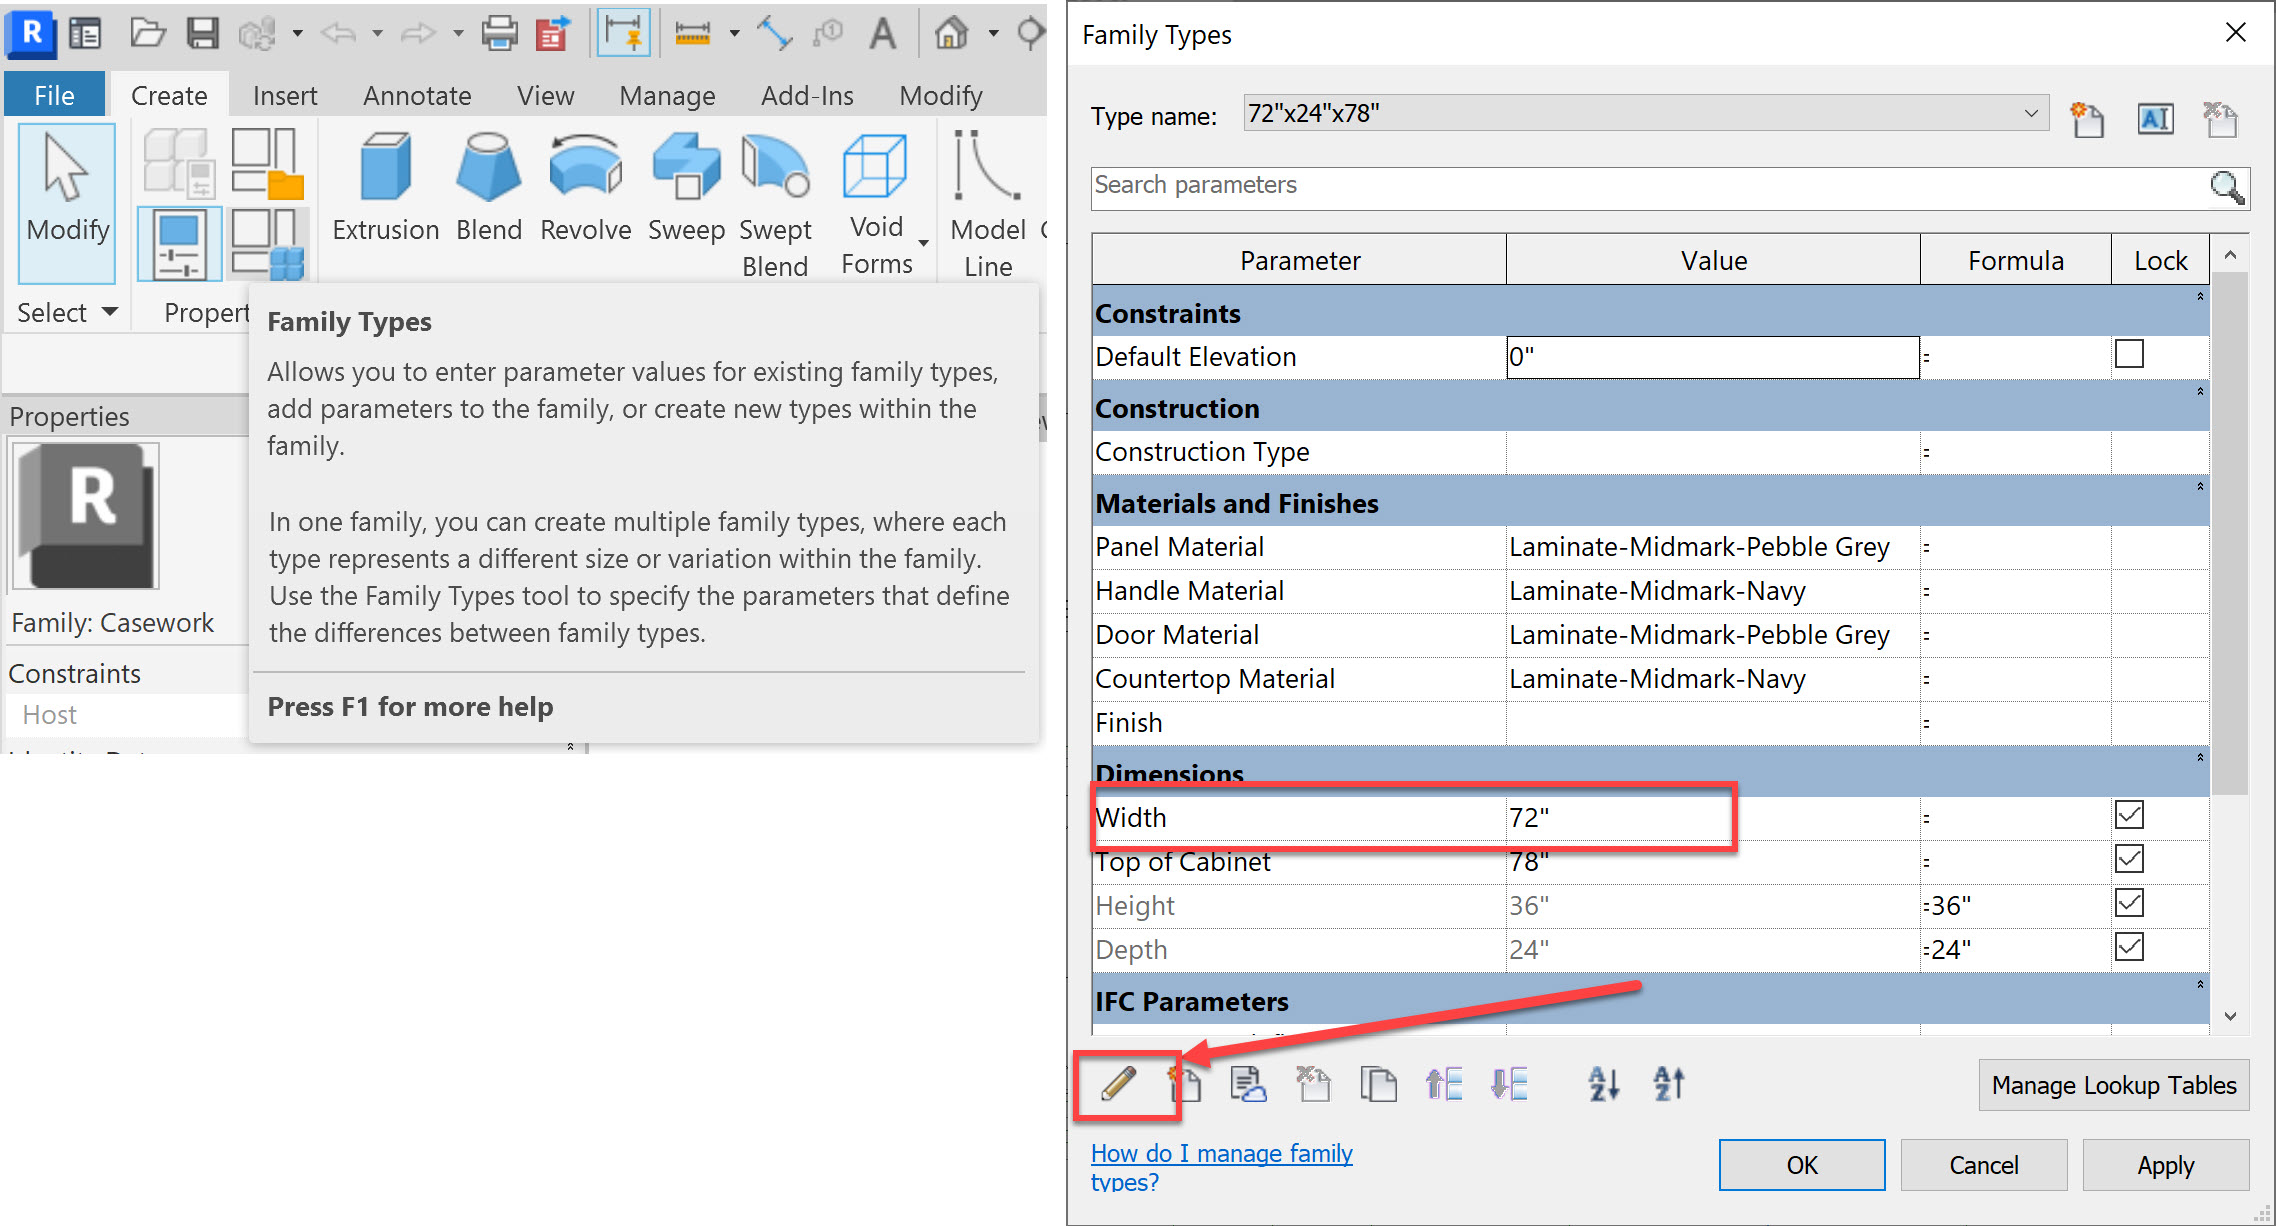
There are additional parameters in this family, and I can access them by going to my Family Types.
03:56
If I click on the Edit button, notice that the width is a built-in parameter, and I can't modify anything within it.
04:04
Although I can change the value if I scroll down to other information.
04:11
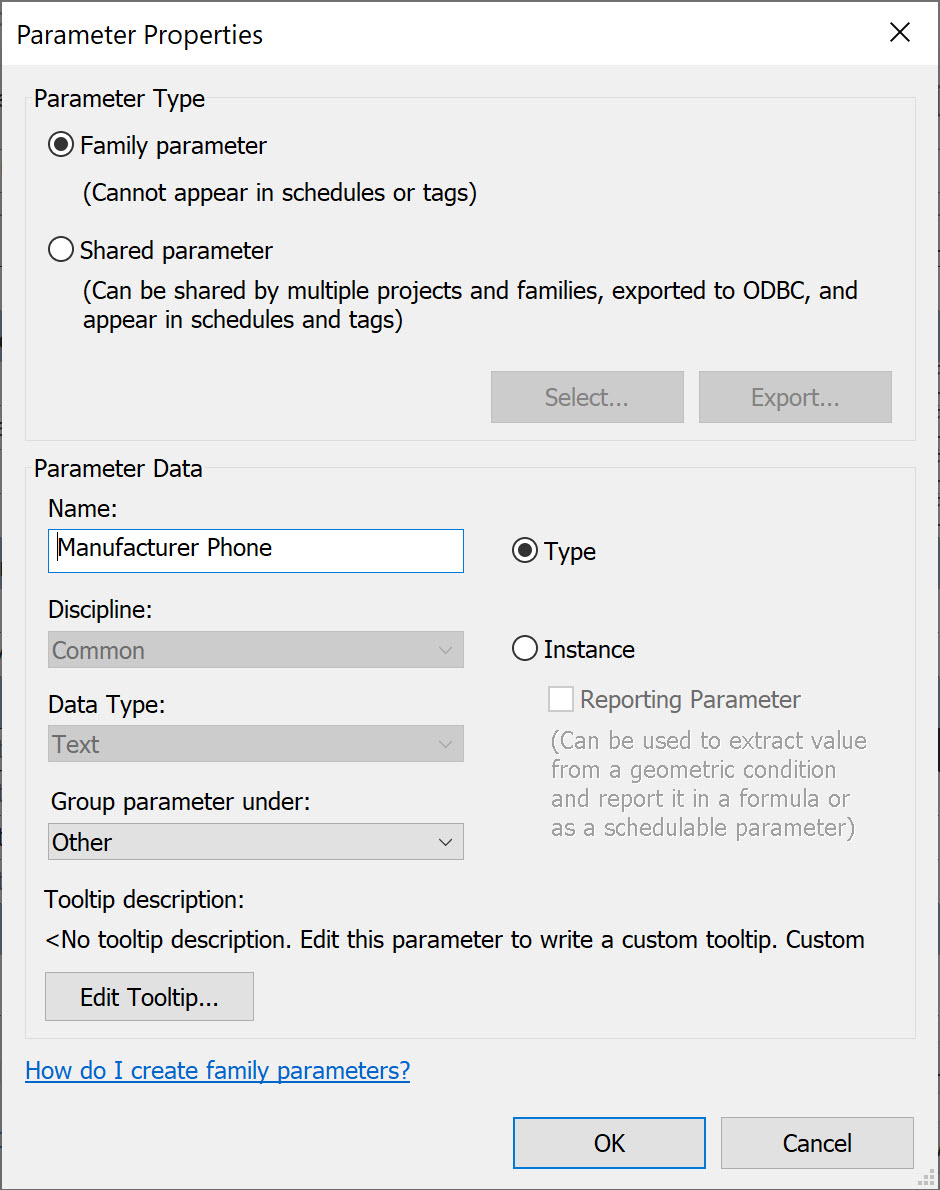
Notice I have my manufacturer phone. If I added this, this is a family parameter.
04:19
So it cannot appear in schedules or tags.
04:22
So it's really only accessible in the family.
04:26
It is also a type parameter.
04:28
So all the casework for this particular type will have the same manufacturer's phone number, which makes sense.
04:36
If I scroll up to material, and I edit this, this material is part of a shared parameter.
04:43
And as I mentioned earlier, this is really one of the most useful types of parameters.
04:49
However, it does take some effort to coordinate this.
04:53
This is also a type material.
04:56
So therefore, all the panel materials for this family will be the same. So I click OK.
05:03
Another thing that we can do in this Family Types is to create new types.
05:07
So therefore, I would have different types of casework belonging to this one family. I'm going to cancel out of this.
05:15
Let's close out this Family Editor.
05:19
We haven't made any changes.
05:20
To summarize, to create custom parameters is really the best way to make your building information model more useful.
05:29
We can add custom parameters for dimensions, model elements, and families, and these can be referenced in schedules, tags, et cetera.