00:00
The What and Why of Parameters in Revit.
00:04
In this video, we're going to walk through the different types of parameters in Revit,
00:09
and show you examples of how you would want to use them,
00:13
including schedules, tags, and filters.
00:16
So let's jump into Revit.
00:18
Here we are in Revit 2024, and let's open up the Small Medical Center Parameters file.
00:25
It opens up in the Ground Floor Plan view.
00:28
Parameters are used in just about every aspect of Revit.
00:32
It's being used in walls, lighting fixtures, dimensions, tags, various other annotations.
00:41
It is even used in schedules and views.
00:46
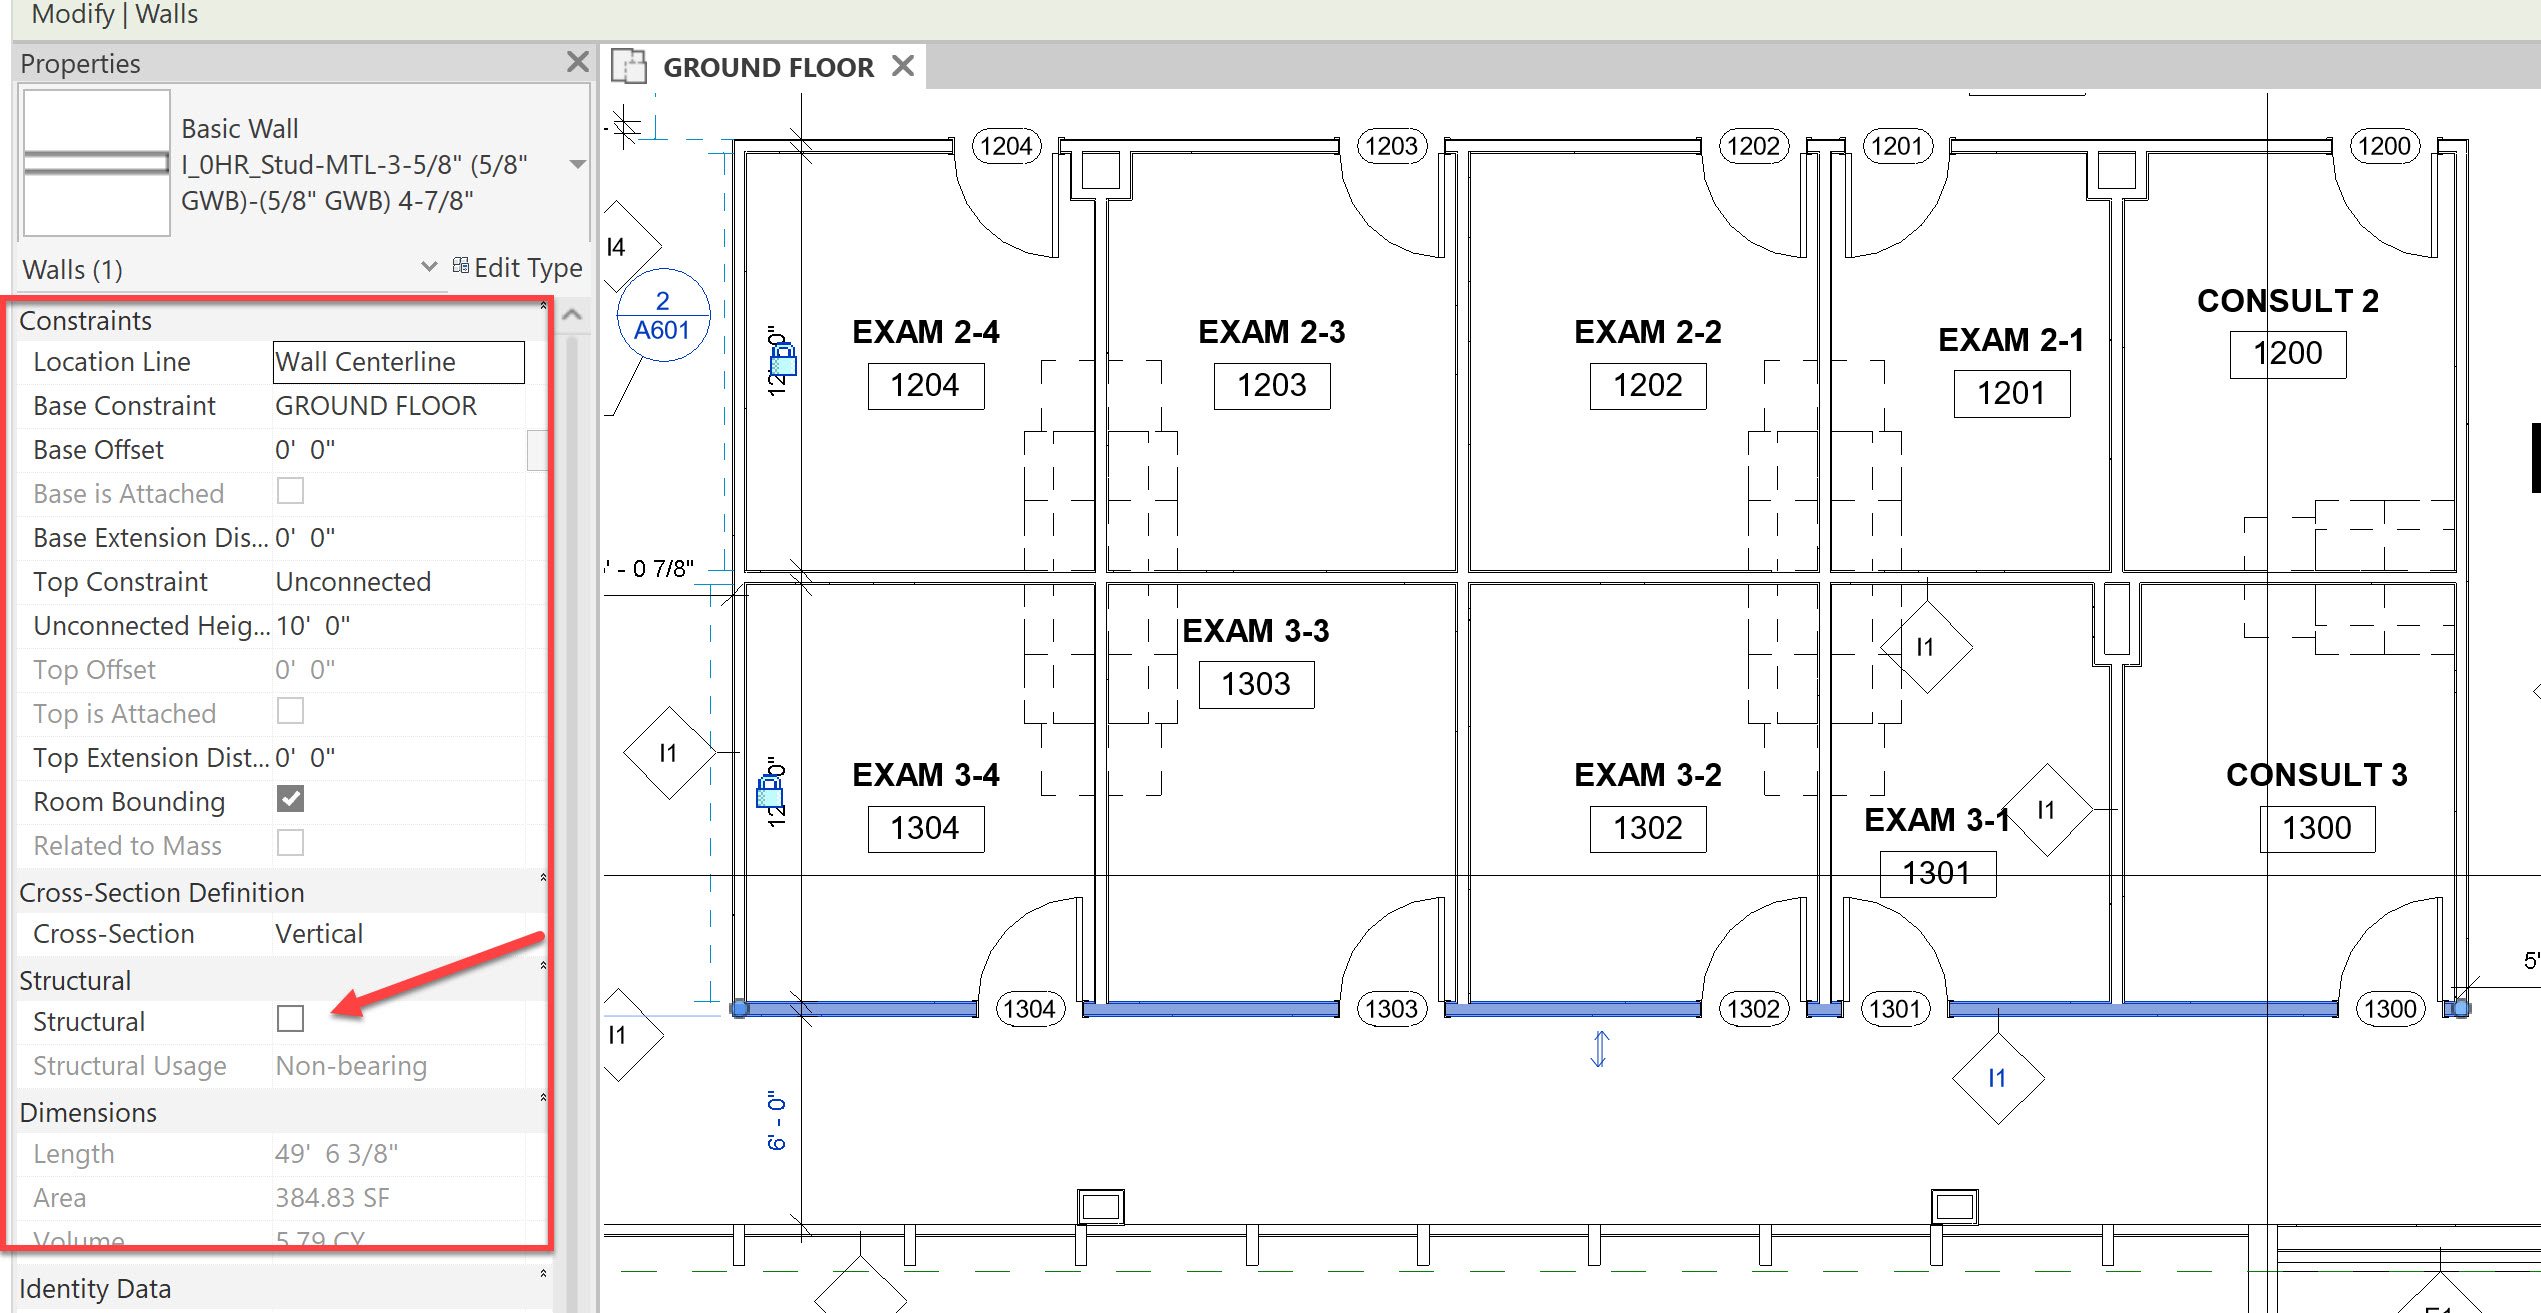
To see the parameters, select an object. And in the properties you see all the parameters listed attributed to that object.
00:56
These parameters are known as instant parameters, for they only pertain to that one object.
01:03
For example, this is a wall.
01:06
And you notice in the parameters under "Structural", the structural is not clicked.
01:13
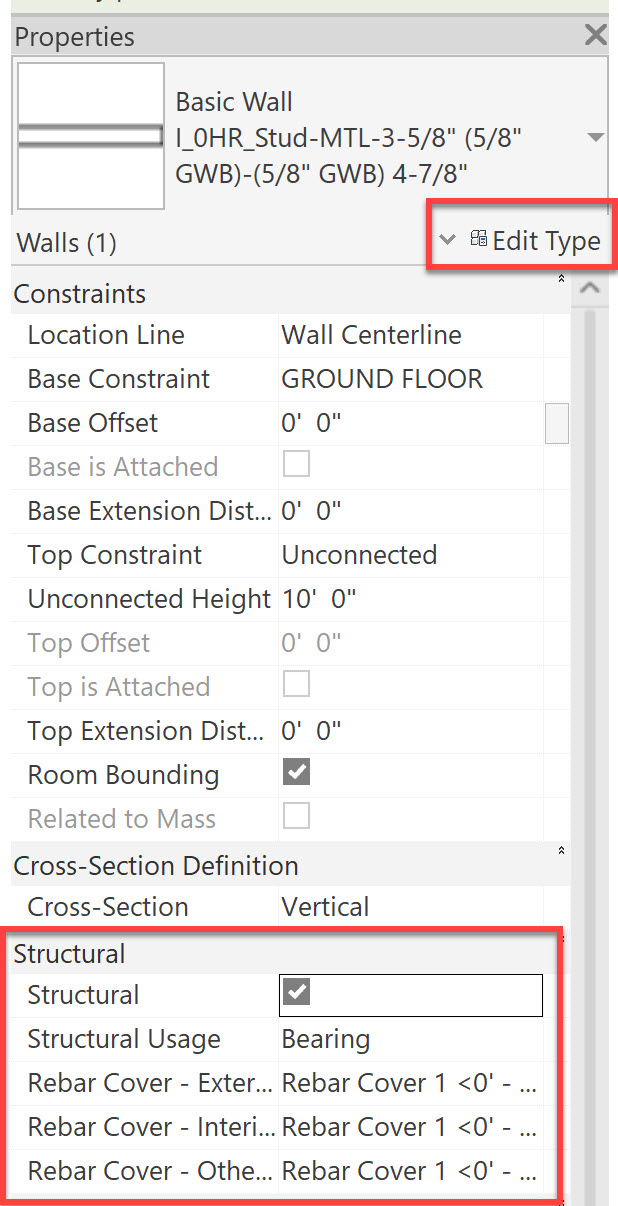
If I select "Structural",
01:15
a variety of other parameters become available that pertain to the structural properties of this wall.
01:24
Now, these parameters only apply to this particular wall, and will not affect any other wall.
01:31
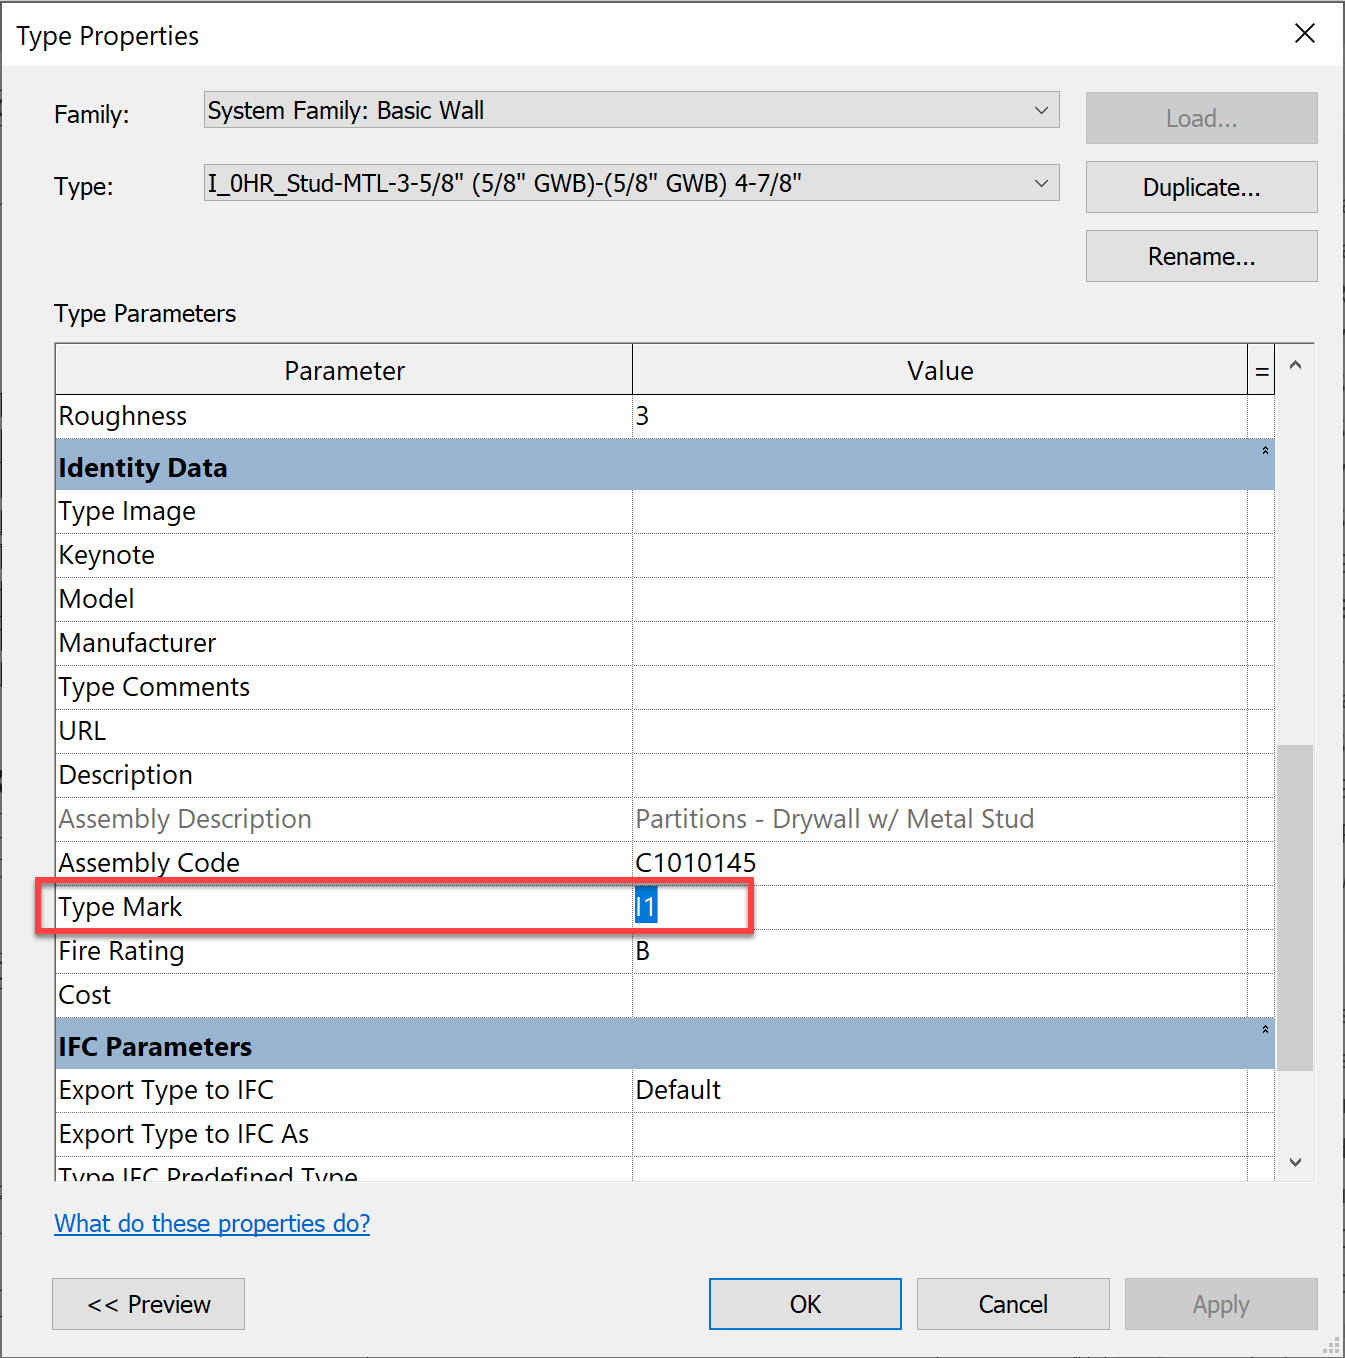
If I go to edit type of this particular wall,
01:34
which is a basic wall, these are the type parameters.
01:42
And if I change anything within here, it's going to affect all the walls of this type in the project.
01:50
So, for example, I can change the fire rating of this wall or the type mark, which is basically the identifier of this wall.
02:01
So if I change the type mark of this wall to I12, and click OK,
02:08
now you notice that the tag for all these types of walls have been changed to I12.
02:18
The instant parameters apply only to this particular instance of this wall.
02:23
The type parameters apply to all the walls of this type in the project.
02:31
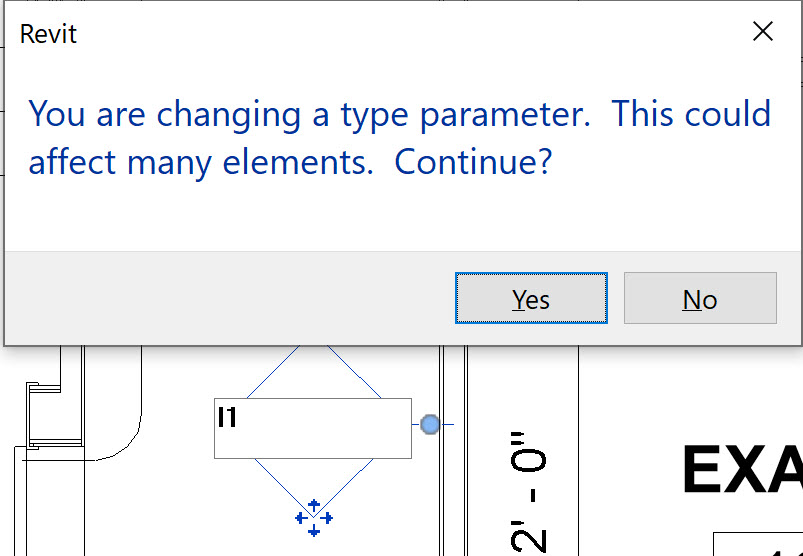
Now I can also modify type parameters by modifying this particular tag.
02:36
If I click on the tag, I can edit it here.
02:40
If I change it back to I1, a warning comes up telling me that I'm changing a type parameter, and this could affect many elements.
02:51
Again, the type parameters will affect all the elements of that type in the entire project.
02:59
There are many built-in parameters in Revit,
03:02
and we can access many of these parameters in the schedule.
03:06
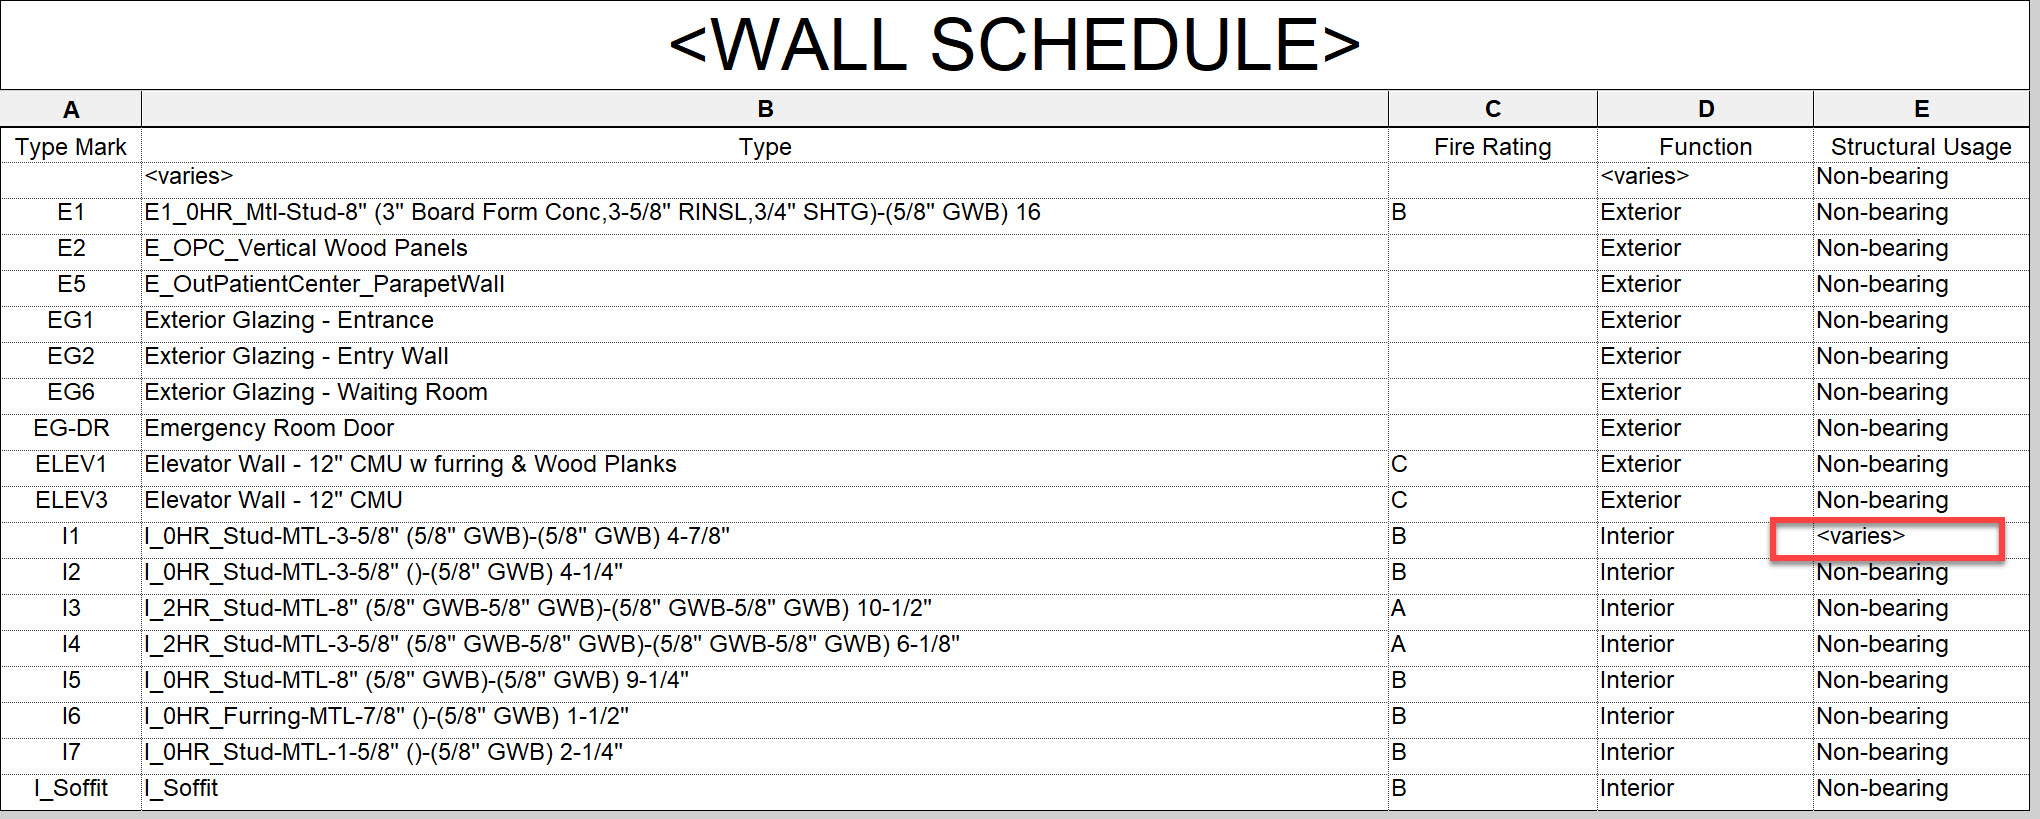
In my project browser, if I go down and open up the wall schedule,
03:11
you'll notice that all of the fields within the schedule are actually parameters.
03:19
Field is really just another word for parameters in Revit.
03:23
You'll notice that most of the structural usage of these walls is set to non-bearing,
03:29
except for this particular one where it says varies.
03:34
If I go back to my ground floor plan, you'll notice that all of the walls of this particular wall type are selected.
03:44
And it is this particular wall whose structural usage varies because, remember, we checked that on as structural.
03:53
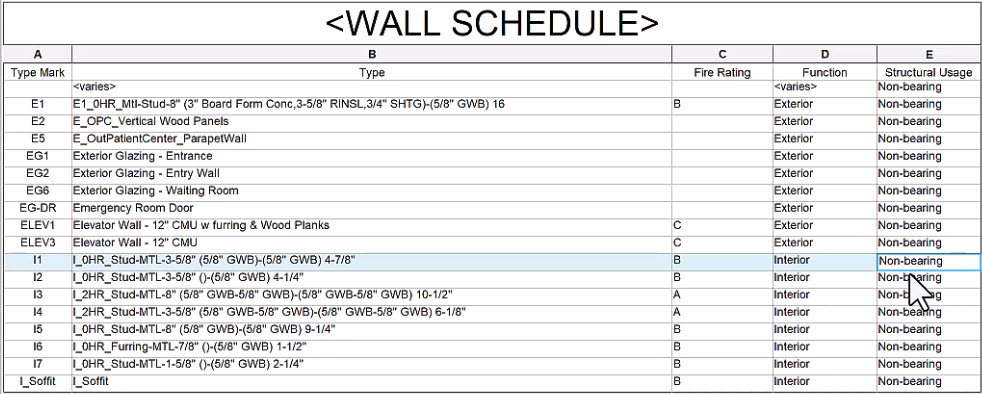
If I uncheck that, and go back to my wall schedule, you'll see that they now are all non-bearing.
04:02
And similarly, as I did before, I can modify the type properties by modifying the field in the schedule.
04:08
So if I change that to F, once again,
04:12
I get a warning that this is going to affect all of the elements in this project.
04:22
So the parameters can be modified in the schedules, they can be modified in the properties, they can be modified in the tags.
04:32
Another excellent use of parameters is through filters.
04:36
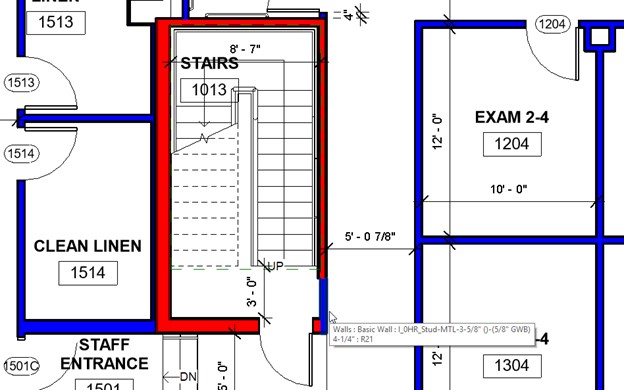
Let's close the wall schedule, and we have another view called Ground Floor Fire Ratings.
04:45
In this view, we used filters to assign colors to the 1 and 2 hour fire-rated walls.
04:52
It gives us a strong visual feedback where the firewalls are.
04:56
And you will note that in this staircase, one of these walls has insufficient fire rating.
05:04
So I can click on that, and note that it is a one-hour fire rating.
05:10
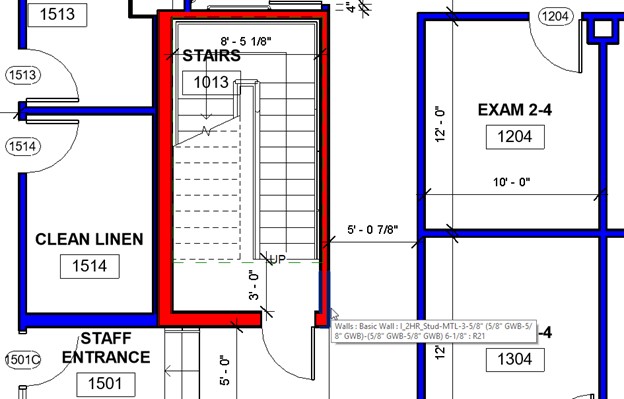
And through the type selector, I can change it to a two-hour fire rating.
05:14
And as I deselect this, it comes in as red.
05:20
And now I see that the entire staircase has a two-hour fire rating, and the perimeter walls have a one-hour fire rating.
05:29
So filters provide a very strong design tool,
05:34
which is driven through the parameters of the fire rating of this particular wall type.
05:40
So by now you understand that parameters hold the information within a Revit model.
05:47
They can be used in tags, they can be used in filters, and they can be used in schedules. They are a very powerful tool.