00:02
When we engage in creating masses, we need to be careful.
00:06
Massing can go in quickly, and some pretty cool shapes can be created.
00:10
However, the faster we create this cool geometry, the faster we can create inaccuracy in that geometry.
00:19
That's why I like reference planes.
00:21
Reference planes act like structural grids. Only structural grids are reserved for, well, structure, and not architectural massing.
00:30
The great thing about reference planes,
00:32
however, is that we can actually name them and use them as a named work plane in plan and elevation.
00:41
So therefore, the objective of this video is to create some unique reference planes to serve as a grid for our massing.
00:49
So let's jump into Revit.
00:53
Here we are in Revit, and let's go open up our model.
00:58
We click on the open icon and browse out to where our model sits.
01:04
And we want to create a new local copy of the model.
01:10
We want to override the existing copy. Okay, you'll notice that we have under Floor Plans a Roof Plan.
01:18
We want to duplicate that, so I right-click on the roof and go to Duplicate View, Duplicate.
01:26
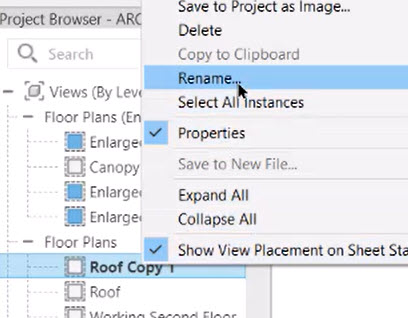
It creates a copy of the roof plan, and it's named Roof Copy 1.
01:32
We want to rename that, so I right-click on it and go to Rename, and we'll call it Garden.
01:40
We don't need the entire area, so I'm going to crop the region.
01:45
I'll first make the crop region visible, and then I click on the crop region.
01:54
And with the grips, I reduce it to the size that I want, just around the garden area.
02:05
I do that on all four sides, and then I type in ZA for Zoom All.
02:13
Okay, now let's start drawing these reference planes.
02:17
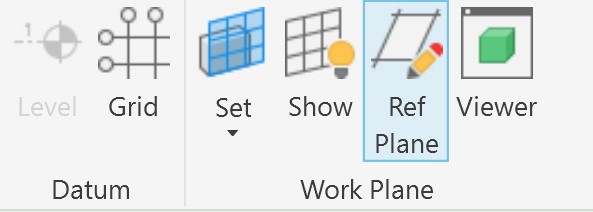
On the Architecture tab, to the far right under the Work Plane panel, click on Ref Plane.
02:24
Now I could start drawing the reference planes right away. I'm prompted for that.
02:28
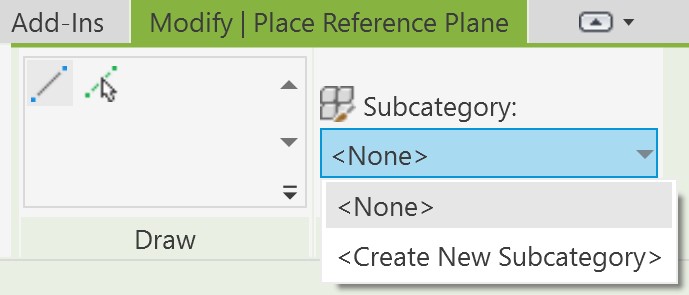
However, I want to create a subcategory for these garden reference planes.
02:34
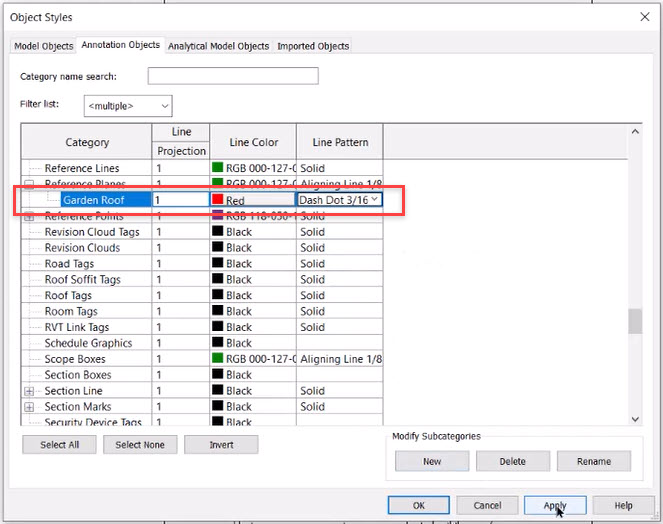
So I click on the drop-down and select Create New Subcategory.
02:40
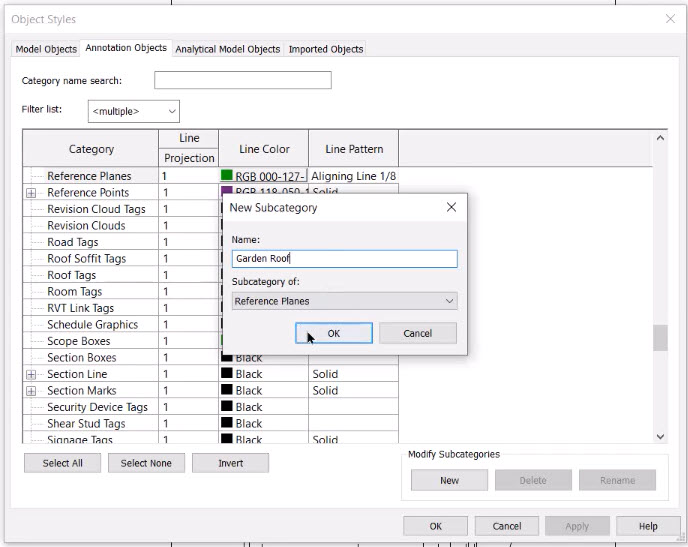
I'm prompted immediately for a name. I type in Garden Roof. Click OK.
02:49
And I want them to stand out a little bit, so I click on the color cell and I select the red color.
02:59
And for the line pattern, I click on the drop-down list and select Dash 3/16.
03:08
I click Apply. And I click OK.
03:13
Now I'm still prompted for my reference plane. However, I know that the visual graphics for the reference planes is currently turned off.
03:23
So I click on the Modify tab in the top left, type in VG for Visibility Graphics.
03:30
I go to the Annotation Categories and I scroll down to Reference Planes.
03:38
You notice the little plus next to Reference Planes?
03:41
So I can expand that, and you'll notice that the subcategory for Garden Roof is already there.
03:47
So I click on the checkmark for Reference Planes.
03:51
Scroll down further for Sections. That is also disabled, so I click on Sections and enable those as well.
03:59
And I click OK. You'll note that the existing sections are now visible.
04:05
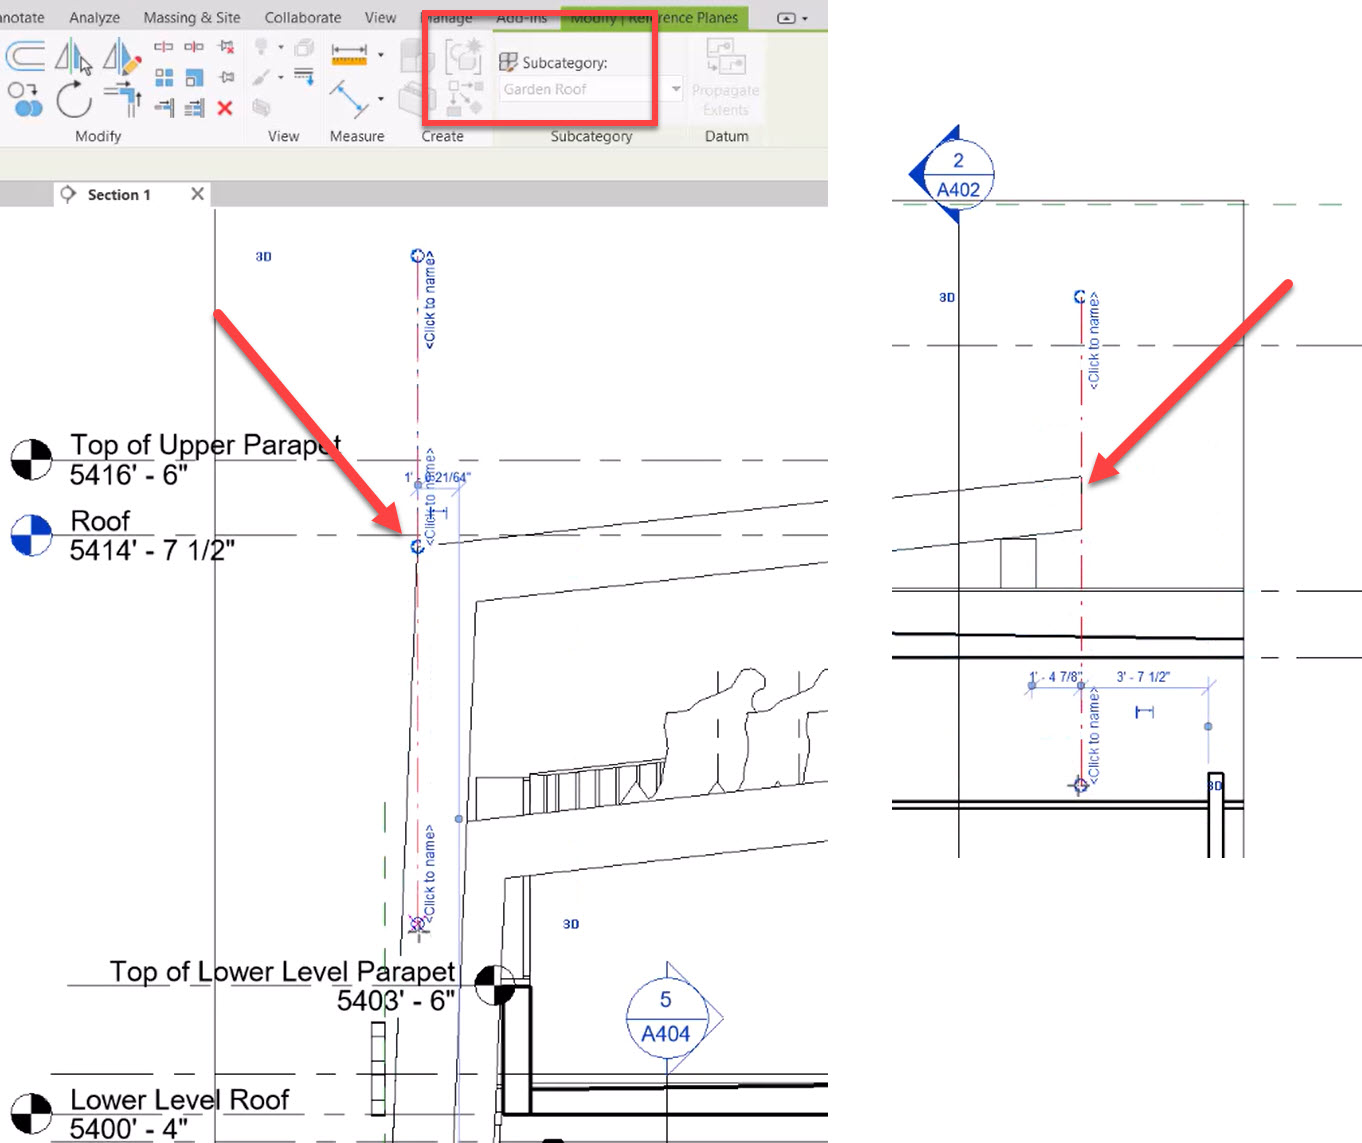
It's time to create our reference planes. I go to the Architecture tab, under Work Plane, and click on Reference Planes.
04:15
And I want to set my subcategory to Garden Roof that we previously created.
04:21
It's already prompting me for the start point of the reference plane.
04:26
So I zoom in to this beam. When I go to the midpoint, I type in SM, which snaps to the midpoint.
04:37
And I drag it out a little bit to the left.
04:41
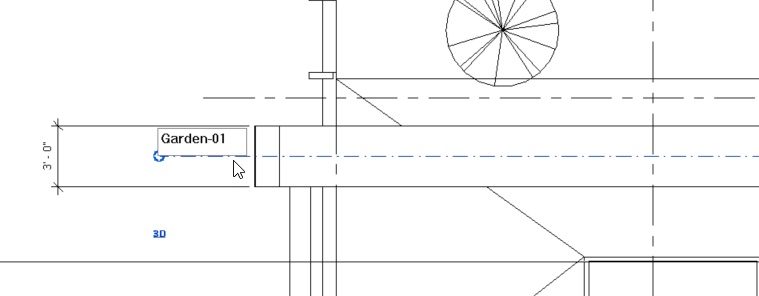
I have an option to name this reference plane.
04:44
So I click on the space and call it Garden dash 01.
04:53
When I provide a numeric suffix like this, then when I copy this,
04:60
Revit is going to update the name to Garden 02, Garden 03, as you will see shortly.
05:09
I hit Enter to accept that name.
05:12
As I zoom in even further,
05:15
I notice there's a grip with the tooltip: Modify the Ref Plane by dragging its model end.
05:25
So I click on that circular grip and drag it to the right.
05:31
Holding my mouse button down, I pan and zoom with my wheel.
05:37
We come to about here to the far right.
05:43
Revit is prompting me for another reference plane.
05:47
However, we are going to copy the existing reference plane, so I click Modify to cancel the command.
05:56
Select the reference plane that we just generated.
06:01
And in the contextual ribbon, I select Copy.
06:06
I want to make sure that Multiple is set, because I want to create multiple copies of this reference plane,
06:12
and Constrain to constrain it in the X and Y axis.
06:20
I click my base point anywhere along the reference plane,
06:24
and as I move it up, you'll see that I can only move it in the X and Y axis because Constrain is set.
06:34
And I zoom to the midpoint of the other beams and keep going up.
06:41
A tooltip appears: Constraint and Nearest, which is ideal.
06:50
So we go to the midpoint of each of these beams, as well as the very top, the midpoint of the beam,
06:59
and I hit Modify to cancel the command.
07:02
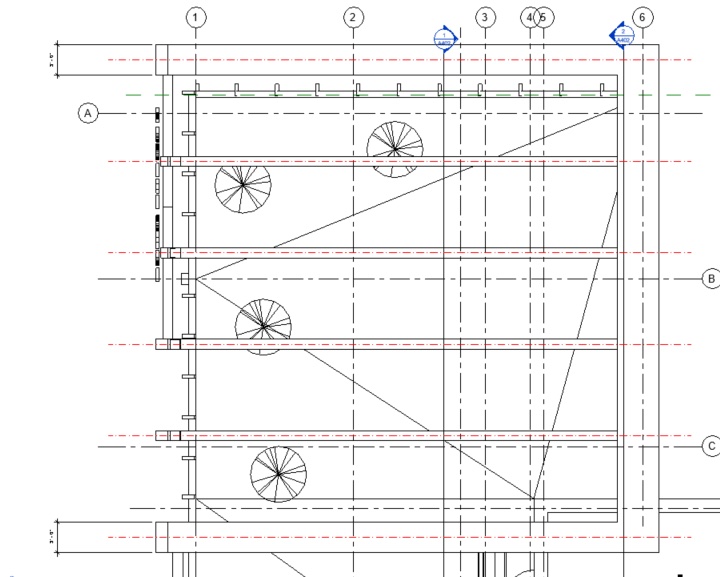
Now you notice that if I hover over these reference planes,
07:08
the name is Garden 06, Garden 05.
07:15
And if I click on it, the name appears both on-screen and in the properties.
07:22
You'll also note that the reference planes are in red with the particular line pattern that we had picked earlier.
07:32
Okay. We've got the reference plane set in one axis. Now we want to set it in another axis. And for that, we need a section.
07:42
So in my Quick Access Bar, I go to my Section.
07:47
I click to the left, below the reference plane that we just created, to the right.
07:56
I check the scope of the section and bring it down just a tad.
08:04
Now I click a blank spot on the screen, which disables my section command.
08:10
And then I can double-click on the section's marker to launch that section.
08:17
Here we are in the section. There's quite a lot of noise going on here.
08:21
So let's make the structural link invisible by typing VG for Visibility Graphics.
08:31
I click on my Revit Links and uncheck the structural Revit file.
08:36
Click Apply, so we make sure that everything is set, and OK.
08:44
I also want to elongate the crop region, so I click on the crop region. And with my circular grip, I make it a little bit higher.
08:56
Click Modify to cancel our current command.
09:01
Now I can type in RP for Reference Planes,
09:06
and I want to generate a reference plane at the endpoint of this beam.
09:13
And I'll move it up.
09:16
I'm going to leave it as a default name, but you'll also notice that it is in the wrong subcategory of None.
09:25
So I click the Modify button to cancel my command.
09:29
I select the reference plane that we just generated, and on my drop-down menu, I'm going to select Garden Roof.
09:39
As before, I'm going to click on the circular grip and drag it down a little bit.
09:47
Now I can generate another reference plane.
09:50
However, with this already selected, with my right-click menu, I'm going to go to Create Similar.
09:60
Time to save the project.
10:04
Now the second reference plane, I want to go to the far left of that beam.
10:09
Select the endpoint, drag it up, and once again drag it down with the circular grip.
10:20
Okay, so now we have six reference planes in plan and two reference planes in section.
10:29
So we have our mini grid already set up. We can start our mass.