00:01
For proper pin and project management, it's strongly advised that once a client accepts an option,
00:10
that you get rid of all the other options from the model, and just keep the primary option.
00:16
In this video, I'll show you how to make a backup of your model for archival purposes that includes all the options.
00:25
And then in our main design model, we can safely get rid of all the other options no longer required.
00:32
In Revit, we're going to change things up a little bit to show you how to make such a backup copy.
00:39
Now, we're not going to open the recent files like we did previously
00:45
because we want to make a copy of this architectural model, for archival purposes.
00:51
So therefore, go to the "Open" button, browse out where our projects reside, go to the proper folder.
01:01
And here is the model that we've been working on.
01:05
Rather than double clicking and opening it, I want to detach that from central. Now, I can click on "Open".
01:14
I want to detach and discard the work sets because it's an individual model and no longer requires work sets,
01:21
and it opens up to that 3D view that we had assigned earlier for the starting view.
01:28
Okay. Now we can save this as a standalone project.
01:34
So I go to my Application menu pull down, and click the "Save As".
01:39
And we want to save it as a project. I do have a submittal folder already created.
01:47
So I double click on that, and let's make another folder within this.
01:55
And we'll call the design options. Double click into that, and let's call it Roof and Front Options.
02:05
We already know from the folder name that there are design options, and click on the options button,
02:12
and let's set the maximum for file backups to one, and click save.
02:17
Now, I realize that IT makes a bunch of backups of our files Revit creates some backups, but this is different.
02:26
This project has been archived for audit trail purposes. How I can close out of this?
02:34
By hitting Control W, and I'm back to my most recent files.
02:41
I'm gonna click on my architectural model like I did previously, it's a central model.
02:48
We want to override our existing local copy.
02:52
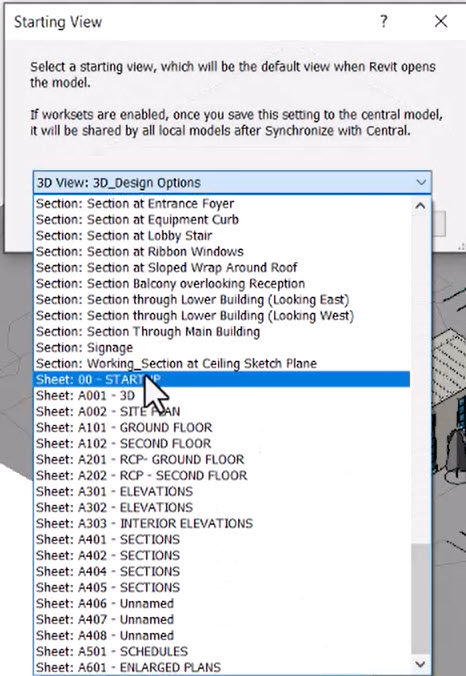
Now, another thing we need to do is to reset our starting view by going to the manage tab,
02:59
manage project starting view, and we select under sheets, sheet 00 startup.
03:10
OK. Now, if we've created an archive copy of this project, we've reset the starting view.
03:19
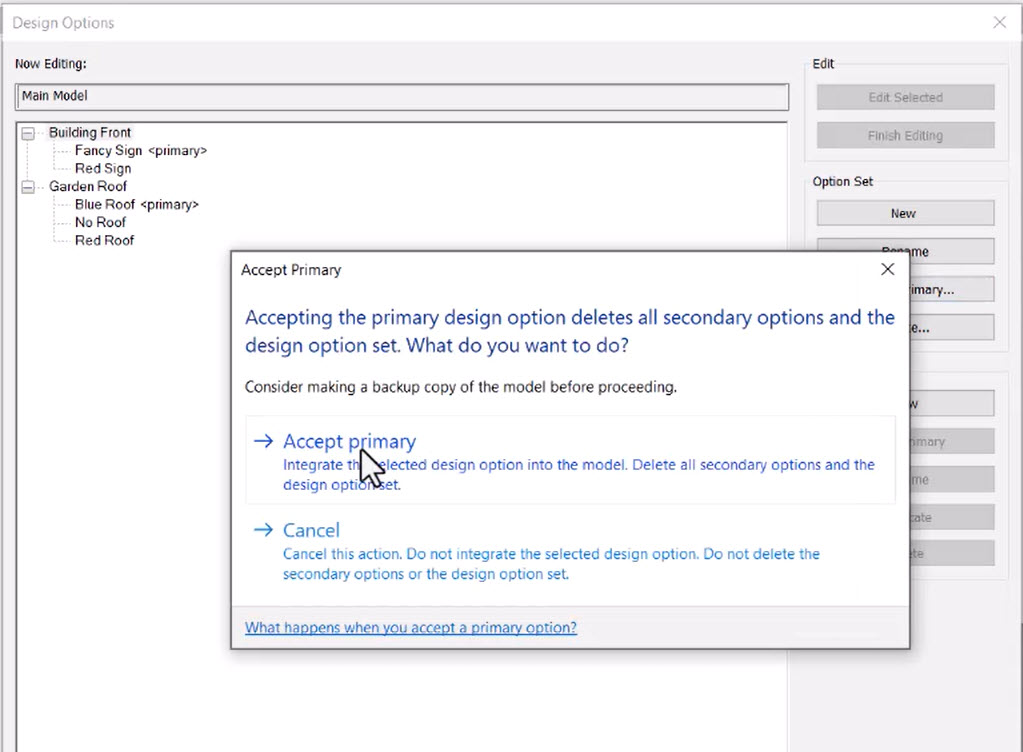
Now, all that remains is to accept the various design options, for the building front,
03:25
the client agrees with this, that the primary should be the fancy sign.
03:31
So I click on building front, and I accept my primary.
03:36
I get a warning telling me that various elements and views might be deleted when I accept the primary,
03:45
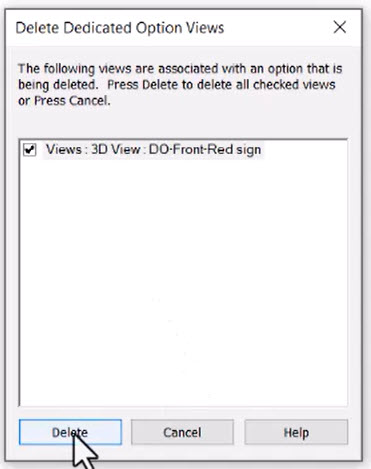
and it tells me that the design option DO-front-red view is going to be deleted.
03:50
So I click on delete. That option set disappears.
03:54
Now for the garden roof, the client disagreed with us and liked the red roof the best.
04:01
So I click on red roof. I'm gonna make that primary.
04:05
I go back to my garden roof and I accept the primary, and again, two views are going to be deleted,
04:13
that are no longer in use.
04:15
So we select delete. Now, I have no more design options.
04:19
I can close out of this, and I can save the project, and we're good to go.