00:00
SHAWN HERRING: Importing the Revit building into Civil 3D
00:03
helps you ensure everything fits together on the site.
00:05
In this unit, you'll learn how to take advantage
00:07
of work already done by the architect,
00:10
saving you time in recreating their work.
00:13
There are several methods of getting that data
00:15
from the architect into Civil 3D.
00:18
One of the methods is to create a shared coordinate.
00:20
This will allow you to export out an XML file from Civil 3D.
00:25
The architect can bring it into Revit
00:26
and make sure everything lines up.
00:28
From Revit, you can also export a 3D solid,
00:32
and you can export a floor plan, just in a DWG format.
00:36
And last but not least, you can also import an NWC or an NWD
00:42
So if you have a coordinated file already completed
00:46
that has your site and multiple disciplines,
00:49
like the architect, structural, you
00:51
can bring that into Civil
00:55
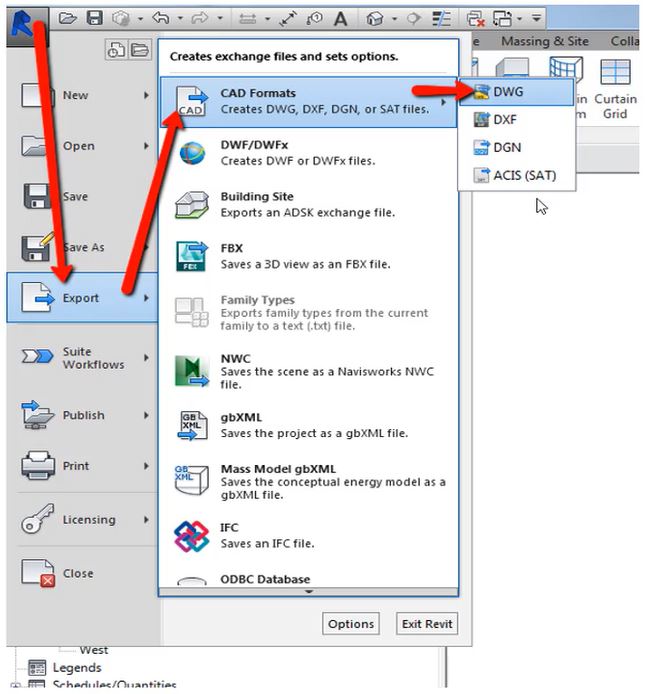
And so let's look at exporting a 3D solid from Revit.
01:01
Very simple, the top left, the R for Revit,
01:04
there is an Export option.
01:06
You can go to your CAD formats and choose DWG.
01:09
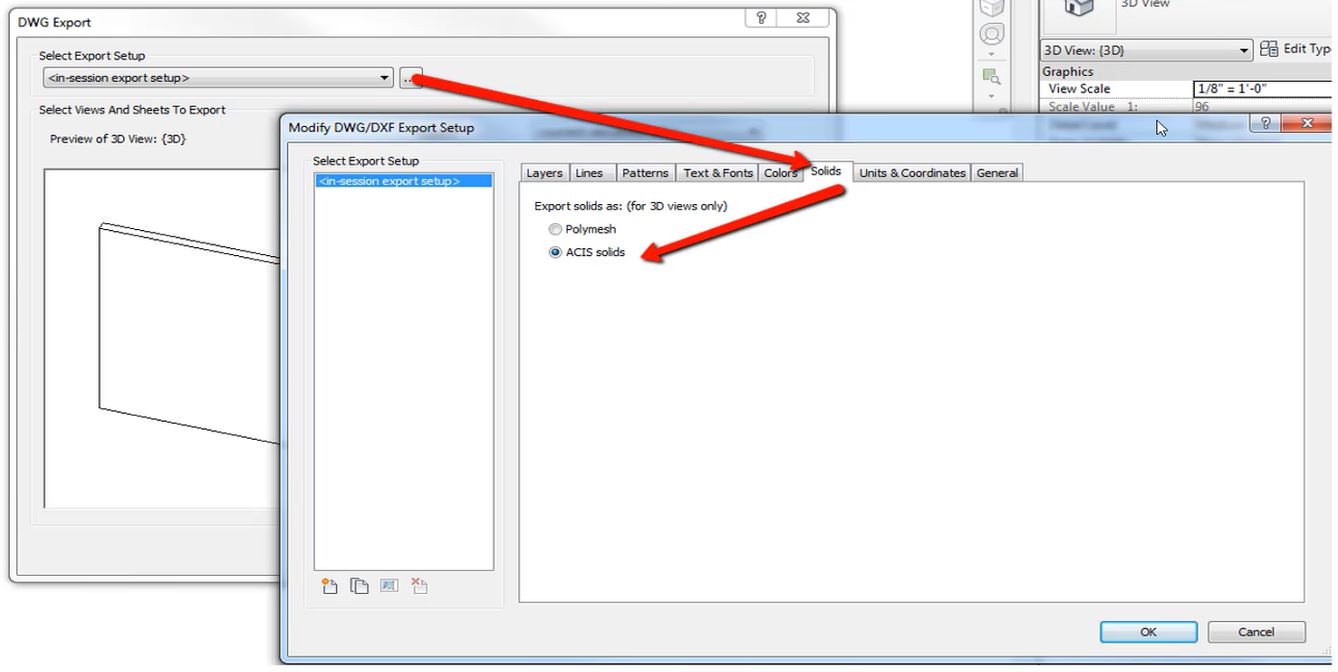
And in that DWG Export settings, on the Solids tab,
01:15
there is an ACIS Solids option you can select.
01:18
And once you do that, you can export it out,
01:20
and I'll show you the format and what it
01:23
looks like after we export it.
01:27
The shared reference point is found in Civil 3D
01:29
on your Toolbox, under the Subscription Extension Manager.
01:33
There, you can export out an XML file,
01:36
and that XML file will then be brought into Revit.
01:39
And that way, it will line up the coordinates
01:41
in the elevation from Civil 3D.
01:43
So it utilizes the XML.
01:46
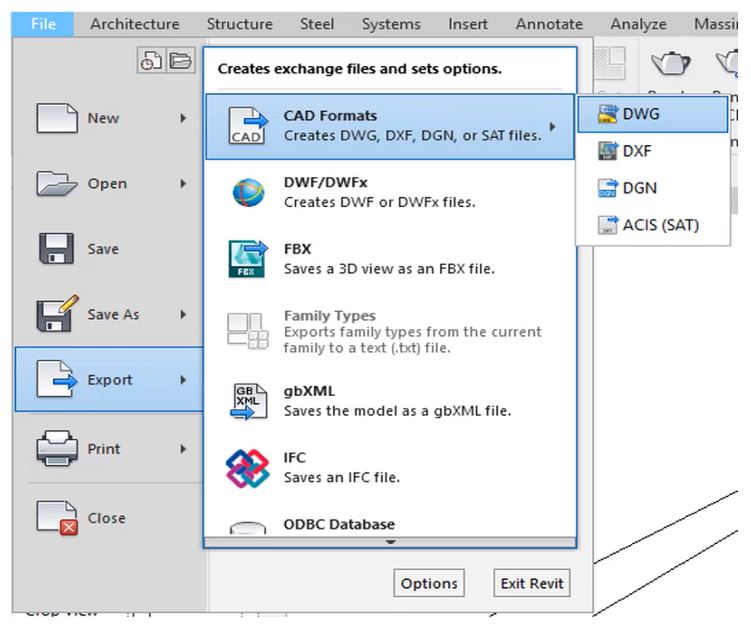
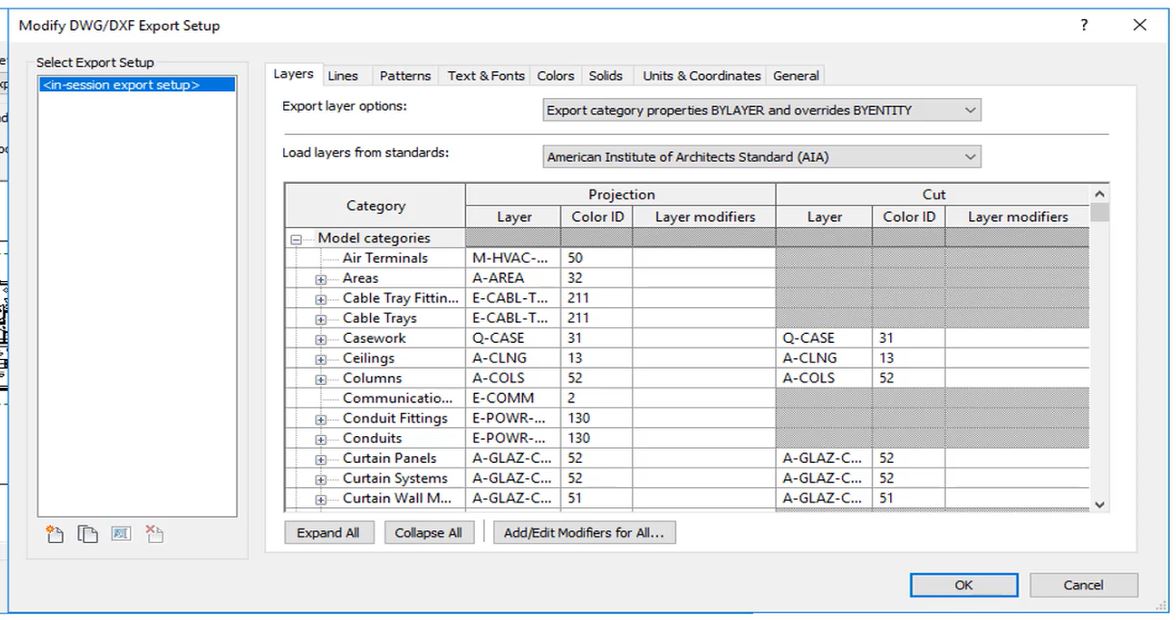
And then a DWG, very simple, just
01:49
like you were exporting out that 3D
01:50
solid, you can go into Revit Export, CAD format, choose DWG.
01:56
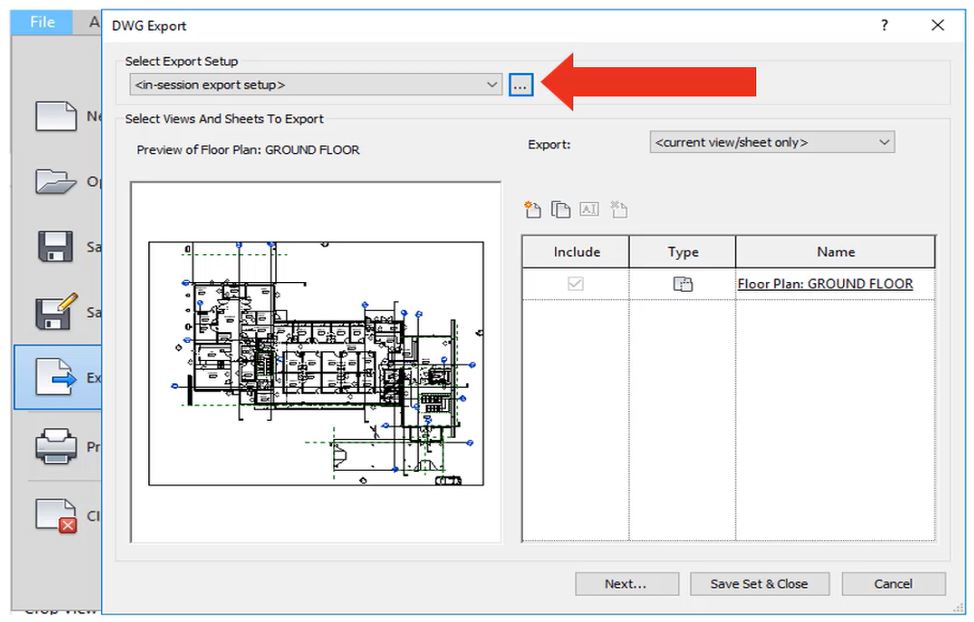
And in the Export Setup options, you can choose your views,
01:60
or you can do the current view, and you
02:03
can do a bunch of the layer standards, and line types,
02:06
and all that, that will export over to AutoCAD easily.
02:08
And that exports out a DWG that you can then
02:14
So it's very simple to get that information from the architect,
02:17
and bring that into Civil 3D.
02:19
So let's jump on over to Civil 3D,
02:21
and let's see how it can bring these in.
02:25
So I want to first look at the formats that
02:27
are brought over from Revit.
02:29
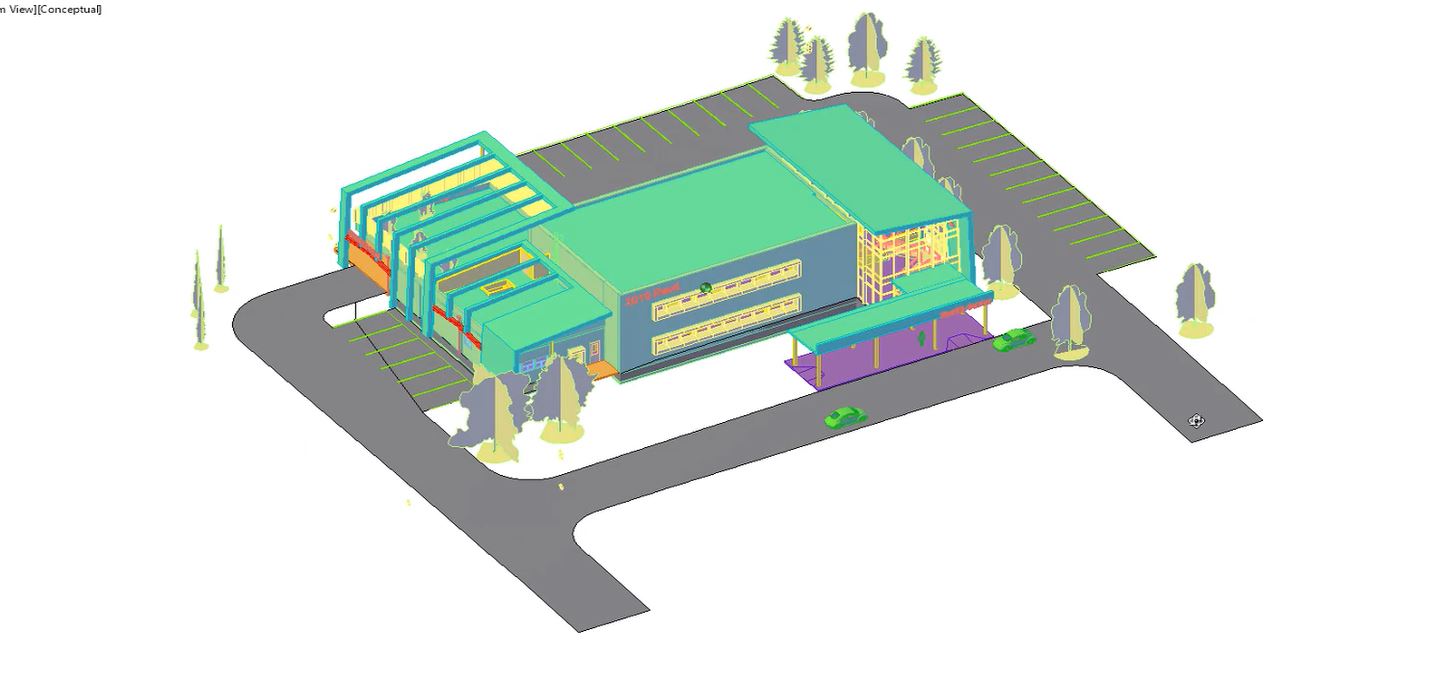
This is the 3D model that is exported out of Revit,
02:31
so you can see it has a lot of information in there.
02:35
And you can bring this into Civil 3D--
02:36
we'll xref it into our site in a moment--
02:38
but you can see that it does have a lot of detail,
02:40
a lot of information.
02:42
You can change the views--
02:43
we have conceptual, you have realistic, hidden, different
02:48
types of views that you can have there.
02:51
So that's the 3D solid.
02:53
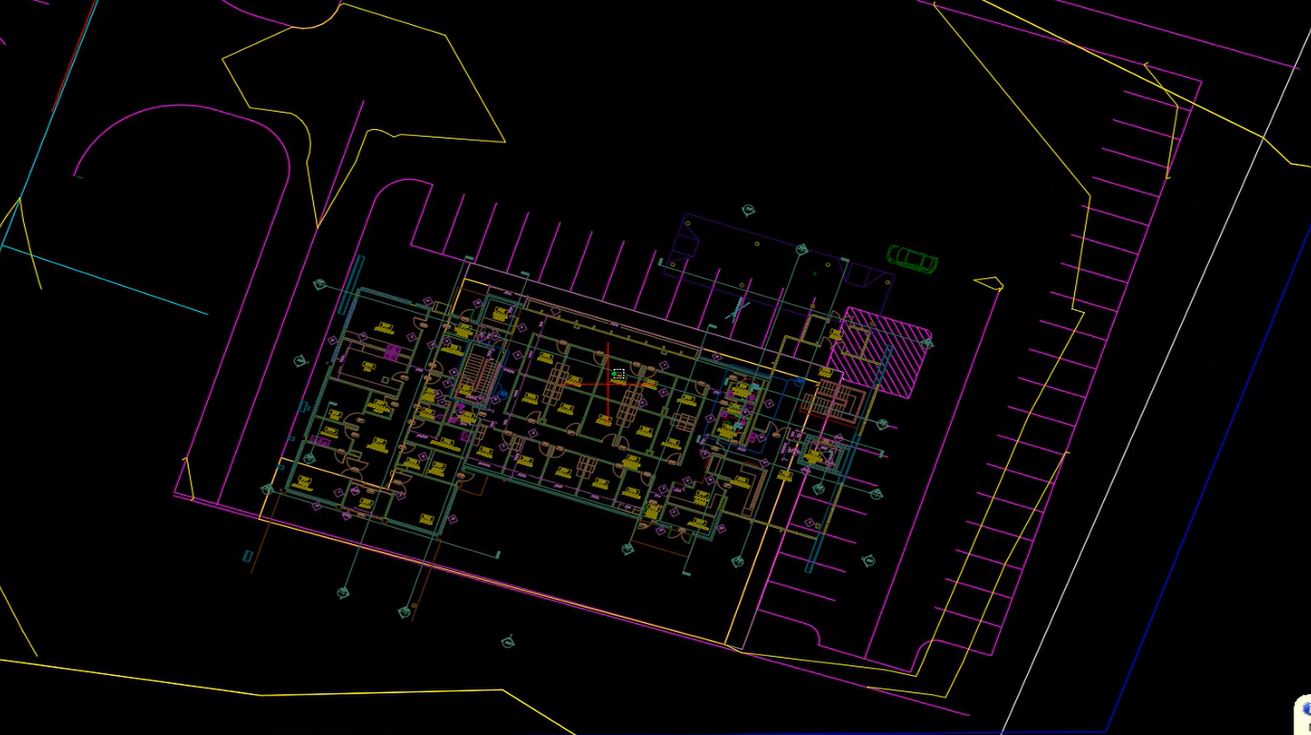
Let's look at the floor plan.
02:56
This is the floor plan that's exported out.
02:59
It's exported out with as much information,
03:01
or as little information, as you want.
03:03
So if you just need the shell or the outer walls,
03:05
you can have the architect just export out certain things.
03:08
And you can also export out the grid line,
03:10
so you can line that up if it's not already
03:12
lined up inside AutoCAD.
03:13
So that's the floor plan.
03:14
We're going to close that one and then bring it into NWC.
03:18
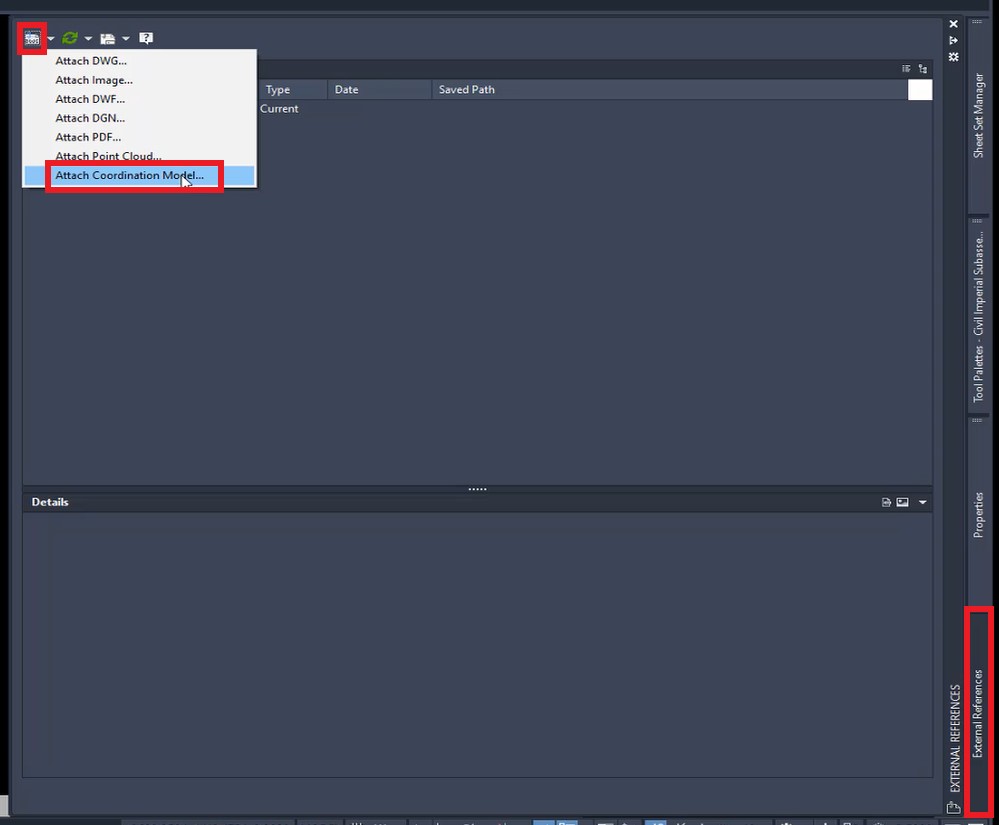
So if we xref this in-- we'll first xref it into a blank
03:23
if you go to your External Reference Manager,
03:26
you can see all your options here.
03:27
The very bottom there is Attach Coordination Model.
03:32
I'm just going to go and choose my Navisworks file, NWC
03:38
hit Open, Specify Onscreen, yes or no--
03:41
I'm just going to hit OK here-- and it's
03:43
going to zoom to that coordinated model,
03:46
and I'm going to just switch this to an isometric view.
03:49
And I'll zoom in, and I'll find that model.
03:52
So you can see that's our Navisworks model.
03:54
It has a lot of information in there
03:57
just xreffed in, as you normally would do an xref.
04:01
So let's bring that into our site.
04:03
So first of all, let's do our floor plan.
04:05
So I'm going to come over here, and I'm
04:07
going to go to my Xref Manager, and very simple,
04:10
you're all familiar with xrefs, we're just
04:12
going to attach a DWG.
04:15
I'm going to choose my floor plan that
04:16
was exported out from the architect and select Open.
04:22
If everything is scaled properly and you've
04:24
done the Create Shared Coordinate,
04:26
then everything will line up.
04:27
So I'm going to simply select OK,
04:30
and we're going to have that floor plan in our model.
04:33
OK, and our xref is brought in.
04:35
We can rotate it if it didn't line up.
04:37
We can adjust it, but very simple,
04:39
very simple xref exercise there.
04:42
I'm going to close that.
04:45
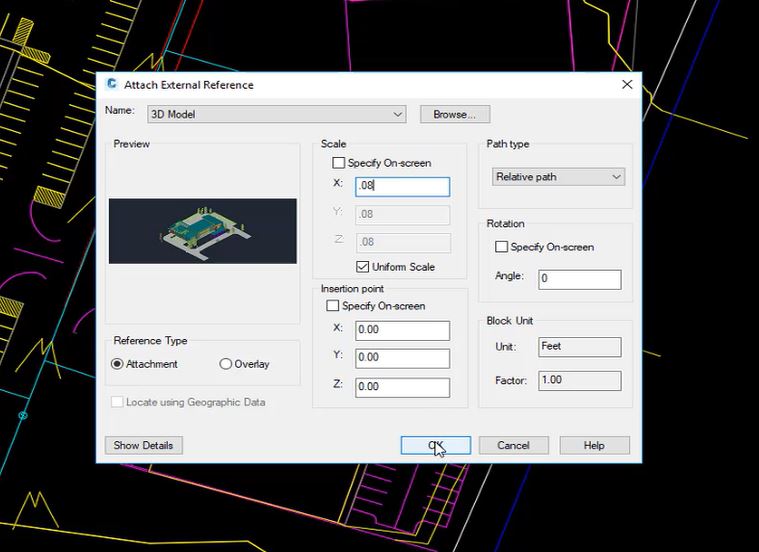
And let's look at the 3D Model option.
04:49
So in here, I'm going to do the same thing.
04:51
I'm going to go to xref, I'm going to attach a DWG,
04:55
and this time, I'm going to choose a 3D model,
05:01
This one tends to sometimes be scaled at a scale of 12,
05:04
so in architectural units.
05:06
So I'm going to choose here, or set scale.
05:09
I'm going to do .08, and scale that down to our Civil units.
05:13
Uniform scale insertion point should be fine.
05:15
I'm going to select OK, and we're
05:17
going to have that 3D model in our Civil site.
05:21
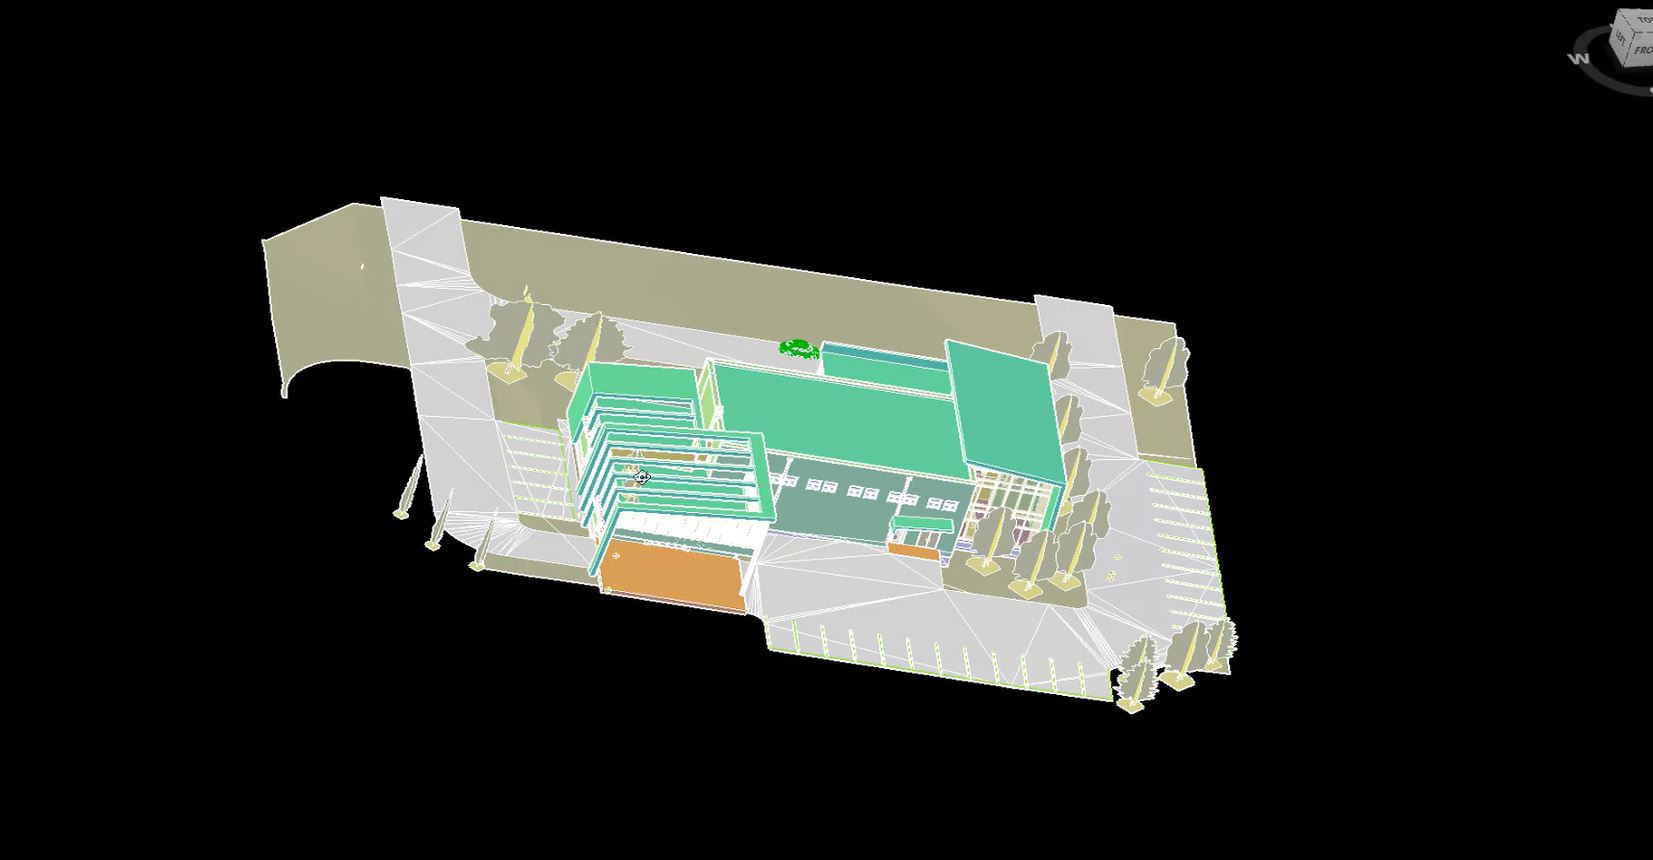
OK, and once that's in, I'm just going to select it here.
05:24
Let's just look at Object Viewer.
05:25
So I'm going to select like my surface and the 3D model--
05:29
just going to go to Object Viewer and take a quick look--
05:33
and let's try and change that to an isometric.
05:36
You can see that that 3D model in our surface lines
05:39
up pretty good right now.
05:40
So you can see it brings a whole new level
05:42
to your detail, your design, and maybe presentation
05:45
within your Civil files.
05:50
And again, we looked at the NWC.
05:53
I'm going to go ahead and xref that into our file, as well.
05:56
So external reference, Attach Coordination Model, I'm
06:01
going to choose my model, hit Open.
06:04
This should all line up.
06:05
We're going to just simply select OK, and have
06:07
it put in our site plan.
06:09
OK, so it comes in pretty quick.
06:11
Let's just change our view.
06:12
We're going to go to an isometric view.
06:14
OK, once I changed to that view, you can see there,
06:17
Navisworks file is now lined up with our surface.
06:19
It's now in our Civil file.
06:21
So very quick, very easy, we looked
06:23
at the different options for export from Revit and import