Building project model co-authoring using Revit and the ACC
Exercise: Building Project Model Co-Authoring Using Revit and the ACC
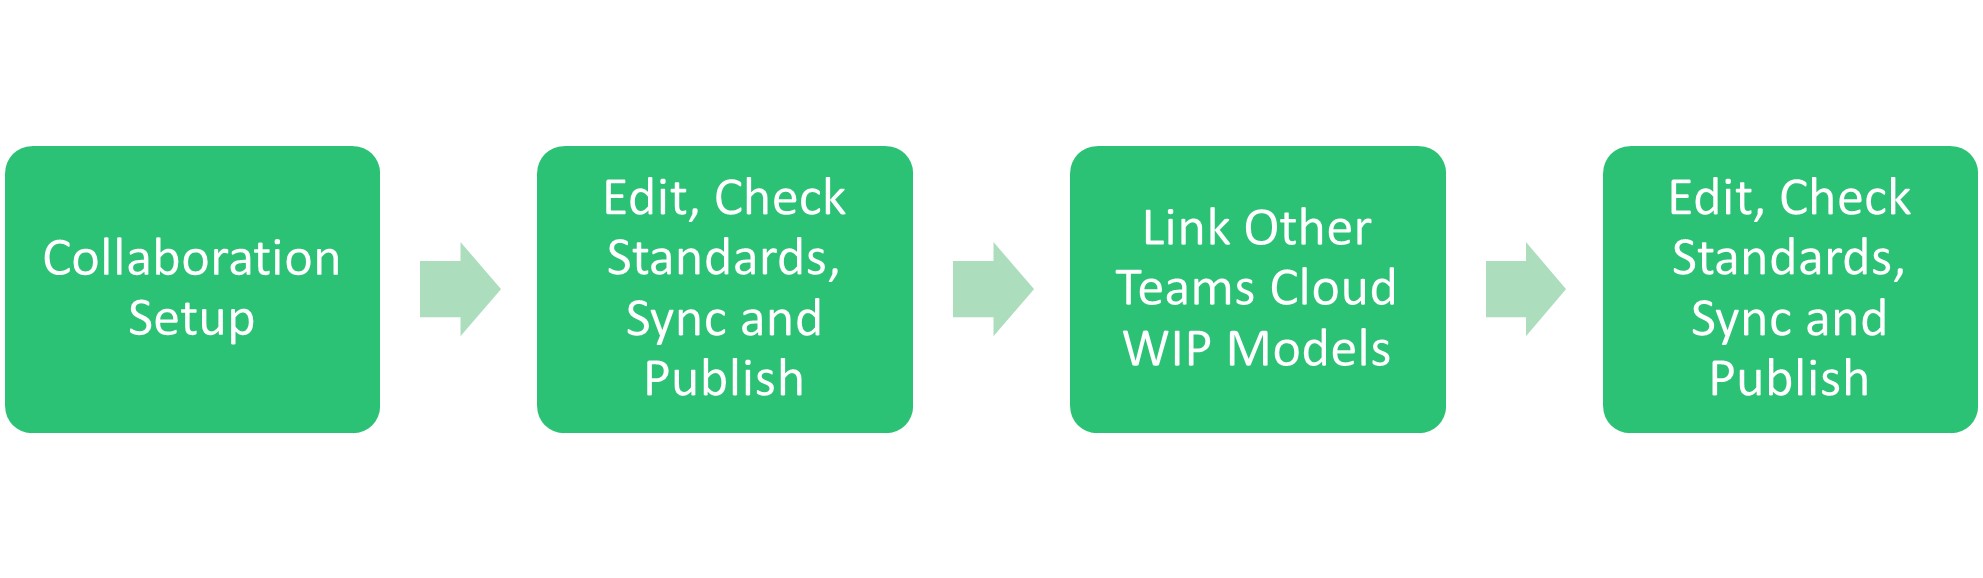
Task 1: Set Up Collaboration
- Accept the Project Invitation in your email.
- Create a new Project Model from your template, or open an existing model you want to upload.
- On the Manage Collaboration tab of Revit, click the Collaborate button.
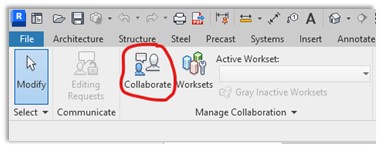
- Select In the Cloud.

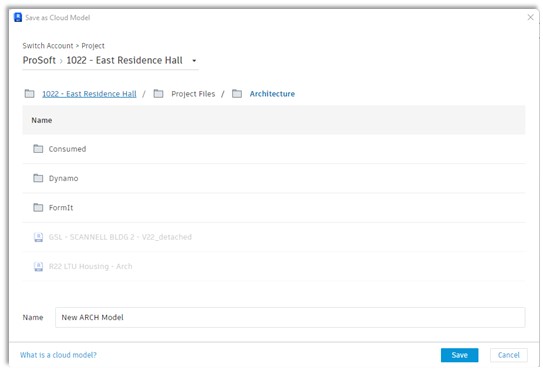
- Select the ACC Account, Project, and Team folder to upload the model to and click Save.
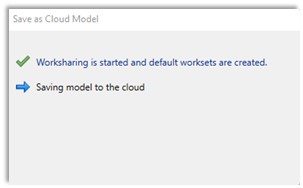
- Monitor upload progress until complete.
Task 2: Edit, Check Standards, Sync, and Publish
- Modify model components and documentation in Revit.
- Save your changes locally as you work.
- Use the Model Checker for Revit to check for standards compliance.
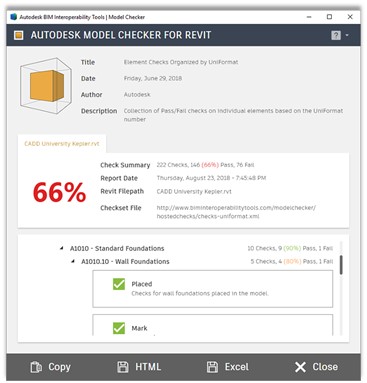
- Refer to the “Check Standards Compliance on Building Projects Using Revit” module for more information on setting up and using the Model Checker for Revit.
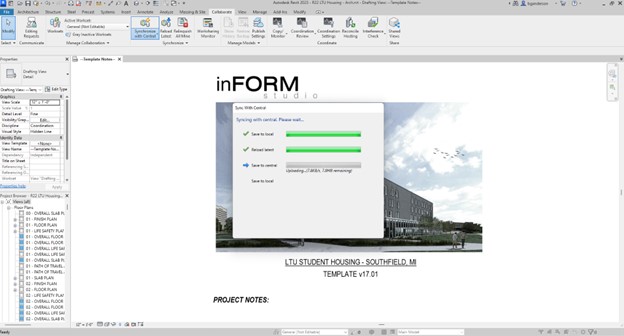
- On the Collaborate tab in Revit, click Synchronize with Central. The modifications you have made locally are synced to the cloud central file.

- Monitor the sync progress in the pop-up window.
- Publish the latest version of a WIP model to the Team folder in Autodesk Docs. On the Revit splash screen, click the three dots next to a Revit model and select Publish Latest.
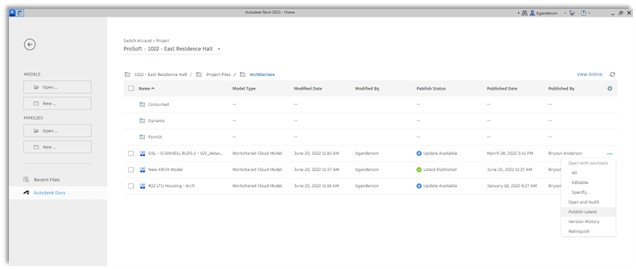
- You can also publish from the Manage Cloud Models tool in Revit.
Task 3: Link Models from Other Teams into WIP Revit Model
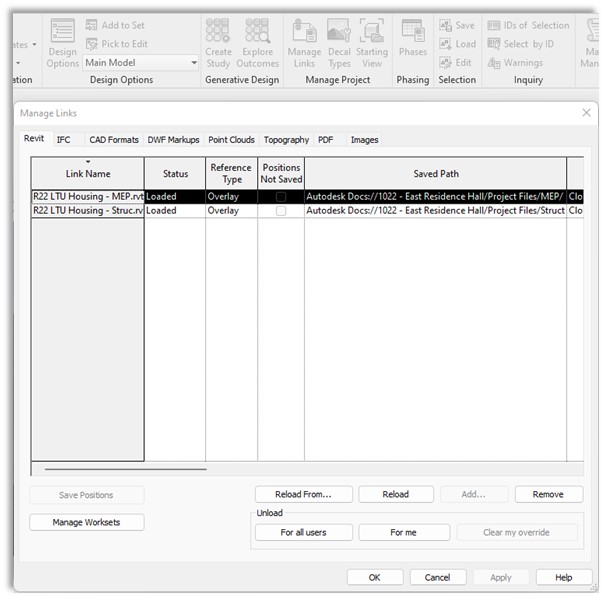
- On the Manage tab of Revit, click Manage Links.
- Add a new link or reload an existing link to the cloud.
- Click Add or Reload From.
- In the Add Link dialog box, use the External Resources shortcut.
- Find the model you want to link in the Account, Project, and Team folder.
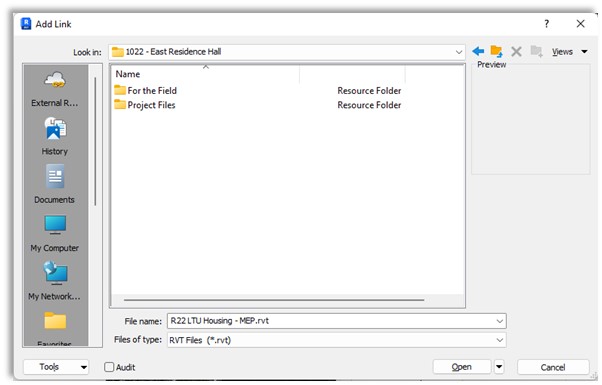
- Click Open to finish linking.
- Verify the location of the link. The path should start with ‘Autodesk Docs’.
Task 4: Edit, Check Standards, Sync, and Publish
- Modify model components and documentation in Revit.
- Save your changes locally as you work.
- Use the Model Checker for Revit to check for standards compliance.

- Refer to the “Check Standards Compliance on Building Projects Using Revit” module for more information on setting up and using the Model Checker for Revit.
- On the Collaborate tab in Revit, click Synchronize with Central. The modifications you have made locally are synced to the cloud central file.
- Monitor the sync progress in the pop-up window.
- Publish the latest version of a WIP model to the Team folder in Autodesk Docs. On the Revit splash screen, click the three dots next to a Revit model and select Publish Latest.

- You can also publish from the Manage Cloud Models tool in Revit.


