00:07
Our last section of learning about AutoCAD
00:11
Electrical projects is learning how to copy a project.
00:15
Now this is incredibly important because I
00:17
would bet that most of you watching this probably
00:20
don't start every project you have completely from scratch.
00:23
You more than likely find a project similar to the last one
00:26
that you did, copy that and then start
00:29
making the edits that you need for the next project.
00:32
It's the easier way to do things.
00:34
It's already been done, why reinvent the wheel.
00:37
So with that said, my advice to you
00:41
when you're first getting started with electrical
00:43
is to create a template drawing.
00:46
So that's a DWT file just like any other core AutoCAD DWT.
00:50
That has all of your settings and your title blocks in it
00:54
that you would typically want to use in any new drawing
00:58
You might have a couple of different kinds of templates
01:01
and that's fine too.
01:01
Maybe you have a panel drawing template, things like that.
01:05
The next thing you're going to do
01:06
is create a standard WDP file, that's the project file
01:11
that we were talking about.
01:12
That will allow you to have the standard settings that you're
01:15
used to seeing inside of it that you
01:19
could use to copy any settings for any next project.
01:22
The final thing you'll do is create a standard project end
01:27
to end, maybe you have five at your company,
01:32
And they might need tweaks and changes
01:34
depending on customer requirements,
01:35
other changes for whatever it is that you're working on.
01:38
But those will be the foundation for all projects
01:41
you build after that.
01:42
And use that as your core template for everything
01:46
you do moving forward as opposed to trying
01:48
to find that one project from five years ago that
01:52
was maybe close to this one.
01:53
Keep a good solid template project or a couple
01:57
to be able to make your changes and tweaks.
01:59
Maybe you change manufacturers of certain kinds of components
02:03
you're purchasing, get that changed in your template
02:05
and then you don't have to think about it with the next project.
02:08
It's already there, you just copy that project.
02:12
So let's talk about how to actually copy that project.
02:15
So if I wanted to copy my project here,
02:19
Really important thing is not to just do this out
02:22
in Windows Explorer, because you're not
02:24
going to get all of the options that you'll
02:26
get within the copy project command in Electrical.
02:29
Now one of the things I always do
02:31
is make sure that I shut down all
02:33
of the drawings that are currently
02:35
open in a live project.
02:37
So if I have that project as my current project,
02:40
I will turn those off just so I'm not
02:42
staring at and keeping active something that's
02:46
needing to be copied over.
02:48
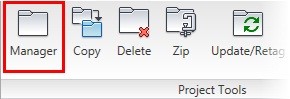
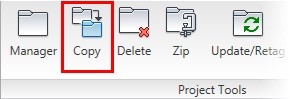
Now, what I'm going to do is come up again
02:50
to my project tab of the ribbon and click on this copy button.
02:54
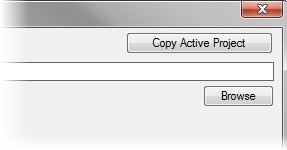
When I do that, I can either find the project that I want
02:58
to copy or if it is my active project, which is what mine is,
03:02
I can just click this button.
03:04
When I click OK, it's then going to ask me
03:07
where do I want to keep my next project.
03:10
So I am going to right click in here to give it a new folder,
03:13
just to keep the everything tidy and separated.
03:16
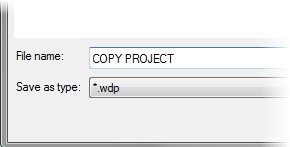
And I am going to call this folder Copy Project
03:25
and inside the folder I am then going
03:28
to give the new project a name of Copy Project, very
03:36
Now, I just created the WDP file and now I
03:39
want to tell it what drawing's I want
03:41
to include in this new project.
03:43
Now, I'm going to end up hitting Do All
03:45
and this is what you'll see every time you
03:47
see these drawings to process dialog boxes.
03:50
But I just want to pause and show you the folder structure.
03:54
So this is what I was talking about in an earlier
03:56
module around being able to filter by certain folders.
04:00
So if I have schematics or I just
04:03
want to copy the panel drawings, I
04:04
can do that as well without having to manually grab them
04:09
But I'm going to Do All to grab everything.
04:13
Now, this is the important part that you would not get out
04:15
of a Windows Explorer copy.
04:17
This is also going to look for all of the support files
04:21
that we have inside of AutoCAD Electrical.
04:23
Now, those support files will allow
04:26
us to do a lot of extra things that we're
04:28
going to be diving into over the next couple of modules.
04:31
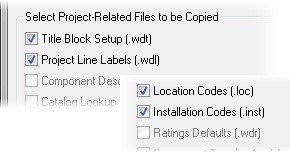
Things like our title block setups,
04:33
project line labels, standards for installation and location
04:37
codes, those can all be defined and copied
04:40
from one project to another.
04:41
So we want to make sure that it looks for all of those files.
04:44
You can see there's quite a few others that
04:46
could be in existence that we would want
04:48
to copy with the new project.
04:51
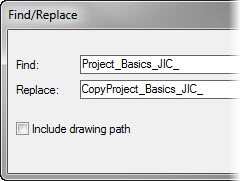
So I'm going to click OK on this and now I
04:54
can do a find and replace on my existing project.
04:59
And change all of the names so that these drawings do not
05:02
have the same names as my old project.
05:06
Again, in Windows Explorer you'd have
05:08
to manually do that or else you'd
05:10
be having duplication of these same things
05:13
even though they're located in different folders.
05:15
Not ideal when you're managing your drawings.
05:18
So what I'm going to say is I want it to find Project_Basics
05:24
and I want to replace it with Copy_Projects.
05:31
And if I do that, now all of my project names
05:34
All of my one, two, three, four, five, six
05:36
is still kept on their.
05:37
Super easy to do that find and replace and I'll click OK.
05:42
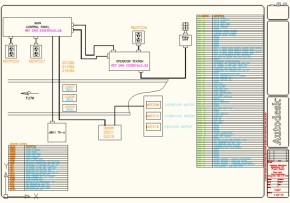
And now my new project has been created
05:44
with all of the same settings, same external files,
05:48
and same information as the project I was just on.
05:52
So I can expand it, I can see the folder structure,
05:54
I can see everything in there.
05:56
And that is the beauty of copy project.
05:59
Now, I want you to try this on your own
06:01
by going out to the copy a new project exercise.