00:08
Now that we have learned how to put a standard panel
00:11
footprints and nameplates into our project,
00:14
let's talk some of the specialty panel tools that we have.
00:17
Things like DIN rails and terminal strips.
00:21
So let's start with the DIN rail.
00:23
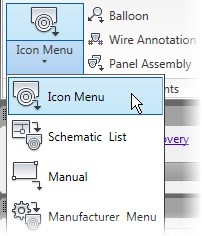
I'm going to come up to my icon menu.
00:28
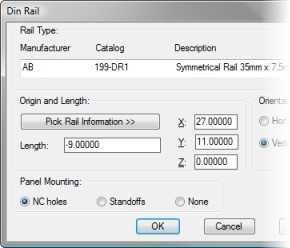
I'm going to click on the DIN rail utility.
00:32
And in here, I can choose which manufacturability of DIN
00:35
rails I want to utilize.
00:38
There's multiple ones from ABB, Newark, and Panduit in here,
00:41
and different options with all of them
00:42
are listed under the descriptions.
00:45
I'm going to choose the default one.
00:49
And then we starter pack our rail information.
00:51
Now we could manually fill it all out in the dialog box,
00:55
or you can go out on screen and just
00:57
draw it in where you want it.
00:59
Mine is going to be vertical.
01:01
And I'm going to click on the pick rail information.
01:04
So my first insertion point, I'm just
01:06
going to pick a bit below I'm going to use my midpoint object
01:15
snap to track this, a bit below this other existing terminal
01:25
Then I'm going to draw it down and click OK.
01:36
Now I have my DIN rail.
01:37
You can fill out your information.
01:39
And here give a description text, even a component tag
01:41
if you want to, and obviously it's
01:43
filled out the catalog information.
01:47
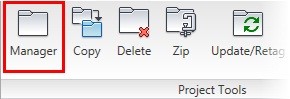
Once I have it, I'm ready to then place my terminal strip
01:52
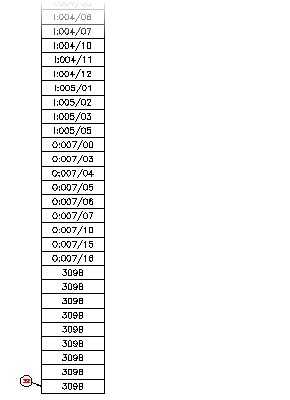
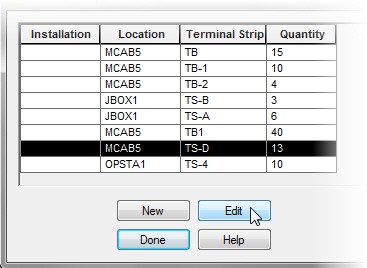
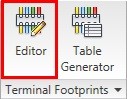
So now I'm going to come up to my terminal strip editor here.
01:58
It's going to scan my entire project for all terminals
02:01
that I have inside of this project.
02:03
You could expand the dialog box to see the full list
02:06
and you can see all of the location codes for them,
02:09
the terminal strip ID names, and the quantity of terminals
02:14
I'm going to choose the very last one here and click Edit.
02:19
Now, we did this in the schematics already.
02:21
You could have started here.
02:23
If you wanted to build your panel drawings
02:25
and your terminal strips first, and then go do your schematics,
02:29
you can do that as well.
02:30
Electrical allows you to work either direction,
02:32
schematic to panel, or panel to schematic.
02:36
But in this case, we have all of our information in.
02:38
Now we're just taking a look at all
02:40
of the terminals within this particular terminal strip.
02:45
Now we can reorder them by clicking
02:47
on the different columns.
02:48
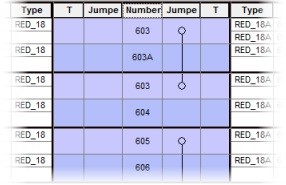
You can see if something is externally jumpered
02:51
or internally jumpered by the dialog box section here.
02:56
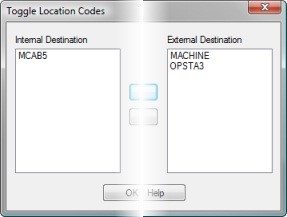
The external jumpers are those jumpers
02:58
we defined in the schematics already.
03:00
The internal ones are the associations
03:03
with the multilevel terminals.
03:05
You can also see upstream and downstream devices and the wire
03:09
numbers coming in and out of those terminals including
03:15
You can also add any of the information
03:17
that we did in the schematics from the toolbar down
03:20
at the bottom, or even the right click menu.
03:23
Both places to do exactly the same thing.
03:25
So there's properties you can define,
03:27
you can put in spares and accessories,
03:30
you can put in your jumpers or even do
03:33
those multilevel associations.
03:36
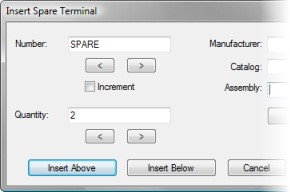
And in fact, we'll put a spare in just
03:38
to see how that gets added.
03:40
If you right click and go to spare, I can say Insert,
03:44
you can even put catalog information on it,
03:46
and I can put it below.
03:47
So there's my new spare terminal.
03:49
Same thing works for accessories, and caps,
03:51
and so on can all be done from in here
03:53
to add those additional pieces before you actually
03:56
insert the terminal strip.
03:58
Now when you jump over to the next column
04:00
is when you see the catalog information
04:02
for that particular terminal strip.
04:05
If you need to edit it, there is a separate area for catalog
04:10
And if this had cables coming into and out of it,
04:12
the cabling information would be located on this tab.
04:16
These are just standard wires so we're not
04:18
seeing any information on it.
04:21
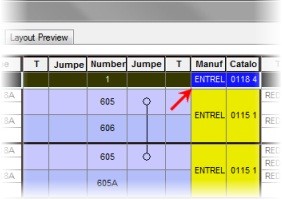
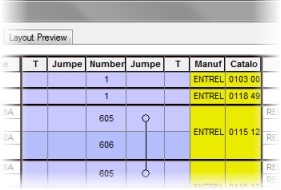
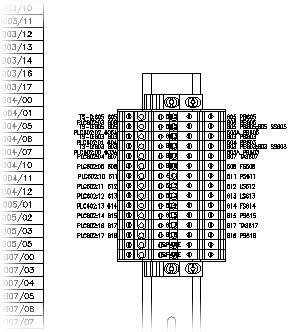
Now the final step is to go to the layout preview.
04:23
This is based off of the type of terminal
04:26
that you have chosen from the catalog.
04:28
Once again, the footprint itself is based off
04:30
of the catalog number.
04:32
So different catalog numbers are going
04:34
to give you different terminals that you will see.
04:37
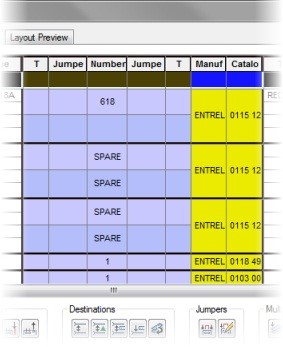
The spare you can see is the generic terminal.
04:40
Now what I put next to the terminals is up to me.
04:43
There is a ton of information for annotating those terminals
04:47
from this dialog box here.
04:49
If I don't want to see anything coming off
04:51
of both sides of the terminals, you just
04:53
clear that out, hit update, and you will see the new updated
04:57
terminal strip information.
04:60
I will insert this in a second.
05:01
But I want to show you some of the other tools in here.
05:04
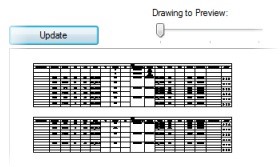
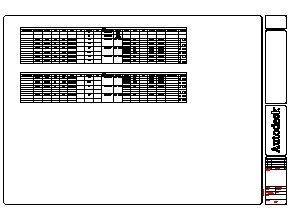
We can switch to a tabular terminal strip.
05:07
This will turn the terminal strip into a full table.
05:10
There are lots of different options and settings
05:13
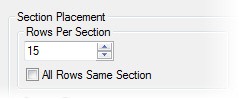
If you go into this dialog box, you
05:15
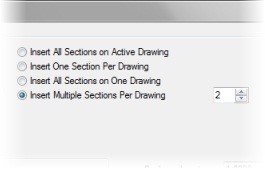
can change how many rows are in a section,
05:18
how many sections are on each drawing
05:20
if you want this to split across multiple drawings, what
05:23
your new drawings will be based off of,
05:26
what their templates will be used for,
05:28
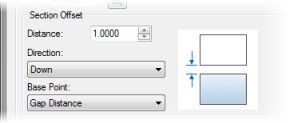
and what drawing name you want to give them,
05:31
as well as spacing and placement, lots
05:33
of control over how those new drawings get created.
05:36
If I just left it all, they would obviously
05:38
look like you're seeing on the preview here.
05:41
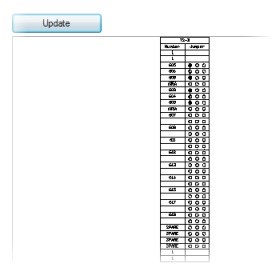
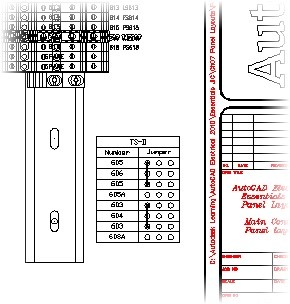
The final thing is a jumper chart.
05:43
So this will show me any jumpers that
05:45
are a part of this particular terminal strip.
05:48
There is also a way to add this after you insert the terminal
05:52
You can also choose to show not every single terminal,
05:55
but instead show only accessories jumper terminals
05:58
or just jumper terminals and that
06:00
will bring this particular report in a smaller form.
06:05
I'm going to switch back to the graphical terminal strip.
06:09
And I am going to click Insert.
06:12
I'm going to line it up right on this DIN rail,
06:16
and just bring it down to insert it here.
06:23
I'm going to click OK, and done.
06:26
And now I have my new terminal strip.
06:29
If I wanted to insert that dumper chart,
06:33
and it's saving out to make sure that all of the related
06:36
drawings are updated and ready to go
06:38
with the new inserts of these, I can right
06:40
click on any one of them and I can insert my jumper chart
06:47
and put that directly next to it.
06:49
Please do the exercise on DIN rails and terminal strip