00:03
When you launch either Argi
00:08
Pro start page appears
00:10
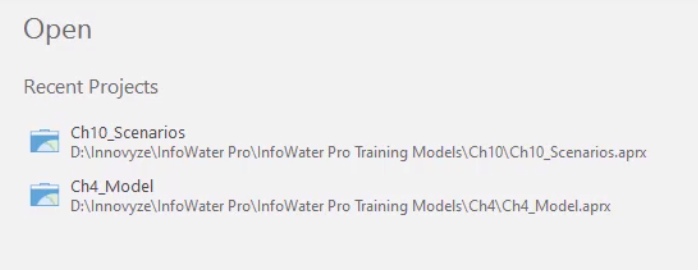
from this page. You can start new projects or open existing projects
00:16
to open an existing project,
00:18
locate and click the project name in the recent projects list
00:23
to open a project that's not in the list.
00:25
Click open another project to access all projects on your computer,
00:30
find the project and click.
00:33
You can also navigate to your model files and open
00:36
the APR file which will skip the start page.
00:40
A useful tip is to pin your favorite projects to the recent
00:43
projects list by hovering over the project name and clicking the pin icon
00:49
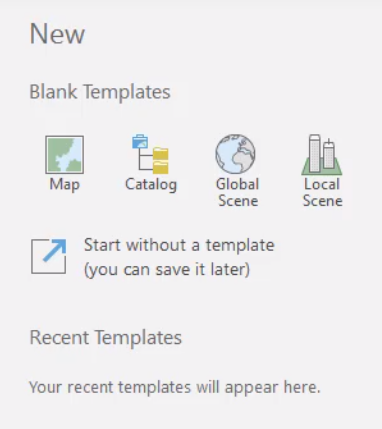
to create a new project.
00:51
Choose a default template from the blank templates
00:54
section of the start page such as map
00:58
in the create a new project pop-up name,
01:00
your project and update the location if needed.
01:06
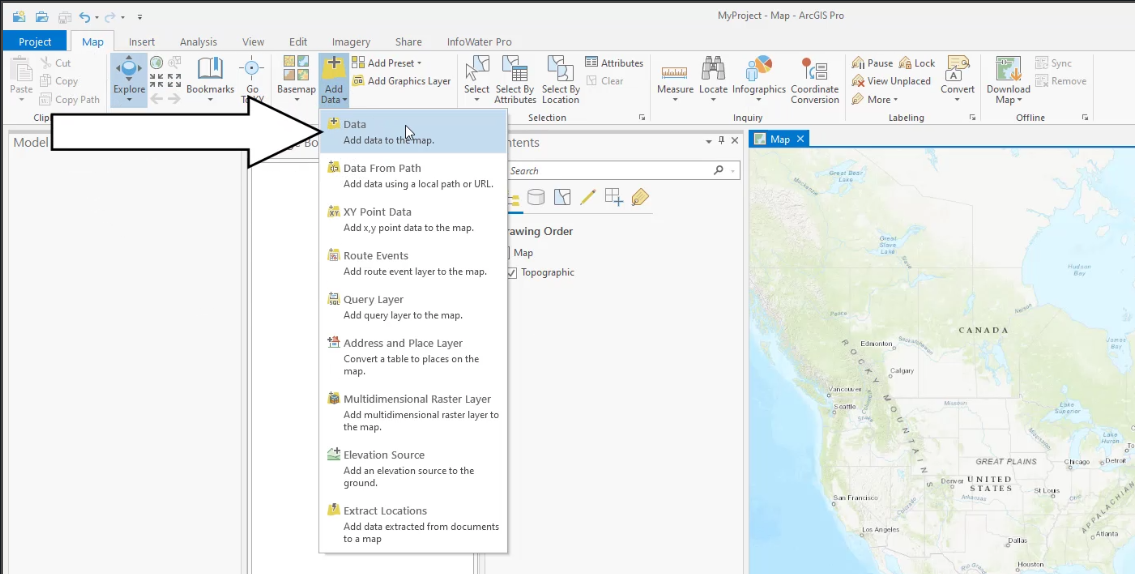
Pro user interface appears,
01:09
click the map tab on the
01:12
and then click add data,
01:15
navigate to find and select the shape file you want to add to start your project,
01:20
click OK, to load the shape file.
01:23
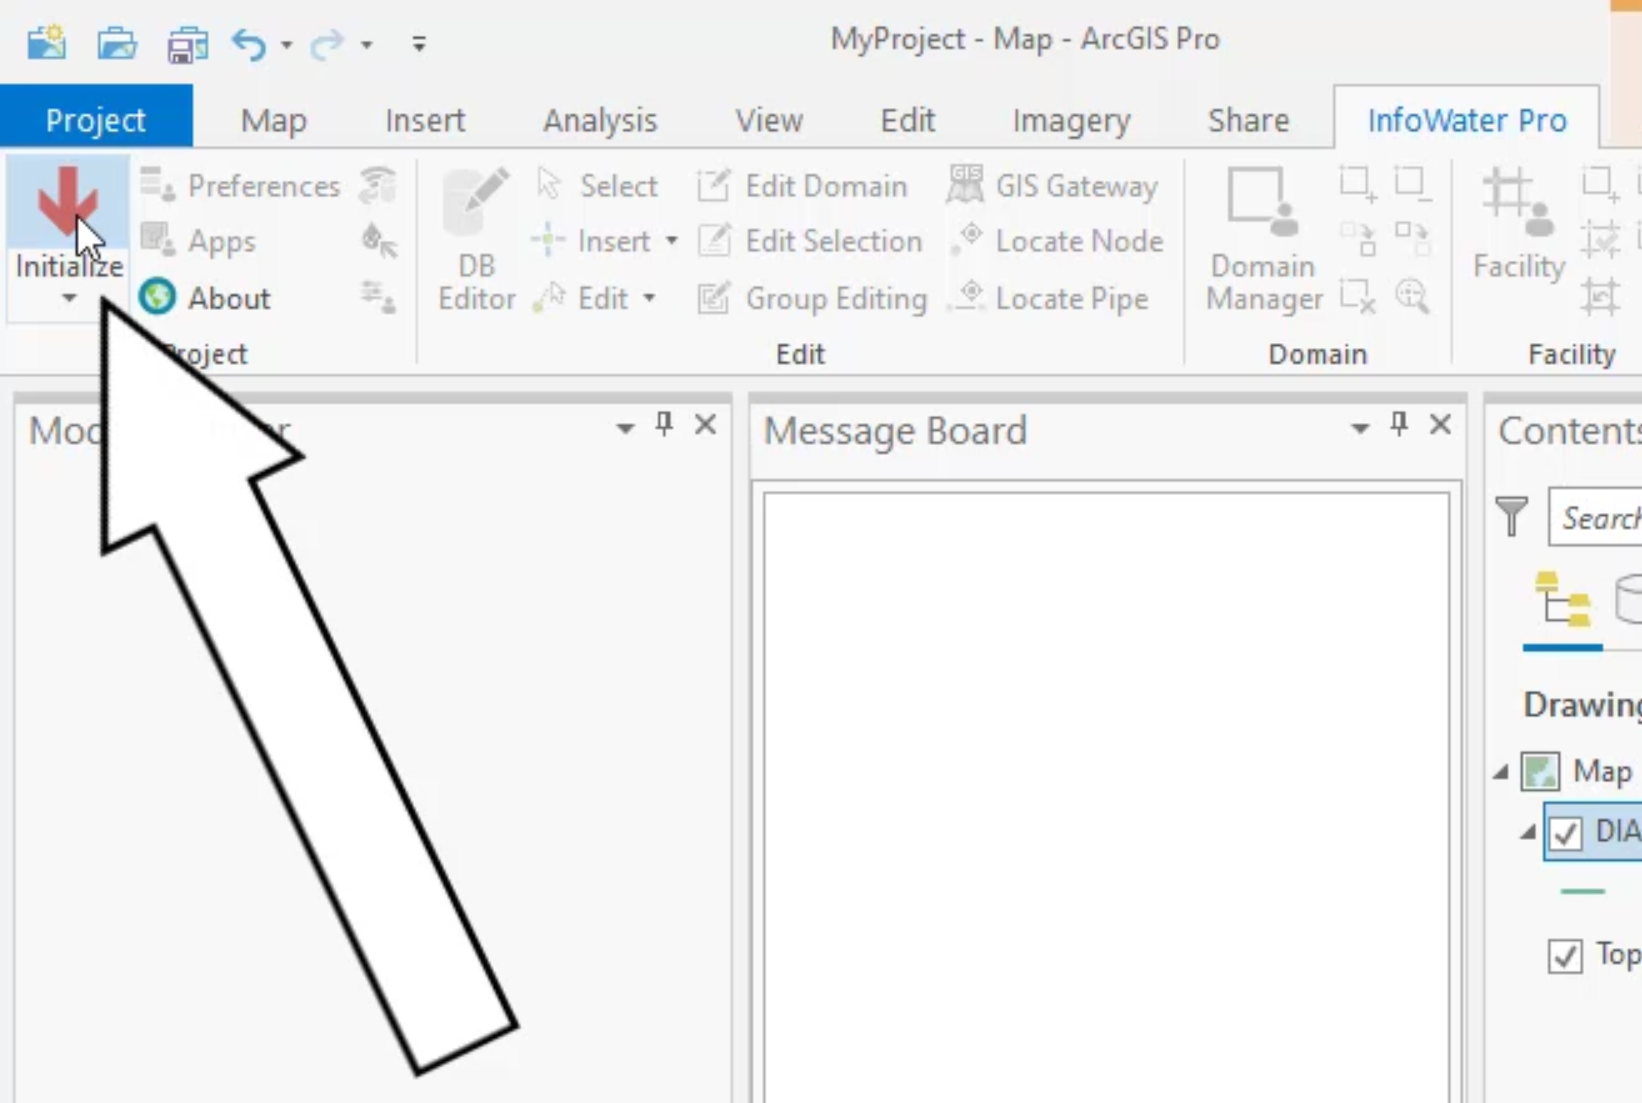
Now click the info Water pro tab to open the info Water pro ribbon
01:28
in the project group, click initialize
01:31
this creates the databases necessary to store the model information.
01:36
It also establishes links between the
01:39
Agis Pro document file and the info Water Pro database tables
01:44
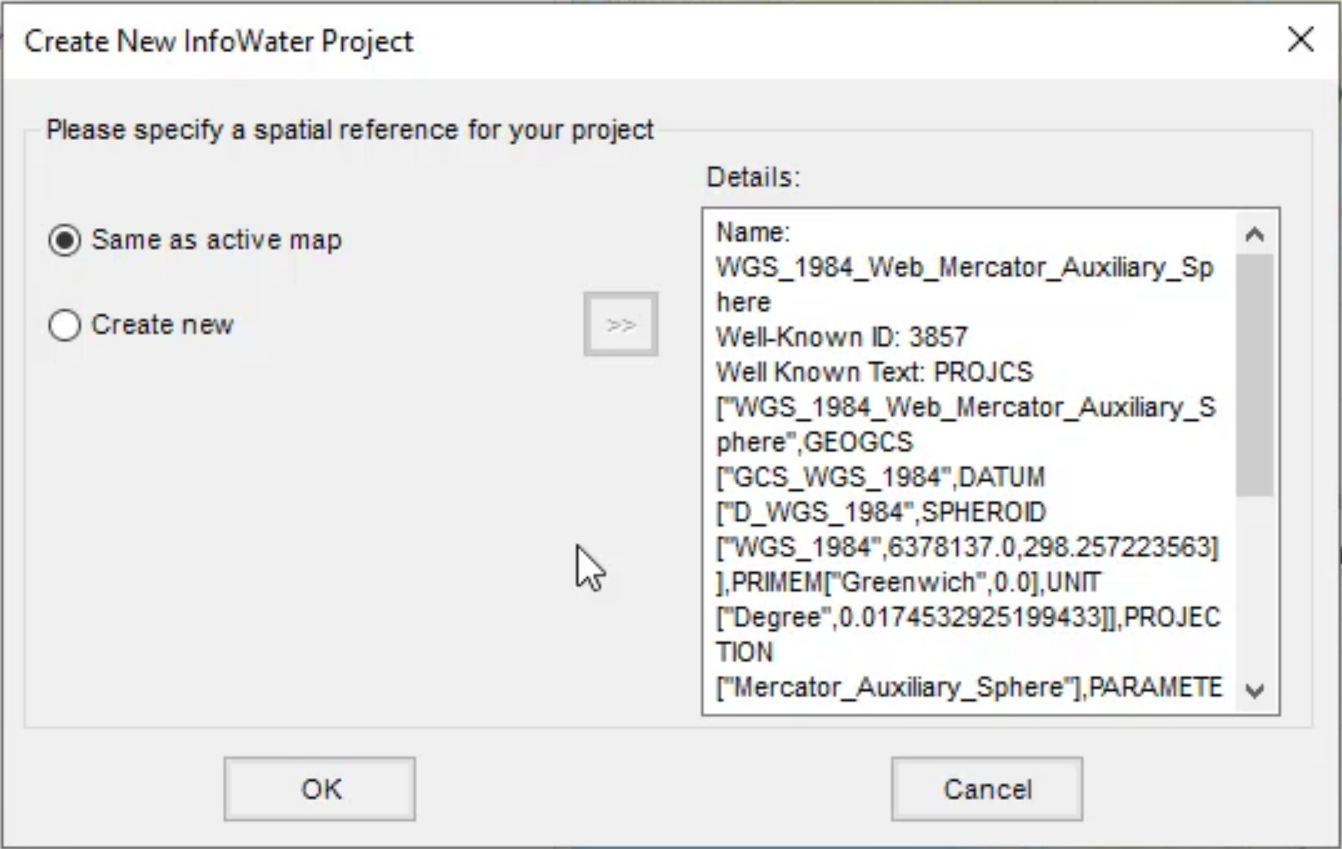
in the create new info water project dialog box that appears
01:48
specify a spatial reference for your project.
01:52
Since you will typically begin your own shape file,
01:54
that usually has the correct spatial projection for
01:57
your model select same as active map.
02:01
However, if you did not add in a layer or shape file with a spatial projection,
02:06
you can still specify the spatial projection you
02:08
want the model to use in this window.
02:13
Once the project is initialized as an info Water pro project,
02:17
click the save icon or press control S to save your project.
02:22
If this is the first time you start info Water Pro,
02:25
you can add the info water pro model explorer
02:28
and message board panels to the existing ARC G
02:31
S panels in the main view area.
02:34
From the view section of the info Water pro tab,
02:37
click the model explorer and message board icons to open the panels.
02:42
Once opened, you can arrange all the panels to your preferred method of working.