Step-by-step:
With InfoWater Pro, you can run steady state simulations on a new model project to take a snapshot in time before going more in-depth. Steady state simulations capture the results for a single timestep with no variance in modeling inputs and are useful for simulating peak hour and fireflow scenarios.
- Open the appropriate .aprx file in ArcGIS Pro.
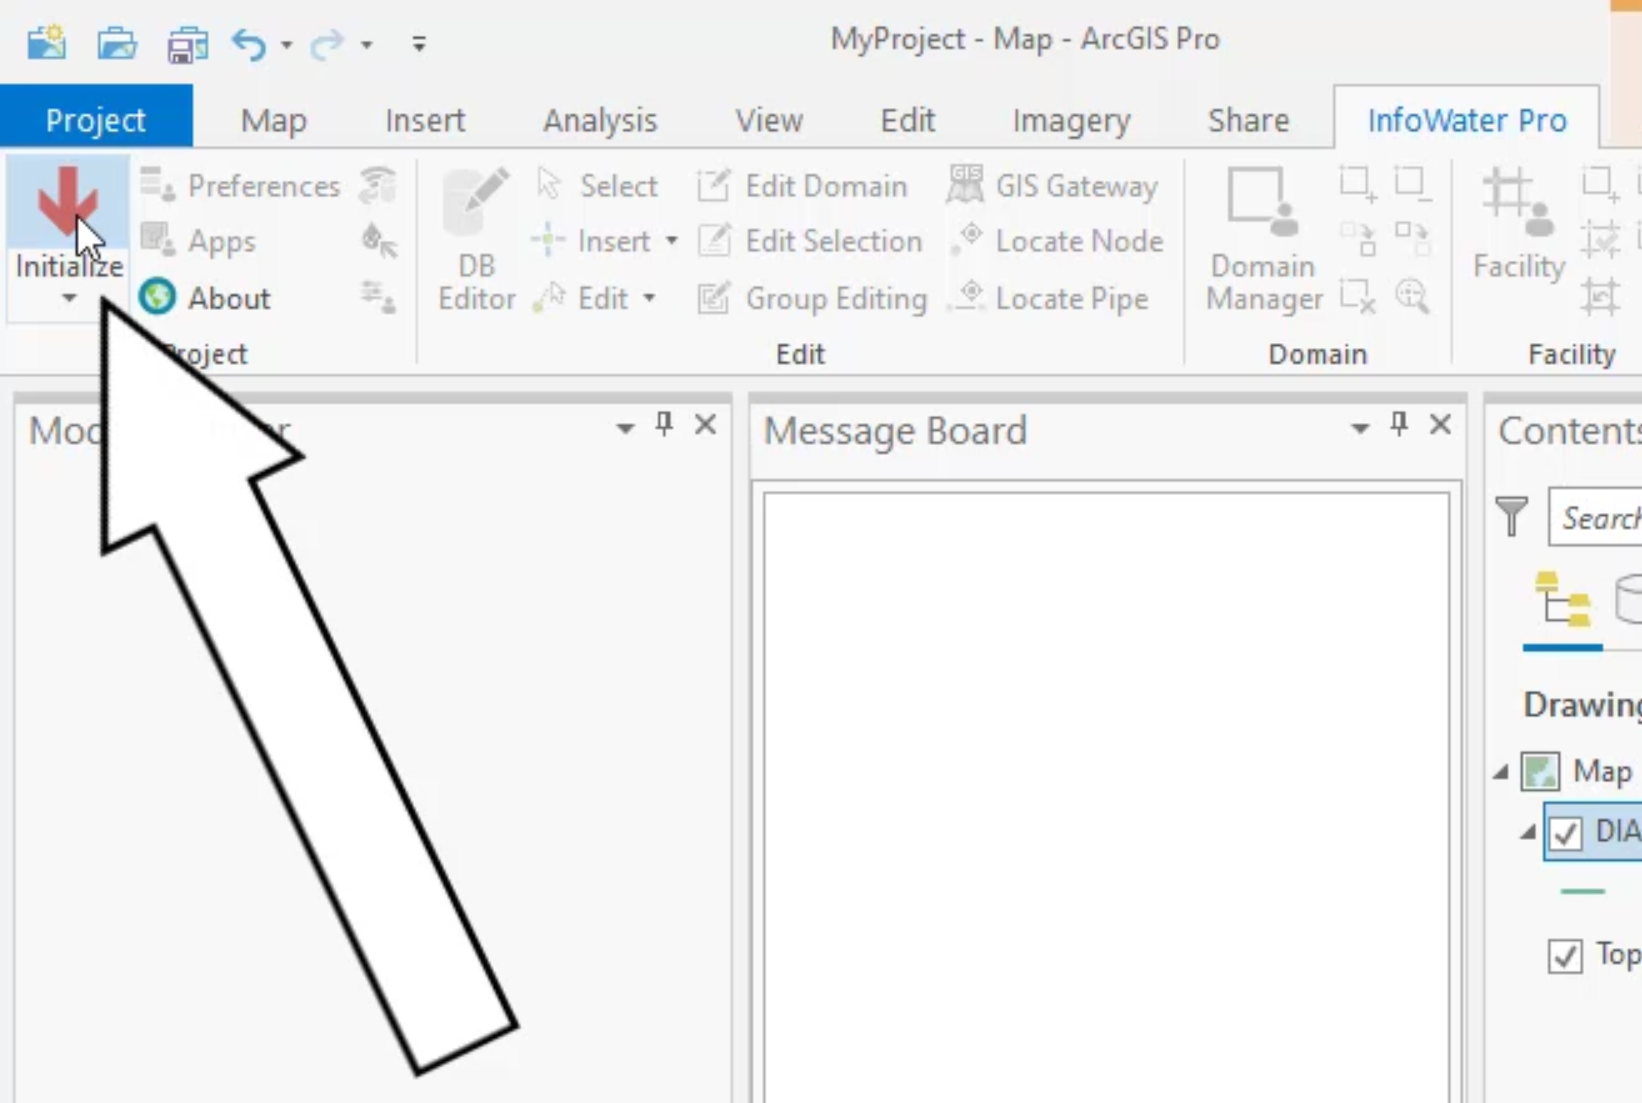
- From the ribbon, InfoWater Pro tab, click Initialize.
- In the Model Explorer, open the Operation tab.

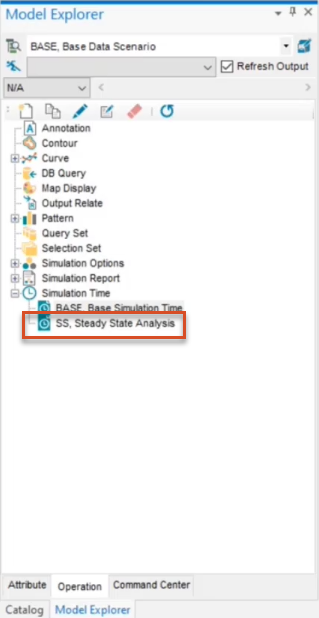
- Expand Simulation Time.
- Double-click BASE, Base Simulation Time.

- In the Simulation Time dialog box toolbar, click New.

Note that you can also open the Simulation Time dialog from the Run Manager, Simulation Time Browse button.
- In the New Simulation Time dialog box, New ID field, type, “SS, Steady-State Analysis”.
- Click OK.

- In the Simulation Time dialog box, enable Steady State.
- Click OK.

The new steady state simulation now appears in the Model Explorer under Simulation Time.