Step-by-step:
The Output Relate option is used to establish the relationship between modeling input data and simulation output results. Once a relate (or link) is established, you can then apply queries to the current project based on modeling inputs and simulation output results simultaneously. Output relates are stored in an external database (dBase IV) file, which can be linked with other third-party GIS software to view the analysis results.
- Open the appropriate .aprx file in ArcGIS Pro.
- From the ribbon, InfoWater Pro tab, Project panel, click Initialize.
To create an output relate to find junctions that have a high pressure during the simulation:
- In the Model Explorer, Operation tab, click Output Relate.
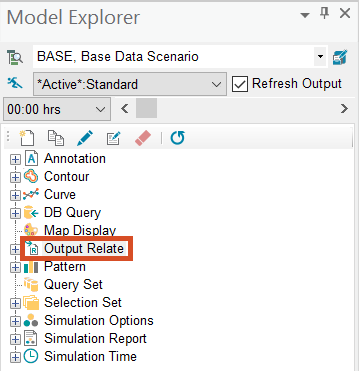
- Right-click Output Relate and select New.
- In the Output Relate Identification popup, type an Output Relate ID of “JUNCT_C, Current Scenario Junction Range”.
- Click OK.
- In the Output Relate dialog box:
- In the Source Output Data group, expand the Desired Output Report drop-down and select Junction Range.
- Expand the Desired Report Page type drop-down and select Pressure. When you do, the Desired Report Page value changes to 2.
- Enable the Automatic Update option.
Note: With the Automatic Update option ON, the relate table will be automatically updated every time you run a simulation when the relate’s target scenario and target simulation are active.
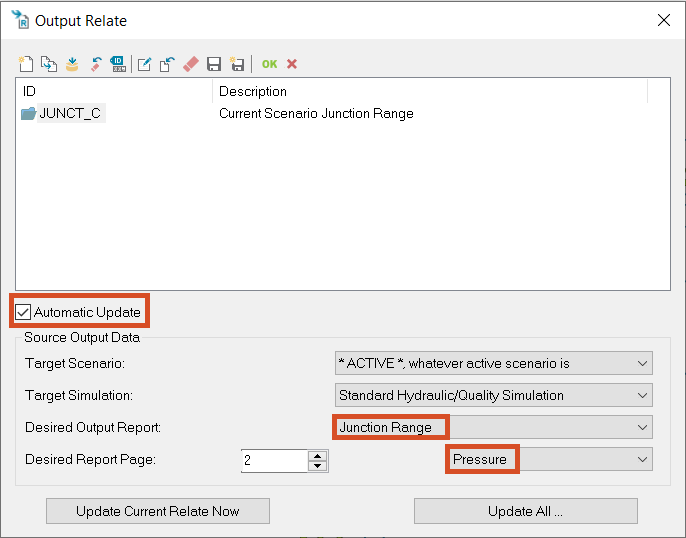
- Click Update Current Relate Now.
- If you see a message that the current relate updated successfully, click OK.
- Click OK again to close the Output Relate dialog.
To set up a DB query that uses this Output Relate:
- In the Model Explorer, on the Operation tab, right-click DB Query and select New.
- In the DB Query Identification popup, type a DB Query ID of “JUNCT_C, Querying Output Relate”.
- Click OK.
- In the DB Query dialog box, switch to the Output Relate(s) tab.
- Make sure JUNCT_C, Current Scenario Junction Range is displayed in the drop-down. Then, click Add Relate to attach this Output Relate to the DB Query.

- Click the Query Statement tab.
- Click the Query Builder icon.
In the Query Builder dialog box, a JUNCT_C tab appears, representing the Output Relate you created. To build a query for junctions with a pressure that drops below 0 psi:
- Click the JUNCT_C tab.
- Select the fields and operators and then click Add, OR type the query directly into the Query Statement type box: “JUNCT_C->MIN_VALUE<= 0.000000”.

- Click Validate to make sure your query is valid.
- Click OK to close the validation message
- Click OK to close the Query Builder.
- Click OK to close the DB Query.
To now apply this query to the domain:
- On the ribbon, InfoWater Pro tab, Domain panel, click Domain Manager.
- In the Domain Manager:
- Set the Element Source to DB Query.
- Expand the drop-down and select JUNCT_C, Querying Output Relate.
- Click Add to add any junctions with a minimum pressure less than 0 psi to the map.

- Click Close to close the Domain Manager.
- On the ribbon, InfoWater Pro tab, Domain panel, click Zoom Domain to zoom to the area designated by the query.
- Select the junction J1404, between the reservoir and two pumps.

- In the Model Explorer, Attribute tab, drag the slide bar for this element and view the Output > Pressure settings.
Note that the pressure becomes negative after hour 4 of the simulation.
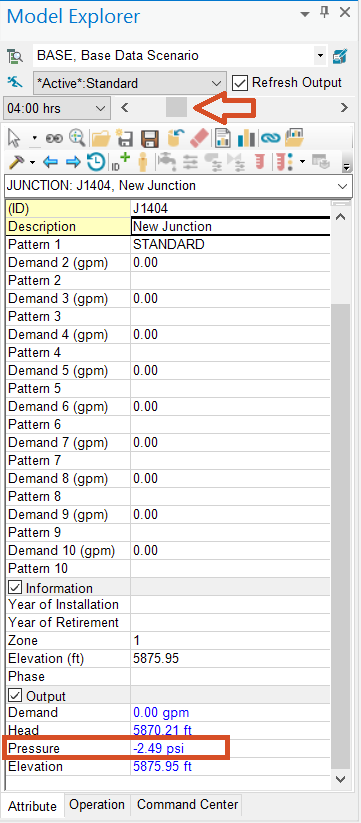
Negative pressures are worth reviewing, as they often mean demands cannot be met at those nodes. The EPANET engine requires that all demands are fulfilled, so it is mathematically possible to get negative pressures even though that would not be reflected in an actual system. The negative pressure at this junction can be ignored as it was digitized for splitting flow to the pumps, so its pressure is artificially reduced by being so close to the reservoir.
- On the ribbon, InfoWater Pro tab, Domain panel, click Clear Domain.


