00:04
When you use the GIS gateway to create
00:06
new features or update changes to existing features,
00:09
you can compare and identify what model elements will be added or modified.
00:13
When the GIS exchanges are completed
00:15
to begin. Double click the desired project dot AP Rx file to open
00:22
Once the project starts,
00:23
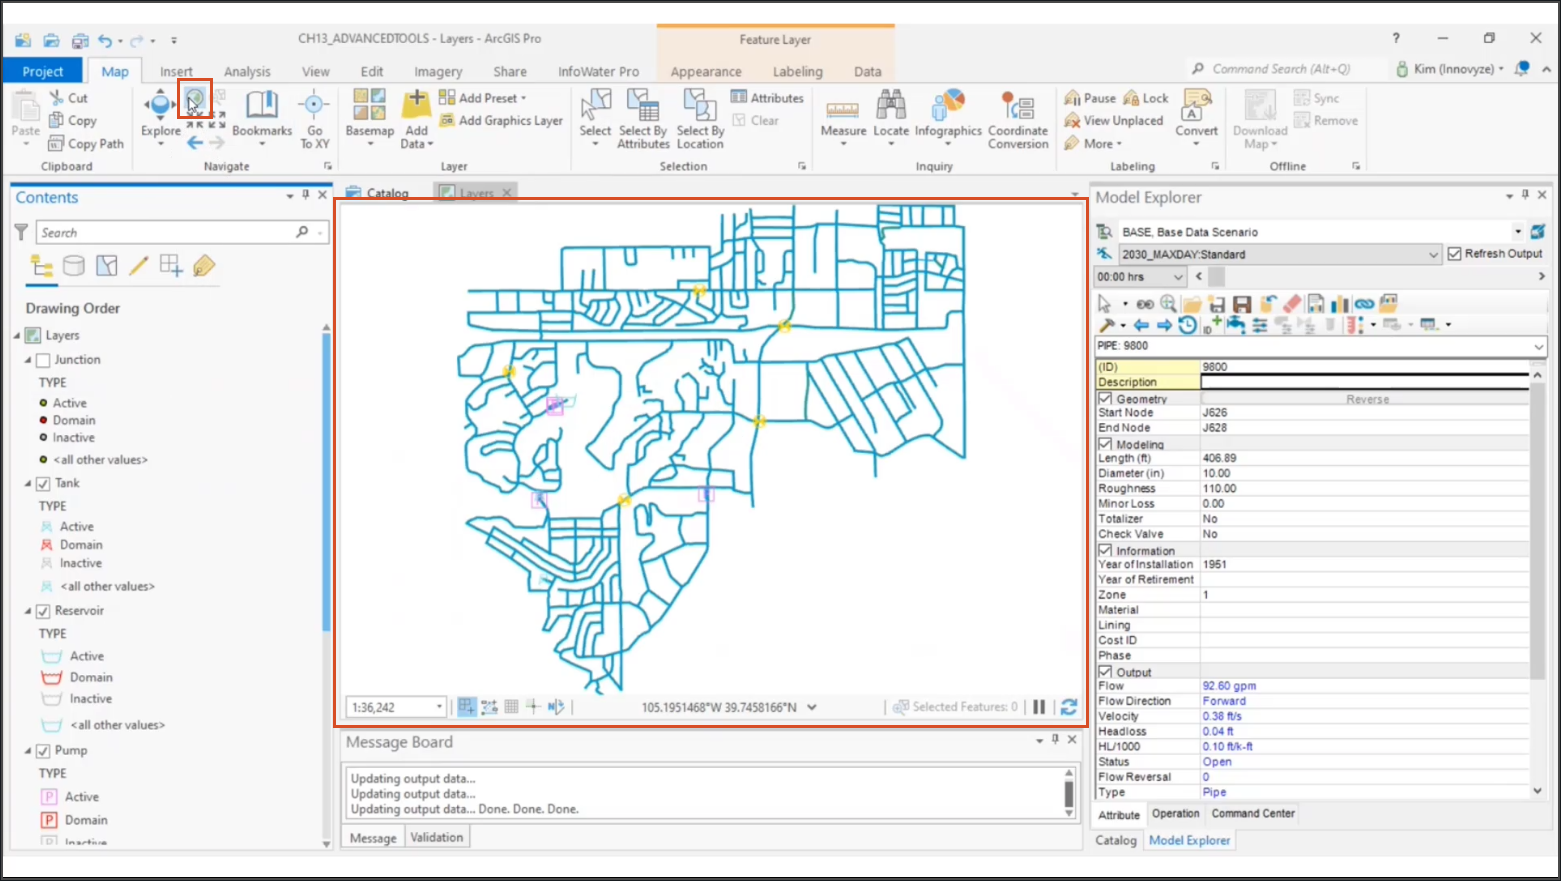
click the info water pro tab to open the info water Pro ribbon
00:28
in the project panel, click initialize
00:31
before you open the GIS gateway.
00:34
there are two settings you can change to help you see the differences more clearly
00:40
contents panel, deselect the junctions layer to get a better view of the pipe layer
00:46
Pro ribbon on the map tab navigate panel,
00:49
click full extent to zoom the map view to the full extent of the model
00:54
on the info water pro ribbon in the edit panel, click GS gateway
00:60
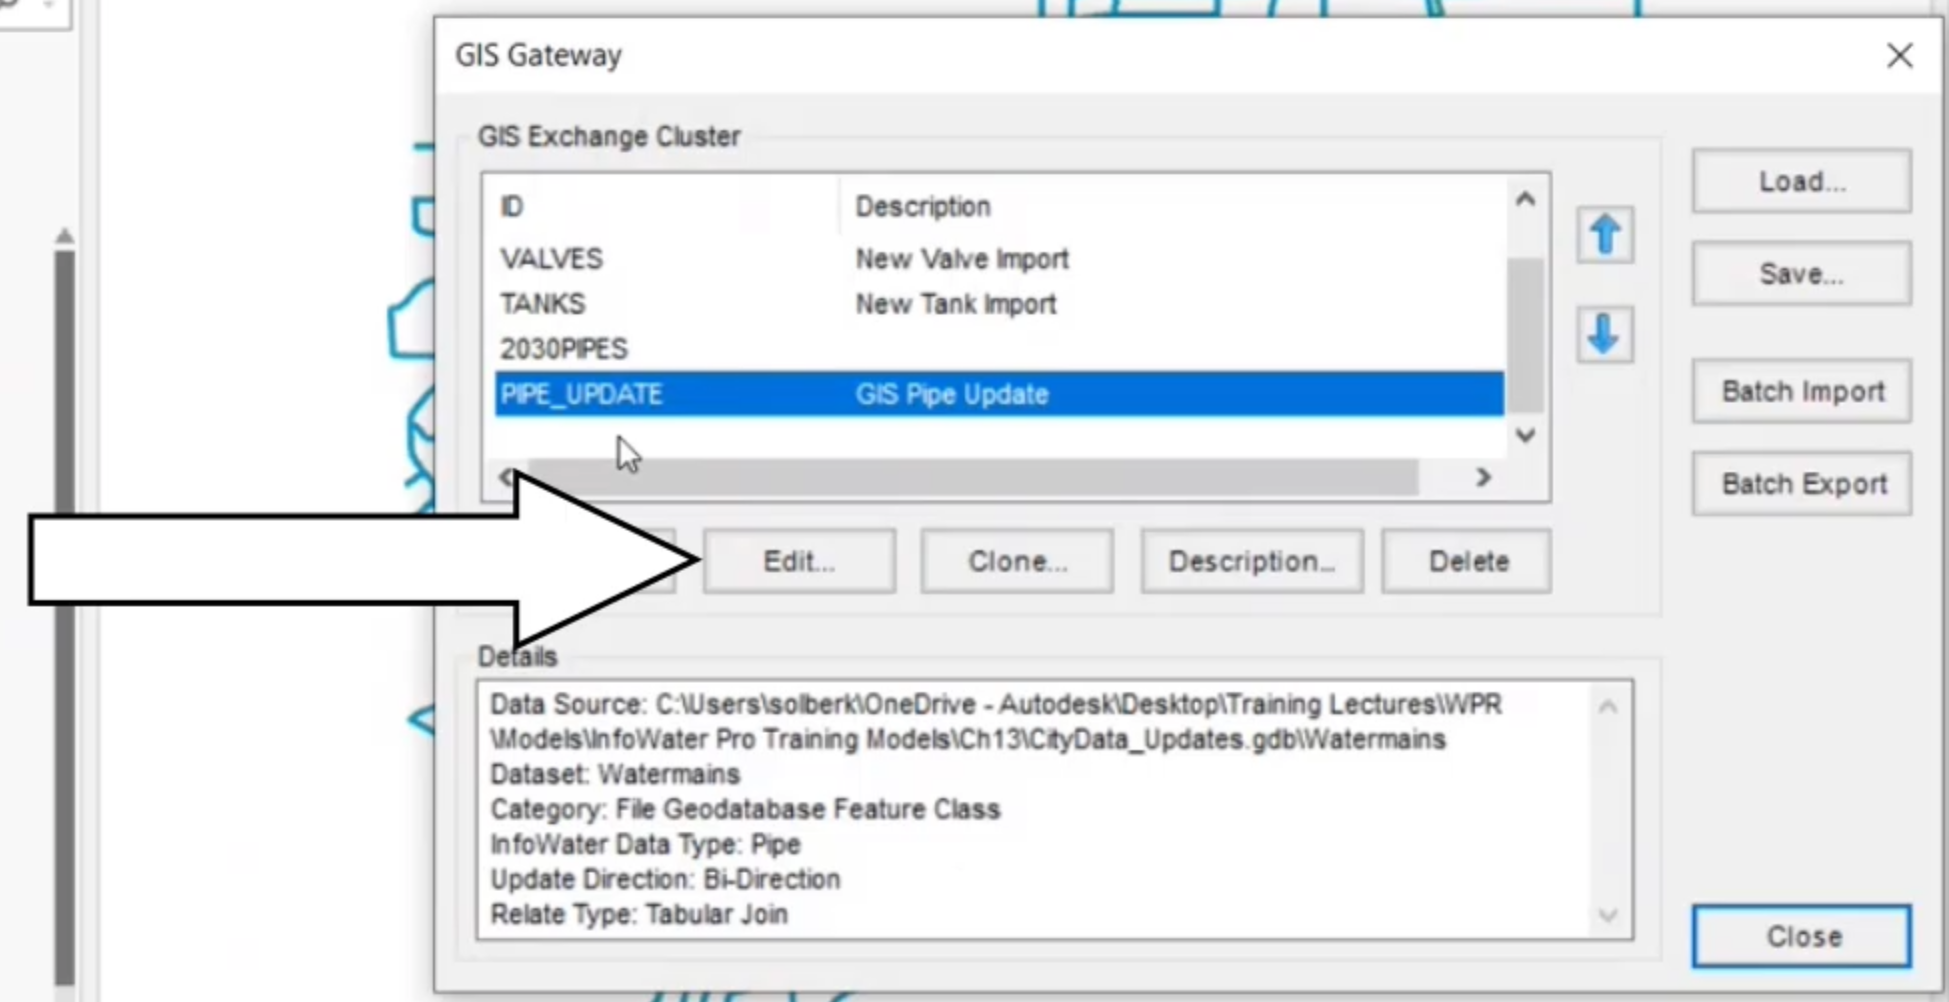
in the GIS exchange cluster group, select pipe update and then click edit
01:07
this cluster with changes from
01:09
GISS was recently added
01:12
on the field mapping tab in the network slash GIS data field mapping list,
01:16
select the pipe hide length field to highlight it.
01:22
Then click the remove arrow,
01:24
you are temporarily un mapping this field for the sake of comparison.
01:28
Otherwise all the pipes in the model will show us having a different length.
01:33
Click OK? To save the changes and return to the GIS
01:39
drag the GIS gateway dialogue to the side to view the map of the entire pipe network.
01:45
Then click load to open the load data from GIS
01:48
layer or table dialogue and drag it to the side,
01:54
select the pipes, new pipe import cluster. So that only that layer is highlighted.
01:58
Then click compare to see the list of new pipes that will be added to the model.
02:04
Review the list of new pipes to be added
02:07
when you are finished, close the GIS data difference dialogue
02:12
back in the load data from G I S layer or table dialogue, select the pipe update G
02:17
pipe update cluster. So that only that layer is highlighted, then click compare
02:25
Dialogue appears with the list of pipe updates that will be done on the model.
02:30
This comparison table identifies field changes that
02:33
will be made by this exchange cluster.
02:36
The fields highlighted in red represent those
02:39
that are different between the two sources.
02:42
For example, you can see that several pipes have been upsized to 12 inches.
02:47
You can use the table to identify differences between the GIS and model to
02:52
determine which elements and fields will be updated when the exchange is run.
02:56
Once you have reviewed the table,
02:58
close the GIS data difference and load data from GIS layer or table dialogs.
03:05
You can now remap the pipe length field in the GIS gateway
03:09
in the GIS exchange cluster section, select pipe update and then click edit
03:16
on the field mapping tab,
03:17
click auto map to remap the length field you temporarily disabled,
03:22
click OK to save your changes to this exchange cluster
03:25
and then click close to exit the GIS gateway.