Step-by-step:
A new scenario has been created, based on existing settings. Modify the demands within it to set up the conditions for analysis of this scenario.
- Open the appropriate .aprx file in ArcGIS Pro.
- From the ribbon, InfoWater Pro tab, Project panel, click Initialize.
- In the Model Explorer, select the EX_MAXDAY scenario.

- At the prompt, click OK to confirm switching to this scenario.
The EX_MAXDAY scenario is activated. Keep in mind that any edits you make with this scenario active will impact the datasets associated with it.
- To further confirm that the correct scenario is active, open Scenario Explorer.

- In the Scenario Explorer, you can see that EX_MAXDAY is selected. Exit the Scenario Explorer.
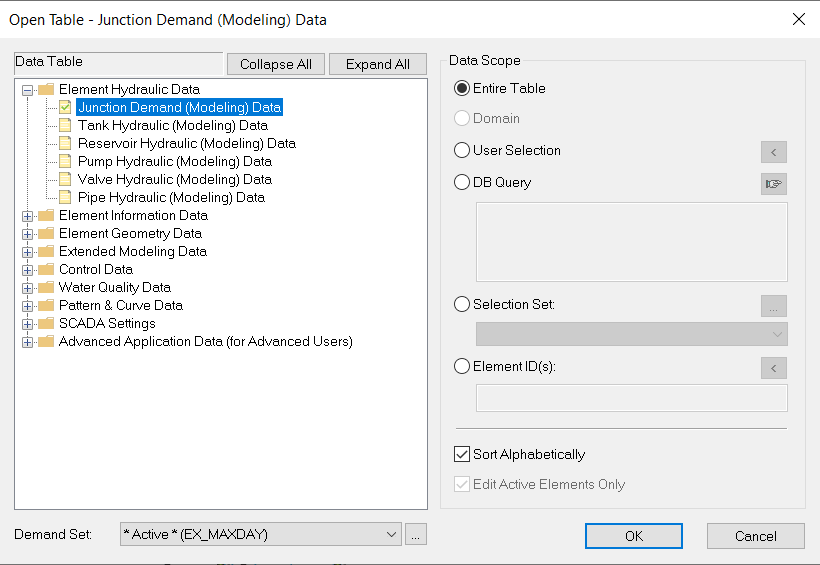
- To modify the demands in the EX_MAXDAY scenario, on the InfoWater Pro ribbon, in the Edit panel, click DB Editor.
In the DB Editor window, notice that the current Demand Set is displayed as *ACTIVE* (EX_MAXDAY).
- In the Data Table, expand the Element Hydraulic Data folder and select Junction Demand (Modeling) Data.
- Under Data Scope, select Entire Table.
- Click OK.
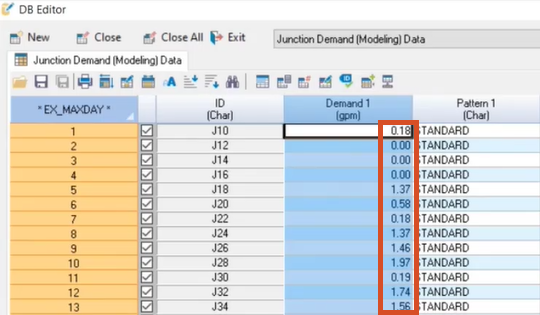
- In the DB Editor, click the header of the Demand 1 (gpm) column to select the column.
- In the toolbar, click Block Editing.

- In the Block Edit popup, set the Operation to Multiply By (*).
- For the Value, type 1.2.

- Click OK.
All demands in the EX_MAXDAY database are increased by 20%:
- Click Save to save the changes to the database table.
- Exit to close the DB Editor.
Now, the existing conditions of this scenario reflect the maximum demands for this network.


