00:03
In InfoWorks ICM, the flood theme is a comprehensive tool that displays water levels across all object results.
00:11
To start, from the File menu, select Open>Open transportable database.
00:16
Open the folder where you downloaded the files for this exercise and select the .icmt file.
00:24
If a popup displays about opening the database as read-only, click Yes.
00:29
Right-click the top-level folder and select Copy.
00:32
When the pop-up displays, click Continue.
00:36
In the Explorer window, right-click the Database and select Paste (with children).
00:41
In the Copying pop-up, enable Copy simulation results and Copy ground models.
00:49
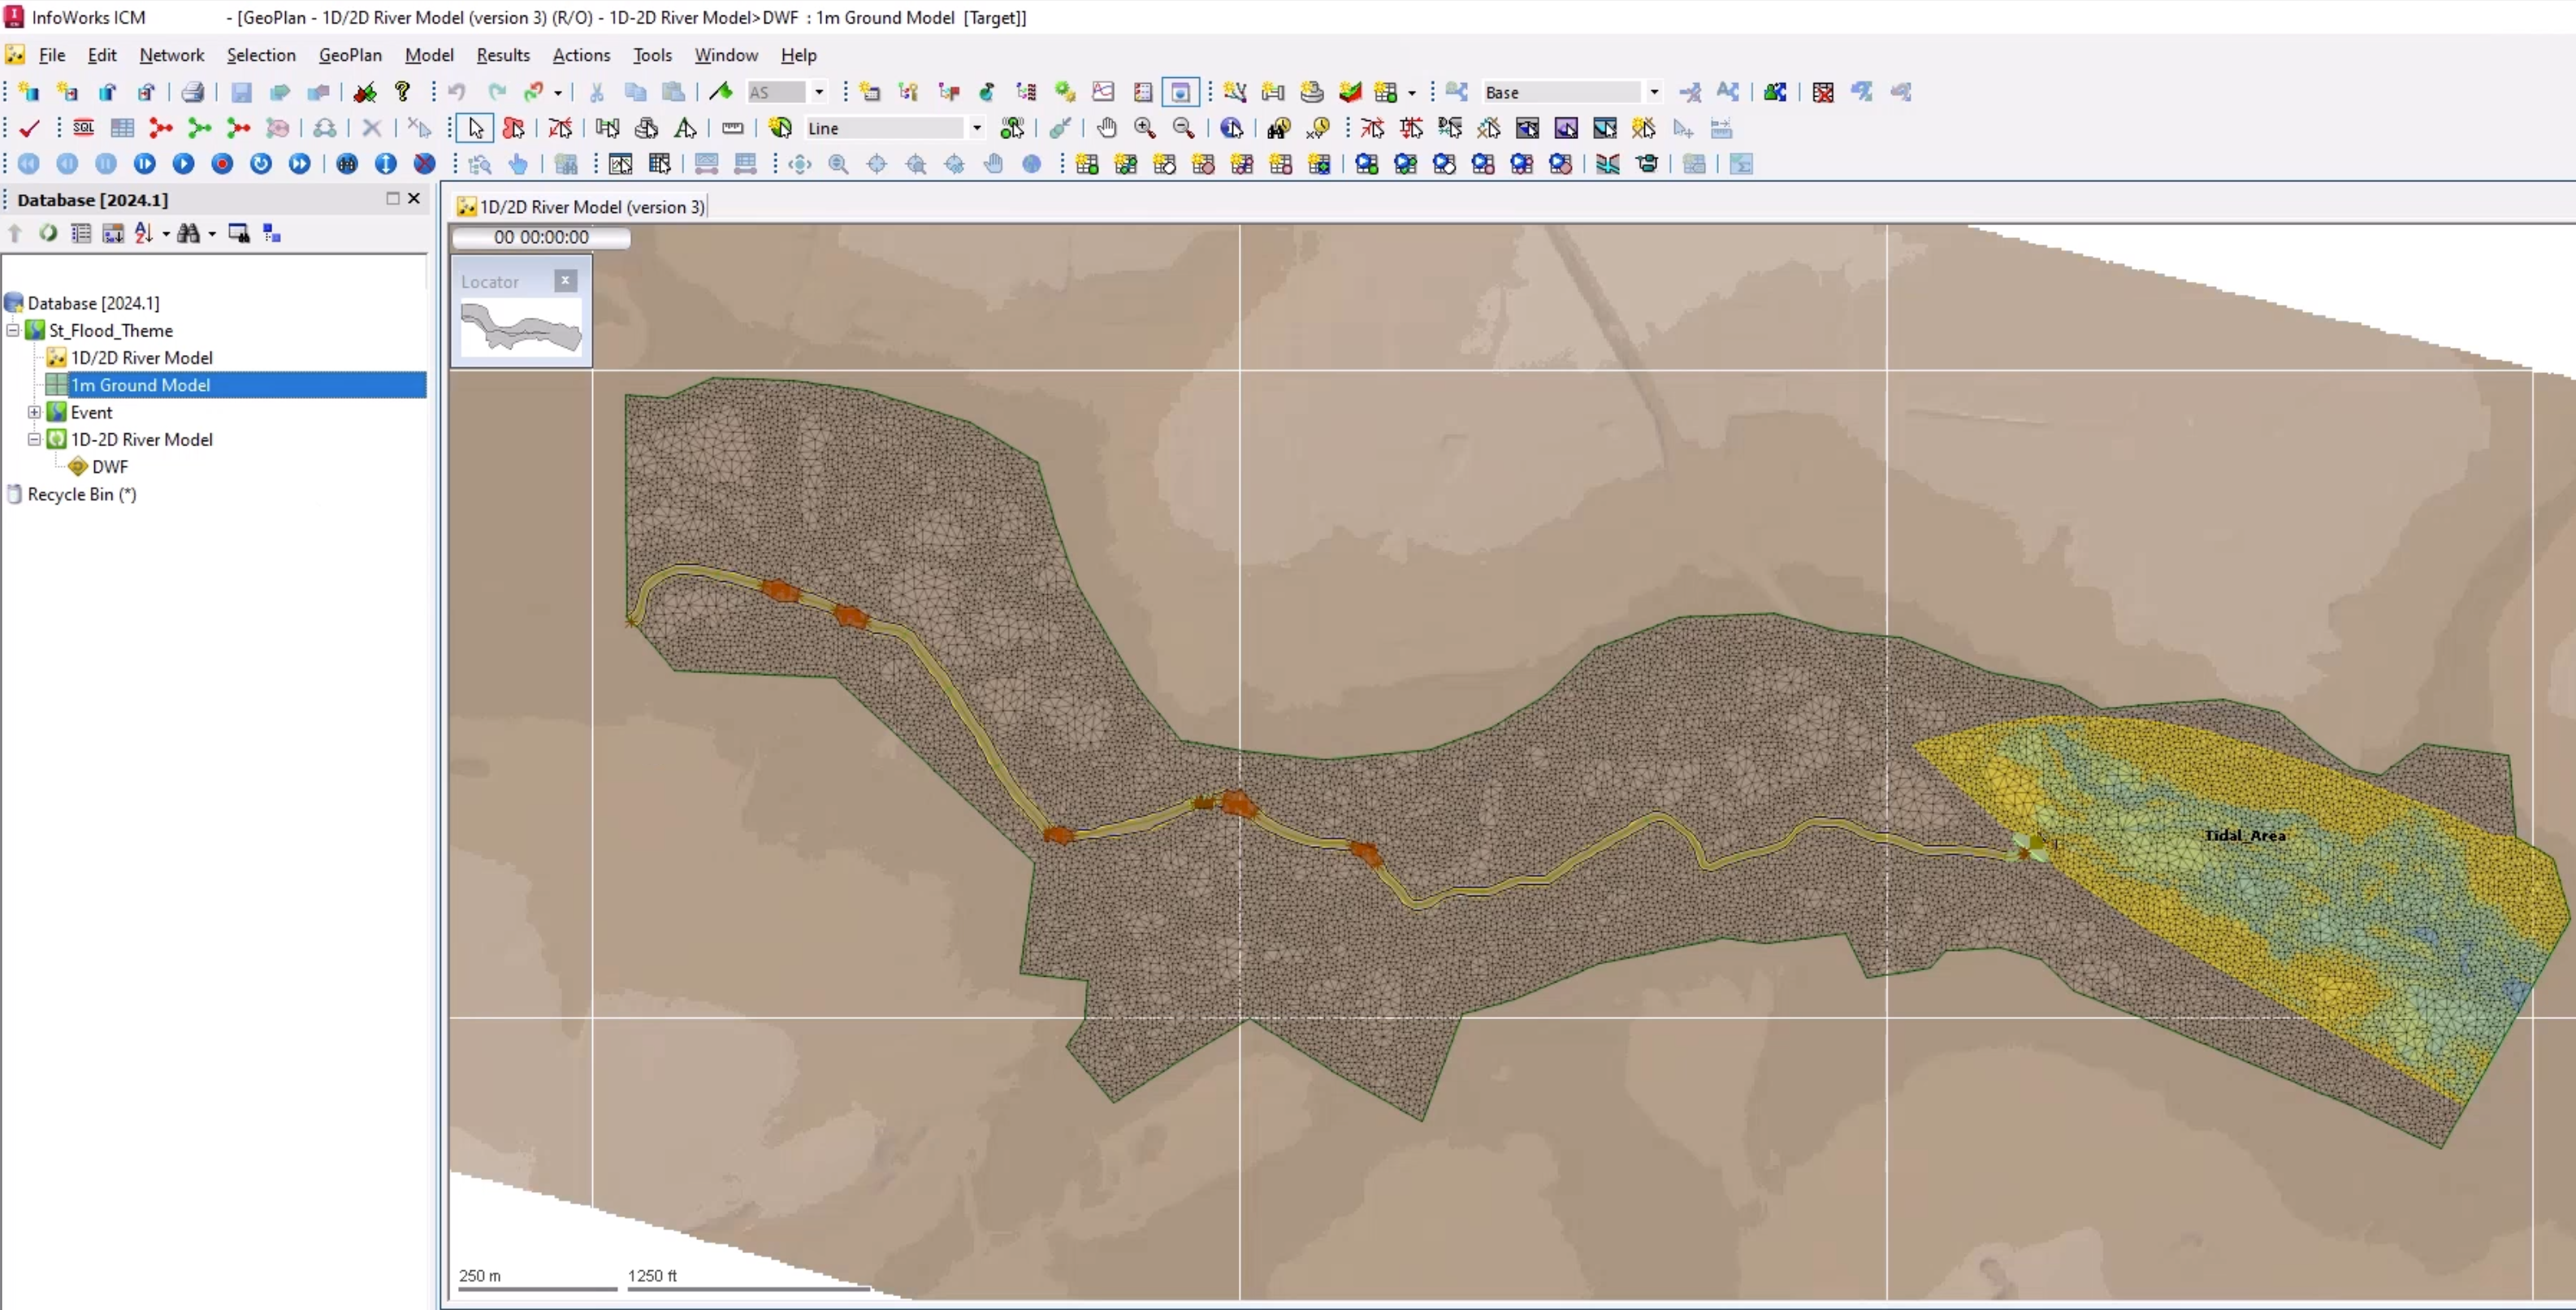
Open the 1D-2D River Model simulation on the GeoPlan to ensure that the model opens with the simulation results applied.
00:57
Before utilizing the flood theme, you must have a ground model loaded.
01:01
From the Explorer window, drag 1m Ground Model and drop it onto the GeoPlan.
01:06
You may not want the loaded ground model to display in the GeoPlan.
01:10
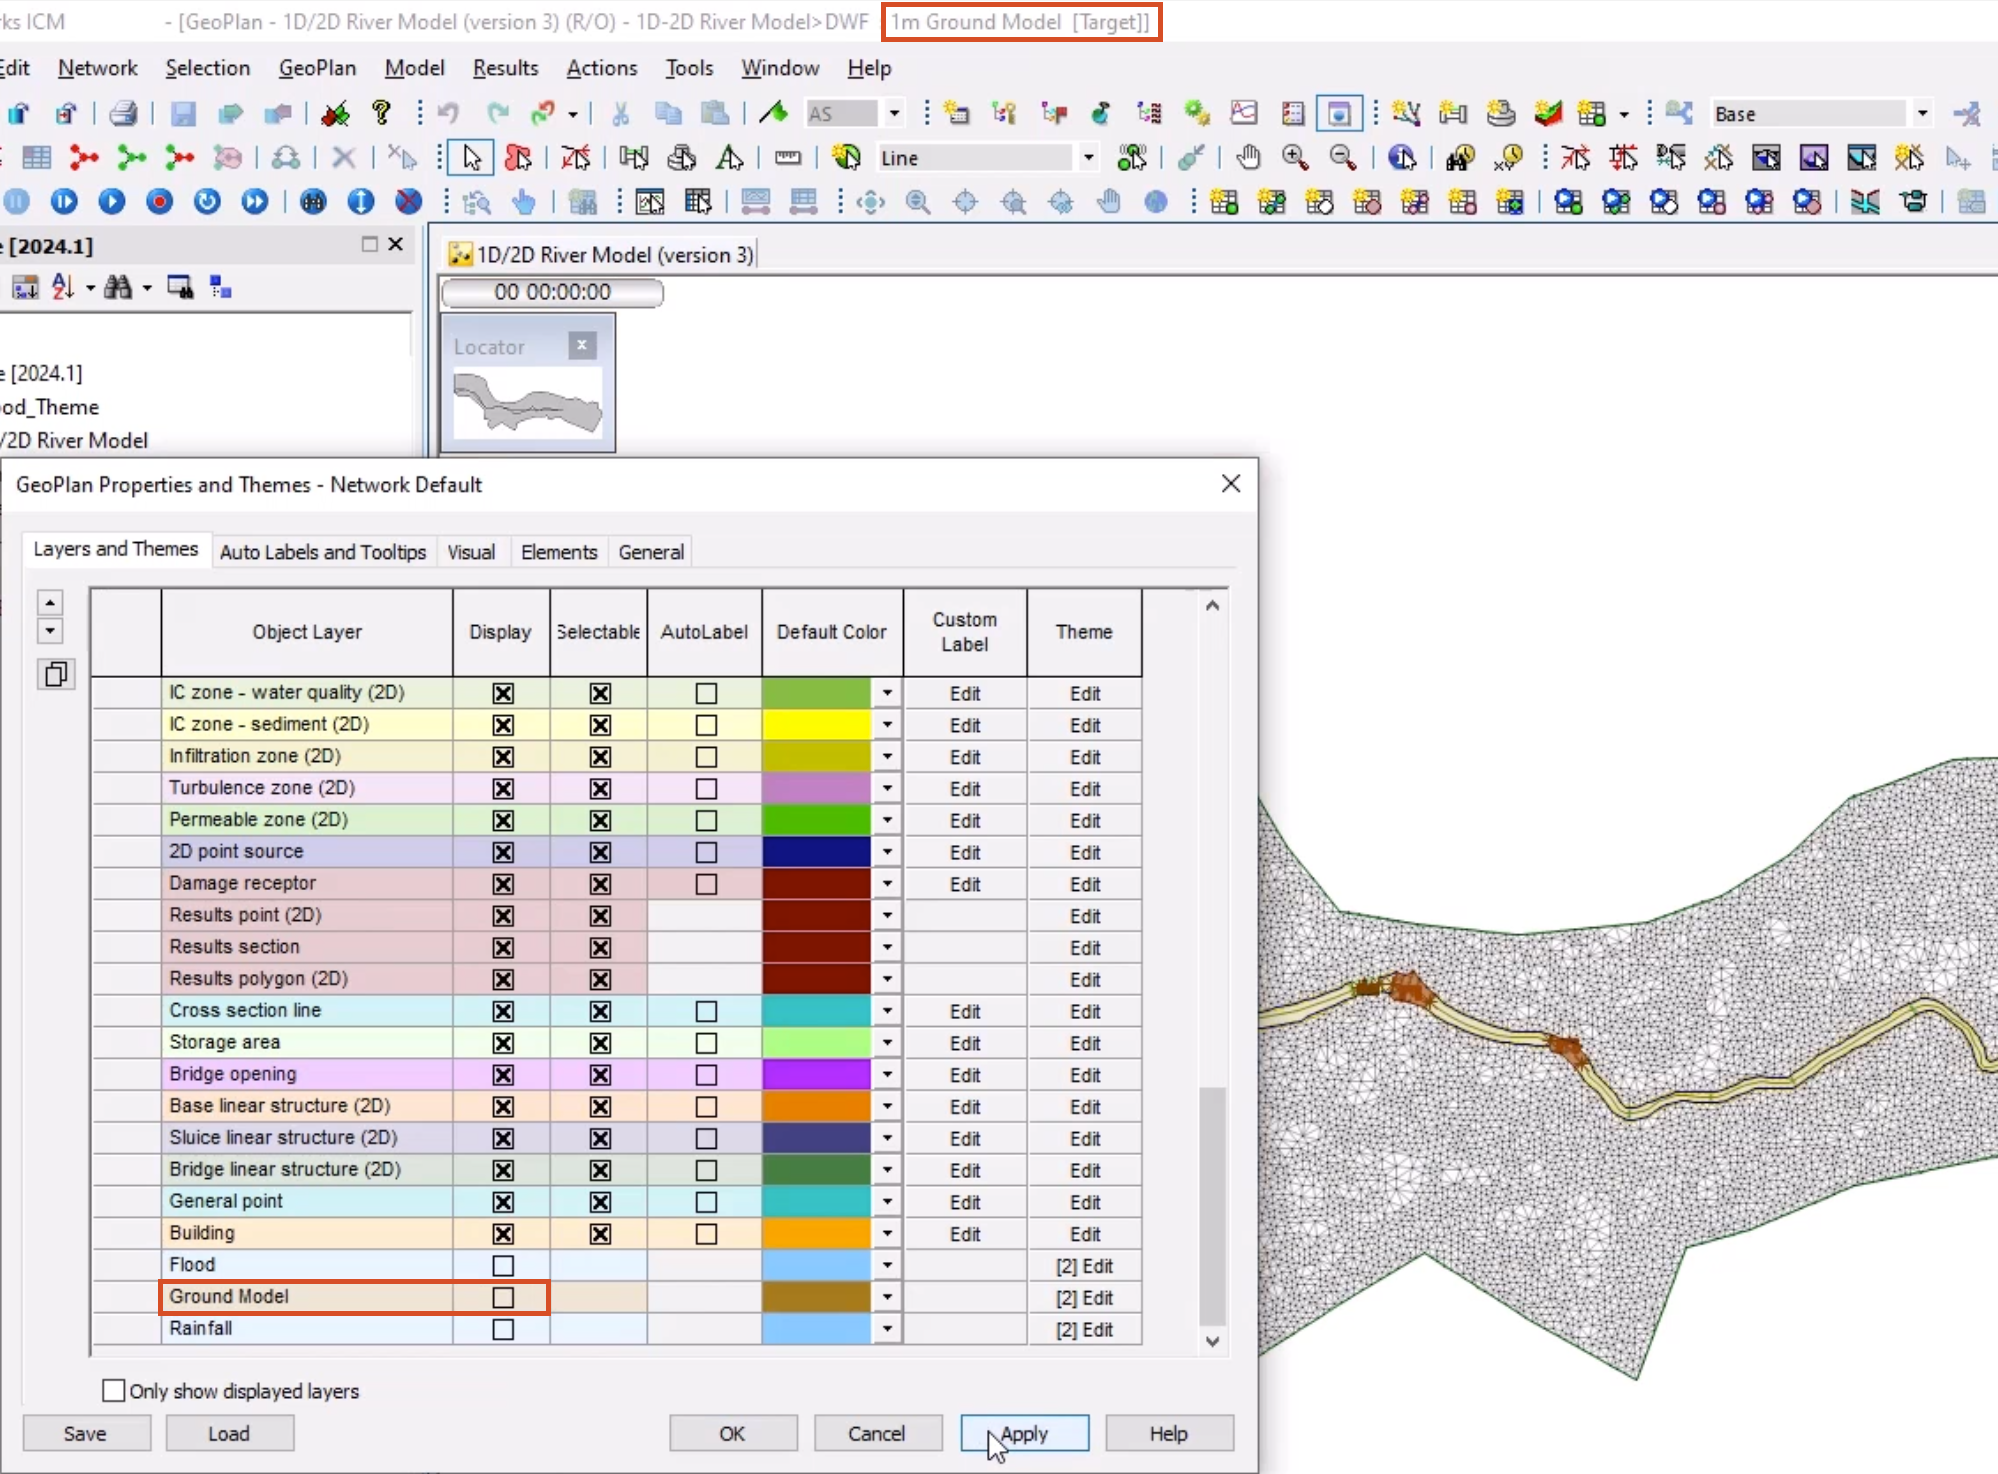
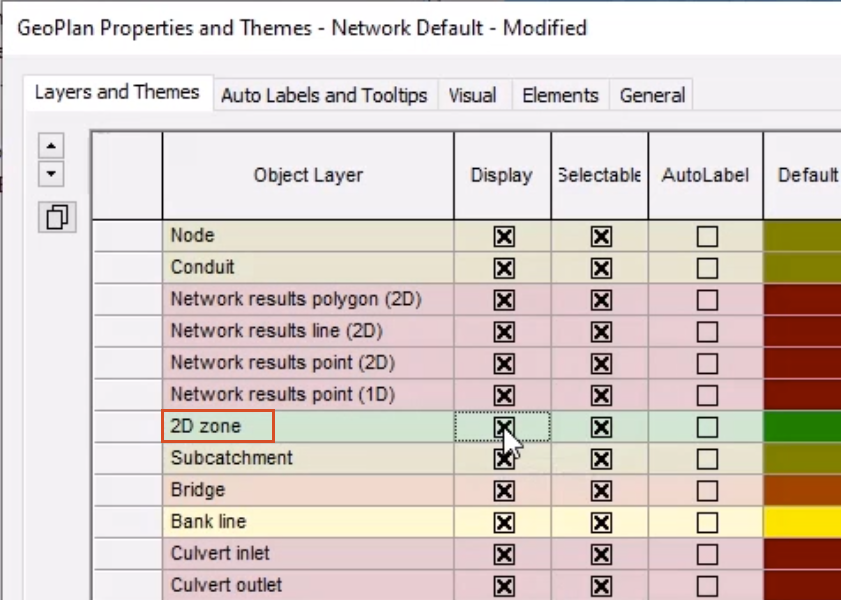
To disable just the display option, right-click the GeoPlan and select Properties & themes.
01:17
In the GeoPlan Properties and Themes dialog, on the Layers and Themes tab, scroll to the Ground Model row.
01:24
In the Display column, deselect Ground Model, and then click Apply.
01:29
In the GeoPlan window, the ground model disappears.
01:33
You can confirm that it is still loaded by viewing the title bar of the ICM window, where 1m Ground Model still appears.
01:40
Now, activate the flood theme.
01:42
In the GeoPlan Properties and Themes dialog, activate the Display column, for Flood.
01:48
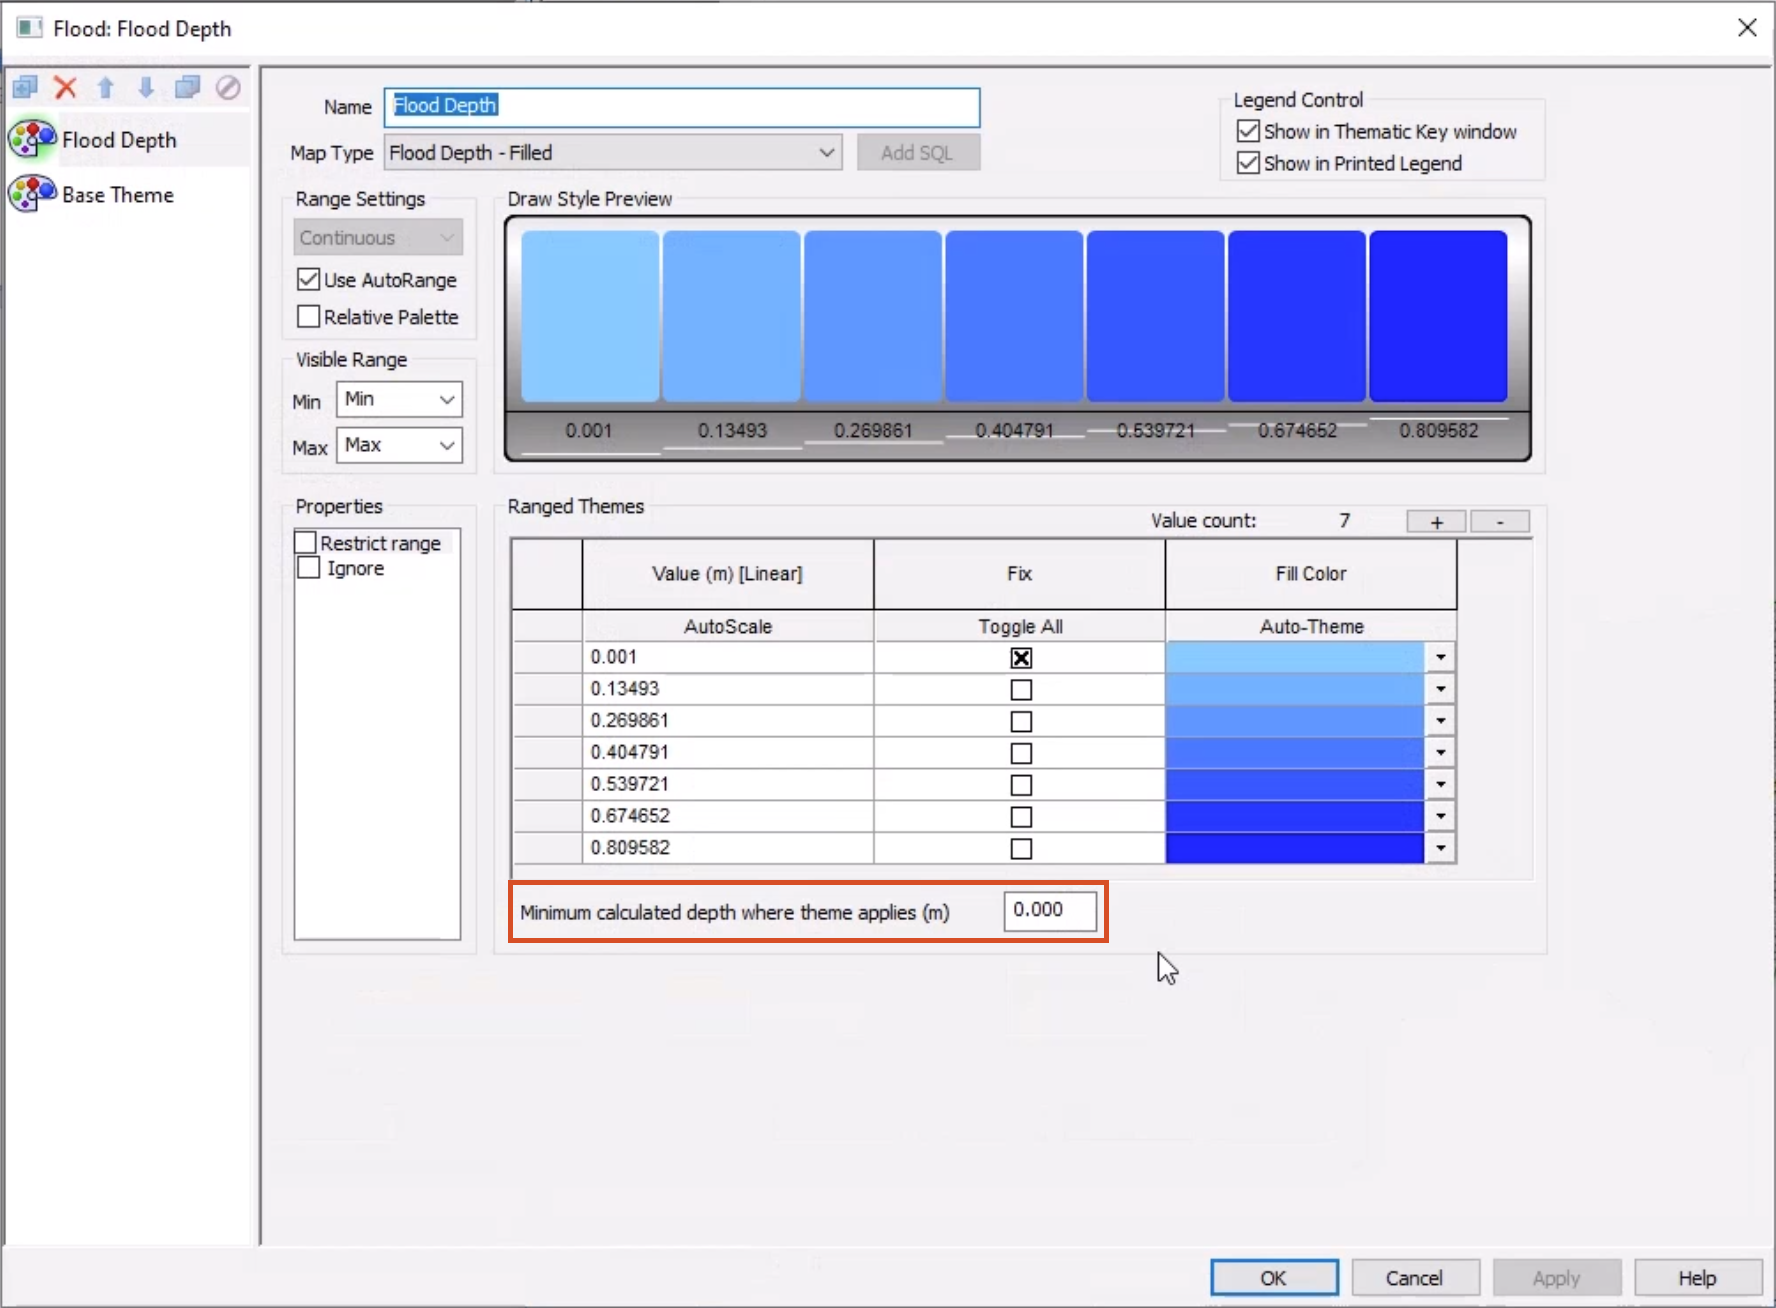
In the Flood row, Theme column, select Edit.
01:52
For this theme and results, leave the automatic calculations.
01:56
Note the minimum calculated depth where theme applies (m) setting.
02:01
This can be used to set a threshold and remove noise created by shallow flows which can be problematic in models with 2d runoff.
02:10
Scroll back up and disable the Display column for the IC Zone – hydraulics (2D) and 2D Zone layers.
02:18
In the GeoPlan Properties and Themes dialog, click OK.
02:23
ICM automatically updates calculations for the new flood theme.
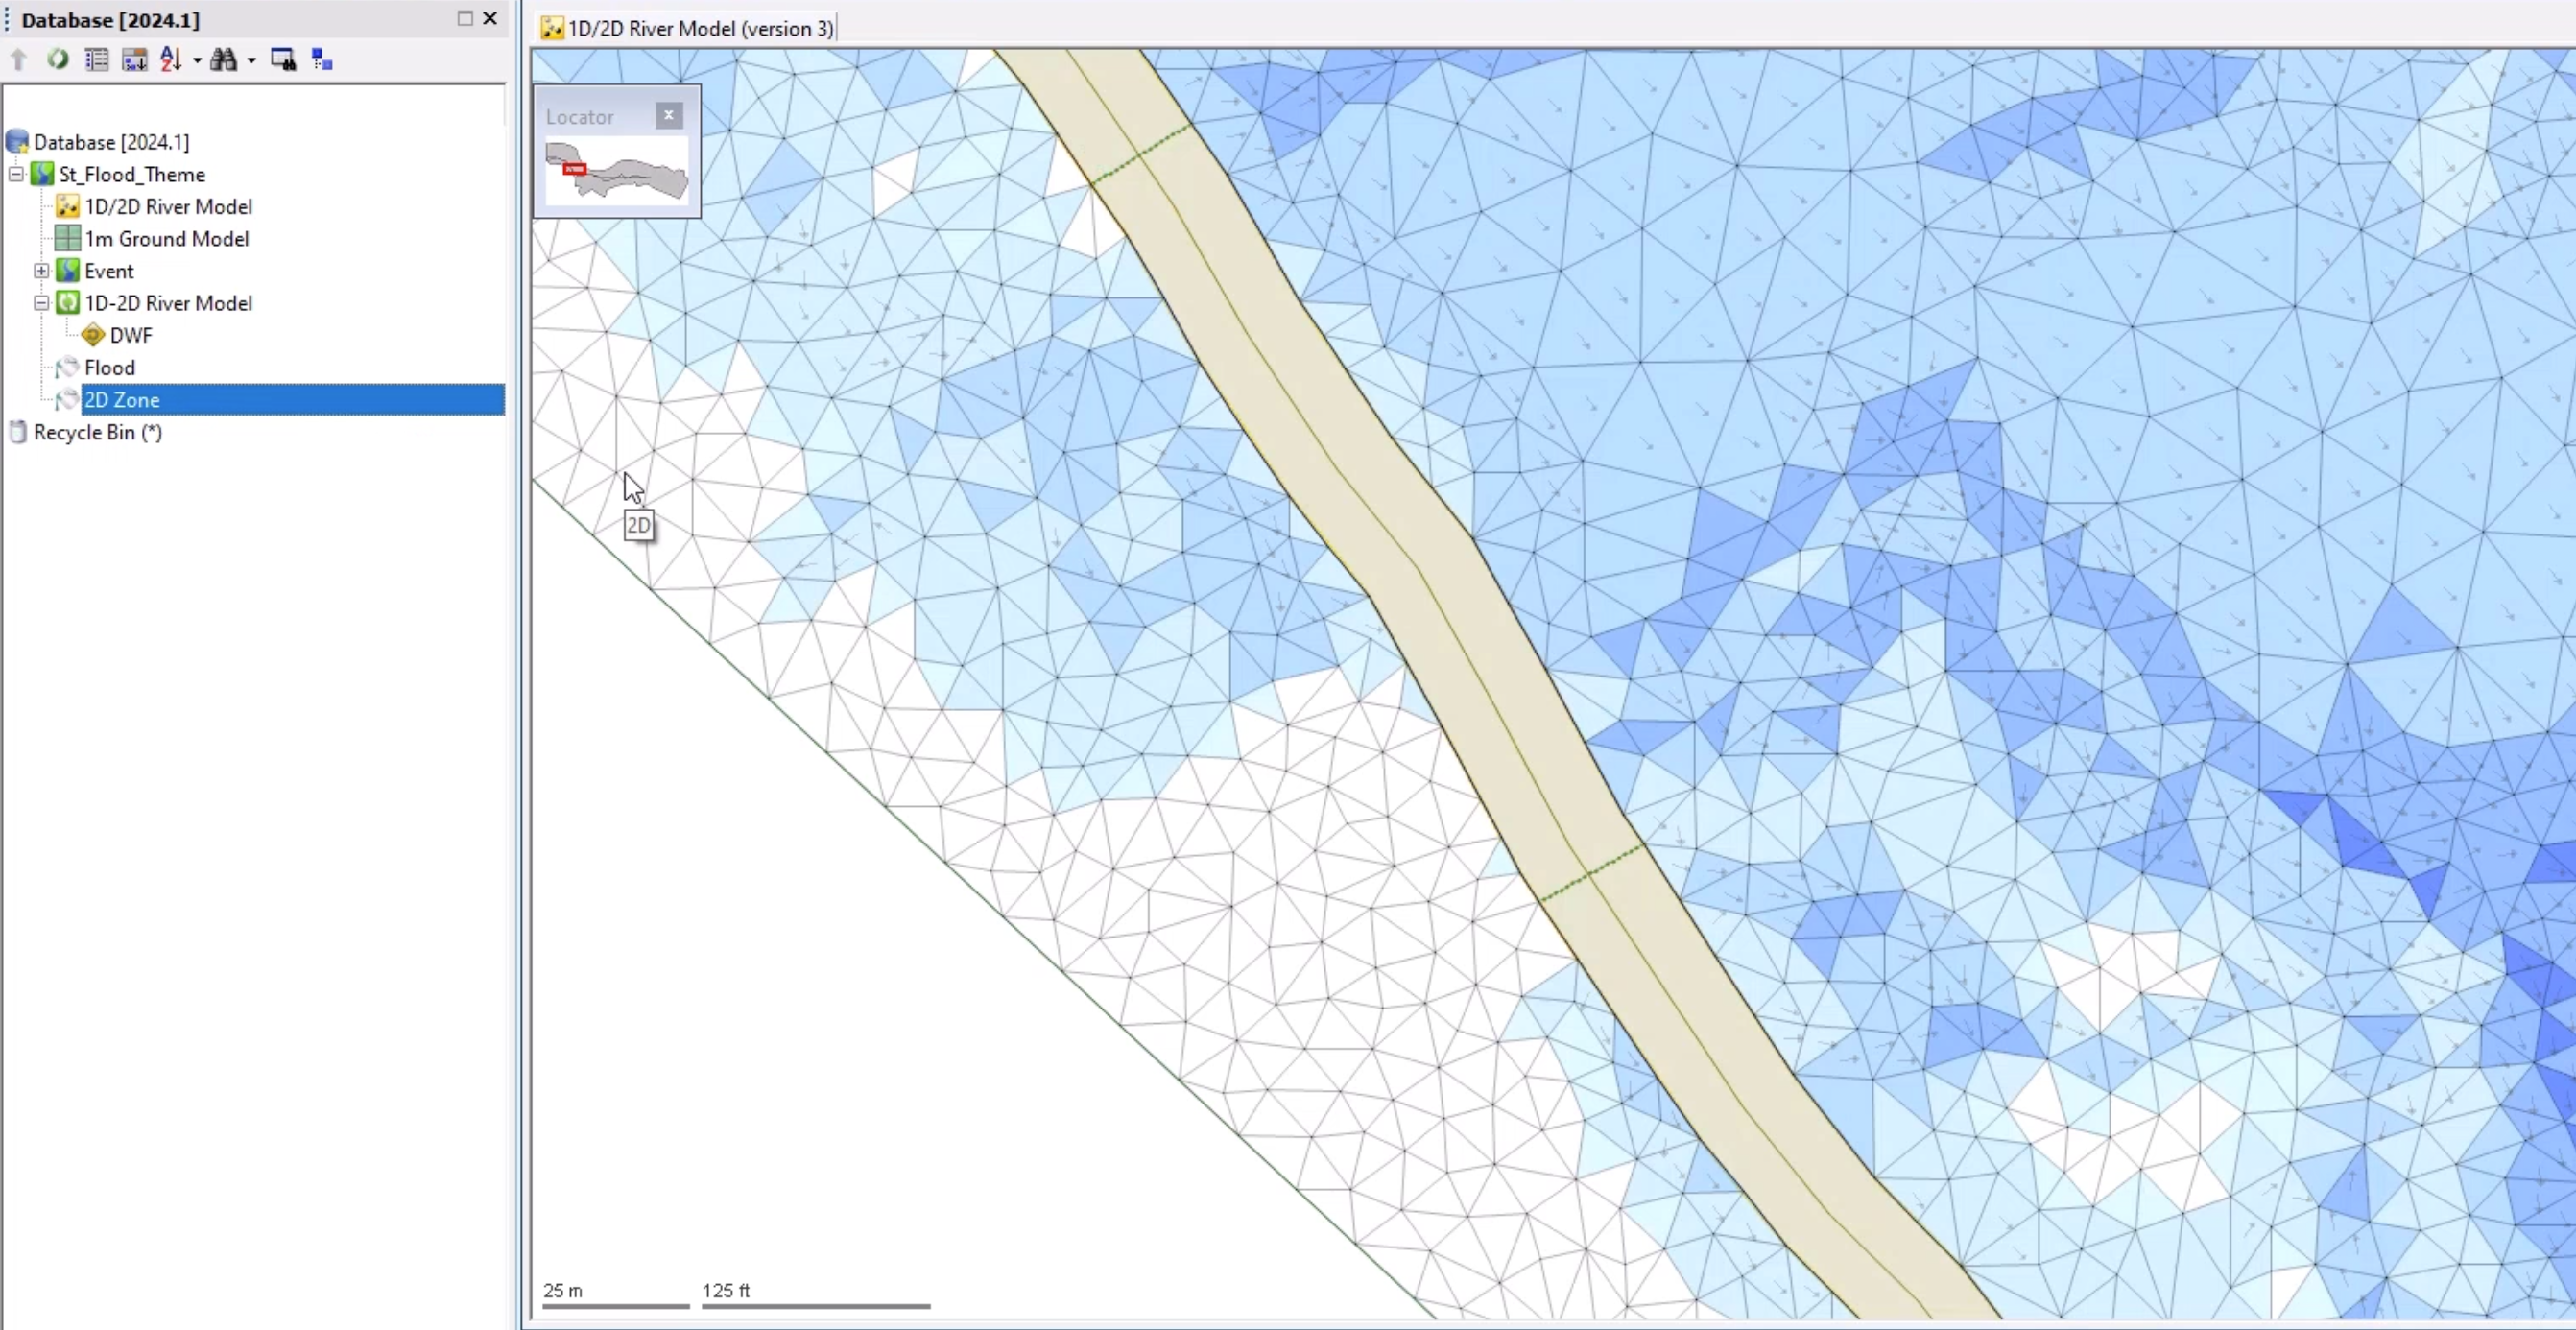
02:28
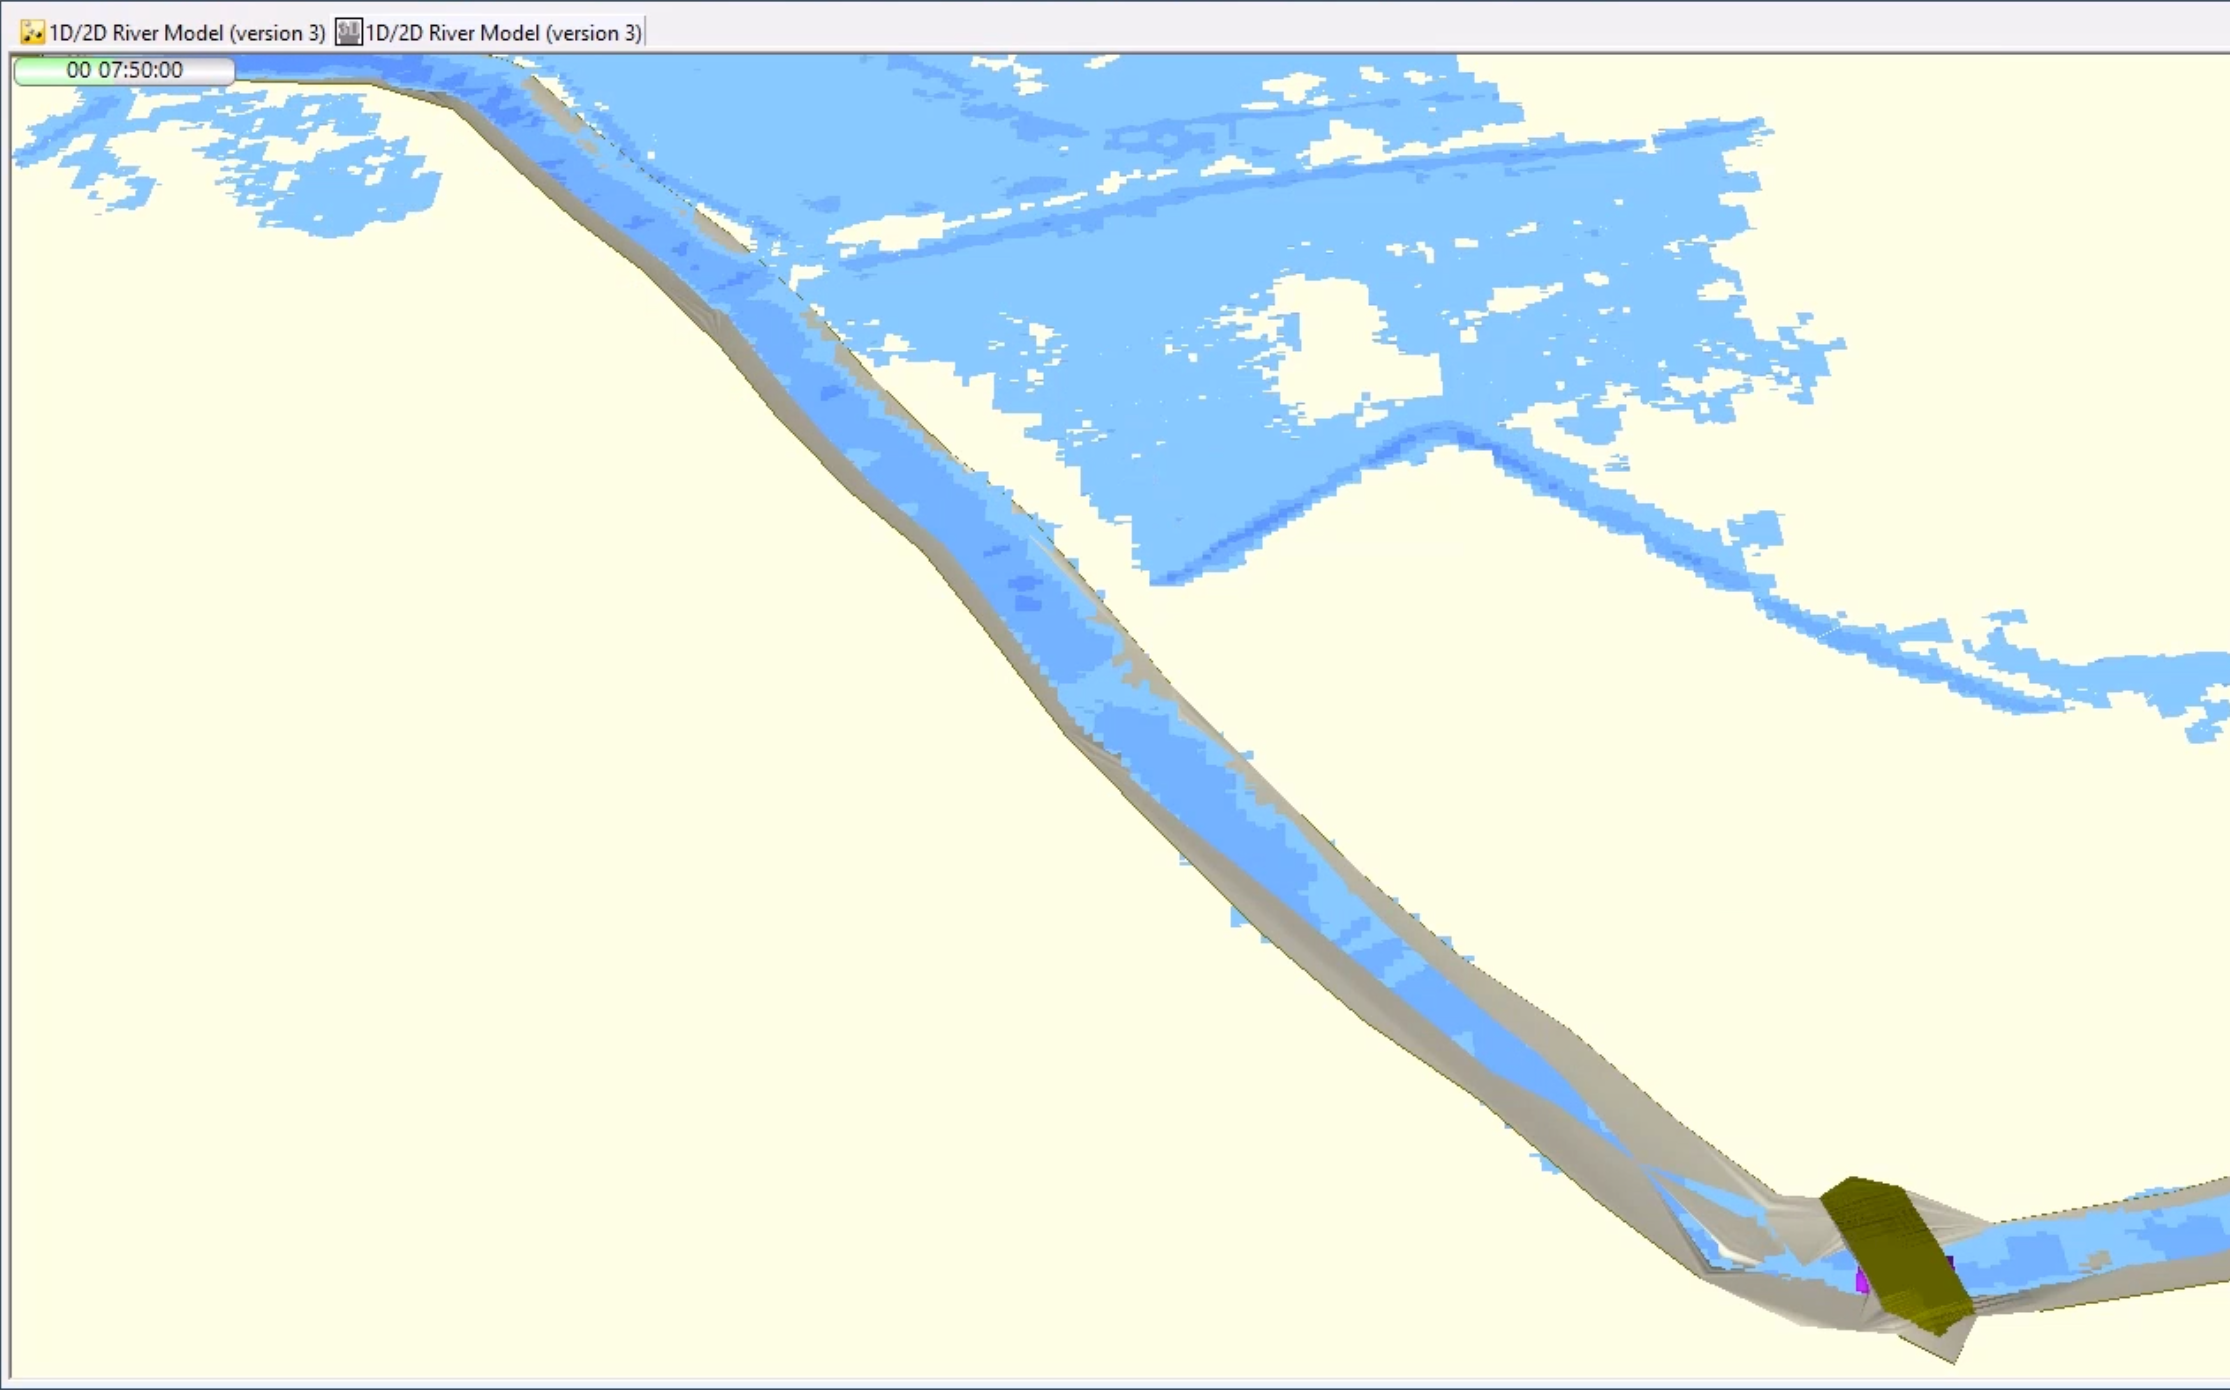
Zoom in to the river model.
02:30
Notice the flood theme is applied in a pattern of grid squares, based on the grid sizes of the ground model.
02:36
ICM looks at the levels of the objects and the ground model to build in more information.
02:43
Take some time to look at the model swapping between the 2D zone results and Flood theme results.
02:50
The easiest way to do this is to create a new theme object for each one.
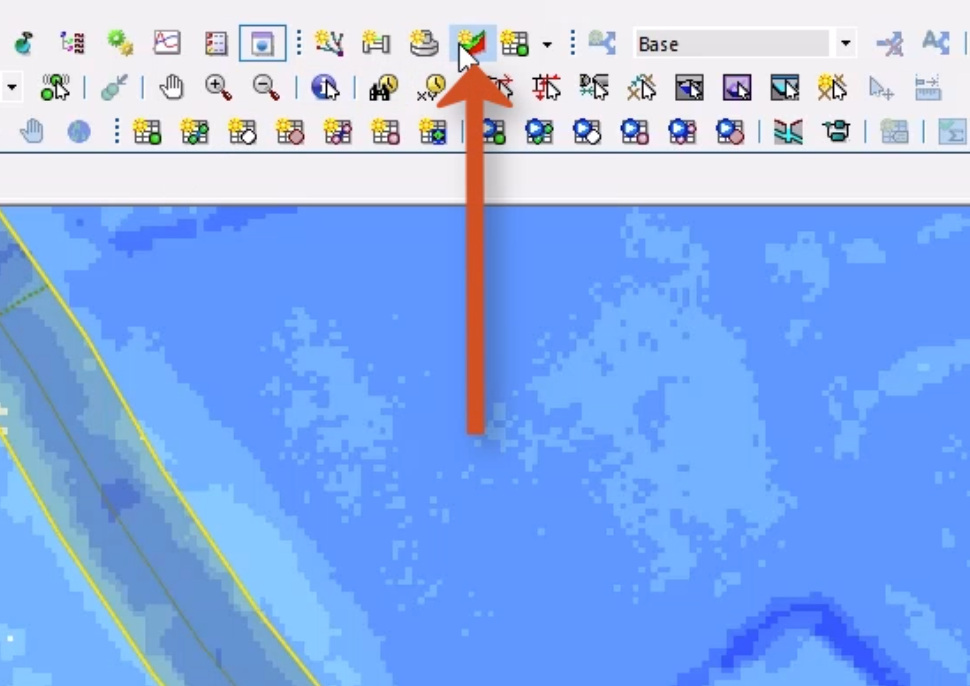
02:59
To view your model in 3D, select New 3D Network Window.
03:05
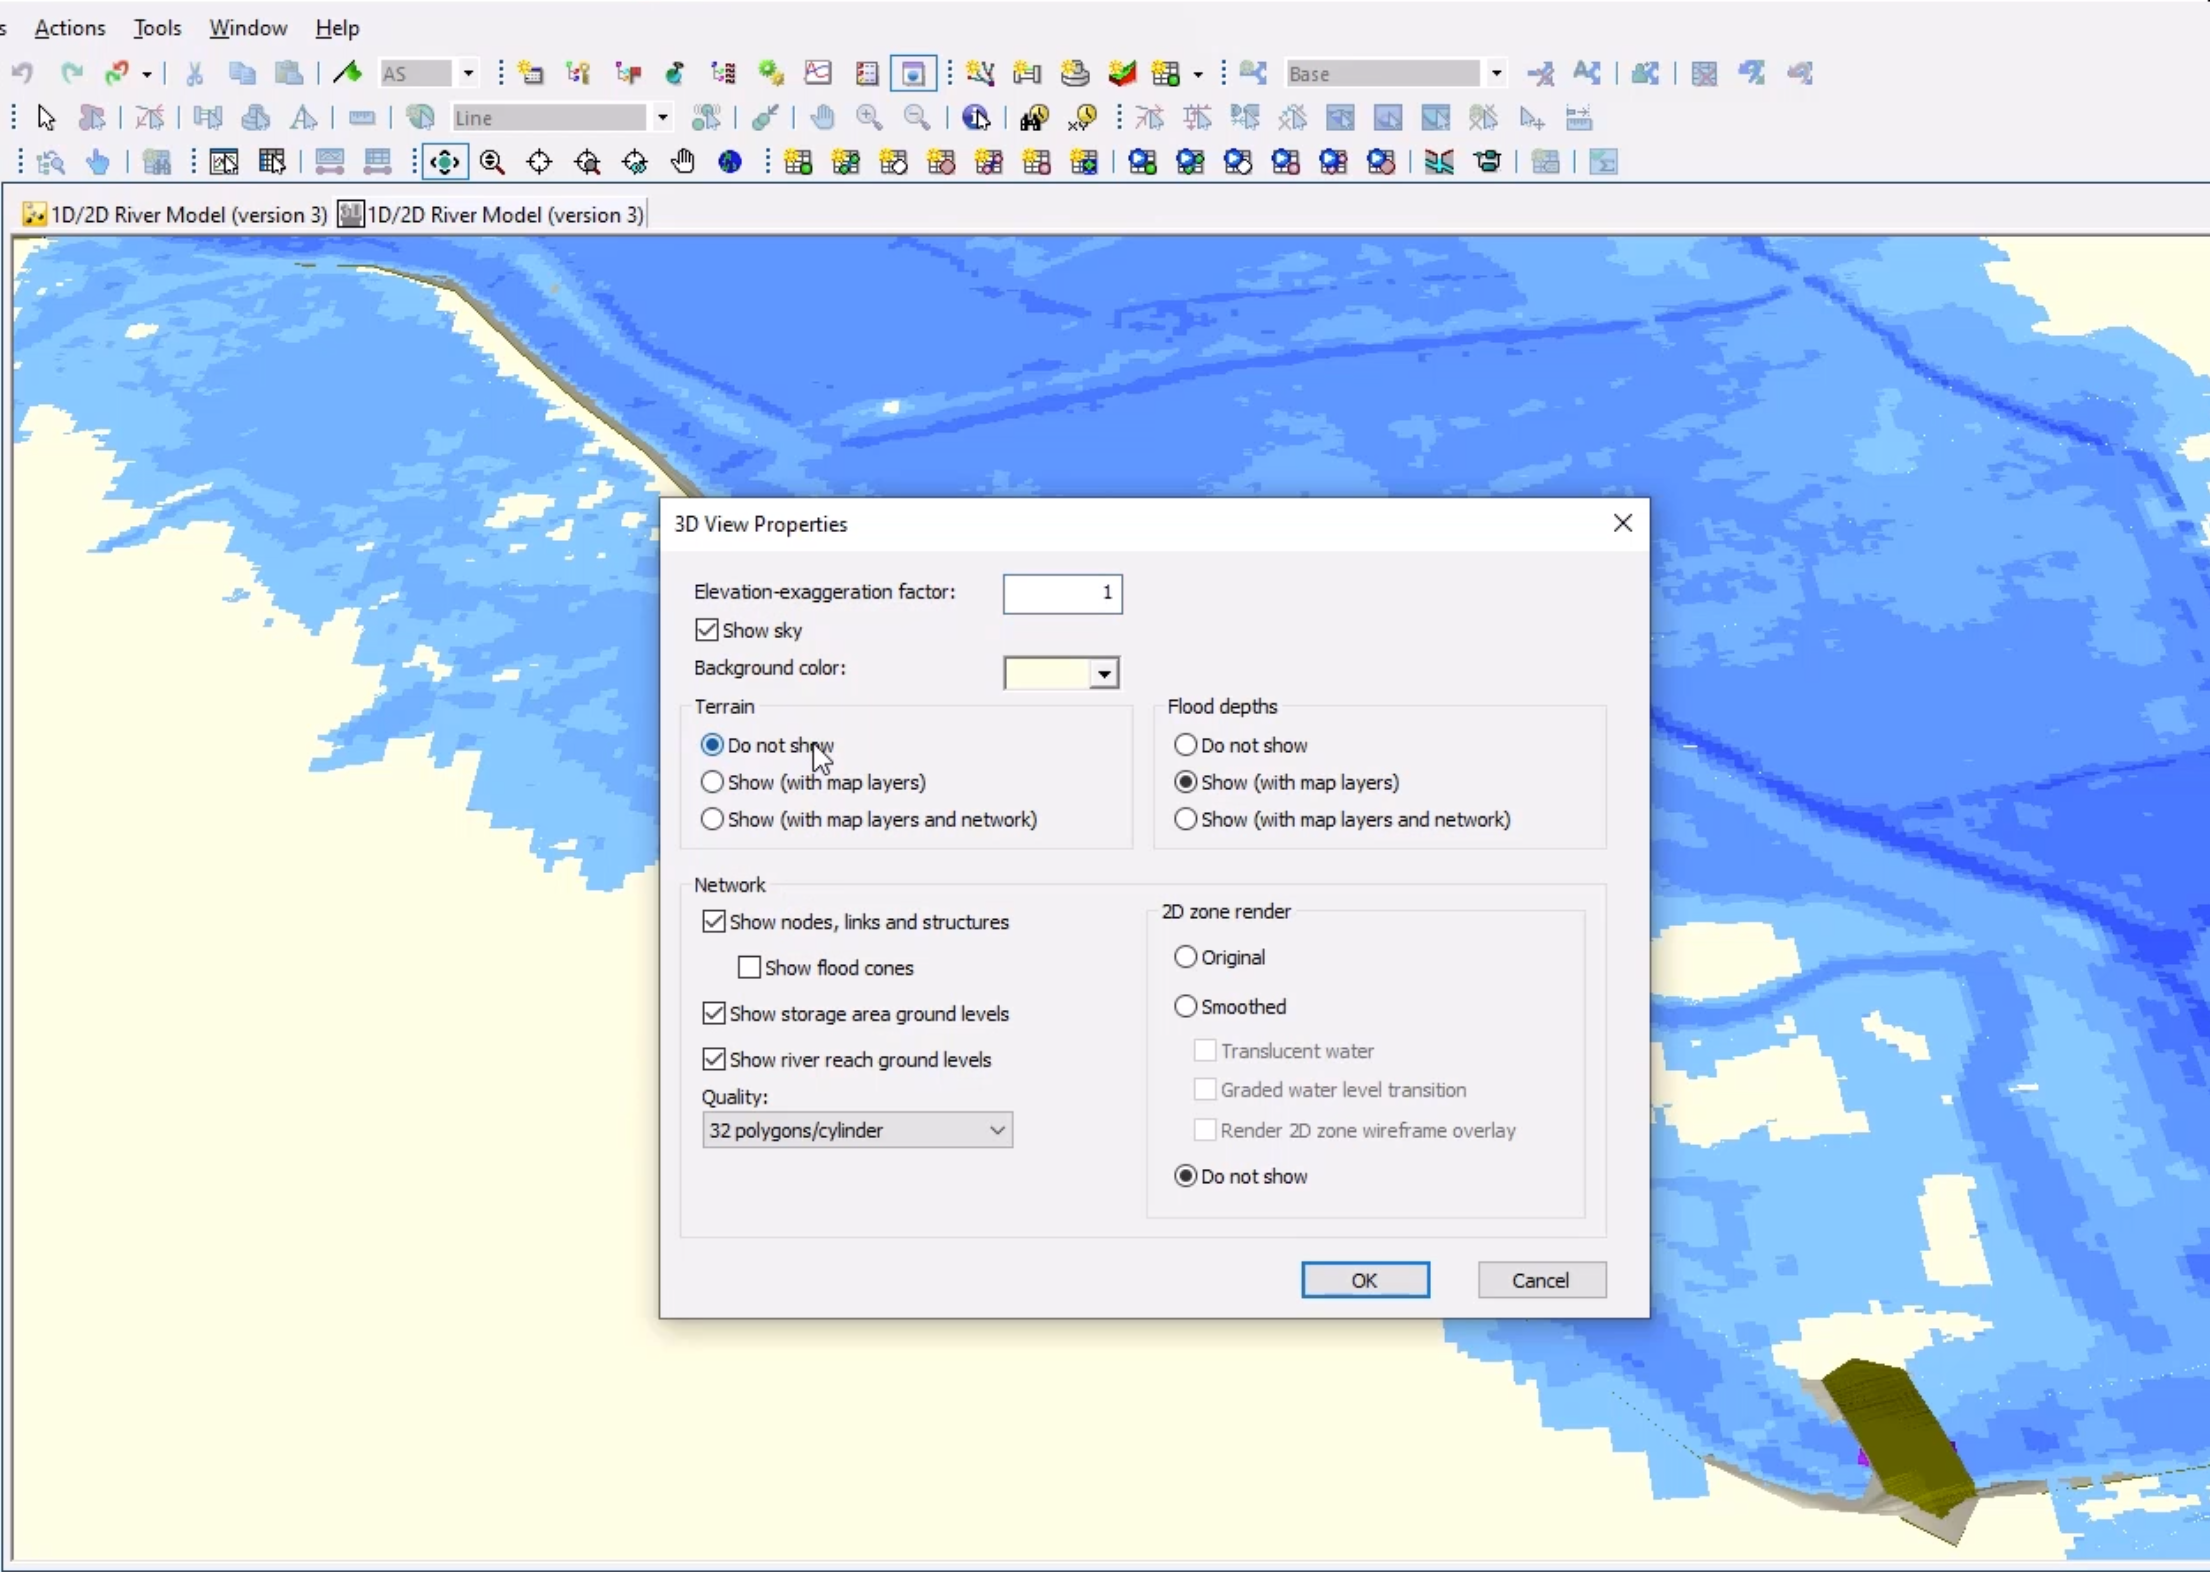
A new window opens to display the 3D view.
03:09
Right click and select Properties if you want to turn off the Terrain in 3D view.
03:14
You can also replay the simulation in 3D.
03:18
In the Results Control toolbar, select Play to see the results as the water level builds up.
03:24
When you are done, right-click the tab for the 3D view and select Close Tab.