00:00
Urban drainage network data can be imported into InfoWorks ICM from a range of sources,
00:09
including existing InfoWorks ICM models, Access files, CSV files, MapInfo, and ArcGIS files.
00:18
Though it is possible to import networks directly from these sources,
00:22
it is more common to import using the Open Data Import Centre (ODIC),
00:27
which allows for data to be mapped automatically to the relevant InfoWorks ICM object data table.
00:33
In this tutorial, you create a model from a blank network, and import three sets of data:
00:39
nodes, conduits, and subcatchments.
00:43
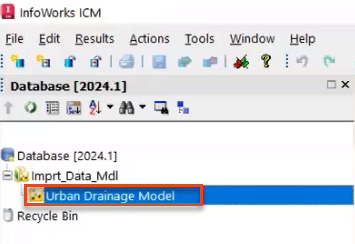
To begin, in the Explorer window, right-click the Model Group and select New InfoWorks > InfoWorks network.
00:51
In the New Name – InfoWorks network popup, in the New Name field,
00:55
enter “Urban Drainage Model” and then press ENTER or click OK.
01:00
The new Urban Drainage Model appears in the Explorer.
01:04
Double-click or drag the Urban Drainage Model onto the GeoPlan to make it the active network.
01:09
To correctly align this tutorial with the GIS layers, set the coordinate system for your model.
01:16
From the GeoPlan menu, select Set Coordinate System.
01:20
In the Select Coordinate System dialog box, in the Projection group, click More (…).
01:26
In the Choose Coordinate System dialog, next to Find, type “british” to find the coordinate system for this tutorial exercise.
01:34
Then, in the tree view, expand the British Coordinate Systems folder,
01:39
select British National Grid [EPSG 27700], and then click OK.
01:46
Click OK again to close the Select Coordinate System dialog box.
01:51
You can now use the Open Data Import Centre to start importing data.
01:55
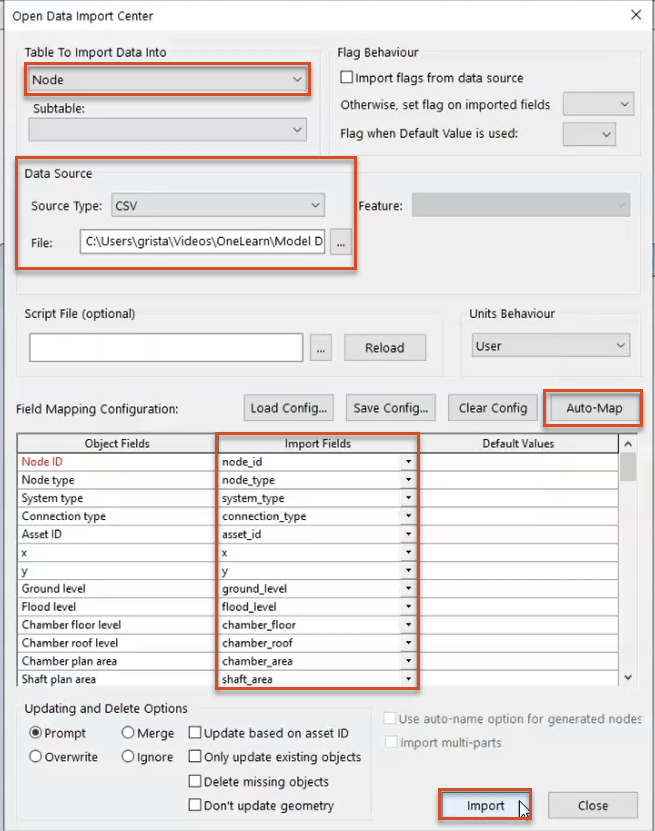
From the Network menu, click Import, then select Open Data Import Centre to open the ODIC.
02:03
In the ODIC, under Data Source, expand the Source Type drop-down and select CSV.
02:11
Click the File Browse (…) icon, navigate to the exercise files for this tutorial,
02:17
select Nodes.csv, and then click Open.
02:22
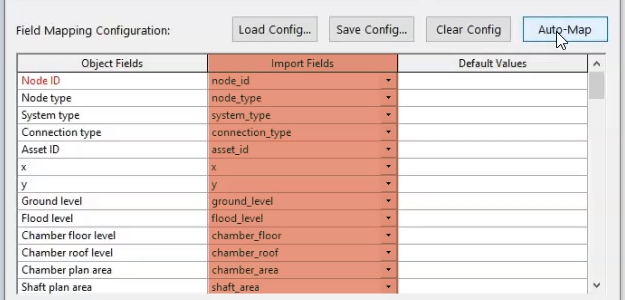
Back in the ODIC, in the Field Mapping Configuration group,
02:26
click Auto-Map to search the import file for fields that match those that define the nodes in the network.
02:32
In the table, under Import Fields, the data from the CSV file populates the matching Object Fields.
02:40
An import notification lets you know how many objects were imported,
02:44
as well as if there were any errors or warnings.
02:49
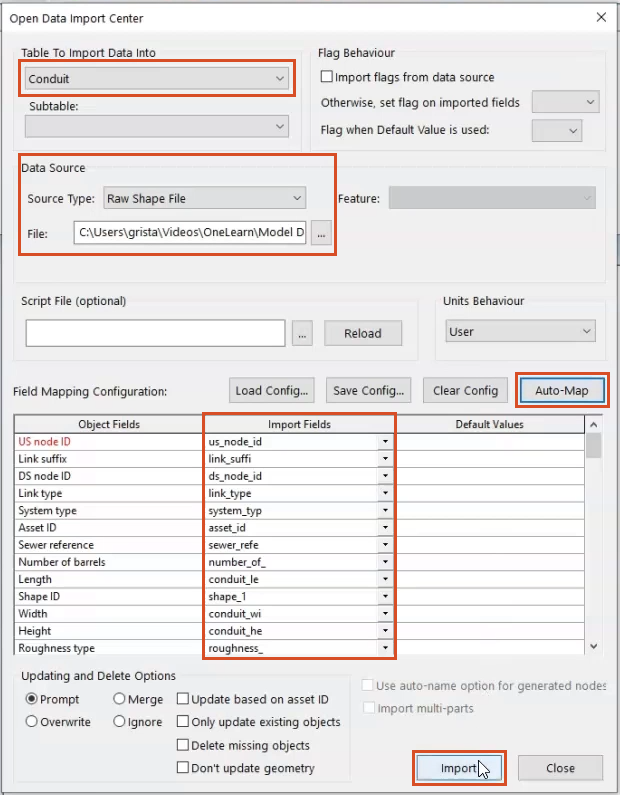
Still in the ODIC, you can now import conduits.
02:54
Under Table To Import Data Into, expand the drop-down and select Conduit.
03:00
This time under Data Source, select Raw Shape File as the Source Type.
03:05
Click the File Browse icon, navigate to the exercise files for this tutorial,
03:10
select Conduits.shp, and then click Open.
03:15
Again, for the Field Mapping Configuration, click Auto-Map.
03:20
Again, you can see the matching data fields in the table.
03:24
Click Import, and then click OK to close the notification window.
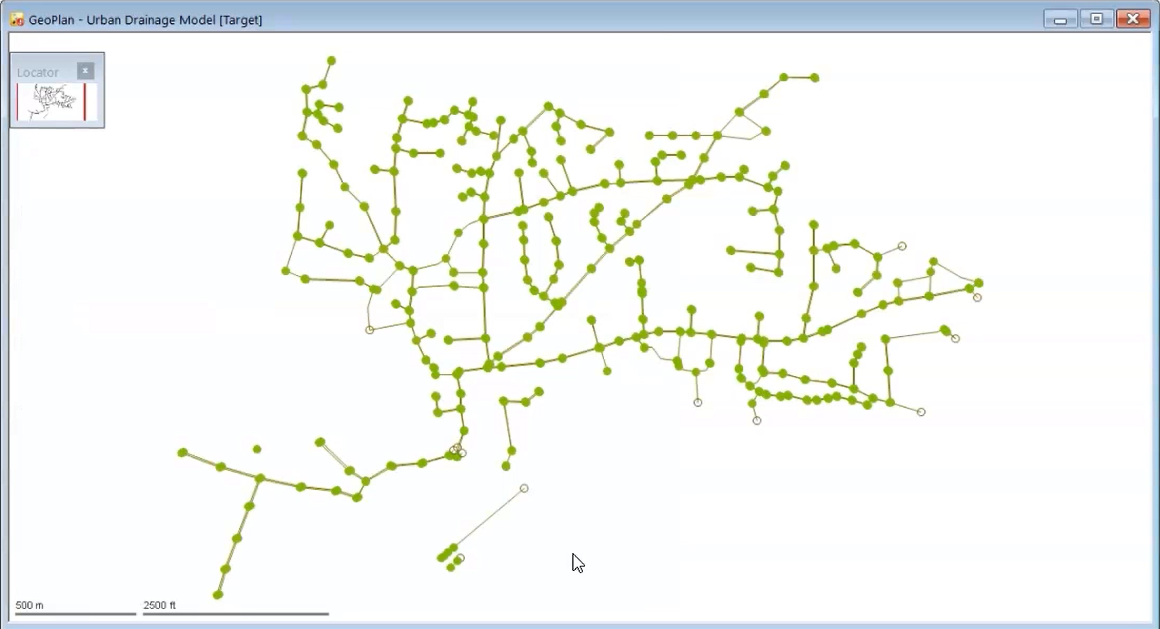
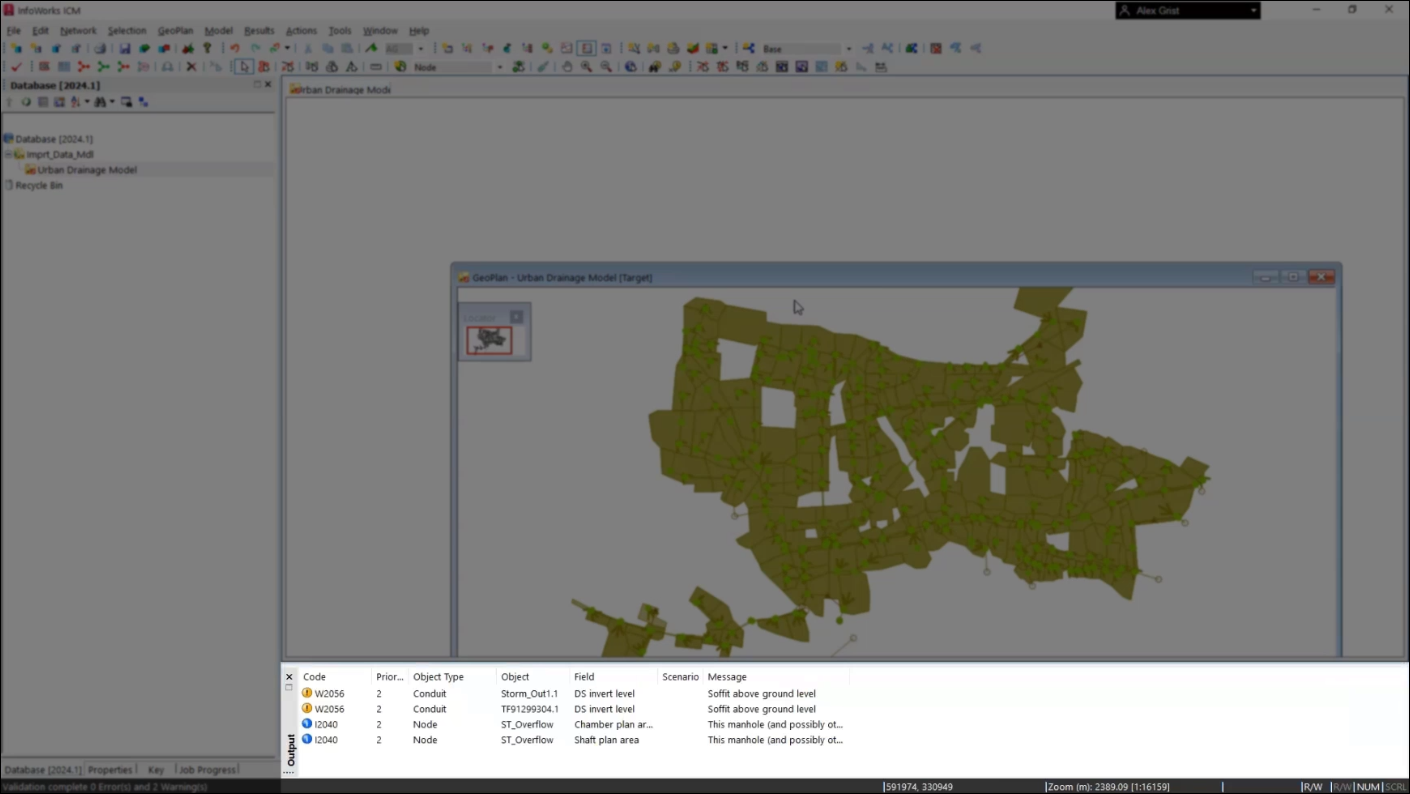
03:29
Click Close the exit the ODIC, and the GeoPlan displays the imported data.
03:36
Another method for importing data into your sewer network model is to bring in updated data from a CSV file.
03:43
This is particularly useful for bringing in changes made by others
03:47
with differences between network versions and InfoWorks format data.
03:52
Now that you have imported nodes and conduits into the sewer network,
03:56
it is time to add subcatchments and other structures from an updated CSV.
04:00
From the Network menu, click Import, then select Update from CSV files.
04:06
In the Import/Update from CSV Data dialog, you can configure the update options, but for this exercise, click OK.
04:15
In the file browser, you can select one or more .csv files to import.
04:20
Locate and select Network_Structures.csv, and then click Open.
04:26
The file browser reappears in case you want to load other .csv files.
04:31
For this tutorial, you can click Cancel.
04:34
The model view changes to show a list of all the data that will be imported in this CSV.
04:40
Subcatchments and structures can now be seen in the GeoPlan,
04:44
along with the previously imported nodes and conduits.
04:48
The imported data is ready to be validated and used in a simulation.
04:53
Click Validate to validate the network.
04:56
In the Network Validation dialog, click OK.
05:00
You should see only yellow warning and blue information messages.
05:05
Click Commit to commit the changes to the new network.
05:09
In the Commit changes to server dialog, add a comment of “Imported model data”, and then click OK.


![The Choose Coordinate System dialog box, with British National Grid [EPSG 27700] selected as the coordinate system.](https://files.upskill-dev.autodesk.com/public/innovyze/infoworksicm/iwcm2023M08U02_Imprt_Data_Mdl_002.webp)