00:03
Once you have entered the required information in the Live Data Configuration grid,
00:08
you must link it to the network.
00:10
This will show you the locations of the live data points within the network.
00:15
In the Model Group window, right-click Live Data Configuration
00:19
and commit any changes you have made to the database.
00:22
In this example, the changes are validated with no errors.
00:27
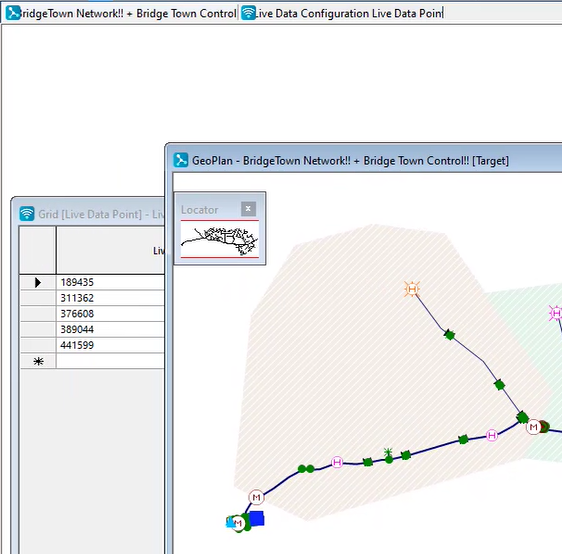
Then, open the network and its associated control in the GeoPlan.
00:32
To link the live data to your network, you must have the Live Data Configuration grid window open in the background of the workspace
00:40
with the network and control GeoPlan window in the foreground.
00:44
Note that if the window positions are reversed, or one is not open in the workspace,
00:49
you will not be able to link the live data to the network.
00:53
Now you need to check to make sure the live data points match with the nodes in the GeoPlan.
00:59
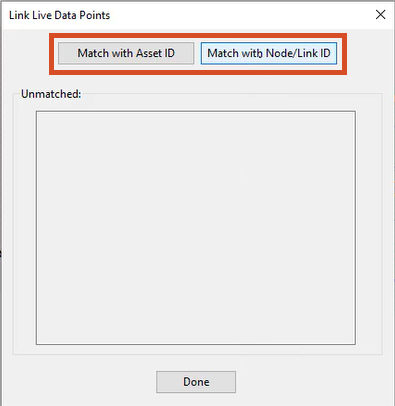
In the Network ribbon, click Control and from the flyout, select Link live data points...
01:06
to open the Link Live Data Points dialog.
01:09
Click both the Match with Asset ID and Match with Node/Link ID buttons.
01:16
In this example, nothing is listed in the Unmatched: group box,
01:20
meaning everything is correctly matched.
01:24
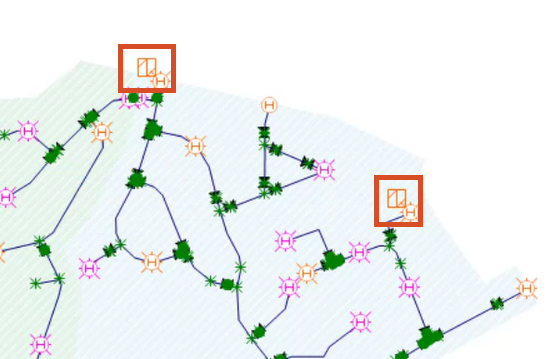
In the GeoPlan, notice that next to some objects,
01:28
there are now icons that look like an orange square with a slightly tilted “Z” inside.
01:34
This icon indicates that there is now a live data point attached to that object.
01:40
Optionally, you can right-click the GeoPlan and click Selection > Select live data point objects from the submenu.
01:47
This will select and highlight all the objects with live data attached to them, so they are easier to see.
01:54
In the toolbar, click the Clear selection button.
01:58
Commit any outstanding changes to the network and control to the database.